Table of Contents
Advertisement
Quick Links
Advertisement
Table of Contents

Related Manuals for Electrolux EKG4120AOW


Summary of Contents for Electrolux EKG4120AOW
- Page 1 EKG4120AOW EN COOKER USER MANUAL...
-
Page 2: Table Of Contents
14. ENERGY EFFICIENCY..................27 WE’RE THINKING OF YOU Thank you for purchasing an Electrolux appliance. You’ve chosen a product that brings with it decades of professional experience and innovation. Ingenious and stylish, it has been designed with you in mind. So whenever you use it, you can be safe in the knowledge that you’ll get great results every time. -
Page 3: Safety Information
ENGLISH SAFETY INFORMATION Before the installation and use of the appliance, carefully read the supplied instructions. The manufacturer is not responsible if an incorrect installation and use causes injuries and damages. Always keep the instructions with the appliance for future reference. 1.1 Children and vulnerable people safety WARNING! Risk of suffocation, injury or permanent disability. -
Page 4: Safety Instructions
Metallic objects such as knives, forks, spoons and lids • should not be placed on the hob surface since they can get hot. Remove any spillage from the lid before opening. Let • the hob surface cool down before closing the lid. - Page 5 ENGLISH 2.2 Electrical Connection adjustment of the appliance are compatible. WARNING! • Make sure that there is air circulation Risk of fire and electrical around the appliance. shock. • The information about the gas supply is on the rating plate. •...
- Page 6 • Do not let sparks or open flames to • Do not install a flame diffuser on the come in contact with the appliance burner. when you open the door. • This appliance is for cooking purposes • Open the appliance door carefully. The only.
- Page 7 ENGLISH • Before you close the lid turn all burners • Do not leave the appliance unattended off. during grilling. Accessible parts • Do not close the lid until the hob and become hot. oven are completely cold. • Keep children away when the grill is in •...
-
Page 8: Product Description
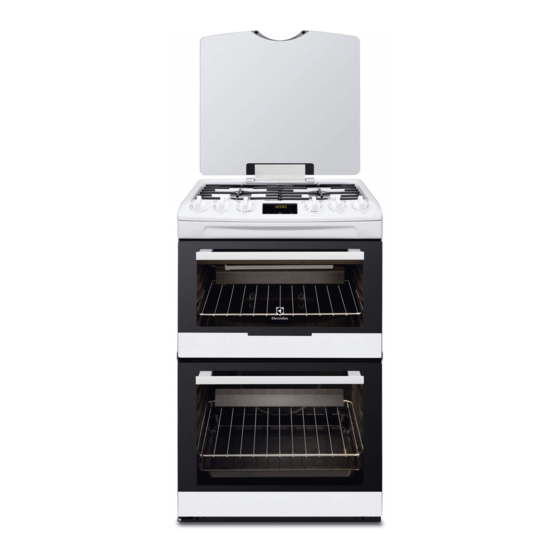
3. PRODUCT DESCRIPTION 3.1 General overview Control panel and hob Air vents for the cooling fan Grill Lamp Shelf positions 3.2 Cooking surface layout Steam outlet - number and position depend on the model Semi-rapid burner Auxiliary burner Rapid burner Semi-rapid burner 3.3 Cooker control panel... -
Page 9: Before First Use
ENGLISH Use the trivet only with the Grill- / roasting pan. 4. BEFORE FIRST USE When you connect the appliance to the WARNING! electrical supply or if a power cut occurs, Refer to Safety chapters. the Time function indicator flashes automatically. - Page 10 5.2 Burner overview 1. Turn the knob for the hob to the position and push it down. When you push the knob, the spark generator activates automatically. 2. Keep the knob for the hob pushed for equal or less than 10 seconds to let the thermocouple warm up.
-
Page 11: Hob - Hints And Tips
ENGLISH WARNING! WARNING! Always turn the flame down Always use the knob for the or switch it off before you hob to switch off a burner. Do remove the pans from the not use the lid as a cut-off burner. device. -
Page 12: Oven - Daily Use
7.2 Pan supports supports are aligned with the centre of the burner. The pan supports are not 7.3 Cleaning the hob resistant to washing in a dishwasher. They must be • Remove immediately: melted plastic, washed by hand. plastic foil, and food with sugar. If not, the dirt can cause damage to the hob. - Page 13 ENGLISH WARNING! If the oven burner accidentally Do not push the knob for goes out, turn the knob for more than 15 seconds. If the the oven functions to the off oven burner does not light position and try to light the after 15 seconds, release the burner again after minimum 1 knob, turn it back to off...
-
Page 14: Oven - Clock Functions
8.6 Inserting the oven because it may cause a damage to the stoper or the deep pan. accessories You can use the trivet to roast larger Put the slide-in accessories between the pieces of meat or poultry on one shelf guide bars in the top / main oven on the position. -
Page 15: Oven - Hints And Tips
ENGLISH 9.2 Buttons Button Function Description MINUS To set the time. CLOCK To set a clock function. PLUS To set the time. 9.3 Setting the Minute Minder 4. Turn the knob for the oven functions and the knob for the temperature to Use this function to set a countdown time. - Page 16 • If you cannot find the settings for a • With longer baking times, you can special recipe, look for the one that is deactivate the oven approximately 10 almost the same. minutes before the end of the baking •...
- Page 17 ENGLISH 10.5 Conventional Cooking - Top oven Food Heat setting Total prepa- Shelf posi- ration time tion (min) Biscuits 10 - 20 Small / Queen Cake 18 - 25 Sponge 18 - 20 Victoria Sandwich 18 - 25 Gingerbread 75 - 90 Flapjack 25 - 30 Shortbread...
- Page 18 10.6 Conventional Cooking - Main oven Food Heat setting Total prepara- Shelf posi- tion time (min) tion Biscuits 10 - 20 1 + 4 Bread 25 - 30 2 - 3 Bread rolls / buns 15 - 20 3 - 4...
- Page 19 ENGLISH Food Heat setting Total prepara- Shelf posi- tion time (min) tion Baked Potatoes 60 - 90 3 - 4 Roast Potatoes 60 - 90 3 - 4 Large Yorkshire Puddings 25 - 40 3 - 4 Individual Yorkshire Puddings 15 - 25 3 - 4 1) When baking bread cook for 10 minutes at heat setting 8 then reduce to heat setting 6 for...
-
Page 20: Oven - Care And Cleaning
Food Heat setting Total preparation time (min) Shelf po- sition Rabbit 20 minutes per 500g (1lb) and 20 minutes over 10.9 Grilling in general • Always grill with the maximum temperature setting. WARNING! • Always put the deep pan with trivet Always grill with the oven onto the second or third shelf position. - Page 21 ENGLISH • To clean metal surfaces, use a usual CAUTION! cleaning agent. Always turn the oven light on • Clean the appliance interior after each while using the catalytic use. Fat accumulation or other food cleaning (if applicable). remains may result in a fire. The risk is higher for the grill pan.
-
Page 22: Troubleshooting
2. Pull up the trim. 3. Remove the glass panels. To replace the glass panels, do the same steps in reverse. Before you lower the trim, attach the A trim part to the door. Refer to the image. 11.6 Replacing the lamp Put a cloth on the bottom of the interior of the appliance. - Page 23 ENGLISH 12.1 What to do if... Problem Possible cause Remedy You cannot activate the ap- The appliance is not con- Check if the appliance is pliance. nected to an electrical sup- correctly connected to the ply or it is connected incor- electrical supply.
-
Page 24: Installation
Problem Possible cause Remedy The appliance makes Some metal parts of the ap- noises. pliance expand and con- tract when they heat up or cool down. The noises are normal. The display shows "12.00". There was a power cut. - Page 25 ENGLISH 2. Mark the position of the wall and this gives anchor point for the stability Dimension chain. less than 400 13.3 Levelling of the appliance 180 mm 30 mm 13.5 Other technical data WARNING! Use small feet on the bottom of appliance These instructions are only to set the appliance top surface level with valid in the countries whose...
- Page 26 13.7 Gas Connection Use a flexible pipe in compliance with the regulation in force. Make sure they do not come in touch with mobile parts and are not squeezed. WARNING! Only a qualified and competent person can do the gas installation.
-
Page 27: Energy Efficiency
13.11 Checking the Lid Safety Device 1. Lift the lid. 14. ENERGY EFFICIENCY 14.1 Product information for hob according to EU 66/2014 Model identification EKG4120AOW Type of hob Hob inside Freestanding Cooker Number of gas burners Energy efficiency per gas Left Front - Rapid 52.9 %... - Page 28 14.3 Product Fiche and information for ovens according to EU 65-66/2014 Supplier's name Electrolux Model identification EKG4120AOW Top oven: 105.0 Energy Efficiency Index Main oven: 90.0 Top oven: A Energy efficiency class Main oven: A Top oven: 1.38 kWh/cycle...
- Page 29 ENGLISH 15. ENVIRONMENT CONCERNS not dispose appliances marked with the Recycle the materials with the symbol symbol with the household waste. Put the packaging in applicable containers Return the product to your local recycling to recycle it. Help protect the environment facility or contact your municipal office.
- Page 30 www.electrolux.com...
- Page 31 ENGLISH...
- Page 32 www.electrolux.com/shop...