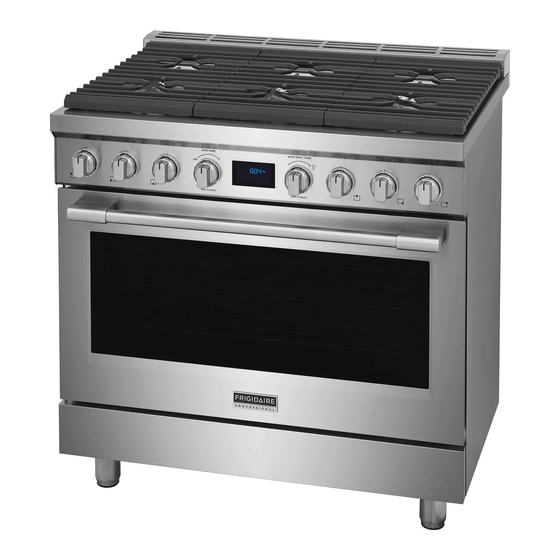
Frigidaire PCFD3668AF Use & Care Manual
Dual fuel range
Hide thumbs
Also See for PCFD3668AF:
- Getting started (2 pages) ,
- Installation instructions manual (56 pages)
Table of Contents
Advertisement
Quick Links
Introduction............................................................2
Important Safety Instructions .........................3
Features .................................................................10
Before using the appliance............................. 14
Using the cooktop.............................................. 15
Frigidaire.com USA 1-800-374-4432
Using the oven .....................................................18
Care and cleaning..............................................38
Before you call ....................................................45
Warranty ...............................................................47
914779731/A (Sept 2021)
Frigidaire.ca Canada 1-800-265-8352
Advertisement
Table of Contents

Related Manuals for Frigidaire PCFD3668AF


Summary of Contents for Frigidaire PCFD3668AF
-
Page 1: Table Of Contents
Introduction............2 Using the oven .............18 Important Safety Instructions ......3 Care and cleaning..........38 Features ..............10 Before you call ............45 Before using the appliance......14 Warranty ...............47 Using the cooktop..........15 914779731/A (Sept 2021) Frigidaire.com USA 1-800-374-4432 Frigidaire.ca Canada 1-800-265-8352... -
Page 2: Introduction
INTRODUCTION Installation Checklist Doors Thank you for bringing Frigidaire into your home! • Handles are secure and tight We see your purchase as the beginning of a long • Door seals completely to cabinet on all relationship together. sides. This manual is your resource for the use and care of Leveling your product. -
Page 3: Important Safety Instructions
IMPORTANT SAFETY INSTRUCTIONS Read all instructions before using this DEFINITIONS appliance. This is the safety alert symbol. It is This manual contains important safety used to alert you to potential personal symbols and instructions. Please pay injury hazards. Follow all the safety mes- attention to these symbols and follow all sages that follow this symbol to avoid pos- instructions given. - Page 4 IMPORTANT SAFETY INSTRUCTIONS attached to the appliance. Do not remove Proper Installation—Be sure your appli- model/serial number plate. ance is properly installed and grounded by a qualified technician. In the United States, Cold temperatures can damage the elec- install in accordance with the National Fuel tronic control.
- Page 5 IMPORTANT SAFETY INSTRUCTIONS IMPORTANT INSTRUCTIONS FOR USING WARNING THE APPLIANCE • Never cover any slots, holes or pas- WARNING sages in the oven bottom or cover and entire rack with materials such Storage In or On the Appliance. as aluminum foil. Doing so blocks air •...
- Page 6 IMPORTANT SAFETY INSTRUCTIONS Wear Proper Apparel - Loose-fitting or hanging garments should never be worn WARNING while using the appliance. Do not let clothing or other flammable materials • Stepping, leaning or sitting on the come into contact with hot surfaces. door or drawer of this appliance can Do Not Use Water or Flour on Grease result in serious injuries and may...
- Page 7 IMPORTANT SAFETY INSTRUCTIONS IMPORTANT INSTRUCTIONS FOR USING Utensil Handles Should Be Turned Inward YOUR GAS COOKTOP and Should Not Extend Over Adjacent Surface Burners - To reduce the risk of WARNING burns, ignition of flammable materials, and spillage due to unintentional contact with •...
- Page 8 IMPORTANT SAFETY INSTRUCTIONS Do Not Use Decorative Surface burner Do not cover the broiler or warmer Covers. If a burner is turned on acciden- drawer (if provided) grid with aluminum tally, the decorative cover will become hot foil. Exposed fat and grease could ignite. and possibly melt.
- Page 9 IMPORTANT SAFETY INSTRUCTIONS IMPORTANT INSTRUCTIONS FOR SER- This unit uses and can radiate radio fre- quency energy that may interfere with VICE AND MAINTENANCE radio communications if not installed and Do not repair or replace any part of the used in accordance with the instructions appliance unless specifically recom- manual.
-
Page 10: Features
FEATURES 4. Seal General description 5. Oven door 6. Fan 7. Rack/tray support frame shelf Cooktop 1. Cooktop 1. 18000 BTU brass coated burners 2. Control panel 1. 12000 BTU black coated burners 3. Inside lights 2. Left grate 4. Central grate 5. Right grate Control panel 1. - Page 11 FEATURES Backlit knobs Cooling fan The fan cools the oven and comes into operation Each knob is equipped with LED lights that light up during cooking. whenever the knob is turned out of the OFF posi- tion. The fan causes a steady outflow of air that exits from the rear of the appliance, which may continue for a brief period of time even after the appliance has been turned off.
- Page 12 FEATURES Available accessories Oven shelf positions The appliance is fitted with shelf supports to posi- Regular rack tion trays and racks at different heights. The inser- tion heights are indicated from the bottom upwards. Useful for supporting containers with food during cooking.
- Page 13 FEATURES Protective cover Used to cover and protect the temperature probe socket when the temperature probe is not in use. NOTE • Some models are not provided with all accessories. • The accessories intended to come into con- tact with food are made of materials that comply with the provisions of current legisla- tion.
-
Page 14: Before Using The Appliance
BEFORE USING THE APPLIANCE First power on First power on When the range is first plugged in, or when the Preliminary setup power supply has been interrupted “12:00 PM” will When setting the clock or a timer, depending on flash on the timer display. how you turn the knob, you can set a different increase / decrease speed for the settable minutes. -
Page 15: Using The Cooktop
USING THE COOKTOP Cooking with the gas cooktop Correct burners placement WARNING The burning of gas cooking fuel can create small amounts of carbon monoxide, benzene, formalde- hyde and soot. To minimize exposure to these substances, the burners should be adjusted by a certified installer or authorized servicer to ensure proper combustion. - Page 16 USING THE COOKTOP To install the burner components: Check that they are fitted correctly by moving each component gently. If the components do not fit 1. The shape of the burner skirt openings must correctly or are inclined, adjust the position of each match the shape of the openings in the component until it remains fixed in position.
- Page 17 USING THE COOKTOP Operating the cooktop burners Cookware properties are a factor in how quickly and evenly heat is distributed, which affects cook- ing results. A non-stick finish has the same charac- WARNING teristics as its base material. For example, a non- stick finish on aluminum cookware will take on the Fire Hazard properties of aluminum.
-
Page 18: Using The Oven
USING THE OVEN To operate the cooktop burners Oven preparation 1. Place your cookware on the burner. CAUTION 2. Push in the cooktop knob to engage the electronic spark device. Remove all accessories, materials and literature 3. Keep pushing the knob and turn it left to the from the inside of the oven before performing this first “MAX”... - Page 19 USING THE OVEN Regular rack To remove the rack: 1. Slide out the rack until it stops due to the CAUTION mechanical safety locks. 2. Slightly lift it upwards and pull it all the way • Be careful to insert the rack in the correct out.
- Page 20 USING THE OVEN To install the telescopic guides: The telescopic guides allow a two stage extraction: 1. Slightly tilt the guides towards the inside wall • Partial extraction: of the oven (1) and rest its hooks on the raised parts of the oven shelf supports (2). •...
- Page 21 USING THE OVEN Temperature probe The core temperature of the food is measured by a sensor located in the tip of the probe. WARNING For cooking with the temperature probe see “Meat probe cooking”. • Do not leave the temperature probe unat- tended.
- Page 22 USING THE OVEN • Every function can be paused at any time by Convection roast simply opening the door. During the pause The combination of the fan and heating the inside lights turns on, the heating ele- elements allows you to cook both on ments are deactivated as well as the oven fan single level and on several levels.
- Page 23 USING THE OVEN Preheating To set a manual cooking cycle 1. Press the oven mode knob. The default screen NOTE will show: At the start of each cooking cycle, the oven will preheat in order to reach the selected cooking temperature (except for Convection roast and Sabbath functions).
- Page 24 USING THE OVEN Oven residual heat Stand alone timer When the display is in standby mode and the oven The stand alone timer can be useful when cooking cavity is still hot, the decreasing temperature bar with the induction cooktop. will be shown at the right side of the screen.
- Page 25 USING THE OVEN Timed cooking 5. Press the oven mode knob to start cooking. Cooking timer in progress IMPORTANT During cooking you can change or deactivate the cooking timer by pressing the oven temperature The timed cooking is allowed for all functions knob until the display shows the number of min- except Warm, Steam clean and Broil.
- Page 26 USING THE OVEN You can change the temperature and the timing To set a delayed function: functions by pressing and turning the temperature 1. Set a timed cooking function (see “Timed knob even during the pause. cooking”) (Example is 350°F Bake). Close the door to resume cooking.
- Page 27 USING THE OVEN Auxiliary functions Preliminary operations: Three auxiliary functions are available, selectable in 1. Open the oven door. the same way as the cooking functions. 2. Place the container containing the dough in the oven. Steam clean 3. Close the oven door. This function is an assisted cleaning To set the Proof function: procedure that facilitates dirt removal.
- Page 28 USING THE OVEN End of Proof function 6. Press the oven mode knob to start the Warm function. At the end of the Proof function, a buzzer sounds and “END” will appear on the display together with Warm function in progress the current time.
- Page 29 USING THE OVEN 6. Press the temp. knob again to confirm the Meat probe cooking previous selections and to switch to the Useful function for cooking various cooking settings screen. types of meat to perfection by measur- 7. Press the oven mode knob to start the ing the core temperature of the meat.
- Page 30 USING THE OVEN Preliminary operations To set a meat probe cooking 1. Open the oven door. IMPORTANT 2. Place the food on the rack. 3. Insert the tip of the probe into the food When setting a meat probe cooking cycle there before placing it in the oven.
- Page 31 USING THE OVEN 5. Press the oven temp. knob to confirm the End of meat probe cooking selection and to allow the probe target The meat probe cooking will end when the probe temperature to be changed (shown at the reaches the set target temperature.
- Page 32 USING THE OVEN Convection Bake function tips • The Convection Bake function is optimized for NOTE multiple rack cooking. • When baking cookies and biscuits on multiple Always use caution when removing food from the racks, use positions 1 and 4. When baking oven.
- Page 33 USING THE OVEN tains slots that allow grease from the meat to Meat probe cooking tips drain into the broil pan. • For some foods, especially poultry and roasts, testing the internal temperature is the most effective way of insuring that your food has been properly cooked.
- Page 34 USING THE OVEN User settings menu By turning the temperature knob to right the screen will show IMPORTANT • To access the settings menu, you must first have to turn on the oven light and then press and hold the oven temperature knob for a few seconds.
- Page 35 USING THE OVEN By turning the temperature knob to right the Time format screen will show: After accessing the settings menu keep pressing the temperature knob until the display shows Now keep pressing the temperature knob to exit By turning the temperature knob to the right, the from the settings menu.
- Page 36 USING THE OVEN Oven cooking tables Bake function cooking table Food Rack Recommended pan position Cookies Shiny pan with no sides/ very low sides placed on the rack Biscuits Shiny pan with no sides/ very low sides placed on the rack Convection Bake function cooking table Food...
- Page 37 USING THE OVEN Convection Roast function cooking table Meat type Weight (lb) Oven T° Probe T° Time/lb (min/ Rack position Standing Rib Roast 5 - 7 350°F - 175°C 145°F - 60°C (med-rare) Standing Rib Roast 5 - 7 350°F - 175°C 170°F - 75°C (well done) Whole Ham, bone-...
-
Page 38: Care And Cleaning
CARE AND CLEANING Steam clean function 4. Press the oven mode knob. • If the inside temperature is above 167°F CAUTION (75°C) the display shows: • Remove any food residues or large spills from previous cooking operations from the inside of the oven. •... - Page 39 CARE AND CLEANING 6. Pour approximately 13.5 fl. oz. (400 cc - 1.7 End of Steam clean function cup) of water onto the bottom of the oven. At the end of the cleaning cycle, a buzzer sounds Make sure it does not overflow out of the and “END”...
- Page 40 CARE AND CLEANING Surface type Cleaning recommendations Aluminum & chrome Use hot, soapy water and a cloth. Dry with a clean cloth. surfaces (rear backguard and handle tips) Plastic & Zamak alloy For general cleaning, use hot soapy water and a cloth. For more difficult to remove soil and built-up grease, apply a liquid detergent directly onto (control knobs) the soil.
- Page 41 CARE AND CLEANING Oven maintenance The oven lights will automatically turn ON when the oven door is opened. The oven lights may also be Removing the shelf supports manually operated by turning the oven temperature knob to the bulb icon (see “Inside lights”). IMPORTANT The oven light bulb is covered by a glass shield.
- Page 42 CARE AND CLEANING 3. Close the cover. Ensure that the molded part into the holes on the hinges indicated in the of the glass (A) is facing the door. figure: Special door care instructions IMPORTANT Most oven doors contain glass that can break. Read the following recommendations: 2.
- Page 43 CARE AND CLEANING holes in the hinges. movement indicated by the arrows (1). 2. Then pull the front part upwards (2). In this way, the 4 pins attached to the glass detach from their housings in the oven door. Removing the oven seal To permit thorough cleaning of the oven, the door seal may be removed.
- Page 44 CARE AND CLEANING applying slight pressure. ing powders, stain removers, creams or specific products for cleaning steel, ovens or dishes. Do not use rough or abrasive cloths and sponges or scour- ing pads. The use of abrasive products could irrep- arably damage the surfaces.
-
Page 45: Before You Call
BEFORE YOU CALL Let us help you troubleshoot your concern! This section will help you with common issues. If you need us, visit our website, chat with an agent, or call us. We may be able to help you avoid a service visit. If you do need service, we can get that started for you! 1-887-435-3287 (United States) 1-800-265-8352 (Canada) - Page 46 BEFORE YOU CALL Flames inside oven or smoking from Excessive spillovers in oven. For example, this will happen for pie spillovers or large amounts of grease left on the oven bot- oven vents tom. Wipe up excessive spillovers before switching on the oven.
-
Page 47: Warranty
Obligations for service and parts under this warranty must be performed by Electrolux or an autho- rized service company. Product features or specifications as described or illustrated are subject to change without notice. Canada 1.800.374.4432 1.800.265.8352 Frigidaire Electrolux Canada Corp. 10200 David Taylor Drive 5855 Terry Fox Way Charlotte, NC 28262 Mississauga, Ontario, Canada... - Page 48 home welcome Our home is your home. Visit us if you need help with any of these things:...