
Summary of Contents for Whirlpool SIA90 IN
- Page 1 Product Introduction for Whirlpool Inverter Plus Split Type Air Conditioner (SIA90 IN, SIA120 IN, SIA180 IN, SIA240 IN)
-
Page 2: Technical Specifications
Technical Specifications Indoor Outdoor Cooling Cooling Cooling Selling Price Model No. Model Capacity in Capacity in Capacity in kJ/hr SIA90IN SIA90CO 1.0 HP 9, 000 10, 023 Php 31, 998 SIA120IN SIA120CO 1.5 HP 12, 000 13, 188 Php 34, 998 SIA180IN SIA180CO 2.0 HP... - Page 3 Technical Specifications Indoor Model No. SIA90IN SIA120IN SIA180IN SIA240IN Outdoor Model No. SIA90CO SIA120CO SIA180CO SIA240CO Compressor Brand GMCC(Toshiba) Highly (Hitachi) QINGAN Highly (Hitachi) Refrigerant Type R410A R410A R410A R410A Power Supply (V/Hz) 220/60 220/60 220/60 220/60 Cooling Load Calculation in m² 9-18 15-25 20-36...
- Page 4 Technical Specifications Indoor Model No. SIA90IN SIA120IN SIA180IN SIA240IN Max Allowable System Pressure in 2900.75 2900.75 2900.75 2900.75 Sealed System Operating Pressure in psi Discharge Side 116.61 116.61 116.61 116.61 Suction Side 443.90 443.9 443.9 443.9 Compressor Type Rotary Rotary Rotary Rotary Indoor liquid tube diameter in...
- Page 5 Technical Specifications Indoor Model No. SIA90IN SIA120IN SIA180IN SIA240IN Indoor tubes in meters Min connection pipe length in meter Max connection pipe length in meter Max height difference in meter...
- Page 6 Indoor Unit Product Dimensions Indoor Model SIA90IN SIA120IN SIA180IN SIA240IN Dimensions In mm In inches In mm In inches In mm In inches In mm In inches 10.75 10.75 12.75 12.75 31.25 31.25 1020 40.25 1020 40.25 8.25 8.25...
- Page 7 Outdoor Unit Product Dimensions Outdoor SIA90CO SIA120CO SIA180CO SIA240CO Model No. Dimensions In mm In inches In mm In inches In mm In inches In mm In inches 21.75 21.75 23.75 30.75 30.75 27.75 10.75 10.75 10.75 12.75...
- Page 8 Installation Rates and Guidelines Cooling Capacity 1.0 hp 1.5 hp 2.0 hp 2.5 hp Basic Installation Rate 7,200 7,200 8,200 8,200 Additional Cost in excess of 10ft/foot Recommended Floor Area Up to 18 19 - 24 25 - 31 32 - 45 Liquid Pipe (in inches) 1/4 "...
- Page 9 Installation Rates and Guidelines Offer 1st-10ft of installation materials such as Copper Tubes, Insulation, Electrical wire from Indoor-to-Outdoor ,bracket & drain line. Circuit Braker will be provided by the customer. Survey fee is "free on a one- time visit"within Metro Manila,primary provincial and secondary cities.Succeeding survey will be charge at Php 400.00 per visit.
-
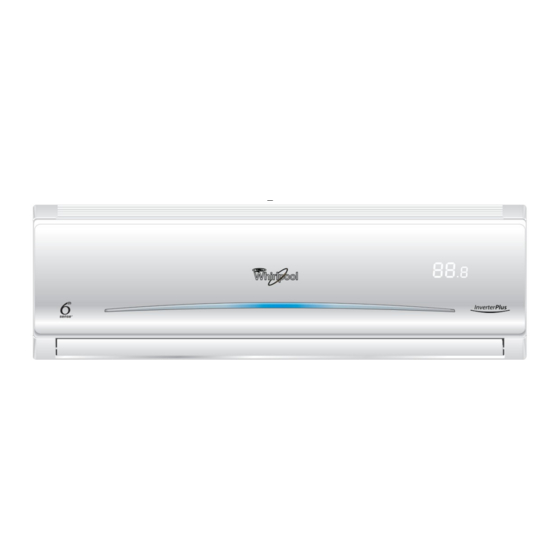
Page 10: Product Description
Product Description Indoor Unit 1. Air Intake 2. Front Panel 3. Display Strip 4. Air Outlet 5. Electrical Box 6. Emergency Control button 7. Vertical Adjustment Louver (Inside) 8. Horizontal Adjustment Louver 9. Air Filter 10. Remote Control Outdoor 11. Air Intake 12. - Page 11 Control Panel Display Indicators Cooling Mode Indicator Temperature Indicator Displays blue light under Displays set temperature and room temperature. COOL operation Default temperature showing Displays purple light under is room temperature. It FAN ONLY operation shows set temperature under the settings by using remote controller, then back to show room temperature after a few seconds.
-
Page 12: Before Using The Remote Control
Before using the Remote Control How to insert the batteries 1. Use your thumb to press the cover and gently slide it down as shown. 2. Hold the two sides of the cover and press to let the cover deform a little bit, at the same time, press down the caudal of cover as shown to open 3. -
Page 13: Remote Control Functions
Remote Control Functions 1. Power Button 2. Cool Button 3. Fan Speed Button 4-5. Temperature Button 6. 6th Sense Button - Used to start 6th sense operation 7. Swing Button 8. Sleep Button 9. Accurate Button - Used to set the temperature at the decimal digits 10. - Page 14 Remote Control Functions...
- Page 15 Mode and Function Description 6th SENSE MODE (1) Press the button, the unit enters 6th sense mode directly regardless of the appliance is on or off. Under this mode, operation mode, temperature and fan speed are automatically set based on the actual room temperature.
- Page 16 Mode and Function Description COOL mode (2) Press the COOL button to start the cooling operation. You can set the desired temperature, fan speed and louver direction by pressing interrelated buttons DRY mode (3) Press the DRY button to start the dehumidification operation to reduce the humidity of room.
- Page 17 Mode and Function Description TURBO mode (5) Press the TURBO button to start or stop fast cooling. Appliance is operating under super high fan speed and indicator is flickering all the time. You can change the fan speed by pressing FAN SPEED button.
- Page 18 Emergency Operation Under emergency situation or when remote control is missing, you can control the unit by pressing the on/off swith located on the indoor unit. Open the front panel, you can find the on/off switch at right side, press it by a pin. •...
- Page 19 Basic Functional Parts...
- Page 20 Sensor Location Evaporator Temperature Actual Room Temperature Sensor (Ambient) Sensor...
- Page 21 Inverter Module Function Compressor Module Main Control Board The main control board is mainly responsible The Compressor Module controls the for outdoor and indoor machine and the power supply for the compressor to run communication between modules, in the accurately based on the Main Board's chip containing all the functionality of the air command.
-
Page 22: Basic Troubleshooting
Basic Troubleshooting... - Page 23 Basic Troubleshooting...
- Page 24 Error Code Analysis When a fault code appears, it does not necessarily mean that the said parts are damaged, could mean that the program needs to be reset. When this happens, turn OFF the unit for 5 minutes, and then turn it ON again.
- Page 25 Error Code Analysis Fault Cause Analysis Processing Method Description Upon turning ON, fan motor does not Testing the motor winding resistance is normal, if the nor turn, this may mean that the motor is broken mal please plug again two butt plugs, if abnormal, please replace the motor.
- Page 26 Error Code Analysis Fault Cause Analysis Processing Method Description F1-F5 Reference indoor machine circuit diagram to ensure To insert the terminal socket, accordingly to ensure good that PG feedback circuit device without welding, contact. welding, control circuit diagram tagging model of device parameters such as resistance, voltage measurement, if the device is damaged, please replace the same type of device.
- Page 27 Error Code Analysis Fault Cause Analysis Processing Method Description F1-F5 Reference indoor machine circuit diagram to ensure To insert the terminal socket, accordingly to ensure good that PG feedback circuit device without welding, contact. welding, control circuit diagram tagging model of device parameters such as resistance, voltage measurement, if the device is damaged, please replace the same type of device.
- Page 28 Error Code Analysis Fault Cause Analysis Processing Method Description Outdoor main control board communication circuit Refer to the circuit diagram, outdoor to ensure communication circuit device without welding, welding, fault control circuit diagram tagging model of device parameters such as resistance, voltage measurement, if the device is damaged, please replace the same type of device.
- Page 29 Inverter Module Troubleshooting A. When LED 1 (red light) in turned OFF, it means that the main control board is deffective. A flashing LED 1 indicates a main control failure. B. When the LED indicator on the compressor module appears fast/slow regular flashing, it means that Compressor Module is deffective.
- Page 30 Thank You!