Table of Contents
Advertisement
Quick Links
Advertisement
Table of Contents

Related Manuals for Bosch HXN391H20N


Summary of Contents for Bosch HXN391H20N
- Page 1 Free standing cooker HXN391H20N User manual and installation instructions [en]...
-
Page 2: Table Of Contents
en Safety ATTENTION: Observe the applicable regula- Table of contents tions and only set up the appliance in well- ventilated rooms. Read through the instruc- tions before setting up and using the appli- USER MANUAL ance. Warning: The appliance is only used for cook- Safety .............. - Page 3 Safety en ▶ Connection, maintenance and setting of the been instructed on how to use the appliance gas governor must be carried out by an au- safely and have understood the resulting thorised installation specialist. dangers. Do not let children play with the appliance. WARNING ‒ Risk of suffocation! Children must not perform cleaning or user Using the gas cooking appliance leads to a...
-
Page 4: Safety
en Safety ▶ Do not place combustible objects (e.g. tea When the cooking compartment is hot, any al- towels or newspapers) on, next to or be- coholic vapours inside may catch fire. hind the appliance. ▶ Only use small quantities of drinks with a Opening the appliance door creates a high alcohol content in food. - Page 5 Safety en ▶ Never let the power cord come into contact ▶ Keep children at a safe distance. with sharp points or edges. If there is water in the cooking compartment when it is hot, this may create hot steam. ▶ Never kink, crush or modify the power cord.
-
Page 6: Preventing Material Damage
en Preventing material damage ▶ Avoid contact with your skin when cleaning. 1.5 Plinth drawer WARNING ‒ Risk of fire! WARNING ‒ Risk of electric shock! The surfaces of the plinth drawer may be- When changing the bulb, the bulb socket con- come very hot. tacts are live. ▶... -
Page 7: Environmental Protection And Saving En- Ergy
Environmental protection and saving energy en The handles or grips on pots or pans may be dam- 2.2 Hob with gas aged. Follow the corresponding instructions when using the Place the pot or pan precisely in the centre of the ▶ appliance. steel grid of the burner. - Page 8 en Installation and connection If the cooking time is relatively long, you can switch Choose a burner roughly the same size as your pan. the appliance off 10 minutes before the cooking time Centre the cookware on the hob. ends. Tip: Cookware manufacturers often give the upper ¡...
-
Page 9: Installation And Connection
Installation and connection en A gas leak could occur. If you move the appliance after ¡ If using a residual current device, only use one that the gas supply has been established, a gas leak could bears the mark . The presence of this mark is the occur. - Page 10 en Installation and connection Use an Allen key to raise or lower the adjustable Push in the plinth drawer. feet until the cooker is level. Adjacent units Any adjacent units must not be made of flammable ma- terials. The fronts of any adjacent units must be heat- resistant up to at least 90 °C.
-
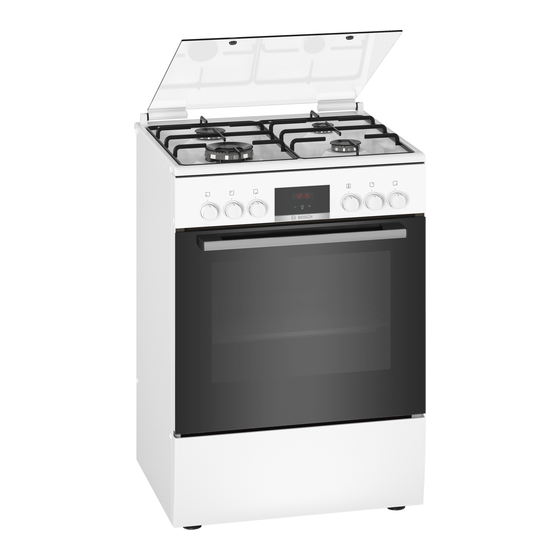
Page 11: Familiarising Yourself With Your Appliance
Familiarising yourself with your appliance en 5 Familiarising yourself with your appliance 5.1 Your appliance 5.2 Hob You can find an overview of the parts of your appliance You can view an overview of the hob here. here. Note: On certain models, specific details such as col- Note: On certain models, specific details such as col- our and shape may differ from those pictured. - Page 12 en Familiarising yourself with your appliance Control Explanation Control Explanation Use the function selector Use the temperature se- Function selector Temperature selector to set the types of heating lector to set the temperat- and other functions. ure for the type of heating You can turn the function and select settings for selector clockwise or anti-...
- Page 13 Familiarising yourself with your appliance en Symbol Type of heating What it's used for and how it works Pizza setting Cook pizza or food that requires a lot of heat from below. The bottom heating element and the ring-shaped heating element in the back wall heat the cooking compartment.
-
Page 14: Accessories
en Accessories With most types of heating and functions, the lighting 5.4 Cooking compartment lights up during operation. If you use the function se- The functions in the cooking compartment make your lector to end the operation, the lighting switches off. appliance easier to use. The oven light setting on the function selector can be used to switch on the light without heating. - Page 15 You will find a comprehensive range of products for your appliance in our brochures and online: www.bosch-home.com Accessories vary from one appliance to another. When purchasing accessories, always quote the exact Note: The pull-out rails lock in place when they are product number (E no.) of your appliance.
- Page 16 en Cookware ¡ Ensure that the size of ¡ Handle the cookware the cookware is suit- that is on the hob able for the burner carefully. size. ¡ Do not bang on the ¡ Never use small cook- hob. ware on large burners. ¡...
-
Page 17: 9.3 Operating The Hotplate
Operating the hotplate en Burner/hotplate Maximum dia- Minimum dia- meter of the meter of the base of the base of the cookware cookware Economy burner 180 mm 120 mm 9 Operating the hotplate You can find out everything you need to know about 9.3 Operating the hotplate operating your hotplate here. -
Page 18: Basic Operation
en Basic operation 9.5 Recommended cooking settings You can find an overview of different foods with appropriate heat settings here. Notes ¡ The cooking time will vary depending on the type, weight, thickness and quality of the food. ¡ Select the right cookware size for each hotplate. The diameter of the cookware base should be the same size as the hotplate. -
Page 19: Rapid Heating
Time-setting options en 11.1 Setting rapid heating a Rapid heating starts after a few seconds. a When the rapid heating process ends, an audible To ensure an even cooking result, do not place the signal sounds and the heating indicator goes out. food in the cooking compartment until rapid heating Use the function selector to set a suitable type of has come to an end. -
Page 20: Childproof Lock
en Childproof lock is highlighted in the display. When the cooking time has elapsed: Requirement: Press any button to end the signal prematurely. ‒ Reset the cooking time to zero using the button. ▶ To set another cooking time, press the ... -
Page 21: Cleaning And Servicing
Cleaning and servicing en Remove all food remnants from the cooking com- Using oven cleaner in a hot cooking compartment ▶ partment and the appliance door before you next damages the enamel. heat up the appliance. Do not use oven cleaner in the cooking compart- ▶... - Page 22 en Cleaning and servicing Cooking compartment Area Suitable cleaning agents Information Enamelled sur- ¡ Hot soapy water Soak any heavily soiled areas and use a brush or steel wool. faces ¡ Vinegar water Leave the appliance door open to dry the cooking compartment after cleaning it.
- Page 23 Cleaning aid en 14.6 Using cleaning gel for burnt-on dirt 14.8 Cleaning the burners For hard-to-remove, burnt-on dirt, you can order a After long use, the brass burner parts become darker cleaning gel from our online shop, from your specialist due to natural oxidation. This discolouration does not retailer or via our after-sales service.
- Page 24 en Rails To dry the cooking compartment more quickly, ‒ heat up the appliance with the door open with 3D hot air and 50 °C for approx. five minutes. 16 Rails To clean the rails and cooking compartment thor- 16.2 Attaching the rails oughly, you can remove the shelf supports.
- Page 25 Appliance door en The oven door hinges each have a locking lever. Close the oven door as far as the limit stop. Grip When the locking levers are closed, the oven door the left and right hand sides of the door with both is secured in place.
- Page 26 en Appliance door Lift the panel up and out. 17.5 Attaching the appliance door Reattach the oven door in the reverse sequence to re- moval. WARNING ‒ Risk of injury! The oven door might accidentally fall or a hinge may suddenly snap shut. In this case, do not hold onto the hinge. Call cus- ▶...
-
Page 27: Top Cover
Top cover en 17.6 Additional door safety WARNING ‒ Risk of burns! During long cooking times, the oven door may become Additional safety devices have been fitted to prevent very hot. contact with the oven doors. Always attach these safety Supervise small children when the oven is in opera- devices when children could come near the oven. - Page 28 en Troubleshooting Fault Cause and troubleshooting The appliance is not There has been a power cut. working. Check whether the lighting in your kitchen or other appliances are working. ▶ The appliance does At the end of a cooking time, the appliance stops heating up. The oven light and cooling fan not switch off fully at do not switch off.
-
Page 29: Transportation And Disposal
Transportation and disposal en Fault Cause and troubleshooting The burner flame is Openings on the burner are soiled. not uniform. Clean and dry the openings on the burner. ▶ The burner flame Gas cylinder is empty. goes out while the Replace the gas cylinder. ▶... -
Page 30: Customer Service
en Customer Service Slide all accessories, such as baking trays, into the If the original packaging is no longer available corresponding slots with thin cardboard at the In order to guarantee sufficient protection against edges, in order to avoid damaging the appliance. any transport damage, pack the appliance in pro- Place cardboard or similar between the front and tective packaging. - Page 31 How it works en 22.3 Good to know 22.4 Notes on baking Observe this information when preparing food. When baking, use the shelf positions indicated. ¡ The temperature and cooking time depend on the Baking on one level Shelf posi- amount of food and the recipe. Settings ranges are tion specified for this reason.
- Page 32 en How it works Topic Topic You do not want small Leave a minimum clear- You want to bake accord- Use similar items in the baked goods to stick to ance of 2 cm around ing to your own recipe. baking tables as a guide. each other when baking.
- Page 33 How it works en Meal Accessory/cookware Shelf posi- Type of Temperature Cooking tion heating in °C time, minutes Yeast cake with moist topping, 2 levels Universal pan 150–170 40–65 Baking tray Plaited loaf, plaited ring Universal pan 160–170 35–40 Swiss roll Universal pan ...
- Page 34 en How it works Meal Accessory/cookware Shelf posi- Type of Temperature Cooking tion heating in °C time, minutes Biscuits, 3 levels 5+3+1 130–150 30–40 Baking tray Universal pan Meringues Universal pan 80-100 100-150 Meringues, 2 levels Universal pan 90-100 100-150 Baking tray...
- Page 35 How it works en 22.6 Bread and bread rolls ATTENTION! When the cooking compartment is hot, any water in- The values for bread dough apply to both dough side it will create steam. The change in temperature placed on a tray and dough placed in a loaf tin. may cause damage.
- Page 36 en How it works Meal Accessory/cookware Shelf posi- Type of Temperature Cooking tion heating in °C time, minutes Pizza, frozen, thin base, x 2 Universal pan 190–210 20–25 Wire rack Pizza, frozen, deep-pan, x 1 Wire rack 180–200 20–25 Pizza, frozen, deep-pan, x 2 Universal pan ...
- Page 37 How it works en Roasting in cookware Tips for poultry, meat and fish If you cook food in cookware, you can remove it from Observe the instructions when preparing poultry, meat the cooking compartment more easily and serve it dir- and fish ectly in the cookware.
- Page 38 en How it works Topic Topic Lean meat must not dry ¡ Coat lean meat with fat Keep the cooking com- ¡ Cook the food in a out. or oil as required or partment as clean as pos- covered roasting dish cover it with strips of sible.
- Page 39 How it works en Food Accessories/cook- Shelf posi- Type of Temperature Cooking ware tion heating in °C/grill time in mins setting Fillet of beef, medium, 1 kg Cookware without lid 210–220 45–55 Pot-roasted beef, 1.5 kg Cookware with lid 200–220 100–120 Sirloin, medium, 1.5 kg...
- Page 40 en How it works 22.10 Vegetables and side dishes This is where you can find information about preparing vegetable products that you can use as a side dish for your meals. Recommended settings Vegetables and side dishes Use the settings listed in the table. Food Accessories/cook- Shelf posi-...
- Page 41 How it works en be preserved. The thinner you cut the slices, the Ensure that neither fruit nor mushrooms overlap on quicker the drying process will be and the more flavour the wire rack. the dried food will retain. Settings ranges are specified Grate vegetables and then blanch them.
- Page 42 en How it works Remove the jars from the cooking compartment ATTENTION! ‒ after the specified residual heating time. If there are large temperature differences, the jars Vegetables may shatter. Once all of the jars are bubbling, reduce the tem- Do not place jars on cold or wet surfaces. ▶...
- Page 43 How it works en Recommended settings Proving dough The temperature and time are dependent on the type and quantity of the ingredients. The values in the table are therefore guide values only. Meal Accessory/cookware Shelf posi- Type of Temperature Cooking time, tion heating in °C...
- Page 44 en How it works If you can use your appliance to cook on multiple levels, position baking tins either next to one another or offset on different shelves so that they are not directly one above the other in the cooking compartment. Recommended settings Baking Meal...
-
Page 45: Installation Instructions
Installation instructions en 23 Installation instructions ¡ After converting the appliance from one The installation instructions contain instructions for the gas connection and for the gas conversion's as- gas type to another, the new gas type must sembly . be labelled on the rating plate. Note: For after-sales service only. - Page 46 en Installation instructions 23.3 Selecting the gas connection side Connection in accordance with EN ISO 228-1 G½ (TS EN ISO 228-1 G½) On many appliances, you can carry out the gas con- Insert the new seal in the connecting piece. Ensure nection on the right- or left-hand side. If necessary, you that the seal is seated correctly.
- Page 47 Installation instructions en Secure the connecting piece using a 24 mm span- Fit the safety gas hose and use a pipe union or ner. Use a 24 mm spanner to place the threaded fit- cable clamp to tighten it securely. ting of the gas pipe or safety gas hose on the con- necting piece and tighten it firmly.
- Page 48 en Installation instructions ¡ In the "Technical data – Gas" → Page 51 table, de- If your appliance features a wok burner with side ac- termine the correct nozzle diameter. cess, remove the burner nozzle as shown below. ¡ Always use a new seal. ¡...
- Page 49 Installation instructions en Converting the appliance from natural gas to Note: Remove the four screws (M4) from the wok burner. liquefied gas If the appliance was set to natural gas at the time of If burner connection screws are present on the hob, delivery (factory setting) (NG: G20, G25) and is now remove all of these.
- Page 50 en Installation instructions Remove the plastic covers from the front profiles on Replacing bypass nozzles the right and left. Ensure that the covers are not Use a flat-head screwdriver (no. 2) to unscrew the damaged or scratched. Unscrew the screws (T20) bypass nozzles.
- Page 51 Installation instructions en to the burner bases. Place the enamelled burner Checking the bypass nozzles lids onto the centre of the appropriate lower parts of Check the leak tightness of each bypass nozzle. the burner and, in doing so, note the sizes. Open the gas connection shut-off.
- Page 52 en Installation instructions G20/ G25.3 G30/ G2.350 Gas pressure (mbar) 20/25 28– 30/37 Nozzle (mm) 0.72 0.72 0.68 0.77 0.72 0.72 0.50 0.43 0.47 0.77 1.00 Bypass nozzle (mm) 0.52/0. 0.52/ 0.52/ 0.52/ 0.52/ 0.52/ 0.32/ 0.32/ 0.32/ 0.52/ 0.52/ Max. input power (kW) Min.
- Page 53 Installation instructions en G20/ G25.3 G30/G31 Gas pressure (mbar) 20/25 28–30/37 Nozzle (mm) 1.38 1.38 1.30 1.43 1.36 1.36 0.90 0.73 0.85 Bypass nozzle (mm) 0.94/0. 0.94/ 0.94/ 0.94/ 0.94/ 0.94/ 0.59/0.55 0.59/ 0.59/ 0.88 0.88 0.88 0.88 0.88 0.55 0.55 Max.
- Page 56 Expert advice for your Bosch home appliances, help with problems or a repair from Bosch experts. Find out everything about the many ways Bosch can support you: www.bosch-home.com/service Contact data of all countries are listed in the attached service directory.