Table of Contents
Advertisement
Quick Links
Advertisement
Table of Contents

Related Manuals for AEG BE7004001


Summary of Contents for AEG BE7004001
- Page 1 User Manual BE7004001 Oven BE7004031 BE730400W BE7304021 BE7304071...
-
Page 2: Table Of Contents
15. ENERGY EFFICIENCY....................38 FOR PERFECT RESULTS Thank you for choosing this AEG product. We have created it to give you impeccable performance for many years, with innovative technologies that help make life simpler features you might not find on ordinary appliances. Please spend a few minutes reading to get the very best from it. -
Page 3: Safety Information
ENGLISH SAFETY INFORMATION Before the installation and use of the appliance, carefully read the supplied instructions. The manufacturer is not responsible if an incorrect installation and use causes injuries and damages. Always keep the instructions with the appliance for future reference. -
Page 4: Safety Instructions
Ensure that the appliance is switched off before • replacing the lamp to avoid the possibility of electric shock. Do not use a steam cleaner to clean the appliance. • Do not use harsh abrasive cleaners or sharp metal •... - Page 5 ENGLISH • Connect the mains plug to the mains • Do not put flammable products or socket only at the end of the items that are wet with flammable installation. Make sure that there is products in, near or on the appliance. access to the mains plug after the WARNING! installation.
-
Page 6: Product Description
• Clean regularly the appliance to • Before replacing the lamp, disconnect prevent the deterioration of the the appliance from the power supply. surface material. • Only use lamps with the same • Remaining fat or food in the specifications. -
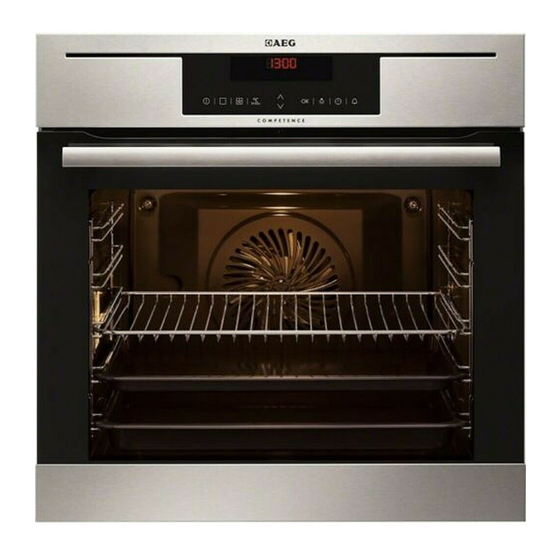
Page 7: Control Panel
ENGLISH 3.2 Accessories Combi pan Wire shelf For cakes and biscuits. To bake and roast or as a pan to collect fat. For cookware, cake tins, roasts. Core temperature sensor Baking tray To measure how far the food is cooked. For cakes and biscuits. - Page 8 Sensor Function Description Field TEMPERATURE / To set and see the cavity temperature or the FAST HEAT UP core temperature sensor temperature (if present). If you press and hold it for three sec- onds, it turns the Fast heat up function ON or OFF.
-
Page 9: Before First Use
ENGLISH Symbol Name Description kg / g An automatic programme with a weight input operates. h / min A clock function operates. Temperature / Fast heat up The function operates. Temperature The current temperature is indicated. Temperature You can change the temperature. Core temperature sensor The core temperature sensor is in the core temperature sensor socket. -
Page 10: Daily Use
6. DAILY USE • the manual mode WARNING! • automatic programmes Refer to Safety chapters. 6.1 Operating the appliance To operate the appliance you can use: 6.2 Oven functions Oven function Application True Fan Cook- To bake on up to 3 shelf positions at the same time and to dry food. -
Page 11: Clock Functions
ENGLISH Oven function Application ECO Roasting The ECO functions let you optimize the energy con- sumption during cooking. It is necessary to set the cooking time first. To get more information about the recommended settings, refer to the cooking tables with the equivalent function. - Page 12 Clock function Application TIME OF DAY To show the time of day. To change the time of day, re- fer to "Setting the time". DURATION To set how long the appliance operates. To set when the appliance deactivates. You can use Du-...
-
Page 13: Automatic Programmes
ENGLISH to "Setting the oven function" and 3. Touch or the MINUTE MINDER "Changing the temperature"). starts automatically after five 2. Set the DURATION (refer to "Setting seconds. the DURATION"). When the set time ends, an acoustic 3. Touch again and again until signal sounds for two minutes and 00:00 flashes in the display. - Page 14 Programme number Programme name WHOLE FISH PIZZA QUICHE LORRAINE LEMON SPONGE CAKE CHEESE CAKE ROLLS FARMER BREAD DOUGH PROVING POTATO GRATIN LASAGNE CANNELLONI CONVENIENCE CAKE CONVENIENCE PIZZA CONVENIENCE POTATO TYPES 8.2 Recipes online The appliance deactivates. 6. Touch a sensor field or open the You can find the recipes for door to stop the acoustic signal.
-
Page 15: Using The Accessories
ENGLISH The appliance deactivates. 3. Install the core temperature sensor. 7. Touch a sensor field or open the Refer to "Core temperature sensor". door to stop the acoustic signal. 4. Touch to set the programme for the core temperature 8.5 Automatic programmes sensor. - Page 16 You can set the core WARNING! temperature only when Be careful when you remove the core temperature flashes. If is in the sensor. It is hot. There is a display but does not risk of burns. flash before you set the core temperature, touch 9.2 Inserting the accessories...
-
Page 17: Additional Functions
ENGLISH Wire shelf and baking tray together: Push the baking tray between the guide • All accessories have small bars of the shelf support and the wire indentations at the top of shelf on the guide bars above. the right and left side to increase safety. - Page 18 10.3 Using the Function Lock You can deactivate the appliance when the Function You can activate the function only when Lock is on. When you the appliance operates. deactivate the appliance, The Function Lock prevents an the Function Lock accidental change of the oven function.
-
Page 19: Hints And Tips
ENGLISH display is lower between 10 PM and 6 the display goes back to the night brightness. • Day brightness: 10.7 Cooling fan – when the appliance is activated. – if you touch a sensor field during When the appliance operates, the the night brightness (apart from cooling fan activates automatically to ON / OFF), the display goes back... - Page 20 Baking results Possible cause Remedy The cake sinks and becomes The baking time is too short. Set a longer baking time. soggy, lumpy or streaky. You cannot decrease bak- ing times by setting higher temperatures. The cake sinks and becomes There is too much liquid in Use less liquid.
- Page 21 ENGLISH Food Function Temperature Time (min) Shelf position (°C) Apple pie / Ap- True Fan Cook- 60 - 90 ple pie (2 tins Ø20 cm, diago- nally off set) Apple pie / Ap- Conventional 70 - 90 ple pie (2 tins Cooking Ø20 cm, diago- nally off set)
- Page 22 Food Function Temperature Time (min) Shelf position (°C) Fruit flans (made Conventional 35 - 55 with yeast Cooking dough / sponge mixture) Fruit flans made True Fan Cook- 160 - 170 40 - 80 with short pastry Yeast cakes with...
- Page 23 ENGLISH Food Function Temperature Time (min) Shelf position (°C) Rolls Conventional 10 - 25 190 - 210 Cooking Small cakes / True Fan Cook- 20 - 35 Small cakes (20 per tray) Small cakes / Conventional 20 - 30 Small cakes (20 Cooking per tray) 1) Preheat the oven.
- Page 24 Food Temperature Time (min) Shelf position Type of food (°C) Sweet dishes 180 - 200 45 - 60 Ring cake or brioche 160 - 170 50 - 70 Plaited bread / bread crown 170 - 190 40 - 50...
- Page 25 ENGLISH Food Temperature Time (min) Shelf position (°C) 2 positions 3 positions Biscuits made 160 - 170 30 - 60 1 / 4 with yeast dough Puff pastries 30 - 50 1 / 4 170 - 180 Rolls 20 - 30 1 / 4 Small cakes / 23 - 40...
- Page 26 Food Temperature (°C) Time (min) Shelf position Pizza (with a lot of 180 - 200 20 - 30 topping) Tarts 180 - 200 40 - 55 Spinach flan 160 - 180 45 - 60 Quiche Lorraine 170 - 190...
- Page 27 ENGLISH 11.11 Roasting tables Beef Food Quantity Function Tempera- Time (min) Shelf posi- ture (°C) tion Pot roast 1 - 1.5 kg Convention- 120 - 150 al Cooking Roast beef or fil- per cm of Turbo Grill- 5 - 6 190 - 200 let: rare thickness...
- Page 28 Food Quantity Function Temperature Time (min) Shelf posi- (kg) (°C) tion Shelf posi- tion Saddle of 1 - 1.5 Turbo Grill- 160 - 180 40 - 60 lamb Game Food Quantity Function Temperature Time (min) Shelf posi- (°C) tion...
- Page 29 ENGLISH 11.12 Grilling • Grill only flat pieces of meat or fish. • Always preheat the empty oven with • Always grill with the maximum the grill functions for 5 minutes. temperature setting. CAUTION! • Set the shelf into the shelf position as Always grill with the oven recommended in the grilling table.
- Page 30 Food Temperature (°C) Time (min) Shelf position French Fries, thin 200 - 220 20 - 30 French Fries, thick 200 - 220 25 - 35 Wedges / Cro- 220 - 230 20 - 35 quettes Hash Browns 210 - 230...
- Page 31 ENGLISH Food Quantity Defrosting Further de- Comments time (min) frosting time (min) Chicken 1 kg 100 - 140 20 - 30 Put the chicken on an upturned saucer in a big plate. Turn halfway through. Meat 1 kg 100 - 140 20 - 30 Turn halfway through.
- Page 32 Vegetables Food Temperature (°C) Cooking time until Continue to cook at simmering (min) 100 °C (min) 160 - 170 50 - 60 5 - 10 Carrots Cucumbers 160 - 170 50 - 60 Mixed pickles 160 - 170 50 - 60...
-
Page 33: Care And Cleaning
ENGLISH Food Food core temperature (°C) Rib / Fillet steak: medium 60 - 65 Rib / Fillet steak: well done 70 - 75 Pork Food Food core temperature (°C) Shoulder / Ham / Neck joint of pork 80 - 82 Chop (saddle) / Smoked pork loin 75 - 80 Meatloaf... - Page 34 12.1 Notes on cleaning Install the shelf supports in the opposite sequence. • Clean the front of the appliance with a soft cloth with warm water and a 12.3 Oven ceiling cleaning agent. • To clean metal surfaces, use a usual WARNING! cleaning agent.
- Page 35 ENGLISH When the cleaning is completed, install WARNING! the glass panels and the door. Do the Be careful when you remove above steps in the opposite sequence. the door from the appliance. Install the smaller panel first, then the The door is heavy. larger.
-
Page 36: Troubleshooting
3. Clean the glass cover. 4. Replace the lamp with a suitable 300 °C heat-resistant lamp. 5. Install the glass cover. 6. Install the left shelf support. 13. TROUBLESHOOTING WARNING! Refer to Safety chapters. 13.1 What to do if... -
Page 37: Technical Information
ENGLISH Problem Possible cause Remedy It takes too long to cook the The temperature is too low Adjust the temperature if dishes or they cook too or too high. necessary. Follow the advice quickly. in the user manual. Steam and condensation You left the dish in the oven Do not leave the dishes in settle on the food and in the... -
Page 38: Energy Efficiency
15. ENERGY EFFICIENCY 15.1 Product Fiche and information according to EU 65-66/2014 Supplier's name BE7004001M BE7004031M Model identification BE730400WM BE7304021M BE7304071M Energy Efficiency Index 92.9 Energy efficiency class Energy consumption with a standard load, conven- 0.99 kWh/cycle tional mode Energy consumption with a standard load, fan-forced 0.79 kWh/cycle... - Page 39 ENGLISH – In some oven functions if a • Eco functions - refer to "Oven programme with time selection functions". (Duration, End, Time Delay) is • When you use the Moist Fan Baking activated and the cooking time is function, the lamp deactivates after 30 longer than 30 minutes, the seconds.
- Page 40 www.aeg.com/shop...