
Related Manuals for Siemens HS836GP.0


Summary of Contents for Siemens HS836GP.0
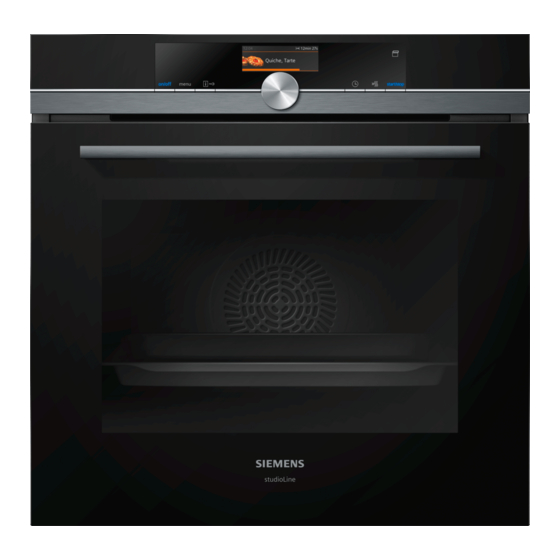
- Page 1 Oven HS836GP.0 User manual and installation instructions Register your product on My Siemens and discover exclusive ser- vices and offers. siemens-home.bsh-group.com/welcome The future moving in. Siemens Home Appliances...
-
Page 2: Table Of Contents
en Safety Table of contents ¡ Keep the instruction manual and the product information safe for future refer- ence or for the next owner. ¡ Do not connect the appliance if it has been INFORMATION FOR USE damaged in transit. Safety .............. 2 1.2 Intended use Preventing material damage ....... -
Page 3: Safety
Safety en Loose food remnants, fat and meat juices WARNING ‒ Risk of injury! may catch fire. Scratched glass in the appliance door may ▶ Before using the appliance, remove the develop into a crack. worst of the food residues and remnants ▶ Do not use any harsh or abrasive cleaners from the cooking compartment, heating ele- or sharp metal scrapers to clean the glass ments and accessories. -
Page 4: Preventing Material Damage
en Preventing material damage Hot steam is generated in the cooking com- WARNING ‒ Danger: Magnetism! partment. Permanent magnets are used in the control ▶ Do not reach into the cooking compartment panel or in the controls. These may affect when using steam. electronic implants, e.g. -
Page 5: Environmental Protection And Saving En- Ergy
Environmental protection and saving energy en If the seal is very dirty, the appliance door will no Using cookware with rust spots may cause corrosion in longer close properly during operation. This may dam- the cooking compartment. Even the smallest spots of age the front of adjacent kitchen units. - Page 6 en Familiarising yourself with your appliance 4 Familiarising yourself with your appliance 4.1 Control panel Buttons The buttons on the left- and right-hand side of You can use the control panel to configure all functions the control panel have a pressure point. Press of your appliance and to obtain information about the a button to execute its function.
-
Page 7: Familiarising Yourself With Your Appliance
Familiarising yourself with your appliance en If you have set a cooking time and the cooking time is If the self-cleaning surfaces no longer clean themselves deleted, the countdown time takes over from the time adequately during operation, heat up the cooking com- that has already elapsed from the cooking time. -
Page 8: Operating Modes
en Operating modes 5 Operating modes This is where you can find an overview of your appli- Operating ance's operating modes and main functions. mode Press to open the menu. Steam Gently prepare food with types of steam heating. Operating mode Drying func-... -
Page 9: Accessories
Accessories en Symbol Type of heating Temperature What it's used for and how it works range Possible additional options Slow cooking 70–120 °C Slowly and gently cook seared, tender pieces of meat in un- covered cookware. The heat is emitted evenly from above and below at a low tem- perature. - Page 10 en Accessories Accessories Baking tray ¡ Tray bakes ¡ Small baked items Unperforated steam con- Cooking: tainer, size S ¡ Rice ¡ Pulses ¡ Cereals Place the steam container on the wire rack. Perforated steam container, ¡ Steaming vegetables. size S ¡...
-
Page 11: 7.1 Before Using For The First Time
Note: Take any accessories that you will not be using your appliance in our brochures and online: out of the cooking compartment while the appliance is siemens-home.bsh-group.com in operation. Accessories vary from one appliance to another. When purchasing accessories, always quote the exact Combining accessories product number (E no.) of your appliance. -
Page 12: Basic Operation
button lights up blue. The appliance will switch itself off automatically if it is ‒ not used for a certain period of time. a The Siemens logo appears in the display. A type of ▶ heating and a temperature are then displayed. Press ... -
Page 13: Rapid Heating
Rapid heating en 8.6 Setting the type of heating and the a The appliance switches off. Any functions currently in progress are cancelled. temperature a The time or residual heat indicator appears in the When you switch on the appliance, the types of heating display. - Page 14 en Time-setting options 10 Time-setting options 10.3 Setting the cooking time Your appliance has different time-setting options, with which you can control its operation. You can set a cooking time for operation of up to 23 hours 59 minutes. 10.1 Overview of the time-setting options Requirement: The type of heating and a temperature You can set a cooking time and an operation end time or setting have been set.
- Page 15 Steam en Cancelling the end time To set a later end time, turn the rotary selector. Press to start the operation. The set end time can only be changed when the oven a The status bar shows a notification when the opera- is in standby mode.
-
Page 16: Steam
en Steam Slide the full water tank back into the recess . ATTENTION! When doing so, make sure that the water tank clicks Risk of damage to kitchen units Too much water has into place in the retainers . collected on the cooking compartment floor. - Page 17 Steam en 11.3 Steam assistance 11.4 After every steam operation When you cook with steam assistance, the appliance The remaining water is pumped back into the water introduces steam into the cooking compartment at vari- tank after every operation with steam. Then empty and ous intervals.
- Page 18 en Meat probe Note: You can remove the condensation tray in order ATTENTION! to clean it. If there is water on the cooking compartment floor → "Removing the condensate tray", Page 27 when operating the appliance at temperatures above 120 °C, this will damage the enamel. Drying the cooking compartment ▶...
- Page 19 Meat probe en a The time, the operation duration and the settings are Poultry Insert the meat probe into the thickest shown in the display. part of the breast, pushing it in as far as a The required temperature and core temperature are possible.
-
Page 20: Meat Probe
en Dishes Poultry Core temperature Veal Core temperature in °C in °C Chicken breast 75 - 80 Joint of veal or hock, lean 75 - 80 Duck 80 - 85 Joint of veal, shoulder 75 - 80 Duck breast, medium rare 55 - 60 Veal knuckle 85 - 90... - Page 21 Dishes en Requirement: To start the operation, the cooking com- Category Foods partment must be cooled down. Cakes Cakes in tins Press . Cakes on a baking tray In the operating modes menu, select "Dishes". Small baked items a The first dish is suggested. Biscuits Use the rotary selector to select the required cat- Bread,...
-
Page 22: Dishes
en Childproof lock 14 Childproof lock You can secure your appliance to prevent children a A confirmation notification appears on the display. from accidentally switching it on or changing the set- a The appears in the status bar when the appliance tings. -
Page 23: Sabbath Mode
Cleaning and servicing en Press . Basic setting Selection a The operating modes menu opens. Brand logo Display Select the "Settings" operating mode. Do not display a The first basic setting appears. Fan run-on Recommended Press to switch between the different settings. Minimum Use the rotary selector to change the basic setting. - Page 24 en Cleaning and servicing Area Suitable cleaning agents Information Door cover ¡ Made of stainless Do not use glass cleaner or a glass scraper. steel: Do not use stainless steel care products. Stainless steel cleaner Tip: Remove the door cover for thorough cleaning. ¡...
- Page 25 Cleaning assistance en 17.2 Cleaning the appliance faces no longer clean themselves adequately during operation, heat up the cooking compartment specific- In order to avoid damaging the appliance, you must ally to the right temperature. clean your appliance only as specified, and with suit- ATTENTION! able cleaning products.
-
Page 26: Descaling
en Descaling 18.2 Wiping down the cooking compartment Clean the smooth surfaces in the cooking compart- ment with a dish cloth or a soft brush. Remove stub- ATTENTION! born food remnants using a stainless steel scouring The prolonged presence of moisture in the cooking pad. - Page 27 Appliance door en In order to use the drying function, set the drying The duration is set to 10:00 min. and cannot be ‒ function. changed. → "Setting the drying process", Page 27 Press to start the drying function. a The appliance starts to dry and the duration counts Setting the drying process down.
- Page 28 en Appliance door Installing the condensate tray Close the locking levers on the left- and right-hand hinges . Use both hands to insert the condensate tray at an angle . a The locking levers are closed. The appliance door is secured and cannot be detached.
- Page 29 Appliance door en Lift out the inner pane and set it down carefully 21.4 Fitting the door panes on a flat surface. Lift out the intermediate pane and set it down WARNING ‒ Risk of injury! carefully on a flat surface. The hinges on the appliance door move when the door is opened and closed, which could trap your fingers.
- Page 30 en Rails Open the appliance door and attach the door seal. Push the inner pane upwards until it is in the left- and right-hand retainers . Slide the inner pane into the left- and right-hand retainers . Put the door cover in position ...
-
Page 31: Troubleshooting
Troubleshooting en First, push the rail into the middle of the rear Push the rail into the front socket until the rail socket until the rail rests against the cooking also rests against the cooking compartment wall, compartment wall, and then push this back ... - Page 32 en Troubleshooting Fault Cause and troubleshooting The time is not dis- Basic setting has been changed. played when the ap- ▶ Change the basic setting for the time display. pliance is switched → "Basic settings", Page 22 off. The control panel The circuit breaker is faulty. cannot be opened.
-
Page 33: Disposal
▶ Next time, set lower or higher values. Tip: A lot of information about the food preparation and corresponding setting values can be found on our website www.siemens-home.bsh-group.com . 24 Disposal 24.1 Disposing of old appliance This appliance is labelled in accord- ance with European Directive Valuable raw materials can be reused by recycling. - Page 34 en How it works Make a note of your appliance's details and the Cus- tomer Service telephone number to find them again quickly. 26 How it works Here, you can find the ideal settings for various types Baking on two or more levels Shelf position of food as well as the best accessories and cookware.
-
Page 35: How It Works
How it works en Roasting in cookware 26.4 Steaming If you cover the cookware when you cook your food, Cook dishes gently. The food remains particularly suc- this will keep the cooking compartment cleaner. culent. In contrast to steam-assisted cooking, the meat does General information about roasting in cookware not become crispy on the outside. - Page 36 en How it works 26.7 List of foods Recommended settings for a variety of foods, sorted into food categories. Recommended settings for various types of food Food Accessories/cook- Shelf pos- Heating Temperature in Steam in- Cooking time ware ition function °C tensity in mins → Page 8 Sponge cake, 2 levels...
- Page 37 How it works en Food Accessories/cook- Shelf pos- Heating Temperature in Steam in- Cooking time ware ition function °C tensity in mins → Page 8 Bread rolls, fresh Baking tray 200–220 Medium 20–30 Pizza, fresh, on a baking Baking tray 200 - 220 25 - 35 tray...
- Page 38 en How it works Food Accessories/cook- Shelf pos- Heating Temperature in Steam in- Cooking time ware ition function °C tensity in mins → Page 8 Burger, 3-4 cm thick Wire rack 25 - 30 Leg of lamb, boned, me- Uncovered cook- 170 - 190 50 - 80 dium, 1.5 kg...
- Page 39 How it works en 26.8 Special cooking methods and other Requirement: The cooking compartment is cold. applications Use fresh, clean, hygienic meat without bones. Place the cookware onto the wire rack at level 2 in Information and recommended settings for special the cooking compartment. cooking methods and other applications, e.g.
- Page 40 en How it works – Acidic ingredients such as lemon juice or vinegar To catch any drops of condensate, slide the univer- make food firmer. sal pan in at level 1. ATTENTION! – Alcohol and garlic give the food an unpleasant after-taste. Risk of damage to kitchen units ▶...
- Page 41 How it works en Food Cooking tips Food Cooking tips Fish ¡ Season the fish and coat with hot Vegetables ¡ Sear the vegetables briefly to give butter. them the flavours you would ex- ¡ To give the fish a nice crust and pect from frying.
- Page 42 en How it works Sterilisation and hygiene Wash the bottles in the dishwasher. Place the bottles into the steaming tray (size XL) in You can sterilise heat-resistant cookware or baby such a way that they do not touch one another. bottles that are in perfect condition. The process is Start the "Sterilise"...
- Page 43 How it works en Tips for reheating food ¡ Place food that you are not reheating in cookware (e.g. bread rolls) directly onto the wire rack at ¡ Use uncovered, heat-resistant cookware that is suit- level 2. able for cooking with steam. ¡...
- Page 44 en How it works Food Accessories/cook- Shelf pos- Heating Temperature in Steam intens- Cooking ware ition function °C time in → Page 8 mins Viennese whirls, on x 2 5+3+1 130 - 140 35 - 55 3 levels Baking tray x 1 Universal pan Small cakes Baking tray ...
-
Page 45: Installation Instructions
Installation instructions en Recommended settings for grilling Food Accessory/cookware Shelf posi- Heating Temperature in °C/ Cooking time tion function grill setting in mins → Page 8 Toasting bread Wire rack 4–6 Do not preheat the appliance. 27 Installation instructions Observe this information when installing the appliance. ¡... - Page 46 en Installation instructions 27.3 Installation below a worktop ATTENTION! Carrying the appliance by the door handle Observe the installation dimensions and the installation could break it. The door handle cannot sup- instructions when installing below a worktop. port the weight of the appliance. ▶...
- Page 47 Installation instructions en 27.5 Installation in a tall unit ¡ Ensure that air exchange is guaranteed in accord- ance with the diagram. Observe the installation dimensions and the installation instructions when installing in a tall unit. ¡ Only fit appliances up to a height that allows ac- cessories to be easily removed.
- Page 48 en Installation instructions ¡ Contact protection must be guaranteed by the in- Screw the appliance into place. stallation. Electrically connect the appliance with the protective contact plug Note: The appliance must only be connected to a pro- tective contact socket that has been correctly installed. ▶...
- Page 52 Valid within Great Britain: Imported to Great Britain by BSH Home Appliances Ltd. Grand Union House Old Wolverton Road Wolverton, Milton Keynes MK12 5PT United Kingdom Manufactured by BSH Hausgeräte GmbH under the trademark licence of Siemens AG *9001756997* 9001756997 (020519)