
Related Manuals for Sony DWTP01N/14


Summary of Contents for Sony DWTP01N/14
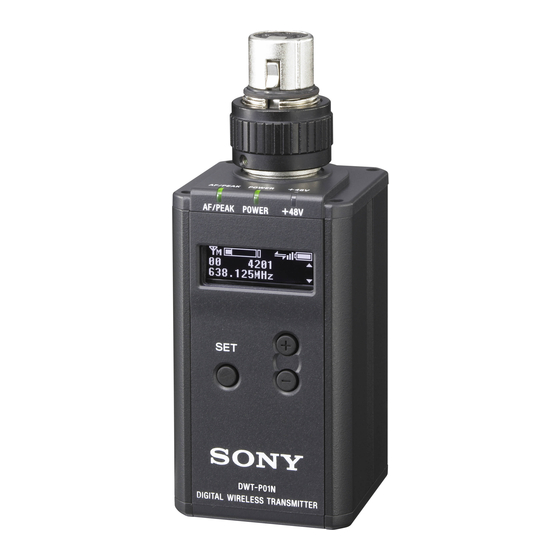
- Page 1 4-692-878-02 (1) Digital Wireless Transmitter Operating Instructions DWT-P01N © 2016 Sony Corporation...
-
Page 2: Table Of Contents
Table of Contents Features ..............3 Parts Identification ........... 4 Power Supply ............. 6 Installing the batteries ..........6 Setting the Transmission Channel ......6 Selecting the group/channel ........6 Using the Cross Remote ..........7 Pairing with a receiver ........... 7 Using the Encrypted Transmission Function .. -
Page 3: Features
What is DWX? For details, see “Setting the audio codec mode (CODEC DWX refers to Sony’s new digital wireless microphone MODE)” on page 13. system. The DWX series reflects Sony’s extensive expertise in professional microphones and sound design. It... -
Page 4: Parts Identification
To connect a microphone or a cable Parts Identification Microphone or a cable (optional) Front Turn the connector ring clockwise (1) and insert the microphone or cable connector into the audio input connector until it is fully engaged (2). Then turn the connector ring counterclockwise to secure the latch (3). - Page 5 j Battery compartment D Reference level gauge Indicates the reference input level. When the attenuation is Accommodates two LR6 (size AA) alkaline batteries. 0 dB with INPUT LEVEL set to MIC, –58 dBu (–60 dBV) is indicated. When LINE is selected for INPUT LEVEL, For details on how to insert the batteries, see “Power +4 dBu is indicated.
-
Page 6: Power Supply
AA) Sony Alkaline batteries. An incorrect indication may result when a different kind of batteries, a different For details on groups and channels, refer to “Sony Digital brand of batteries or old batteries are used. If you plan to Wireless Microphone System Frequency Lists” on the use other kind of batteries than alkaline, set the supplied CD-ROM. -
Page 7: Using The Cross Remote
Hold down the SET button until the group indication Using the Cross Remote flashes. Press the + or – button repeatedly to select a group. This transmitter is equipped with a wireless remote control Press the SET button to enter the group. function that can be used to set the parameters (low-cut filter, attenuation operation, power save mode, etc.) of the The channel indication starts flashing. -
Page 8: Using The Encrypted Transmission Function
goes up, the RF REMOTE function turns on, and the Using the Encrypted remote control function becomes operative. Transmission Function To use the Cross Remote with a previous pairing In the RF REMOTE indication, select ON. To prevent hacking of the signal, the transmitter scrambles the signal during transmission. -
Page 9: Using Password Mode (Password)
When the RF REMOTE function is off, REMOTE Set the same password that was set on the transmitter. cannot be selected. For details on receiver operations, refer to the operating instructions supplied with the receiver. Note When the receiver does not support encryption key Note exchange through USB connection, select REMOTE. -
Page 10: Using A Usb Keyboard
Using a USB Keyboard Basic Menu Operations Connecting an optional USB keyboard to the transmitter Function name allows you to perform menu operations and enter your name and password for the encrypted transmission function from the keyboard. A Micro USB connector is used on the transmitter. For this reason, use the supplied USB adapter cable. -
Page 11: Setting Menus
For details on wireless remote control function, see For details on the frequency range of each band, refer to “Using the Cross Remote” on page 7. “Sony Digital Wireless Microphone System Frequency Lists” on the supplied CD-ROM. The maximum RF output power can be configured on the unit. -
Page 12: Setting The Audio Input Level (Input Level)
TYPE1: The power status is indicated based on For details on wireless remote control function, see characteristics of new LR6 (size AA) Sony Alkaline “Using the Cross Remote” on page 7. batteries. Select this for LR6 (size AA) alkaline batteries. -
Page 13: Power Supply Setting (+48V)
To reset the accumulated time indication unexpected interference, resulting in more reliable transmission. Hold down the SET button until the time indication The audio delay durations that occur when transmitting flashes. and receiving with each mode will differ depending on the receiver’s operating environment. -
Page 14: Locking The Power Switch (Power Sw Lock)
For details on wireless remote control function, see Automatic dimming of the display “Using the Cross Remote” on page 7. (DIMMER MODE) Locking the POWER switch (POWER The organic light-emitting diode display can be set to dim or turn off after a certain amount of time. SW LOCK) The POWER switch can be locked to prevent the AUTO OFF: The display turns off after 30 seconds. -
Page 15: Block Diagram
Block Diagram Digital signal processor Attenuator Head amp. Low-cut filter High- Audio A/D converter frequency codec circuit modulator Internal SG... -
Page 16: Troubleshooting
If you encounter a problem using this transmitter, use the following checklist to find a solution. For any problems with the receiver or adapter, refer to the operating instructions supplied with the respective device. If the problem persists, consult your Sony dealer. Symptom... -
Page 17: Important Notes On Operation
Position the transmitter so that interference is It is recommended that you use the Sony ECM-673/9X, minimized. ECM-674/9X, or ECM-678/9X Electret Condenser • To avoid degradation of the signal-to-noise ratio, do not Microphone with this transmitter. -
Page 18: Specifications
Operating voltage WARRANTY, OR FOR ANY OTHER REASON WHATSOEVER. 3 V DC, with two LR6 (AA) alkaline • SONY WILL NOT BE LIABLE FOR CLAIMS OF ANY batteries KIND MADE BY USERS OF THIS UNIT OR MADE BY Battery life Continuous operating time THIRD PARTIES. -
Page 19: Carrier Frequencies And Channel Steps
Carrier Frequencies and Channel Steps Underlined items are the factory setting. Channel step: 25 kHz Model No. Frequency band Frequency Group/channel (factory setting) TV14-17 470.125 - 493.875 MHz 14UC (TV14-25) TV18-21 494.125 - 517.875 MHz 00 1801 494.125 MHz TV22-25 518.125 - 541.875 MHz TV30-33 566.125 - 589.875 MHz... - Page 20 Sony Corporation...