Table of Contents
Advertisement
Quick Links
Advertisement
Table of Contents

Related Manuals for Toshiba XM-6201B


Summary of Contents for Toshiba XM-6201B
- Page 1 XM-6201B SCSI CD-ROM Drive Installation Manual www.toshiba-teg.com...
-
Page 2: Table Of Contents
The Interface/Power Connector ......17 Mounting the XM-6201B ......17... - Page 3 This manual is copyright Toshiba Europe GmbH with all rights reserved. Under the copyright laws, this manual cannot be reproduced in any form without the prior written permission of Toshiba. No patent liability is assumed, however, with respect to the use of the information contained herein.
-
Page 4: Introduction
Introduction Congratulations on the purchase of your Toshiba XM-6201 CD-ROM drive. Read carefully through this manual in order to install the drive and learn how to use it. This manual guides you gently through the process of setting up the drive and fitting the drive into your computer. -
Page 5: Connecting The Cd-Rom: Scsi Vs Eide
EIDE is a convenient way of connecting a CD-ROM drive to your computer, but during data access and transfer, 100% of the CPU time is used. This can slow down some applications, especially under multi-tasking, multi-threaded operating systems such as OS/2, Windows 95 and Windows NT 4 TOSHIBA XM-6201 CD-ROM Drive... -
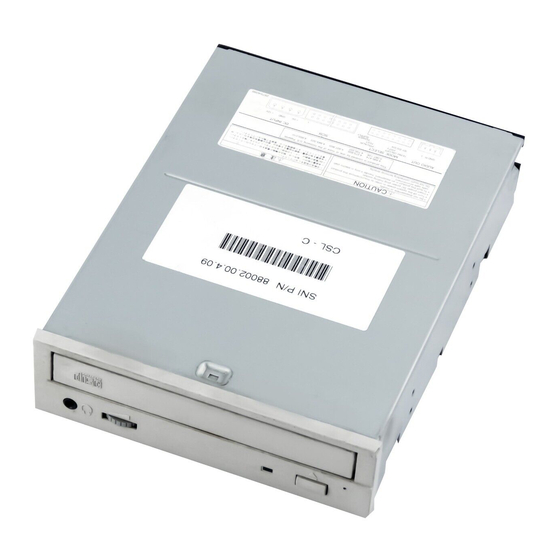
Page 6: Your Toshiba Xm-6201 Cd-Rom Drive
It depends, but one thing is certain, simply looking at the “speed” of the drive is not enough. To get the full picture, look at the seek time, access time, sustained transfer rate and quality of components. Your Toshiba XM-6201 CD-ROM Drive Disk tray Headphone socket... - Page 7 CD-ROM drive is fitted. NOTE Before you begin installing the CD-ROM drive, make sure the computer is switched off and the power cable is disconnected from the computer. 6 TOSHIBA XM-6201 CD-ROM Drive...
-
Page 8: Installing The Drive
Installing the Drive Setting up the CD-ROM drive This section shows you how to set up the drive and install it in your computer. These are the steps you will follow: Set the jumper plugs on the drive (if necessary) Remove the computer’s case Find a free drive bay at the front of the computer Slide in the drive... - Page 9 If the drive is one of a series of drives - but not the last, this jumper, number 5, should be set to OFF. If the drive is the last in a series of SCSI devices, this jumper should be set to ON. See also the Termination Power Supply Jumper below. 8 TOSHIBA XM-6201 CD-ROM Drive...
-
Page 10: Remove The Computer's Case
Jumper 7 should always be set to OFF. Terminator Power Supply Jumper Toshiba SCSI CD-ROM drives are capable of supplying power to the terminating resistors on the SCSI bus. The power supply is set to ON or OFF using this jumper. -
Page 11: Fit The Drive
The connector should only fit one way into the power socket on the back of the drive. One face of the plug has chamfered edges - make sure the plug fits into the socket the right way up. Carefully push the plug all the way into the socket. 10 TOSHIBA XM-6201 CD-ROM Drive... -
Page 12: Connect A Sound Cable To Your Drive
Each sound card requires a different cable, so you will need to tell your supplier which sound card you have and that you have a Toshiba XM-6201B CD-ROM drive. Your supplier should be able to supply you with a suitable inexpensive cable. -
Page 13: The Controls
The volume control is used to control the level of the audio signal from the headphones socket. The volume control does not affect the level of the signal sent to the audio output on the back of the drives. 12 TOSHIBA XM-6201 CD-ROM Drive... -
Page 14: Operating The Disk Tray
Operating the Disk Tray Make sure that on desk-top computers, or if your external CD-ROM drive is on your desk, that no drinks or other delicate objects stand in front of the disk tray! To open the disk tray and remove your disk, just press the Eject button: Loading a Disk After putting a disk into the drive, gently push on the front of the open disk tray. -
Page 15: Drive Specifications
6. Data buffer capacity 256 Kbytes 7. Disk loading Auto front loading (open tray) 8. Air flow Not required 9. Acoustic noise 45 dB (IEC 179 A) max at 1 metre 10. Power supply +5V DC, +12V DC 14 TOSHIBA XM-6201 CD-ROM Drive... - Page 16 1X rotational speed is fixed for CD-audio (Red-book) format. Measured by performing multiple accesses which means reads of data blocks over the whole area of the media from 00 min 02 sec 00 block to 60 min 01 sec 74 block more than 3000 times.
-
Page 17: The Audio-Out Connector
External Dimensions and Mounting Points 4 x M3 4 x M3 79.2 47.4 The Audio-out Connector The analogue audio-output has connector part number 00823031100000, made by Kyocera Elko Corporation. Connect only to the matching fitting, part number 16 TOSHIBA XM-6201 CD-ROM Drive... -
Page 18: The Interface/Power Connector
2. Ground 3. Ground 4. +5V Mounting the XM-6201B The internal drive should be mounted within 20° of the horizontal or within 10° of the vertical. The internal drive has 12 screw mounts of size M3. The length of the screw (underside of screw head to tip of screw) should not exceed 3 ±...