
Related Manuals for Electrolux ECFG3068AS


Summary of Contents for Electrolux ECFG3068AS
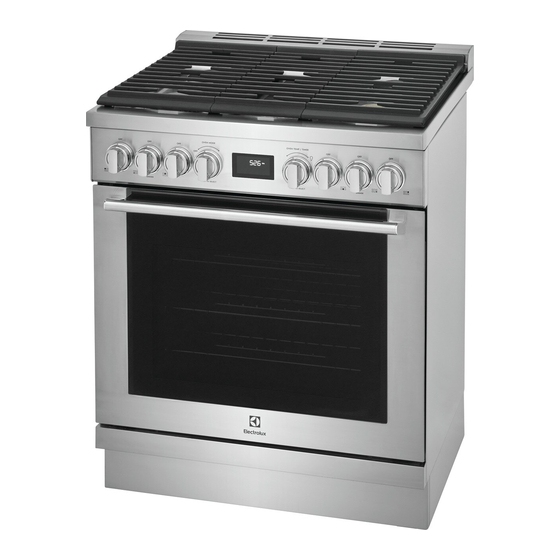
- Page 1 Use & Care Manual Full Gas Range Guide d’utilisation et d’entretien FR 45 Cuisinière à gaz Manual de uso y cuidado SP 88 Estufa de gas...
-
Page 2: Table Of Contents
WELCOME TO ELECTROLUX! THANK YOU FOR CHOOSING OUR APPLIANCE! For Customer Care support and webshop visit or download an extended version of this manual, visit: www.ElectroluxAppliances.com WELCOME TO ELECTROLUX!..........2 USING THE COOKTOP............13 IMPORTANT SAFETY INSTRUCTIONS........3 USING THE OVEN..............18 FEATURES..................9 CARE AND CLEANING............36 BEFORE USING THE APPLIANCE.........12... -
Page 3: Important Safety Instructions
IMPORTANT SAFETY INSTRUCTIONS Read all instructions before using this appli- DEFINITIONS ance. This is the safety alert symbol. It is used to This manual contains important safety symbols alert you to potential personal injury haz- and instructions. Please pay attention to these ards. - Page 4 IMPORTANT SAFETY INSTRUCTIONS Cold temperatures can damage the electronic For personal safety, this appliance must be control. If this appliance has not been used for properly grounded. For maximum safety, the a long time, make sure that it has been stored power cord must be securely connected to an at temperatures above 32ºF (0ºC) for at least electrical outlet or junction box that is the cor-...
- Page 5 IMPORTANT SAFETY INSTRUCTIONS WARNING WARNING • Do not store items of interest to chil- dren in the cabinets above the appli- • Stepping, leaning or sitting on the ance or on the backguards of ranges. door or drawer of this appliance can Children climbing on or near the appli- result in serious injuries and may also ance to reach items could be seriously...
- Page 6 IMPORTANT SAFETY INSTRUCTIONS Do Not Use Water or Flour on Grease Fires - IMPORTANT INSTRUCTIONS FOR USING Smother the fire with a pan lid, or use baking YOUR GAS COOKTOP soda, a dry chemical or foam-type extin- WARNING guisher. Only use dry potholders - Moist or damp •...
- Page 7 IMPORTANT SAFETY INSTRUCTIONS tioned so that it is turned inward and does IMPORTANT INSTRUCTIONS FOR USING not extend over adjacent surface burners. YOUR OVEN Never Leave Surface Burners Unattended - Take Care When Opening the Door or Boilovers cause smoking and greasy spill- Drawer.
- Page 8 IMPORTANT SAFETY INSTRUCTIONS IMPORTANT INSTRUCTIONS FOR CLEANING Do not touch a hot oven light bulb with a damp cloth. Doing so could cause the bulb to YOUR APPLIANCE break. Handle halogen lights (if provided) CAUTION with paper towels or soft gloves. Disconnect the appliance or shut off the Make sure all controls are turned off and power to the appliance before removing and...
-
Page 9: Features
FEATURES General description 6. Fan 7. Rack/tray support frame shelf 8. Oven burner 9. Broil burner Cooktop 1. 18000 BTU burners (brass coated Circular Dual Flame burner) 1. Cooktop 2. 12000 BTU burners (black coated Circular Single Flame burner) 2. Control panel 3. - Page 10 FEATURES Oven shelf positions Oven knobs: 8. Oven mode knob The appliance is fitted with shelf supports to position trays and racks at different heights. The insertion heights are indicated from the bottom upwards. 9. Oven temperature knob Cooling fan The fan cools the oven and comes into operation during cooking.
- Page 11 FEATURES Available accessories Protective cover Regular rack Used to cover and protect the temperature probe socket when the temperature probe is not in use. Useful for supporting containers with food during cooking. NOTE Telescopic guide set • Some models are not provided with all acces- sories.
-
Page 12: Before Using The Appliance
BEFORE USING THE APPLIANCE First power on First power on When the range is first plugged in, or when the power Preliminary setup supply has been interrupted “12:00 PM” will flash on When setting the clock or a timer, depending on how the timer display. -
Page 13: Using The Cooktop
USING THE COOKTOP Cooking with the gas cooktop Correct burners placement WARNING The burning of gas cooking fuel can create small amounts of carbon monoxide, benzene, formalde- hyde and soot. To minimize exposure to these sub- stances, the burners should be adjusted by a certified installer or authorized servicer to ensure proper combustion. - Page 14 USING THE COOKTOP 2. The flame-spreader crown must be centered on Installing the Fish Burner components: the burner skirt. 1. Take care to align the flame-spreader crown recesses (A) to the igniters (B). 3. The burner cover must be leveled and centered with respect to the burner skirt.
- Page 15 USING THE COOKTOP Cooking utensils 3. Visually check the burner covers correct positioning. IMPORTANT Ideally, cookware should have a flat bottom, straight sides, a tight-fitting lid and medium-to-heavy thick- • Each burner component must be positioned ness. Rough cookware finishes may scratch the cook- horizontally and must correctly interlock with top surface.
- Page 16 USING THE COOKTOP To operate the cooktop burners Porcelain enameled steel or cast iron • See stainless steel or cast iron. 1. Place your cookware on the burner. Stainless steel 2. PUSH-IN and TURN the cooktop knob to the • Heats quickly but unevenly. (SPARK) position to ignite the burner.
- Page 17 USING THE COOKTOP Circular Dual Flame burners Outer ring Inner ring Circular Single Flame burners and Fish Burner...
-
Page 18: Using The Oven
USING THE OVEN Oven preparation Regular rack CAUTION CAUTION Remove all accessories, materials and literature from • Be careful to insert the rack in the correct the inside of the oven before performing this opera- spaces indicated by the dashed lines: tion. - Page 19 USING THE OVEN To remove the rack: To install the telescopic guides: 1. Slide out the rack until it stops due to the 1. Slightly tilt the guides towards the inside wall of mechanical safety locks. the oven (1) and rest its hooks on the raised parts of the oven shelf supports (2).
- Page 20 USING THE OVEN Temperature probe The telescopic guides allow a two stage extraction: • Partial extraction: WARNING • Do not leave the temperature probe unat- tended. • Do not allow children to play with the probe. • Take care not to hurt yourself on the sharp parts of the probe.
- Page 21 USING THE OVEN For cooking with the temperature probe see “Meat Convection roast probe cooking”. The combination of the fan and the ring heating element (incorporated in the rear Cooking with the oven of the oven) allows you to cook different With this range, you can bake many kinds of food in foods on several levels, as long as they several ways.
- Page 22 USING THE OVEN • When setting the temperature and the timing 4. Once the cooking function and temperature functions, the relative symbol/word starts flash- have been selected, press the oven mode knob ing: to start cooking (the word “START” disappears) Manual cooking in progress 1.
- Page 23 USING THE OVEN Minute minder A buzzer sounds to signal the end of preheating. Open the oven door to stop the buzzer. NOTE IMPORTANT • The minute minder can be set both during There is no preheating for the convection roast func- cooking and as a stand alone timer.
- Page 24 USING THE OVEN Cooking timer End of cooking timer This timer mode acts as a stand alone timer during a When the timer expires, a buzzer sounds and the fol- function in progress. lowing screen appears on the display with the 1.
- Page 25 USING THE OVEN Delayed cooking 3. Turn the temperature knob left or right to set the time. IMPORTANT 4. Press the temperature knob until the display shows the cooking settings screen with the • Delayed cooking can only be selected if a cooking time just set and the word “START”...
- Page 26 USING THE OVEN Auxiliary functions To set the Proof function: Three auxiliary functions are available, selectable in 1. Press the oven mode knob. the same way as the cooking functions. 2. Turn the oven mode knob until the Proof setting screen appears on the display (the word Proof “START”...
- Page 27 USING THE OVEN Warm End of Warm function At the end of the Warm function, a buzzer sounds and NOTE “END” will appear on the display together with the cur- rent time. The temperature range for this function is from 160°F (70°C) to 200°F (90°C).
- Page 28 USING THE OVEN Meat probe cooking 4. Insert the plug of the probe into the socket on the left the side of the oven cavity. The IMPORTANT icon starts flashing. • Meat probe cooking is allowed only with Bake, Convection Bake and Convection Roast func- tions.
- Page 29 USING THE OVEN Meat probe cooking in progress 3. Press the oven temp. knob to change the oven cavity temperature. The display will show the When meat probe cooking is in progress the display default cavity temperature at the bottom with will show the oven cavity temperature at the top, the the flashing degree symbol.
- Page 30 USING THE OVEN Oven cooking tips Make sure that pans don't touch the internal glass pane of the door or the back wall of the oven. WARNING FOOD POISONING HAZARD. Do not let food sit for more than one hour before or after cooking. Doing so can result in food poisoning or sickness.
- Page 31 USING THE OVEN Broil function tips • Always pull the rack out to the “stop” position before turning or removing food (see “Regular rack”). WARNING Convection Roast function tips • Should an oven fire occur, close the oven door. If the fire continues, throw baking soda on the •...
- Page 32 USING THE OVEN Child lock mode • For very thick pieces of meat, take care to insert the entire length of the probe to ensure correct temperature detection. IMPORTANT This setting will only lock the oven knobs. After accessing the settings menu, the oven display will show: User settings menu By turning the temperature knob to right the screen will...
- Page 33 USING THE OVEN Demo mode Temperature units After accessing the settings menu keep pressing the IMPORTANT temperature knob until the display shows This mode can be activated and deactivated only for the first 5 minutes after the power to the appli- ance has been turned on.
- Page 34 USING THE OVEN Oven cooking tables Bake function cooking table Food Rack Recommended pan position Cookies Shiny pan with no sides/ very low sides placed on the rack Biscuits Shiny pan with no sides/ very low sides placed on the rack Convection Bake function cooking table Food Rack...
- Page 35 USING THE OVEN Convection Roast function cooking table Meat type Weight (lb) Oven T° Probe T° Time/lb (min/lb) Rack position Standing Rib Roast 5 - 7 350°F - 175°C 150°F - 65°C 2 - 3 (med-rare) Standing Rib Roast 5 - 7 350°F - 175°C 185°F - 85°C 2 - 3...
-
Page 36: Care And Cleaning
CARE AND CLEANING Cleaning recommendation table Surface type Cleaning recommendations Aluminum & chrome surfaces Use hot, soapy water and a cloth. Dry with a clean cloth. (rear backguard and handle tips) Plastic & Zamak alloy (control For general cleaning, use hot soapy water and a cloth. For more difficult to knobs) remove soil and built-up grease, apply a liquid detergent directly onto the soil. - Page 37 CARE AND CLEANING Oven maintenance The oven lights will automatically turn ON when the oven door is opened. The oven lights may also be Removing the shelf supports manually operated by turning the oven temperature knob to the bulb icon (see “Inside lights”). IMPORTANT The oven light bulb is covered by a glass shield.
- Page 38 CARE AND CLEANING Removing the oven door 3. Close the cover. Ensure that the molded part of the glass (A) is facing the door. CAUTION The oven door is heavy. Be careful when removing and lifting the door. Do not lift the oven door by the handle.
- Page 39 CARE AND CLEANING 3. To reassemble the door, put the hinges in the ment indicated by the arrows (1). relevant slots in the oven, making sure that the grooved sections A are resting completely in the slots. Lower the door and once it is in place remove the pins from the holes in the hinges.
- Page 40 CARE AND CLEANING applying slight pressure. scouring pads. The use of abrasive products could irreparably damage the surfaces. Food stains or residues Do not use metallic sponges or sharp scrapers as they will damage the surfaces. Use ordinary non-abrasive products with the aid of wooden or plastic utensils if necessary.
-
Page 41: Before You Call
BEFORE YOU CALL Baking problems For best results, pre-heat the oven when baking cookies, breads, cakes, pies or pastries etc. There is no need to preheat the oven for roasting meats or baking casseroles. The cooking times and temperatures needed to bake a product may vary slightly from your previous appliance. - Page 42 BEFORE YOU CALL Let us help you troubleshoot your concern! This section will help you with common issues. If you need us, visit our website, chat with an agent, or call us. We may be able to help you avoid a service visit. If you do need service, we can get that started for you! 1-887-435-3287 (United States) 1-800-265-8352 (Canada)
- Page 43 BEFORE YOU CALL Excessive oven smoke during broiling Meat too close to the broiler element. Reposition the rack to pro- vide more clearance between the meat and the broiler. Pour a small amount of water into the broiler pan before cooking to prevent meat grease from producing smoke due to intense heating.
- Page 44 Electrolux at the addresses or phone numbers below. This warranty only applies in the USA and Canada. In the USA, your appliance is warranted by Electrolux Major Appliances North America, a division of Electrolux Home Products, Inc. In Canada, your appliance is warranted by Electrolux Canada Corp.