Advertisement
Quick Links
ITEM PART NO. DESCRIPTION
1
SA72/01
DRIVE GEAR SHAFT
2
SA72/02
NEEDLE ROLLER
3
SA72/03
BEVEL GEAR
4
SA72/04
BEARING
5
SA72/05
SAW BLADE FLANGE HOLDER
6
SA72/06
SAW BLADE BOLT FLANGE
7
SA72/07
BOLT,HEX SOCKET CAP HEAD
8
SA72/08
BEVEL GEAR CASING (GREY)
9
SA72/09
BEARING
10
SA72/10
EXTERNAL STOP RING
11
SA72/11
CASING COVER
12
SA72/12
GUIDE PLATE
13
SA72/13
SPRING WASHER
14
SA72/14
BOLT
15
SA72/15
MAIN SHAFT
16
SA72/16
NEEDLE ROLLER
17
SA72/17
BEARING
18
SA72/18
SPACER COLLAR
19
SA72/19
IDLER GEAR
20
SA72/20
INTERNAL GEAR
21
SA72/21
BEARING SUPPORT
22
SA72/22
DRIVE SHAFT
23
SA72/23
BEARING
24
SA72/24
INTERNAL GEAR
25
SA72/25
INTERNAL STOP RING
Sole UK Distributor, Sealey Group, Bury St. Edmunds, Suffolk.
01284 757500
Issue Date:
230701
Issue No:
Date Modified:
ITEM PART NO. DESCRIPTION
26
SA72/26
DISTANCE NUT
27
SA72/27
THROTTLE HANDLE
28
SA72/28
AIR INLET BUSHING
29
SA72/29
THROTTLE VALVE
30
SA72/30
VALVE
31
SA72/31
O-RING
32
SA72/32
THROTTLE SPRING
33
SA72/33
THROTTLE VALVE PLUG
34
SA72/34
O-RING
35
SA72/35
THROTTLE LEVER
36
SA72/36
SPRING PIN
37
SA72/37
ROTOR
38
SA72/38
REAR END PLATE
39
SA72/39
SPRING PIN
40
SA72/40
BEARING
41
SA72/41
ROTOR BLADE
42
SA72/42
CYLINDER
43
SA72/43
FRONT END PLATE
44
SA72/44
BEARING CAP
45
SA72/45
WASHER
46
SA72/B
BLADE, 50x1x12.7mm 150 TPU. HSS
47
SA72/47
WRENCH, L-SHAPED
48
SA72/48
WRENCH, HEX, L-SHAPED
49
SA72/49
BEARING
01284 703534
E-mail: sales@sealey.co.uk
Thank you for purchasing a Sealey Product. Manufactured to a high standard this product will, if used according to these instructions
and properly maintained, give you years of trouble free performance.
IMPORTANT: PLEASE READ THESE INSTRUCTIONS CAREFULLY. NOTE THE SAFE OPERATIONAL REQUIREMENTS,
WARNINGS AND CAUTIONS. USE THIS PRODUCT CORRECTLY AND WITH CARE FOR THE PURPOSE FOR WHICH
IT IS INTENDED. FAILURE TO DO SO MAY CAUSE DAMAGE AND/ OR PERSONAL INJURY AND WILL INVALIDATE
THE WARRANTY. PLEASE KEEP INSTRUCTIONS SAFE FOR FUTURE USE.
1.
SAFETY INSTRUCTIONS
p WARNING! Ensure Health & Safety, local authority, and general workshop practice regulations are adhered to
when using this equipment.
p WARNING! Disconnect from air supply before changing the blade, servicing or performing maintenance.
Maintain the saw in good condition (use an authorised service agent).
Replace or repair damaged parts. Use genuine parts only. Non-authorised parts may be dangerous and
3
will invalidate the warranty.
3
Use in suitable clean and tidy working area, free from unrelated materials and ensure there is adequate lighting.
p WARNING! Always wear approved eye or face and hand protection when operating the saw
3
Remove ill fitting clothing. Remove ties, loose jewellery, and contain and/or tie back long hair.
Wear appropriate protective clothing and
3
Maintain correct balance and footing.
3
Ensure the floor is not slippery and wear
1
3
N/A
non-slip shoes.
Keep children and unauthorised persons
away from the working area.
3
Check moving parts alignment on a regular basis.
Ensure workpiece is secure before
3
operating the saw. Never hold a workpiece
3
by hand. Use a vice or clamps.
p WARNING! Ensure correct air pressure is
maintained and not exceeded. Recommended pressure 50-90psi.
Keep air hose away from heat, oil and sharp edges. Check air hose for wear before each use and ensure
that all connections are secure.
3
Prolonged exposure to vibration from this saw poses a health risk. It is the Employers/Owners and operator’s
responsibility to correctly assess the potential hazard and issue guidelines for safe periods of use and offer
3
suitable protective equipment.
DO NOT use any power source except an air compressor.
DO NOT operate the saw near any inflammable substance or on any container that once contained an
7
inflammable substance.
7
DO NOT use the saw for a task it is not designed to perform.
DO NOT operate saw if any parts are damaged or missing as this may cause failure and/or personal injury.
7
DO NOT carry the saw by the hose, or yank the hose from the air supply.
7
DO NOT operate saw when you are tired, under the influence of alcohol, drugs or intoxicating medication.
7
DO NOT carry the saw with your finger on the trigger.
7
DO NOT direct air from the air hose at yourself or others.
7
When not in use disconnect from air supply and store in a safe, dry, childproof location.
7
3
NOTE: It is our policy to continually improve products and as such we reserve the right to alter data, specifications and component
parts without prior notice. IMPORTANT: No liability is accepted for incorrect use of this equipment. WARRANTY: Guarantee is 12
months from purchase date. proof of which will be required for any claim. INFORMATION: Call us for a copy of our latest catalogue
and promotions on 01284 757525 and leave your full name and address including your postcode.
INSTRUCTIONS FOR
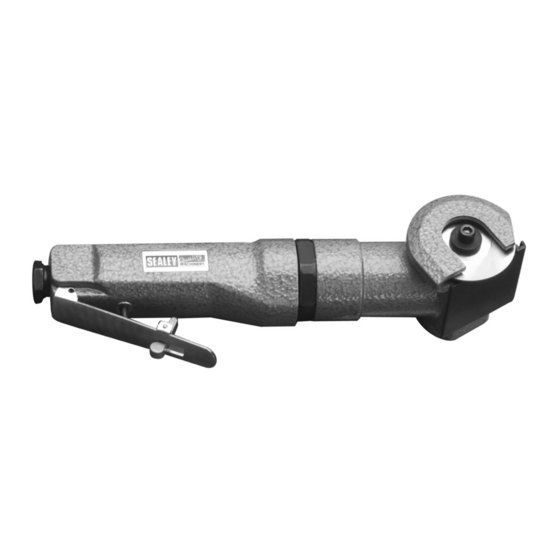
AIR SHEET SAW
Model: SA72
keep hands and body clear of working parts.
SA72 - 0016 - (1) - 230701
Advertisement

Related Manuals for Sealey SA72


Summary of Contents for Sealey SA72
- Page 1 AIR SHEET SAW Model: SA72 Thank you for purchasing a Sealey Product. Manufactured to a high standard this product will, if used according to these instructions and properly maintained, give you years of trouble free performance. IMPORTANT: PLEASE READ THESE INSTRUCTIONS CAREFULLY. NOTE THE SAFE OPERATIONAL REQUIREMENTS, WARNINGS AND CAUTIONS.
- Page 2 Air Consumption ....6cfm Saw blade ..... .SA72/B plate onto the edge of the workpiece and align the blade with the previously marked out line.