Table of Contents
Advertisement
Quick Links
Advertisement
Table of Contents

Related Manuals for Beko VRR 60314 VW


Summary of Contents for Beko VRR 60314 VW
- Page 1 Robot Vacuum Cleaner User Manual VRR 60314 VW 01M-8914023200-4622-01...
- Page 2 Please read this guide first! Dear Customer, Thank you for choosing a Beko product. We would like you to achieve the optimal efficiency from this high quality product which has been manufactured with the state of the art technology. Please make sure you read and understand this guide and supplementary documentation fully before use and keep it as a reference.
-
Page 3: Table Of Contents
CONTENTS 1 Important safety and environmental instructions 1.1 General safety ....4 1.2 Compliance with the WEEE regulations and waste disposal ..... . . 9 1.3 Packaging information . -
Page 4: Important Safety And Environmental Instructions
1 Important safety and environmental instructions This section contains dren must not play with safety instructions the appliance. Cleaning prevent hazards that can and user maintenance result in injury or property should not be carried damage. out by unattended chil- Any warranty is void if dren. - Page 5 1 Important safety and environmental instructions To prevent damage to Do not use the appli- • • the power cord, prevent ance in or near explosive it from being pinched, or flammable environ- crimped rubbed ments and substances. against sharp edges. Unplug the appliance •...
- Page 6 1 Important safety and environmental instructions Do not immerse the ap- This appliance is not in- • • pliance or its power cord tended to be used by per- in water for cleaning. sons, including children, with physical, sensory Do not disassemble the •...
- Page 7 1 Important safety and environmental instructions To avoid any risk of haz- Do not short circuit the • • ard, a damaged adapter supply terminals. shall be replaced by the Shall be used with • manufacturer, the au- ME1XXFG CM 2600 thorised representative mAh batteries only.
- Page 8 1 Important safety and environmental instructions Do not run the appliance This appliance can be • • on high grounds like used by children aged table or chair. from 8 years and above and persons with re- The appliance is only •...
-
Page 9: Compliance With The Weee Regulations And Waste Disposal
Do not dispose of the packaging waste the EU declaration of conformity is avail- with the household waste or other able at the following website: beko.com. wastes, dispose it to the packaging col- lection areas specified by local authori- ties. -
Page 10: Plug Wiring
1 Important safety and environmental instructions 1.7 Plug Wiring • With the alternative plugs a 13 A fuse must be fitted either in the plug or The moulded plug on this appliance adaptore or in the main fuse box. If in incorporates a 13 A fuse. -
Page 11: Box Content
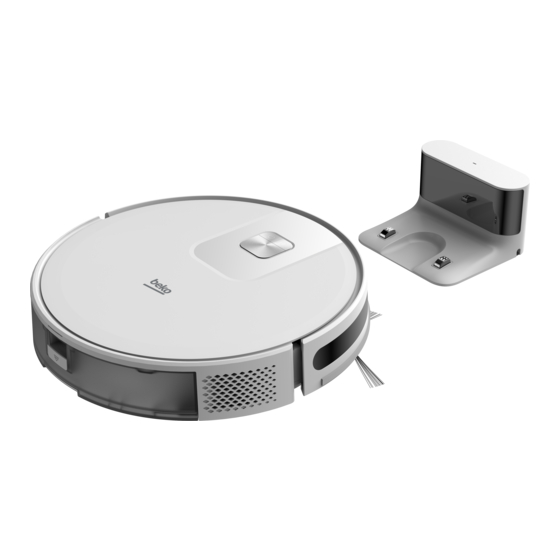
2 Box content Robot Vacuum Charging dock Charge adaptor Robot Vacuum Cleaner User Manual VRR 60314 VW 01M-8914023200-4022-01 User’s manual and Cleaning brush Mopping tool Mopping cloth product documentation (2 pcs) Spare accessories supplied 1 side brush 1 mopping cloth... -
Page 12: Overview
3 Overview Robot Vacuum / User Manual 12 / EN... -
Page 13: Checks And Components
3 Overview 3.1 Checks and components 3.2 Technical data 1. Upper body Adapter voltage 100-240V~, 50/60 Hz 2. Central body Adapter output 19 V 0.6 A 3. Start Cleaning-Pause But- Battery Li-ion: 14.4V / 2.6 Ah ton / Sending to Charging Stand button Charging period: 4.5-5.5 hours... - Page 14 3 Overview Parameter of External Power Supply Manufacturer E-TEK Electronics Manufactory Co., LTD Model Identifier : ZD012A190060BS Input Voltage : 100-240V~ Input Frequency : 50/60Hz Input Current : 0.5A Output Voltage : 19.0V DC Output Current : 0.6 A Output Power : 11.4W Average active efficiency...
-
Page 15: Installation
4 Installation 1- Remove the protective sponges. 2- Remove the protective film Remove the protective film on the front of the front impactbumper before use. 3- Install the side brush Side brush installation: align the holes and press gently to fix the side brush on the device. - Page 16 4 Installation 4- Install the charging station. Install the adaptor plug to the charging station and set the cables up to prevent the adaptor cable from wrapping around the machine during vacuuming. Install the charging station in a location where it can easily be accessed by the vacuum cleaner.
-
Page 17: Operation
5 Operation Please charge the machine before first use. 5.1 Intended use This appliance is intended for household use and it is not suitable for industrial use. Press and hold the for 3 seconds to turn on. Press and hold the for 3 seconds to turn off. - Page 18 5 Operation WARNING: If the charging level is too low, the cleaning cannot be started. Please charge the appliance before starting the cleaning. WARNING: Before the cleaning, tidy up all cab- les to prevent disconnections due to entang- lement/pulling of the cables and to prevent damage to the furniture.
- Page 19 5 Operation Spot Cleaning (supported with the relevant mobile application only) 1.5m Move the sweeping robot to the area to be cleaned, press the twice. After the mode is activated, the sweeping robot will sweep the circular area with a diameter of 1.5 m calculated from its own posi- tion.
-
Page 20: Operation With The Application
5 Operation 5.2.1 Operation with the application Download the application To download the application, search for “HomeDirect-SDA” application in the mobile app store. Review the mobile application manual for detailed information. Reset Wi-Fi Press “ ” “ ” buttons simultaneously until you hear the aural warning and see the light blinking. - Page 21 5 Operation Wi-Fi connection error Wi-Fi Status Indicator Cause Solution • Ensure that the modem is connected to the net- The robot has been work. White indicator connected to the router, • Contact your network normally on but cannot connect to operator to see if there is the network.
-
Page 22: Operation Of The Mop
5 Operation Network security requirements: Use TKIP, PSK and AES/CCMP encrypted WPA and WPA2 networks. 5.3 Operation of the mop WARNING: Do not use the mopping mode on a carpet. WARNING: Do not put bleach or detergent in the water tank. These chemicals may dama- ge the liquid channels that ensure the water flow in the robot vacuum cleaner or the pump. -
Page 23: Installation Of The Wet Mopping Unit
5 Operation 5.3.1 Installation of the wet mopping unit Remove the dust container and the water tank assembly Remove rubber (2 in 1). plug and add water to Remove the dust con- the water tank from the tainer. water inlet. Moisten the swab be- Place the swab to the mop Remove the swab on the mop... -
Page 24: Wet Mopping Setting
5 Operation 5.3.2 Wet mopping setting You may start the cleaning operation by selecting the cleaning mode and set the level of wetness during mopping as desired in the application. It is suggested remove carpets from the floor to prevent the device from wetting the carpet when mopping the floor. - Page 25 6 Cleaning and maintenance 2. Remove the dust container by pulling it in the direction of the arrow. 3. Open the dust container as it is seen below and empty it as it is shown. 4. Remove the high performance filter and clean the filter using the cleaning brush provided together with the appliance.
-
Page 26: Cleaning Of The Brush
6 Cleaning and maintenance 5. Wash the water tank, dust container and filter assembly periodically with cold water as required as per the frequency of operation. 6. Leave the water tank, dust container and filter assembly to dry after washing, and ensure that they are completely dried. -
Page 27: Cleaning And Installation Of The Side Brush
6 Cleaning and maintenance 2. Replace the brush after cleaning it and close the cover in the direction of the arrow. 6.3 Cleaning and installation of the side brush In the long term use, wash the side brush with warm water in order to eliminate the shape deformation. - Page 28 6 Cleaning and maintenance Recharge sensor Düșme önleme sensörü Robot Vacuum / User Manual 28 / EN...
-
Page 29: Cleaning Of The Mopping Unit
6 Cleaning and maintenance 6.5 Cleaning of the mopping unit We recommend that you remove the mop holder from one side, drain the water tank, rinse the mop with water and then leave it to dry after each operation of the mopping unit. -
Page 30: Troubleshooting
7 Troubleshooting Troubleshooting The power indicator will flash in red and the buzzer will give a beep in case that there is an abnormality in the operation of the sweeping robot. Please check the table below to solve your problems. Voice Prompts Solution - Make sure the robot is connected to power supply. - Page 31 7 Troubleshooting Troubleshooting The power indicator will flash in red and the buzzer will give a beep in case that there is an abnormality in the operation of the sweeping robot. Please check the table below to solve your problems. Voice Prompts Solution - Clear the charging dock of objects within 0.5m on the...
- Page 32 Product Guarantee 12 months breakdown and repair guarantee Guarantor: Beko plc, 1 Greenhill Crescent, Watford, Hertfordshire. WD18 8UF The guarantee does not in any way diminish your statutory or legal rights. Your appliance has the benefit of our manufacturer’s guarantee which covers the product for 12 months from the date of original purchase.
- Page 33 Arçelik A.Ş. Karaağaç Caddesi No: 2-6, 34445, Sütlüce/ İSTANBUL/ TÜRKİYE www.beko.co.uk...