Table of Contents
Advertisement
Quick Links
Advertisement
Table of Contents

Related Manuals for Siemens CM878G4 6B Series


Summary of Contents for Siemens CM878G4 6B Series
- Page 1 Built-in oven CM878G4.6B [en] Instruction manual...
-
Page 3: Table Of Contents
Table of contents e n I n s t r u c t i o n m a n u a l Intended use ......4 Basic settings. -
Page 4: Intended Use
person... -
Page 5: Important Safety Information
Important safety information Risk of scalding! Water in a hot cooking compartment may (Important safety ■ create hot steam. Never pour water into the information cooking compartment when the cooking compartment is hot. G eneral information Warning – Risk of injury! I m p o r t a n t s a f e t y i n f o r m a t i o n Scratched glass in the appliance door may Warning –... -
Page 6: Microwave
Important safety information Risk of burns! Microwave Airtight packaging may burst when food is ■ heated. Always observe the instructions on Warning – Risk of fire! the packaging. Always use oven gloves to Using the appliance for anything other than remove dishes from the cooking ■... -
Page 7: Meat Thermometer
Important safety information If using the appliance in microwave mode The appliance will become very hot on the ■ ■ only, placing cookware and containers outside during the cleaning function. Never made of metal or featuring metal detailing hang combustible objects, e.g. tea towels, inside the appliance may cause sparks on the door handle. -
Page 8: Causes Of Damage
Causes of damage Inserting accessories: depending on the appliance ]Causes of damage ■ model, accessories can scratch the door panel when closing the appliance door. Always insert the G eneral information accessories into the cooking compartment as far as C a u s e s o f d a m a g e they will go. -
Page 9: Environmental Protection
Environmental protection Open the appliance door as infrequently as possible 7Environmental protection ■ when the appliance is in use. Y our new appliance is particularly energy-efficient. E n v i r o n m e n t a l p r o t e c t i o n Here you can find tips on how to save even more energy when using the appliance, and how to dispose of your appliance properly. -
Page 10: Getting To Know Your Appliance
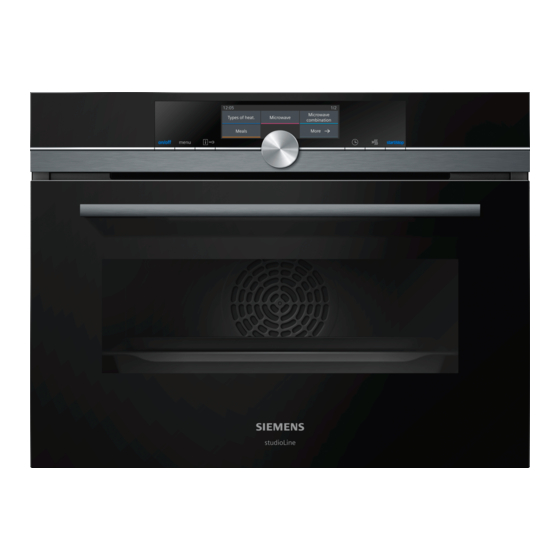
Getting to know your appliance Note: Depending on the appliance model, individual *Getting to know your details and colours may differ. appliance Control panel I n this section, we will explain the indicators and In the control panel, you can use the various buttons G e t t i n g t o k n o w y o u r a p p l i a n c e controls. -
Page 11: Operating Modes Menu
Getting to know your appliance Operating modes menu If you had set a cooking time and it was deleted, the countdown applies the time that has already elapsed The menu is divided into different operating modes. In and continues to count down from this time. You can this way, you can quickly access the required function. -
Page 12: Further Information
Getting to know your appliance Grill, small area Grill settings: For grilling small quantities of food such as steaks, sausages or bread, and for 1 = low browning food. 2 = medium The centre part under the grill heating element becomes hot. 3 = high Pizza setting 30-275 °C... -
Page 13: Accessories
Accessories Inserting accessories _Accessories The cooking compartment has three shelf positions. The shelf positions are counted from the bottom up. Y our appliance is accompanied by a range of A c c e s s o r i e s accessories. -
Page 14: Optional Accessories
Before using for the first time ‚ When inserting the wire rack, ensure that the lug is at Universal pan, non-stick the rear and is facing downwards. The word For moist cakes, pastries, frozen meals and large roasts. "microwave" must be at the front and the curvature must Pastries and roasts can be removed more easily from the universal be facing downwards ¾... -
Page 15: Cleaning The Cooking Compartment And Accessories
Operating the appliance Setting the clock 1Operating the appliance The time starts at 12:00. Use the rotary selector to set the current time. Y ou have already learnt about the controls and how O p e r a t i n g t h e a p p l i a n c e Æ... -
Page 16: Selecting An Operating Mode
Operating the appliance Selecting an operating mode Rapid heat up When you select an operating mode, the appliance You can use the button to heat up the cooking must be switched on. compartment particularly quickly. The rapid heat up function is not possible for all types of Press the menu button. -
Page 17: Time-Setting Options
Time-setting options Cooking time OTime-setting options If you set the cooking time for your meal, the operation stops automatically once this time has elapsed. The Y our appliance has different time-setting options. oven stops heating. T i m e - s e t t i n g o p t i o n s The maximum setting you can apply is 23 hours and 59 Time-setting option minutes. -
Page 18: Childproof Lock
Childproof lock Touch the "End " field. AChildproof lock The end time is displayed. Y our appliance is equipped with a childproof lock so C h i l d p r o o f l o c k that children cannot switch it on accidentally or change any settings. -
Page 19: Changing The Time
Microwave Changing the time Audible signal duration Short (30 s) You can change the time in the basic settings. Medium (1 m) For example: Changing from summer to winter time. Long (5 m) Volume Can be adjusted to one of five different Press the menu button. -
Page 20: Microwave Power Settings
Microwave Setting the microwave combined with a type Cookware test of heating Never switch on the microwave unless there is food inside. The short cookware test is the only exception to You can set output settings from 90 W to 360 W. this rule. -
Page 21: Dry
Meat thermometer You can change the microwave output setting.Pause Open the appliance door for 1 to 2 minutes so that the the oven by pressing the Start/Stop button.Touch the moisture can escape. appropriate microwave field. Press the Start/Stop Caution! button to restart. Enamel damage: Do not start any operations when You can change the cooking time at any time while the there is water on the cooking compartment floor. -
Page 22: Inserting The Meat Probe Into The Food
Meat thermometer Inserting the meat probe into the food Setting the core temperature Before placing your food into the cooking compartment, Insert the meat thermometer in the socket on the left- insert the meat probe into the food. hand side of the cooking compartment. Use the rotary selector to select the type of heating The meat probe has three measuring points. -
Page 23: Sabbath Mode
Sabbath mode FSabbath mode Setting Cleaning level Duration Light Approx. 1 hour, 15 minutes Medium Approx. 1 hour, 30 minutes W ith the Sabbath mode, a cooking time of up to 74 S a b b a t h m o d e hours can be set. -
Page 24: Descaling
Cleaning function any time throughout the day. ~ "Time-setting options" Warning on page 17 Risk of fire! Loose food remnants, fat and meat juices may catch ■ Once the cleaning function has ended fire when the cleaning function is in progress. Before Once the cooking compartment has cooled down, use you start the cleaning function, always remove the a damp cloth to wipe off the ash that has been left... -
Page 25: Home Connect
Home Connect Descaling solution: Do not allow any descaling oHome Connect ■ solution or descaler to come into contact with the control panel or other surfaces on the appliance. This damages the surfaces. If this does happen, T his appliance is Wi-Fi-capable and can be remotely H o m e C o n n e c t remove the descaling solution immediately with controlled using a mobile device. -
Page 26: Home Connect Settings
A detailed RED Declaration of Conformity can be found available in your country. online at www.siemens-home.bsh-group.com on the product page of your appliance with the additional Note: For more information and to check whether the documents. -
Page 27: Cleaning Agent
Cleaning agent DCleaning agent Door panels Hot soapy water: Clean with a dish cloth and then dry with a soft cloth. W ith good care and cleaning, your appliance will retain Do not use a glass scraper or a stainless steel C l e a n i n g a g e n t its appearance and remain fully functioning for a long scouring pad. -
Page 28: Keeping The Appliance Clean
Rails pRails Accessories Hot soapy water: Soak and clean with a dish cloth or brush. If there are heavy deposits of dirt, use a stainless W ith good care and cleaning, your appliance will retain steel scouring pad. R a i l s its appearance and remain fully functional for a long Meat thermome- Hot soapy water:... - Page 29 Rails Inserting the holders Then fold it forwards and insert it (fig. And push it downwards (fig. If the holders fall out when you remove the rails, these must be re-inserted. The holders at the front differ from those at the rear (fig.
-
Page 30: Appliance Door
Appliance door Removing and fitting the door panels qAppliance door To facilitate cleaning, you can remove the glass panels from the appliance door. W ith good care and cleaning, your appliance will retain A p p l i a n c e d o o r its appearance and remain fully functional for a long Removing the door panels from the appliance time to come. - Page 31 Appliance door Press the front panel down until it clicks audibly into Warning – Risk of serious damage to health! place (fig. If the screws are loosened, the safety of the appliance Open the appliance door again slightly and remove can no longer be guaranteed.
-
Page 32: Trouble Shooting
Trouble shooting 3Trouble shooting Warning – Risk of electric shock! Incorrect repairs are dangerous. Repairs may only be carried out and damaged power cables replaced by I f a fault occurs, there is often a simple explanation. one of our trained after-sales technicians. If the T r o u b l e s h o o t i n g Before calling the after-sales service, please refer to the appliance is defective, unplug the appliance from the... -
Page 33: Customer Service
Customer service 4Customer service PDishes O ur after-sales service is there for you if your appliance Y ou can use the "Dishes" operating mode to prepare a C u s t o m e r s e r v i c e D i s h e s needs to be repaired. -
Page 34: Selecting A Dish
Dishes Selecting a dish Category Food Dishes The dishes are arranged in a uniform structure: Cakes in deep tins Cakes in shallow tins Cake Category ■ Food Cakes on a tray ■ Dish ■ Puff pastry The following table lists the categories with the Scones Small baked corresponding food. -
Page 35: Tested For You In Our Cooking Studio
Tested for you in our cooking studio If you are not satisfied with the cooking result, you can JTested for you in our increase the cooking time again. Touch the "Extend cooking studio cooking time" field. A cooking time is suggested. However, you can change this if you want. - Page 36 Tested for you in our cooking studio continue baking without the microwave. The baking liquid does not overflow and make the cooking time will be extended. compartment dirty. If you use baking tins/dishes made from plastic, Baking tins ceramic or glass, the baking time indicated in the Dark- coloured metal baking tins are most suitable.
- Page 37 Tested for you in our cooking studio Dish Accessories/cookware Shelf po- Type of Tempera- MW pow- Cooking sition heating ture in °C er in time in mins. watts Fruit crumble flat glass dish 150-170* 30-45 Sponge Cake (fatless), 3 eggs springform cake tin, Ø26 cm 160-170* 30-45...
-
Page 38: Roasting And Braising
Tested for you in our cooking studio The cake is generally too light in col- If the shelf position and the cookware are correct, then you should increase the temperature if necessary or our. extend the baking time. The cake is too light on top, and too Bake the cake one level higher in the oven the next time. - Page 39 Tested for you in our cooking studio Observe the manufacturer's instructions for your Meat thermometer roasting cookware. You can cook accurately using a meat thermometer. Roasting in uncovered cookware Read important notes on using the meat thermometer in It is best to use a deep roasting tin/dish for roasting the corresponding chapter.
- Page 40 Tested for you in our cooking studio Dish Accessories/cookware Shelf posi- Type of Temperature MW power Time in min. tion heating in °C in watts Lamb Leg (bone-in) cookware, uncovered 160-170 25+25 Shoulder (bone-in) cookware, uncovered 160-170 25+20 Shoulder (boned and rolled) cookware, uncovered 170-180 25+25...
-
Page 41: Grilling
Tested for you in our cooking studio The crackling is too thin. Increase the temperature or switch on the grill briefly at the end of the roasting time. The roast looks good but the juices Next time, use a smaller roasting dish and add more liquid if necessary. are burnt. - Page 42 Tested for you in our cooking studio Very hot steam may escape when opening the lid after Notes cooking. Lift the lid at the rear, so that the hot steam The grill element switches itself continuously on and ■ can escape away from you. off;...
- Page 43 Tested for you in our cooking studio Types of heating used: Grill, large area ■ Circulated air grilling ■ Dish Accessories/cookware Shelf po- Type of Temperature in C / MW power Time in min. sition heating Grill setting in watts Beef Steaks, height 2-3 cm wire rack...
-
Page 44: Convenience Products
Tested for you in our cooking studio Dish Accessories/cookware Shelf po- Type of Temperature in C / MW power Time in min. sition heating Grill setting in watts Chicken, portion, 200-250 g wire rack 200-220 30-45 each***** Chicken, portion 4 pieces 250 g cookware, uncovered 190-210 20-30... - Page 45 Tested for you in our cooking studio Universal pan or baking tray The setting values apply to dishes placed into a cold Slide the universal pan or the baking tray in carefully as cooking compartment. By doing so, you can make far as the limit stop with the bevelled edge facing the energy savings of up to 20 per cent.
-
Page 46: Microwave
Tested for you in our cooking studio Dish Accessories/cookware Shelf po- Type of Tempera- MW pow- Cooking sition heating ture in °C er in time in mins. watts Food, frozen Lasagna, 500 g* ovenproof dish on universal pan Lasagna, 500 g ovenproof dish on wire rack 200-210 18-23... -
Page 47: Yogurt
Tested for you in our cooking studio Type of heating used: Ý Microwave ■ Dish Accessories/cookware Shelf po- Type of MW power Cooking sition heating in watts time in mins. Fish Fish fillet, plain, braised, 400 g cookware, covered Ý Vegetables, fresh Vegetable, fresh, 250 g* cookware, covered... -
Page 48: Eco Heating Functions
Tested for you in our cooking studio Eco heating functions Universal pan or baking tray Slide the universal pan or the baking tray in carefully as Hot air eco and Top/bottom heating eco are intelligent far as the limit stop with the bevelled edge facing the heating functions that allow you to gently cook meat, appliance door. -
Page 49: Acrylamide In Foodstuffs
Tested for you in our cooking studio Dish Accessories/cookware Shelf po- Type of Tempera- Cooking sition heating ture in °C time in mins. Jacket potatoes baking tray 150-170 60-90 ‘ Meat Beef, slow roast joint wire rack 140+150 35+40 ‘ Casserole Diced meat (beef, pork, lamb), 500 g meat cookware, covered... -
Page 50: Drying
Tested for you in our cooking studio Type of heating used: Slow cooking ■ Dish Cookware Shelf posi- Heating Searing time Tempera- Cooking tion function in mins ture in °C time in mins Poultry Duck breast, medium rare, 300 g Cookware, uncovered 45-60 each... -
Page 51: Preserving
Tested for you in our cooking studio Recommended setting values will be and the more aromatic the dried food will remain. Setting ranges are indicated for this reason. In the table, you can find settings for drying various foodstuffs. The temperature and cooking time are If you wish to dry additional foodstuffs, you should use dependent on the type, moisture, ripeness and similar foodstuffs in the table as a reference. -
Page 52: Prove Dough
Tested for you in our cooking studio Type of heating used: 4D hot air ■ Dish Cookware Shelf posi- Type of Tempera- Cooking time in mins. tion heating ture in °C Preserving Vegetables, e.g. carrots 1-litre preserving jars 160-170 Before it starts bubbling: 30-40 When it starts to bubble: 30-40 Residual heat: 30 Vegetables, e.g. - Page 53 Tested for you in our cooking studio Leave the defrosted food to rest for another 10 to 30 Tip: If you have quantities other than those indicated in minutes in the appliance whilst it is switched off, so that the settings table, this basic rule will help: double the the temperature balances out.
-
Page 54: Heating Food In A Microwave
Tested for you in our cooking studio Dish Accessories/cookware Shelf posi- Type of Tempera- MW power in Cooking tion heating ture in °C watts time in mins. Miscellaneous Defrosting butter, 125 g Cookware, uncovered Ý * Turn halfway through cooking time Heating food in a microwave Using the microwave, you can heat food, or defrost and heat it in a single step. -
Page 55: Keeping Warm
Tested for you in our cooking studio Dish Cookware Shelf posi- Type of Temperature MW power in Cooking tion heating in °C watts time in mins. Vegetables, frozen loose, 250 g Cookware, covered 8-12 Ý Creamed spinach, frozen block, 450 g Cookware, covered 11-16 Ý... - Page 56 Tested for you in our cooking studio Dish Accessories/cookware Shelf posi- Type of Tempera- Cooking tion heating ture in °C time in mins. Small cakes Baking tray 160* 25-35 Small cakes Baking tray 150* 20-30 Small cakes, 2 levels Universal pan + baking tray 140* 30-40 Fatless sponge cake...
- Page 60 BSH Home Appliances Ltd. BSH Hausgeräte GmbH Grand Union House Carl-Wery-Str. 34 Old Wolverton Road 81739 München Wolverton, Milton Keynes MK12 5PT GERMANY United Kingdom Manufactured by BSH Hausgeräte GmbH under Trademark License of Siemens AG siemens-home.bsh-group.com *9001388486* 9001388486 (990731)