Table of Contents
Advertisement
Quick Links
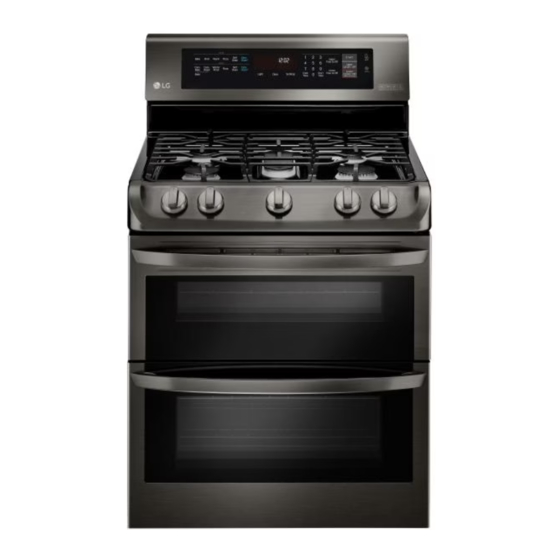
OWNER'S MANUAL
GAS RANGE
Read this owner's manual thoroughly before operating the appliance
and keep it handy for reference at all times.
WArnInG
If the information in this manual is not followed exactly, a fire or explosion
may result causing property damage, personal injury or death.
• Do not store or use gasoline or other flammable vapors and liquids in the
vicinity of this or any other appliance.
• WHAT TO DO IF YOU SMELL GAS
- Do not try to light any appliance.
- Do not touch any electrical switch.
- Do not use any phone in your building.
- Immediately call your gas supplier from a neighbor's phone. Follow the
gas supplier's instructions.
- If you cannot reach your gas supplier, call the fire department.
• Installation and service must be performed by a qualified installer, service
agency, or the gas supplier.
LDG4315ST
LDG4315BD
LDG4313ST
LDG4311ST
LDG4311SB
MFL68920501_03
LDG4311SW
www.lg.com
Advertisement
Table of Contents

Related Manuals for LG LDG4315BD


Summary of Contents for LG LDG4315BD
- Page 1 - Immediately call your gas supplier from a neighbor's phone. Follow the gas supplier's instructions. - If you cannot reach your gas supplier, call the fire department. • Installation and service must be performed by a qualified installer, service agency, or the gas supplier. LDG4315ST LDG4315BD LDG4313ST LDG4311ST LDG4311SB LDG4311SW www.lg.com...
-
Page 2: Table Of Contents
TABLE OF CONTENTS TABLE OF COnTEnTS PrODUCT FEATUrES Lockout Start Time (Delayed Timed Cook) Cook Time (Timed Cook) IMPOrTAnT SAFETY Removing and Replacing the Oven Racks InSTrUCTIOnS Recommended Baking and Roasting Guide Bake Convection Bake PrODUCT OVErVIEW Cookware for Convection Cooking Convection Roast Parts Broil... -
Page 3: Product Features
PRODUCT FEATURES PrODUCT FEATUrES Multiple Gas Burner Sizes Choose a burner to fit the size of your cookware. Cooking multiple items at once is possible by using different burners at the same time. Safe and Convenient Gas range Provides safety and convenience for cooking. Upper Oven / Lower Oven Separate upper and lower ovens. -
Page 4: Important Safety Instructions
Always contact your service agent or manufacturer about problems that you do not understand. Download this owner's manual at: http://www.lg.com This is the safety alert symbol. This symbol alerts you to potential hazards that can result in property damage and/or serious bodily harm or death. - Page 5 IMPORTANT SAFETY INSTRUCTIONS IMPOrTAnT SAFETY nOTICE The Safe Drinking Water and Toxic Enforcement act requires the Governor of California to publish a list of substances known to the state to cause birth defects or other reproductive harm, and requires businesses to warn customers of potential exposure to such substances. Gas appliances can cause minor exposure to four of these substances, namely benzene, carbon monoxide, formaldehyde and soot, caused primarily by the imperfect combustion of natural or LP gas.
- Page 6 IMPORTANT SAFETY INSTRUCTIONS WArnInG • Gas leaks may occur in the system and result in a serious hazard. Gas leaks may not be detected by smell alone. Gas suppliers recommend you purchase and install a UL approved gas detector. Install and use in accordance with the gas detector manufacturer’s instructions.
- Page 7 IMPORTANT SAFETY INSTRUCTIONS WArnInG • Disconnect the electrical supply before servicing the appliance. • Never use the appliance door as a step stool or seat, as this may result in possible tipping of the appliance and serious injuries. • This product should not be installed below ventilation type hood systems that direct air in a downward direction.
- Page 8 IMPORTANT SAFETY INSTRUCTIONS SUrFACE BUrnErS WArnInG • Even if the top burner flame goes out, gas is still flowing to the burner until the knob is turned to the Off position. If you smell gas, immediately open a window and ventilate the area for five minutes prior to using the burner.
- Page 9 IMPORTANT SAFETY INSTRUCTIONS CAUTIOn • To prevent burns, always be sure that the controls for all burners are in the Off position and all grates are cool before attempting to remove them. • If you smell gas, turn off the gas to the range and call a qualified service technician. Never use an open flame to locate a leak.
- Page 10 10 IMPORTANT SAFETY INSTRUCTIONS OVEn When opening the door of a hot oven, stand away from the range. The hot air and steam that escape can cause burns to hands, face and eyes. WArnInG • Never block any slots, holes or passages in the oven bottom or cover an entire rack with materials such as aluminum foil.
- Page 11 IMPORTANT SAFETY INSTRUCTIONS EnErGY SAVInG TIPS • Multiple-rack cooking saves time and energy. Whenever possible, cook foods requiring the same cooking temperature together in one oven. • For optimal performance and energy savings, follow the guides on page 31 for proper rack and pan placements.
-
Page 12: Product Overview
Broiler pan scouring pad (1ea) nOTE • Contact LG Customer Service at 1-800-243-0000 (1-888-542-2623 in Canada) if any accessories are missing. • For your safety and for extended product life, only use authorized components. • The manufacturer is not responsible for product malfunction or accidents caused by the use of separately purchased, unauthorized components or parts. -
Page 13: Installation
INSTALLATION InSTALLATIOn Before Installing the range Make sure your range is properly installed and grounded by a qualified installer, according to the installation instructions. Any adjustment and service should be performed only by qualified gas range installers or service technicians. In the Commonwealth of Massachusetts •... -
Page 14: Installing The Range
14 INSTALLATION Installing the range Choosing the Proper Location Do not locate your range where it may be subject to Unpacking and Moving the range strong drafts. Any openings in the floor or wall behind the range should be sealed. Make sure the openings CAUTIOn around the base of the range that supply fresh air •... - Page 15 INSTALLATION Dimensions and Clearances Provide proper clearance between the range and adjacent combustible surfaces. These dimensions must be met for safe use of your range. The location of the electrical outlet and pipe opening (see Gas Pipe and Electrical Outlet Locations, page 14) may be adjusted to meet specific requirements. The range may be placed with 0" clearance (flush) at the back wall.
-
Page 16: Providing Adequate Gas Supply
16 INSTALLATION Providing Adequate Gas Installing the Anti-tip Device Supply Anti-tip Wall plate bracket Your range is designed to operate at a pressure of Screw must enter wood or 5" of water column on natural gas or 10" of water concrete column on LP. -
Page 17: Connecting The Range To Gas
INSTALLATION Connecting the range to Gas WArnInG • Do not use a flame to check for gas leaks. Shut off the range gas supply valve before removing the old range and leave it off until the new hook-up • Isolate the range from the gas supply system has been completed. -
Page 18: Electrical Connections
18 INSTALLATION Electrical Connections Do not use an adapter plug. Disconnecting of the power cord places undue strain on the adapter and leads to eventual failure of the adapter ground Electrical requirements terminal. 120 Volt, 60 Hz, properly grounded dedicated circuit Installation must conform with local codes or, in the protected by a 15 or 20 Amp circuit breaker, or slow absence of local codes, with the National Fuel Gas... -
Page 19: Assembling The Surface Burners
INSTALLATION Assembling the Surface Quality of Flames Burners The combustion quality of the burner flames needs to be confirmed visually. A Yellow flames - Call for service. CAUTIOn Do not operate the burners without all parts in B Yellow tips on outer cones - This place. -
Page 20: Leveling The Range
20 INSTALLATION Leveling the range Checking Operation of Bake / Broil Burners Level the range by adjusting the leveling legs. To check ignition of the Bake burner, follow the steps Extending the legs slightly may also make it easier to insert the rear leg into the anti-tip bracket. -
Page 21: Operation
OPERATION OPErATIOn CAUTIOn WHAT TO DO IF YOU SMELL GAS Gas Surface Burners • Open windows. • Do not try to light any appliance. Before Use • Do not touch any electrical switch. Read all instructions before using. • Do not use any phone in your building. Make sure that all burners are properly placed. -
Page 22: Burner Locations
22 OPERATION Burner Locations Using the Gas Surface Burners Your gas range cooktop has four or five sealed gas Be sure that all of the surface burners and grates burners, depending on the model. These can be are placed in the correct positions. assembled and separated. - Page 23 OPERATION In Case of Power Failure Using a Wok In case of a power failure, you can light the gas If using a wok, use a 14-inch or smaller flat-bottomed surface burners on your range with a match. piece of wok. Make sure that the wok bottom sits flat on the grate.
-
Page 24: Using The Griddle
24 OPERATION Using the Griddle (on some models) Preheat the griddle according to the guide below and adjust for the desired setting. Preheat Cook Type of Food Conditions Setting Warming Tortillas 5 (MED) Pancakes HI 5 min. Hamburgers HI 5 min. Fried Eggs HI 5 min. -
Page 25: The Oven
OPERATION The Oven Do not block, touch or place items around the oven vent during cooking. Before Use Your oven is vented through ducts at the center above the burner grate. Do not block the oven vent when Read all instructions before using. cooking to allow for proper air flow. -
Page 26: Control Panel Overview
26 OPERATION Control Panel Overview 1 Oven Controls 5 nFC Tag On 2 Features 6 Smart Diagnosis 3 number Keys 7 Clear Off / Lockout Key 4 Start Key 8 Gas Surface Burners Flashing Time If the oven displays a flashing clock, touch Clock and reset the time, or touch any key to stop the flashing. -
Page 27: Changing Oven Settings
OPERATION Changing Oven Settings Minimum & Maximum Default Settings Clock All of the features listed have a minimum and a The clock must be set to the correct time of day in maximum time or temperature setting that can be order for the automatic oven timing functions to work entered into the control. -
Page 28: Timer On/Off
28 OPERATION Timer On/Off Settings The Upper or Lower Timer On/Off serves as an extra Touch the Settings key repeatedly to toggle through timer in the kitchen that beeps when the set time has and change oven settings. run out. It does not start or stop cooking. The Settings key allows you to The Upper or Lower Timer On/Off feature can be •... -
Page 29: Adjusting The Oven Thermostat
OPERATION Adjusting the Oven Thermostat Adjusting the Beeper Volume Your new oven may cook differently from the one Touch Settings repeatedly until Beep appears in it replaced. Use your new oven for a few weeks to the display. become more familiar with it before changing the temperature settings. -
Page 30: Start Time (Delayed Timed Cook)
30 OPERATION Start Time (Delayed Timed Cook) Cook Time (Timed Cook) The automatic timer of the Delayed Timed Cook Set the oven to cook for a specific length of time function turns the oven on and off at the time you using the Timed Cook feature. -
Page 31: Removing And Replacing The Oven Racks
OPERATION removing and replacing the Oven • If cooking on multiple racks in the lower oven, place a standard rack in position 1 and an offset racks rack in position 4. Place the cookware as shown in the multiple rack image, with cookware on the top CAUTIOn rack placed toward the front and cookware on the •... -
Page 32: Bake
32 OPERATION Bake Baking Chart This chart is only for reference and can be used for Bake is used to prepare foods such as pastries, both the upper and lower ovens. Adjust the cook time breads and casseroles. The oven can be programmed according to your recipe. -
Page 33: Convection Bake
OPERATION Convection Mode Convection Baking Chart If auto conversion is disabled, reduce standard The convection system uses a fan to circulate heat recipe temperature by 25 °F (14 °C) for Convection evenly within the oven. This improves heat distribution Bake. Temperatures have been adjusted in this and allows for even cooking and excellent results, chart. -
Page 34: Cookware For Convection Cooking
34 OPERATION Cookware for Convection Cooking Convection roast Any cookware safe for use in a conventional oven will The Convection Roast feature is designed to give work in a convection oven. But for best results, keep optimum roasting performance. Convection Roast the following in mind. -
Page 35: Broil
OPERATION Broil Setting the Upper oven to Broil Touch Broil once for Hi and twice for Lo. Your oven is designed for closed-door broiling. Broil uses an intense heat radiation from the upper gas burner. Touch Start. The Broil function works best when broiling thin, tender cuts of meat (1"... - Page 36 36 OPERATION recommended Broiling Guide The size, weight, thickness, starting temperature, and your preference of doneness will affect broiling times. This guide is based on meats at refrigerator temperature. For best results when broiling, use a pan designed for broiling. Upper oven Food Quantity and/or Thickness...
-
Page 37: Pizza
OPERATION Pizza Warm This function automatically sets the upper or lower This function will maintain an oven temperature of oven temperature to cook either frozen pizza with 170 °F. The Warm function will keep cooked food regular or rising crust, or freshly made pizza. Simply warm for serving up to three hours after cooking has choose the type of pizza (see chart) and set the finished. -
Page 38: Proof
38 OPERATION Proof This feature maintains a warm oven for rising yeast leavened products before baking. Setting the Proof Function Use rack position 2 or 3 for proofing. Touch Warm/Proof until Proof appears in the display. Touch Start. Touch Clear/Off when proofing is finished. nOTE •... -
Page 39: Smart Features
SMArT FEATUrES Check Use read and Write/P2P receive. Before Using Tag On The Tag On function allows you to conveniently use LG Smart Diagnosis™, set the cook mode and ® EasyClean features, and communicate with your appliance using a smart phone. To use the Tag On... -
Page 40: Using Tag On With Applications
NFC antenna inside the back of the smart phone matches the position of the Tag On Touch an LG appliance's Tag On logo with an NFC- icon on the appliance. (The position of the antenna equipped smart phone to use the LG Smart Oven cannot be seen, so the LG Smart Oven application application's LG Smart Diagnosis™, Oven Settings,... -
Page 41: Maintenance
MAINTENANCE MAInTEnAnCE Cleaning Burner Heads/Caps For even and unhampered flame, the slits in the CAUTIOn burner heads must be kept clean at all times.The burner heads and caps (and the oval burner head • Do not clean this appliance with bleach. and cap assembly) can be lifted off. - Page 42 42 MAINTENANCE Burner Grates Cleaning the Burner Grates The range consists of three separate professional- CAUTIOn style grates. For maximum stability, these grates • Do not lift the grates out until they have cooled. should only be used when in their proper position. The two side grates can be interchanged from left •...
-
Page 43: Cleaning The Exterior
Off position and pull them straight off the 1-888-542-2623(CANADA) stems. or visit our website at: www.lg.com • To replace the knobs, make sure the knob has the Off position centered at the top, and slide the knob directly onto the stem. -
Page 44: Door Care Instructions
Compared to the more intense Self Clean process, your LG oven gives you the option of cleaning with LESS HEAT, LESS TIME, and virtually NO SMOKE OR FUMES. - Page 45 MAINTENANCE When to Use EasyClean ® Suggested Types of Common Food Items Example of Oven Soiling Soil Pattern Cleaning Method Soils That Can Soil Your Oven Cheese Small drops or or other Pizza spots ingredients Steaks, broiled EasyClean ® Fish, broiled Light splatter Fat/grease Meat roasted at low...
- Page 46 46 MAINTENANCE Spray or pour the remaining 1 cup (8 oz or 250 Clean the oven cavity immediately after the ml) of water onto the bottom center of the oven EasyClean ® cycle by scrubbing with a wet, cavity. The indentation on the oven bottom non-scratch scouring sponge or pad.
-
Page 47: Self Clean
MAINTENANCE Self Clean During the Self Clean cycle, the cooktop elements and warming drawer cannot be used. The Self Clean cycle uses extremely hot temperatures nOTE to clean the oven cavity. While running the Self Clean • Remove oven racks and accessories before cycle, you may notice smoking or an odor. - Page 48 48 MAINTENANCE After the Self Clean Cycle CAUTIOn • The oven door remains locked until the oven Do not force the oven door open when the lock temperature has cooled. icon is displayed. The oven door remains locked until the oven temperature has cooled. Forcing •...
-
Page 49: Changing The Oven Light
MAINTENANCE Changing the Oven Light removing and replacing the Lift-Off Oven Doors The oven light is a standard 40-watt appliance bulb. It turns on when the oven door is open. When the oven door is closed, touch Light to turn it on or off. CAUTIOn WArnInG •... - Page 50 50 MAINTENANCE Lower Oven Lift the door up until it is clear of the hinges. removing the Door about 30° Fully open the door. Unlock the hinge locks, rotating them as far toward the open door frame as they will go. Lock Slot Unlock...
- Page 51 MAINTENANCE replacing the Door Firmly grasp both sides of the door at the top. With the door at the same angle as the removal position, seat the indentation of the hinge arms into the bottom edge of the hinge slots. The notch in the hinge arms must be fully seated into the bottom edge of the slots.
-
Page 52: Troubleshooting
52 TROUBLESHOOTING TrOUBLESHOOTInG Can I use aluminum foil to catch drippings in my oven cavity? Never use aluminum foil to line the bottom or sides of FAQs the oven or the warming drawer. The foil will melt and stick to the bottom surface of the oven, and will not be What types of cookware are recommended for removable. - Page 53 TROUBLESHOOTING Why aren't the function buttons working? Is it safe for my convection fan, broil burner or heater element to get wet during EasyClean ® Make sure that the range is not in Lockout mode. The lock will show in the display if Lockout is activated. Yes.
- Page 54 54 TROUBLESHOOTING Before Calling for Service Before you call for service, review this list. It may save you time and expense. The list includes common occurrences that are not the result of defective workmanship or materials in this appliance. Symptoms Possible Cause / Solution •...
- Page 55 TROUBLESHOOTING Symptoms Possible Cause / Solution Too much soil in the oven. Open the windows to get rid of the smoke from the Too much smoke room. Touch the Upper Clear/Off or Lower Clear/Off key. Wait until the light goes during the Self Clean off before trying to open the oven door.
-
Page 56: Smart Diagnosis
56 SMART DIAGNOSIS™ SMArT DIAGnOSIS™ Smart Diagnosis™ Through the Call Center Call the LG call center at: (LG U.S.) 1-800-243- 0000 (LG Canada) 1-888-542-2623. When instructed to do so by the call center Should you experience any problems with your range,... -
Page 57: Warranty
WArrAnTY (USA) Should your LG Gas Range fail due to a defect in materials or workmanship under normal home use, during the warranty period set forth below, LG will at its option repair or replace the product. This limited warranty is valid only to the original retail purchaser of the product and applies only when purchased and used within the United States including U.S. - Page 58 • The removal and reinstallation of the Product if it is installed in an inaccessible location or is not installed in accordance with published installation instructions, including LG’s owner’s and installation manuals. • Damage resulting from misuse, abuse, improper installation, repair, or maintenance. Improper repair includes use of parts not approved or specified by LG.
- Page 59 WARRANTY Problem Cause Prevention • Burner cap color 1. Scratching • Do not use steel wool or change and lost shine abrasive cleansers to clean. 2. Use of detergent or abrasive cleansers • To remove burnt-on food, soak the burner heads in hot water for 20–30 minutes.
- Page 60 60 WARRANTY Problem Cause Prevention • Oven shows error The regulator valve is closed. • Check with installer first code (F9, F19) but cooktop burners are working. Lever’s open Lever’s closed position position • Flames too bigon The installer missed part of the conversion. •...
- Page 61 LG Electronics at the number below. For assistance or service, call 1-800-243-0000. If you need further assistance, you can write to LG with any questions or concerns at the address below: LG Electronics, 201 James Record Road, Huntsville, Alabama 35813...
- Page 62 LG Customer Information Center 1-800-243-0000 1-888-542-2623 CANADA Register your product Online! www.lg.com Printed in Korea...