
Related Manuals for Hitachi RV-X20M


Summary of Contents for Hitachi RV-X20M
- Page 1 Contents ENGLISH 02-31 Robot THAI 32-61 VIETNAM 62-91 RV-X20M 01M-8913703600-3022-01...
- Page 2 Please read this guide first! Dear Customer, Thank you for choosing a Hitachi product. We would like you to achieve the optimal efficiency from this high quality product which has been manufactured with state of the art technology. Please make sure you read and understand this guide and supplementary documentation fully before use and keep it as a reference.
-
Page 3: Safety Precautions
■ The severity of injury or damage that might occur if these precautions are ignored or the vacuum cleaner is used improperly is classified and explained below. Hitachi is not responsible for any injury or damage that occurs as a result of ignoring these precautions. - Page 4 Continuing to use the vacuum cleaner under these conditions could result in smoke, fire, or electric shock. Turn off the vacuum cleaner immediately and unplug the AC adapter from the outlet. Then, contact a Hitachi authorized service agent to request an inspection and repair. ENGLISH 4...
- Page 5 WARNING Others ● Do not use the vacuum cleaner near inflammable or combustible items or materials (kerosene, gasoline, paint thinner, benzine, toner, iron powder, detergents, large amounts of flour, aerosol sprays, flammable gas, cigarette butts, etc.), or to clean up such items or materials. ●...
- Page 6 CAUTION Others ● When carrying the vacuum cleaner, do not hold the dust case. The vacuum cleaner might fall and cause injury or damage the floor. ● Keep away from fire. Failure to heed this warning might cause short-circuiting due to vacuum cleaner deformation, resulting in fire.
- Page 7 Replacement of the battery is to be performed by a trained service technician. Do not remove the battery except when disposing of this vacuum cleaner. Please consult with a Hitachi authorized service agent. ● Do not touch the terminals or connect them by using metal items such as wires and pins.
- Page 8 CAUTION ● When charging the battery, make sure the ambient temperature is between 5°C and 35°C. Charging the battery in temperatures outside of this range might prevent the battery from being fully charged. As a result, the battery might take a long time to charge, or you might only be able to use the vacuum cleaner for a short time, Failure to heed this warning might cause the battery to deteriorate.
-
Page 9: Important Safety And Environmental Instructions
1 Important safety and environmental instructions Cleaning and care Waste batteries Warning Ensure that the waste batteries are Use only the TS-A011-190060E1 ■ ■ disposed of in accordance with removable supply unit delivered with the local laws and regulations. appliance to charge to the battery. Never use gasoline, solvent, abrasive The symbol on the battery and packaging ■... - Page 10 2 Overview 2.1 Box content Robot Vacuum Charging dock Charge adaptor Mopping tool Mopping cloth User’s manual and product Cleaning brush documentation (2 pcs) Spare accessories supplied 1 side brush 1 mopping cloth 1 filter ENGLISH 10...
- Page 11 2 Overview ENGLISH 11...
-
Page 12: Controls And Components
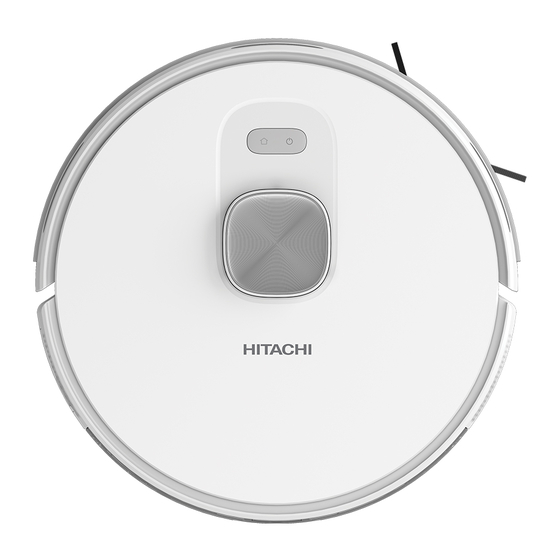
2 Overview 2.2 Controls and 2.3 Technical data components Adapter voltage 100-240V~ 50-60Hz 1. Lidar Adapter output 24.0V / 1.0 A 2. Upper body Battery Li-ion: 14.4V / 3.2 Ah 3. Central body 4. Start Cleaning-Pause Button / Charging period: 4-5 hours Sending to Charging Stand button Up to 150 minutes (in... - Page 13 2 Overview Parameter of External Power Supply Manufacturer E-TEK Electronics Manufactory Co., LTD Model Identifier ZD024D240100EU Input Voltage 100-240V~ Input Frequency 50-60Hz Input Current 0.8A Output Voltage 24.0V DC Output Current 1.0 A Output Power 24.0W Average active efficiency 87.91% Efficiency at low load(10%) 84.01% No-load power consumption...
-
Page 14: Installation
3 Installation 3.1 Remove the protective sponges. 3.2 Install the charging station. Install the adaptor plug to the charging station and set the cables up to prevent the adaptor cable from wrapping around the machine during vacuuming. Install the charging station in a location where it can easily be accessed by the vacuum cleaner. -
Page 15: Operation
4 Operation 4.1 Intended use This appliance is intended for household use and it is not suitable for industrial use. 4.2 Charging the appliance 1. Bring the on-off button on the side to the on position for the initial power up. On/Off button 2. -
Page 16: Point Cleaning
4 Operation WARNING: If the charging level is too low, the cleaning cannot be started. Please charge the appliance before starting the cleaning. WARNING: Before the cleaning, tidy up all cables to prevent disconnections due to entanglement/pulling of the cables and to prevent damage to the furniture. -
Page 17: Download The Application
4 Operation Vacuum power selection (Supported with the relevant mobile application only) You may select the desired cleaning power from the application: Quiet ● ■ Standard ● ■ Powerful ● ■ Maximum ● ■ Remote controlled cleaning (Supported with the relevant mobile application only) You may direct the robot vacuum cleaner to the area to be cleaned by using the manual remote control mode through the application. - Page 18 4 Operation A. Robot Vacuum Cleaner: The charging level of the robot vacuum cleaner shall be over 20% or the robot vacuum ● ■ cleaner shall be placed on the charging dock. B. Wi-Fi network: Make sure the password of your wireless network (modem) is correct. ●...
- Page 19 4 Operation Wi-Fi Status Root Cause Solution Ensure the Wi-Fi ● ■ connection of the robot vacuum cleaner. Please review the Mobile Application Manual for White light is flashing Wi-Fi is reset. slowly. detailed directions. Reset the Wi-Fi connection, if required.
- Page 20 4 Operation Room cleaning mode (Supported by the relevant mobile application only) You may specify the rooms you want to be cleaned with the mobile application, then the robot vacuum cleaner cleans only the room(s) that is/are marked in the map. The robot vacuum cleaner may also enter the areas other than the selected area after ●...
- Page 21 4 Operation 4.4 Operation of the mop WARNING: Do not use the mopping mode on a carpet. WARNING: Do not put bleach or detergent in the water tank. These chemicals may damage the liquid channels that ensure the water flow in the robot vacuum cleaner or the pump.
- Page 22 4 Operation Remove the swab on the Moisten the swab before Place the swab to the mop mop retainer as it is shown. each mopping. retainer. Install the mop retainer to Install the dust container the dust container and the and the water tank water tank assembly (two in assembly (two in one) to...
-
Page 23: Cleaning And Maintenance
5 Cleaning and maintenance Turn off and unplug the appliance before cleaning. WARNING: Never use gasoline, solvent, abrasive cleaners, metal objects or hard brushes to clean the appliance. 5.1 Cleaning the dust container and filters You may call our call center to order a new filter when your filter reaches the end of its expected life, is deformed or needs to be replaced for a reason. - Page 24 5 Cleaning and maintenance 2. Remove the dust container by pulling it in the direction of the arrow. 3. Open the dust container as it is seen below and empty it as it is shown. 4. Remove the high performance filter and clean the filter using the cleaning brush provided together with the appliance.
- Page 25 5 Cleaning and maintenance 5. Wash the water tank, dust container and filter assembly periodically with cold water as required as per the frequency of operation. 6. Leave the water tank, dust container and filter assembly to dry after washing, and ensure that they are completely dried.
- Page 26 5 Cleaning and maintenance 2. Replace the brush after cleaning it and close the cover in the direction of the arrow. 5.3 Cleaning and installation of the side brush In the long term use, wash the side brush with warm water in order to eliminate the shape deformation.
- Page 27 5 Cleaning and maintenance Front bumper hitting sensor Bumper sensor Fall prevention sensor ENGLISH 27...
- Page 28 5 Cleaning and maintenance 5.5 Cleaning of the mopping unit We recommend that you remove the mop holder from one side, drain the water tank, rinse the mop with water and then leave it to dry after each operation of the mopping unit. You may wash the mop in a washing machine.
-
Page 29: Troubleshooting
6 Troubleshooting General Error Conditions Failure Cause and remedy 1. Charging level is low. Place the robot vacuum cleaner to the charging dock so that it shall be aligned with the charging poles. Bring the button on the left of the robot vacuum cleaner to position “I”;... - Page 30 6 Troubleshooting Failure Cause and remedy 1. Wi-Fi signal is weak. Make sure that the Wi-Fi signal in the location of the robot vacuum cleaner is strong. 2. There is a cutoff in Wi-Fi connection. Please reset Wi-Fi, download the latest mobile application and try Cannot connect to the Wi-Fi again.
- Page 31 6 Troubleshooting Audible Warning Solution Error 5: Turbo brush error. Please refer to Please remove the rotating brush, and ● ■ the manual or the application. clean the connection part of the rotating brush, rotating brush cover and the dust nozzle.
- Page 32 ขอขอบคุ ณ ที ่ เ ลื อ กใช้ ผ ลิ ต ภั ณ ฑ์ Hitachi เราต้ อ งการให้ ค ุ ณ ได้ ร ั บ ประสิ ท ธิ ภ าพสู ง สุ ด จากผลิ ต ภั ณ ฑ์ ค ุ ณ...
- Page 33 ร้ อ งการรั บ ประกั น ส� า หรั บ ความเสี ย หายที ่ เ กิ ด จาก ใช้ เ ฉพาะอุ ป กรณ์ เ สริ ม Hitachi ของแท้ เ ท่ า นั ้ น การจั ด การที ่ ไ ม่ เ หมาะสม...
- Page 34 ค� า เตื อ น เต้ า เสี ย บ, ปลั ๊ ก , สายไฟ และชุ ด สายไฟ ● ใช้ เ ต้ า เสี ย บ 100-240V ไม่ ค วรใช้ ป ลั ๊ ก พ่ ว ง หรื อ เต้ า เสี ย บร่ ว มกั บ เครื ่ อ งใช้ ไ ฟฟ้ า อื ่ น ๆ ●...
- Page 35 ค� า เตื อ น อื ่ น ๆ ● ห้ า มใช้ ง านใกล้ เ ปลวไฟ วั ต ถุ ไ วไฟหรื อ ติ ด ไฟง่ า ย (เช่ น น� ้ า มั น ก๊ า ด, น� ้ า มั น เชื ้ อ เพลิ ง , ทิ...
- Page 36 ข้ อ ควรระวั ง อื ่ น ๆ ● ไม่ ค วรถื อ หรื อ จั บ เครื ่ อ งดู ด ฝุ ่ น บริ เ วณกล่ อ งเก็ บ ฝุ ่ น ตั ว เครื ่ อ งอาจตกหล่ น ก่ อ ให้ เ กิ ด อั น ตรายหรื อ ความเสี ย หายต่ อ พื ้ น บ้ า นได้ ●...
- Page 37 แบตเตอรี ่ (ลิ เ ที ่ ย มไอออน) อั น ตราย ● ห้ า มต่ อ แบตเตอรี ่ เ ข้ า กั บ วั ต ถุ อ ื ่ น ๆ นอกเหนื อ จากเครื ่ อ งดู ด ฝุ ่ น ห้ า มดั ด แปลง แก้ ไ ข หรื...
- Page 38 ข้ อ ควรระวั ง ● ชาร์ จ แบตเตอรี ่ ใ นบริ เ วณที ่ ม ี อ ุ ณ หภู ม ิ ร ะหว่ า ง 5°C ถึ ง 35 °C การชาร์ จ แบตเตอรี ่ ใ นพื ้ น ที ่ ท ี ่ ม ี อ ุ ณ หภู ม ิ น อกเหนื อ จากอุ ณ หภู ม ิ ด ั ง กล่ า ว อาจท� า ให้ ไ ม่ ส ามารถ ชาร์...
- Page 39 ค� า แนะน� า ด้ า นความปลอดภั ย และด้ า นสิ ่ ง แวดล้ อ มที ่ ส � า คั ญ การท� า ความสะอาดและการดู แ ล แบตเตอรี ่ ท ี ่ เ สี ย ค� า เตื อ น ตรวจสอบให้...
- Page 40 ภาพรวม อุ ป กรณ์ ภ ายในกล่ อ ง หุ ่ น ยนต์ ด ู ด ฝุ ่ น แท่ น ชาร์ จ อะแดปเตอร์ ช าร์ จ ถั ง น� ้ า ผ้ า ถู พ ื ้ น คู ่ ม ื อ ผู ้ ใ ช้ แ ละเอกสารผลิ ต ภั ณ ฑ์ แปรงท�...
- Page 41 ภาพรวม THAI 41...
- Page 42 ภาพรวม ปุ ่ ม ควบคุ ม และส่ ว นประกอบ ข้ อ มู ล ทางเทคนิ ค 1. ลิ ด าร์ แรงดั น ไฟฟ้ า อะแดป 100-240V~ 50-60Hz 2. ฝาครอบด้ า นบน เตอร์ ข าเข้ า 3. ส่ ว นกลาง แรงดั น ไฟฟ้ า อะแดป 4.
- Page 43 ภาพรวม พารามิ เ ตอร์ ข องแหล่ ง จ่ า ยไฟภายนอก ผู ้ ผ ลิ ต E-TEK Electronics Manufactory Co., LTD รหั ส ระบุ ร ุ ่ น ZD024D240100EU แรงดั น ไฟฟ้ า ขาเข้ า 100-240V~ ความถี ่ ข าเข้ า 50-60Hz กระแสไฟฟ้...
- Page 44 การติ ด ตั ้ ง ถอดฟองน� ้ า กั น กระแทกออก ติ ด ตั ้ ง แท่ น ชาร์ จ ติ ด ตั ้ ง ปลั ๊ ก อะแดปเตอร์ เ ข้ า กั บ แท่ น ชาร์ จ และตั ้ ง สายขึ ้ น เพื ่ อ ป้ อ งกั น ไม่ ใ ห้ ส ายอะแดปเตอร์ พ ั น รอบเครื ่ อ ง ระหว่...
- Page 45 การใช้ ง าน วั ต ถุ ป ระสงค์ ก ารใช้ ง าน อุ ป กรณ์ น ี ้ ม ี ไ ว้ ส � า หรั บ ใช้ ใ นบ้ า นและไม่ เ หมาะส� า หรั บ ใช้ ใ นอุ ต สาหกรรม การชาร์...
- Page 46 การใช้ ง าน ค� า เตื อ น: หากระดั บ การชาร์ จ ต� ่ า เกิ น ไป การท� า ความสะอาดจะไม่ ส ามารถเริ ่ ม ได้ กรุ ณ าชาร์ จ เครื ่ อ งดู ด ฝุ ่ น ก่ อ นเริ ่ ม ท� า ความสะอาด ค�...
- Page 47 การใช้ ง าน การเลื อ กก� า ลั ง แรงดู ด (รองรั บ เฉพาะแอปพลิ เ คชั น มื อ ถื อ ที ่ เ กี ่ ย วข้ อ งเท่ า นั ้ น ) คุ ณ สามารถเลื อ กพลั ง ท� า ความสะอาดที ่ ต ้ อ งการจาก แอปพลิ...
- Page 48 การใช้ ง าน A. หุ ่ น ยนต์ ด ู ด ฝุ ่ น : ระดั บ การชาร์ จ ของหุ ่ น ยนต์ ด ู ด ฝุ ่ น จะต้ อ งมากกว่ า 20% หรื อ หุ ่ น ยนต์ ด ู ด ฝุ ่ น จะต้ อ งวางอยู ่ บ นแท่ น ชาร์ จ ●...
- Page 49 การใช้ ง าน สถานะ Wi-Fi สาเหตุ วิ ธ ี แ ก้ ไ ข ตรวจสอบการเชื ่ อ มต่ อ Wi-Fi ● ■ ของหุ ่ น ยนต์ ด ู ด ฝุ ่ น กรุ ณ าตรวจ สอบคู ่ ม ื อ แอปพลิ เ คชั น มื อ ถื อ ส�...
- Page 50 การใช้ ง าน โหมดท� า ความสะอาดห้ อ ง (รองรั บ เฉพาะแอปพลิ เ คชั น มื อ ถื อ ที ่ เ กี ่ ย วข้ อ งเท่ า นั ้ น ) คุ ณ สามารถระบุ ห ้ อ งที ่ ค ุ ณ ต้ อ งการท� า ความสะอาดด้ ว ยแอปพลิ เ คชั น มื อ ถื อ จากนั ้ น หุ ่ น ยนต์ ด ู ด ฝุ ่ น จะท� า ความ สะอาดเฉพาะห้...
- Page 51 การใช้ ง าน การท� า งานของแผ่ น ถู พ ื ้ น ค� า เตื อ น: ห้ า มใช้ โ หมดถู พ ื ้ น บนพรม ค� า เตื อ น: อย่ า ใส่ ส ารฟอกขาวหรื อ ผงซั ก ฟอกลงในถั ง เก็ บ น� ้ า สารเคมี เ หล่ า นี ้ อ าจท� า ให้ ช ่ อ ง ของเหลวซึ...
- Page 52 การใช้ ง าน ถอดผ้ า เช็ ด บนที ่ ย ึ ด แผ่ น ถู พ ื ้ น ตาม ท� า ให้ ผ ้ า เช็ ด เปี ย กชื ้ น ก่ อ นการถู วางผ้ า เช็ ด บนที ่ ย ึ ด แผ่ น ถู พ ื ้ น ที...
- Page 53 การท� า ความสะอาดและการบ� า รุ ง รั ก ษา ปิ ด และถอดปลั ๊ ก อุ ป กรณ์ ก ่ อ นท� า ความสะอาด ค� า เตื อ น: ห้ า มใช้ น � ้ า มั น เบนซิ น , ตั ว ท� า ละลาย, น� ้ า ยาท� า ความสะอาดที ่ ม ี ฤ ทธิ ์ ก ั ด กร่ อ น, วั ต ถุ ท ี ่ เป็...
- Page 54 การท� า ความสะอาดและการบ� า รุ ง รั ก ษา 2. ถอดถั ง เก็ บ ฝุ ่ น โดยดึ ง ตามทิ ศ ทางลู ก ศร 3. เปิ ด ถั ง เก็ บ ฝุ ่ น และเททิ ้ ง ตามภาพด้ า นล่ า ง 4.
- Page 55 การท� า ความสะอาดและการบ� า รุ ง รั ก ษา 5. ล้ า งถั ง เก็ บ น� ้ า ภาชนะเก็ บ ฝุ ่ น และไส้ ก รองเป็ น ระยะด้ ว ยน� ้ า เย็ น ตามความถี ่ ใ นการใช้ ง าน 6.
- Page 56 การท� า ความสะอาดและการบ� า รุ ง รั ก ษา 2. วางแปรงหมุ น หลั ง จากท� า ความสะอาดแล้ ว และปิ ด ฝาครอบตามทิ ศ ทางลู ก ศร การท� า ความสะอาดและติ ด ตั ้ ง แปรงด้ า นข้ า ง ในการใช้ ง านในระยะยาว ให้ ล ้ า งแปรงด้ า นข้ า งด้ ว ยน� ้ า อุ ่ น เพื ่ อ ป้ อ งกั น การเสี ย รู ป ของแปรง ติ...
- Page 57 การท� า ความสะอาดและการบ� า รุ ง รั ก ษา เซ็ น เซอร์ ก ั น กระแทกกั น ชนหน้ า เซ็ น เซอร์ ก ั น ชน เซ็ น เซอร์ ป ้ อ งกั น การตก THAI 57...
- Page 58 การท� า ความสะอาดและการบ� า รุ ง รั ก ษา การท� า ความสะอาดชุ ด ถู พ ื ้ น เราขอแนะน� า ให้ ค ุ ณ ถอดที ่ ย ึ ด ไม้ ถ ู พ ื ้ น ออกจากด้ า นใดด้ า นหนึ ่ ง ออก, ระบายน� ้ า ออกจากถั ง เก็ บ น� ้ า ล้ า งม็ อ บ ด้...
- Page 59 การแก้ ไ ขปั ญ หา สภาพการผิ ด พลาดทั ่ ว ไป ความผิ ด พลาด สาเหตุ แ ละวิ ธ ี แ ก้ ไ ข 1. ระดั บ การชาร์ จ ต� ่ า วางหุ ่ น ยนต์ ด ู ด ฝุ ่ น เข้ า กั บ แท่ น ชาร์ จ เพื ่ อ ให้ อ ยู ่ ในแนวเดี...
- Page 60 การแก้ ไ ขปั ญ หา ความผิ ด พลาด สาเหตุ แ ละวิ ธ ี แ ก้ ไ ข 1. สั ญ ญาณ Wi-Fi อ่ อ น ตรวจสอบให้ แ น่ ใ จว่ า สั ญ ญาณ Wi-Fi ใน ต� า แหน่ ง ของหุ ่ น ยนต์ ด ู ด ฝุ ่ น นั ้ น แรง 2.
- Page 61 การแก้ ไ ขปั ญ หา เสี ย งเตื อ น วิ ธ ี แ ก้ ไ ข ข้ อ ผิ ด พลาด 5: ข้ อ ผิ ด พลาดของหั ว แปรงเทอร์ โ บ โปรดถอดหั ว แปรงหมุ น ออก แล้ ว ท� า ความสะอาด ●...
- Page 62 Quý khách thân mến, Cảm ơn bạn đã chọn một sản phẩm của Hitachi. Chúng tôi mong muốn bạn đạt được hiệu quả tối ưu từ sản phẩm chất lượng cao được sản xuất với công nghệ hiện đại này.
-
Page 63: Hướng Dẫn An Toàn
đúng cách. Hitachi không chịu trách nhiệm về bất kỳ chấn thương hoặc hư hại nào xảy ra do bỏ qua các hướng dẫn này. - Page 64 điện giật. Ngay lập tức tắt máy hút bụi và rút bộ đổi nguồn AC ra khỏi ổ điện. Sau đó liên hệ với đại lý dịch vụ được ủy quyền của Hitachi để yêu cầu kiểm tra và sửa chữa. VIETNAM 64...
- Page 65 CẢNH BÁO Khác ● Không sử dụng máy hút bụi gần các vật dụng hoặc vật liệu dễ cháy hoặc dễ bắt lửa (dầu hỏa, xăng, chất pha loãng sơn, benzen, bột mực, bột sắt, chất tẩy rửa, lượng lớn bột mì, bình xịt sol khí, khí dễ bắt lửa, tàn thuốc, v.v.), hoặc để...
- Page 66 THẬN TRỌNG Khác ● Khi mang theo máy hút bụi, không cầm ở hộp bụi. Máy hút bụi có thể rơi và gây chấn thương hoặc gây hư hại cho sàn nhà. ● Tránh xa lửa. Bỏ qua cảnh báo này có thể gây đoản mạch do máy hút bụi bị biến dạng, dẫn đến cháy.
- Page 67 Không tháo pin trừ khi thải bỏ máy hút bụi này. Vui lòng tham vấn ý kiến của đại lý dịch vụ được ủy quyền của Hitachi. ● Không chạm vào các điện cực, không dùng các vật dụng kim loại như...
- Page 68 THẬN TRỌNG ● Đảm bảo nhiệt độ môi trường khi sạc pin trong khoảng từ 5°C đến 35°C. Sạc ở nhiệt độ nằm ngoài phạm vi này có thể khiến pin không được sạc đầy. Do đó, có thể phải tốn nhiều thời gian để sạc hoặc bạn chỉ có thể sử dụng máy hút bụi trong thời gian ngắn.
- Page 69 1 Các hướng dẫn quan trọng về an toàn và môi trường Vệ sinh và bảo dưỡng Pin thải Cảnh báo Đảm bảo rằng pin thải được thải Chỉ sử dụng bộ cấp nguồn có thể tháo ■ bỏ theo luật và quy định của địa ■...
- Page 70 2 Tổng quan 2.1 Thành phần trong hộp Robot hút bụi Thiết bị sạc Bộ đổi nguồn sạc Bình nước Khăn lau Hướng dẫn sử dụng và tài liệu Chổi làm sạch sản phẩm (2 chiếc) Phụ kiện thay thế được cung cấp 1 Chổi bên 1 Khăn lau 1 Bộ...
- Page 71 2 Tổng quan VIETNAM 71...
- Page 72 2 Tổng quan 2.2 Điều khiển và thành 2.3 Thông số kỹ thuật phần Đầu vào bộ đổi 100-240V~ 50-60Hz 1. Máy quét lidar nguồn 2. Nắp trên Đầu ra bộ đổi 24.0V / 1.0 A 3. Thân trung tâm nguồn 4.
- Page 73 2 Tổng quan Thông số nguồn điện bên ngoài Nhà sản xuất E-TEK Electronics Manufactory Co., LTD ID Model ZD024D240100EU Điện áp đầu vào 100-240V~ Tần số đầu vào 50-60Hz Dòng điện đầu vào 0.8A Điện áp đầu ra 24.0V DC Dòng điện đầu ra 1.0 A Công suất đầu ra...
- Page 74 3 Lắp đặt 3.1 Bỏ các miếng bọt biển bảo vệ. 3.2 Lắp đặt trạm sạc. Lắp phích cắm chuyển đổi vào trạm sạc và đi dây cáp sao cho cáp chuyển đổi không quấn quanh robot trong quá trình hút bụi. Lặp đặt trạm sạc ở...
- Page 75 4 Vận hành 4.1 Mục đích sử dụng Thiết bị này được thiết kế để sử dụng trong gia đình và không thích hợp để sử dụng trong công nghiệp. 4.2 Sạc thiết bị 1. Để khởi động lần đầu, đưa nút bật-tắt nguồn bên cạnh sang bị trí bật. Nút bật/tắt 2.
- Page 76 4 Vận hành CẢNH BÁO: Nếu mức pin xuống quá thấp, quá trình dọn dẹp sẽ không thể bắt đầu. Vui lòng sạc thiết bị trước khi bắt đầu dọn dẹp. CẢNH BÁO: Trước khi bắt đầu quá trình dọn dẹp, vui lòng thu gọn các dây cáp để...
- Page 77 4 Vận hành Chọn công suất hút bụi (Chỉ được hỗ trợ với ứng dụng di động liên quan) Bạn có thể chọn công suất dọn dẹp theo ý muốn trên ứng dụng: Im lặng ● ■ Tiêu chuẩn ● ■...
- Page 78 4 Vận hành A. Robot hút bụi: Robot hút bụi phải có mức pin trên 20% hoặc đang được đặt trên trạm sạc. ● ■ B. Mạng Wi-Fi: Vui lòng đảm bảo rằng mật khẩu của mạng không dây (modem) là chính xác. ●...
- Page 79 4 Vận hành Trạng thái Wi-Fi Nguyên nhân gốc rễ Giải pháp Đảm bảo kết nối Wi-Fi ● ■ của robot hút bụi. Vui lòng xem lại Hướng dẫn sử dụng ứng dụng di động để biết thông tin Ánh sáng trắng nhấp nháy Wi-Fi được thiết lập lại.
- Page 80 4 Vận hành Chế độ dọn phòng (Chỉ được hỗ trợ với ứng dụng di động liên quan) Bạn có thể chỉ định những phòng bạn muốn dọn dẹp qua ứng dụng di động, sau đó robot hút bụi sẽ chỉ dọn dẹp (những) phòng được đánh dấu trên bản đồ. Robot hút bụi có...
- Page 81 4 Vận hành 4.4 Thao tác vận hành của giẻ lau CẢNH BÁO: Không sử dụng chế độ lau trên thảm. CẢNH BÁO: Không cho chất tẩy trắng hoặc chất tẩy rửa vào hộp chứa nước. Những hoá chất này có thể làm hỏng luồng nước của robot hút bụi hoặc máy bơm.
- Page 82 4 Vận hành Tháo tấm vải lau ra từ khay Làm ẩm tấm vải trước mỗi Đặt tấm vải vào khay lau. lau như hình minh hoạ. lần lau. Lắp khay lau vào hộp chứa Lắp hộp chứa bụi và hộp bụi và...
- Page 83 5 Vệ sinh và bảo trì Tắt và rút dây thiết bị trước khi vệ sinh. CẢNH BÁO: Không bao giờ sử dụng xăng, dung môi, chất tẩy rửa ăn mòn, các vật kim loại hoặc bàn chải cứng để làm vệ sinh thiết bị. 5.1 Vệ...
- Page 84 5 Vệ sinh và bảo trì 2. Tháo hộp chứa bụi ra theo hướng mũi tên. 3. Mở và làm sạch hộp chứa bụi như hình minh hoạ. 4. Tháo bộ lọc hiệu suất cao và làm sạch bộ lọc bàng chổi làm sạch được cung cấp cùng với thiết bị.
- Page 85 5 Vệ sinh và bảo trì 5. Rửa hộp chứa nước, hộp chứa bụi và bộ lọc định kỳ bằngnước lạnh theo tần suất hoạt động. 6. Phơi khô hộp chứa nước, hộp chứa bụi và bộ lọc sau khi rửa và đảm bảo chúng khô hoàn toàn.
- Page 86 5 Vệ sinh và bảo trì 2. Thay thế chổi sau khi làm sạch nó và đóng nắp theo hướng mũi tên. 5.3 Vệ sinh và lắp đặt chổi cạnh Sau một thời gian dài sử dụng, hãy rửa chổi cạnh bằng nước ấm để tránh bị biến dạng. Lắp chổi quét vào robot sau khi đã...
- Page 87 5 Vệ sinh và bảo trì Cảm biến chống va chạm trước Cảm biến chống va chạm Cảm biến chống rơi VIETNAM 87...
- Page 88 5 Vệ sinh và bảo trì 5.5 Vệ sinh bộ lau dọn Chúng tôi khuyên bạn nên tháo khay giẻ từ một bên, xả hết hộp chứa nước, giặt sạch giẻ lau bằng nước rồi phơi khô sau mỗi lần vận hành bộ lau dọn. Bạn có...
- Page 89 6 Khắc phục vấn đề Tình trạng lỗi chung Sự cố Nguyên nhân và cách khắc phục 1. Mức pin thấp. Đặt robot hút bụi vào đế sạc sao cho thẳng hàng với các cực sạc. Đưa nút bên trái của robot hút bụi đến vị...
- Page 90 6 Khắc phục vấn đề Sự cố Nguyên nhân và cách khắc phục 1. Tín hiệu Wi-Fi yếu. Đảm bảo rằng robot hút bụi ở nơi có tín hiệu Wi-Fi mạnh. 2. Sự cố kết nối Wi-Fi. Vui lòng thiết lập lại Wi-Fi, tải ứng Không thể...
- Page 91 6 Khắc phục vấn đề Âm thanh cảnh báo Giải pháp Vui lòng làm sạch hộp chứa nước và ● ■ Lỗi 6: Lỗi máy bơm nước. Vui lòng tham luồng nước bên dưới máy hút bụi và khảo hướng dẫn sử dụng hoặc ứng dụng. kiểm tra mô-đun lau.
- Page 92 Arcelik Hitachi Home Appliances (Thailand) Ltd.