Table of Contents
Advertisement
Quick Links
132989240
WASHER-DRYER
ZWD 1270 W
ZWD 1270 S
ZWD 1470 W
PROGRE SS
1200
HYDROSYSTEM 5.5 kg
INSTRUCTION BOOKLET
ZWD 127O W
Cottons
Extra Dry
Cottons
95°C
1200
Prewash
Prewash
Store Dry
Synthetics
60°C
900
Wash
700
40° AA
Iron Dry
Delicates
50°C
Cottons
Rinse
Wool
40°C
500
Synthetics
Spin
On/Off
Synthetics
Skip
Hand Wash
30°C
Rinse Hold
Extra Quick
Store Dry
Drain
Drying
Reset
Auto Dry Drying Time Start/Pause
Fabrics
Temperature Spin Speed
Options
GB
Advertisement
Table of Contents

Related Manuals for Electrolux Zanussi ZWD 1270 W


Summary of Contents for Electrolux Zanussi ZWD 1270 W
- Page 1 WASHER-DRYER ZWD 1270 W ZWD 1270 S ZWD 1470 W ZWD 127O W Cottons Extra Dry Cottons 95°C 1200 Prewash Prewash Store Dry Synthetics 60°C Wash 40° AA Iron Dry Delicates 50°C Cottons Rinse Wool 40°C Synthetics Spin On/Off Synthetics Skip Hand Wash 30°C...
-
Page 2: Important Safety Information
Important Safety Information It is most important that this instruction book should be retained with the appliance for future reference. Should the appliance be sold or transferred to another owner, or should you move house and leave the appliance, always ensure that the book is supplied with the appliance in order that the new owner can get to know the functioning of the appliance and the relevant warnings. -
Page 3: Table Of Contents
Contents For the User 20-21 Maintenance and Cleaning Descaling After each wash Important Safety Information Maintenance wash Your New Washer-Dryer External cleaning Description of the Appliance Cleaning the dispenser drawer Detergent dispenser drawer Cleaning the drawer recess Child safety feature Cleaning the pump 20-21 Cleaning the water inlet filter... -
Page 4: Your New Washer-Dryer
Your New Washer-Dryer This new machine meets all modern requirements for effective treatment of laundry with low water, energy and detergent consumption. The special wool programme with its new delicate In the interest wash system treats your woollens with extreme care. of the environment The balance control device ensures that the machine remains stable when spinning. -
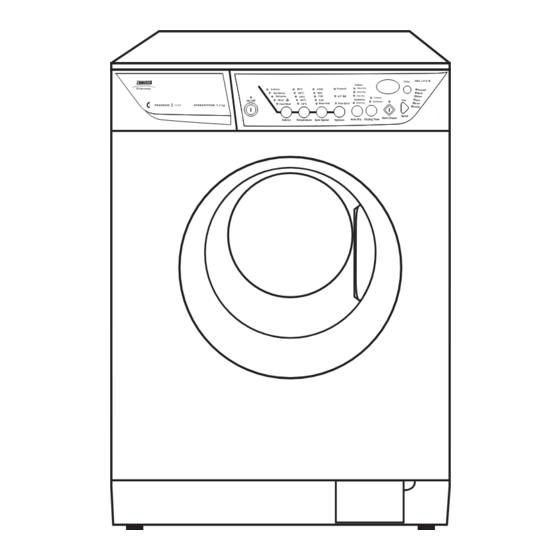
Page 5: Description Of The Appliance
Description of the Appliance 1 Detergent dispenser drawer 2 Control Panel 3 Door opening handle 4 Drain pump 5 Adjustable feet ZWD 127O W Cottons Cottons 95°C 1200 Prewash Extra Dry Prewash Synthetics 60°C Store Dry Wash Delicates 50°C 40° AA Iron Dry Rinse Cottons... -
Page 6: The Control Panel
The Control Panel ZWD 127O W Cottons Prewash Extra Dry 95°C 1200 Cottons Prewash Store Dry Synthetics 60°C Wash 40° AA Iron Dry 50°C Delicates Rinse Cottons Wool 40°C Synthetics Spin On/Off Skip Synthetics Store Dry Extra Quick 30°C Rinse Hold Drain Hand Wash Drying... - Page 7 • Drain only 7 “Auto Dry” button - Press the “Skip/Reset” button once, so as to cause This button allows you to choose the required degree of the “Drain” light to light up, then press the drying for cottons and synthetics: “Start/Pause”...
- Page 8 • Duration of washing programme in hours Important! and minutes, after you have selected a programme. The first time you use the machine, when you switch it on, it may display a blinking zero and give an audible warning signal. This is due to the fact that the machine has performed a washing cycle during the 2.05 manufacturer’s inspection tests, and this cycle has not...
- Page 9 10 “Start/Pause” button Prewash This button has three functions: Wash • Start: after you have selected the desired programme Rinses and options, press this button to start the machine. The Spin light above the button will stop flashing and remain lit. Drain If you have selected a delay time by means of button Drying...
- Page 10 12 “Delay” button 13 Programme phase indicator lights This button makes it possible to delay the starting of the programme by up to 24 hours. The delay you have When you select a programme, the lights relevant to the selected is shown on the display for about 3 seconds; phases that form the programme light up.
-
Page 11: Operating Sequence
Operating Sequence WASHING 4. Switch the machine on Press the “On/Off” button to switch the machine on. The Before the first wash we recommend that you pour 2 display will show three blinking dashes or a blinking litres of water into the main wash compartment zero. -
Page 12: Select The Temperature
6. Select the temperature 9. Select the “Delay” Press the “Temperature” button if you wish to select a Before you start the programme, if you wish the temperature value different from the one proposed by start to be delayed, press the “Delay” button the machine. -
Page 13: How To Change A Programme During Its Cycle
11. How to change a programme After approximately 3 minutes, you can open the door. Pay attention to the level and temperature of the during its cycle water in the machine! Before you make any change, you must pause the When you close the door and press the “On/Off”... -
Page 14: Drying 2.75 Kg Of Cotton
5. At the end of the programme press “Skip/Reset” DRYING 2.75 KG OF COTTON button to clear the memory and switch the machine You have for example just machine-washed and spun at off by depressing “On/Off” button. 1200 rpm 5.5 kg of laundry. 6. -
Page 15: Washing And Drying Hints
Washing and Drying Hints Do NOT overload the machine. Weigh the laundry the Some stains such as fruit, wine, grass, rust etc. are first few times you use the appliance. difficult to remove and should be treated before washing with specific products, which can be found The average weights of the most common items are in most household shops. -
Page 16: Which Detergent To Use
And in which form? Which detergent?..Not only are there different types of detergent, but they To ensure you obtain the best wash results from your are also available in different forms. Whether you chose appliance, it is important to use the right detergent in a powder or liquid in traditional or compact form is your everyday wash, and only detergents recommended your own personal choice. -
Page 17: Wash Care Symbols
Wash Care Symbols Wash care labels inside garments recommend how to launder your clothes with the best results. The care labelling code is in line with care labelling used in the rest of Europe. The symbols used make it easy to select the correct programme on your washing machine. -
Page 18: Washing Programmes
Washing programmes Type of Consumption* laundry and Programme/ Description of Load Available options Energy Water Time symbols on temperature programme labels litres h/min. 5,5 kg Cottons Main wash at SPIN SPEED 2.19 White cotton: 60°-95°C 60°-95°C RINSE HOLD e.g. sheets, 3 rinses PREWASH tablecloths,... -
Page 19: Drying Programmes
Drying Programmes Timed drying Degree of drying Type of fabric Max. load Spin speed Drying time mins 90-100 1200 2.75 kg Extra dry Cotton and linen 1400 80-90 Ideal for (bathrobes, bath towelling towels, etc.) 1200 60-70 materials 1.5 kg 1400 50-60 1200... -
Page 20: Maintenance And Cleaning
Maintenance and Cleaning Before any maintenance or cleaning is carried out you must DISCONNECT the appliance from the electricity supply. Descaling The water we use normally contains lime. It is a good idea to periodically use a water softening powder in the C0068 machine. -
Page 21: Cleaning The Water Inlet Filter
Clean the filter using a hard bristle brush. • When no more water comes out, unscrew the pump Tighten up the inlet hose. cover and remove it. Always keep a rag nearby to dry up spillage of water when removing the cover. P1090 P1096 The dangers of freezing... -
Page 22: Something Not Working
Something Not Working Certain problems are due to lack of simple maintenance or oversights, which can be solved easily without calling out an engineer. Before contacting your local Service Force Centre, please carry out the checks listed below. IMPORTANT: if you call out an engineer to a fault listed below, or to repair a fault caused by incorrect use or installation, a charge will be made even if the appliance is under guarantee. -
Page 23: Service And Spare Parts
For Customer Service in Ireland please contact us at the guarantee service calls. address below: Zanussi Electrolux Electrolux Group (Irl) Ltd Long Mile Road Dublin 12 Republic of Ireland Tel: +353 (0)1 4090751 Mod... -
Page 24: Guarantee Conditions
Standard guarantee conditions Appliances found to be in use within a commercial environment, plus those which are subject to rental We, Zanussi Electrolux, undertake that if, within 12 agreements. months of the date of the purchase, this ZANUSSI Products of Zanussi Electrolux manufacture which ELECTROLUX appliance or any part thereof is proved are NOT marketed by Zanussi Electrolux. -
Page 25: Installation Instructions
Installation Instructions It is dangerous to alter the specifications or attempt to modify this product in any way. Care must be taken to ensure that the appliance does not stand on the electrical supply cable. Any electrical work required to install this appliance should be carried out by a qualified electrician or competent person. -
Page 26: Unpacking
Fill all the holes with the plastic plugs supplied with the Unpacking instruction booklet. All transit bolts and packing must be removed before using the appliance. You are advised to keep all the packaging for re-use in case the machine is to be transported again. Using a spanner unscrew and remove the two rear bottom screws. -
Page 27: Water Inlet
Water inlet Connect the hose supplied with the machine to a tap with a 3/4” thread. Do not use already employed hoses. “U” piece supplied P1199 Place the drain hose into your standpipe, which should have an internal diameter of approximately 38mm thus ensuring there is an air break between the drain hose and standpipe. -
Page 28: Levelling
2. Onto a sink outlet spigot. Some vibration is inevitable, especially if mounted on a wooden floor. Sprung wooden floors are particularly If the outlet spigot has not been used before, remove susceptible to vibration. For advice, consult a builder. If any blanking plug that may be in place. -
Page 29: Electrical Connection
Electrical connection The wire coloured brown must be connected to the terminal marked «L» or coloured red. Any electrical work required to install this appliance Upon completion there must be no cut, or stray strands should be carried out by a qualified electrician or of wire present and the cord clamp must be secure over competent person. - Page 30 From the Electrolux Group. The world’s No. 1 choice The Electrolux Group is the world's largest producer of powered appliances for kitchen, cleaning and outdoor use. More than 55 million Electrolux Group products (such as refrigerators, cookers, washing machines, vacuum cleaners, chain saws and lawn mowers) are sold each year to a value of approx.
- Page 31 This file has been downloaded from: www.UsersManualGuide.com User Manual and User Guide for many equipments like mobile phones, photo cameras, monther board, monitors, software, tv, dvd, and othes.. Manual users, user manuals, user guide manual, owners manual, instruction manual, manual owner, manual owner's, manual guide, manual operation, operating manual, user's manual, operating instructions, manual operators, manual operator, manual product, documentation manual, user maintenance, brochure, user reference, pdf manual...