Table of Contents
Advertisement
Quick Links
Installation
&
Maintenance
Manual
INVERTER-DRIVEN
MULTI-SPLIT SYSTEM
HEAT PUMP
AIR CONDITIONERS
- SET-FREE FSN -
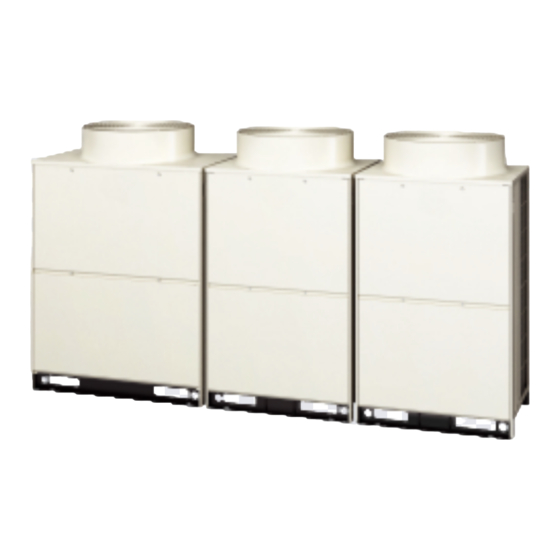
Models:
Outdoor Units;
RAS-34FSN
RAS-36FSN
RAS-38FSN
RAS-40FSN
RAS-42FSN
IMPORTANT:
READ AND UNDERSTAND
THIS MANUAL BEFORE
USING THIS HEAT-PUMP
AIR CONDITIONER.
KEEP THIS MANUAL FOR
FUTURE REFERENCE.
SET-FREE
P5414034
Advertisement
Table of Contents

Related Manuals for Hitachi RAS-34FSN


Summary of Contents for Hitachi RAS-34FSN
- Page 1 Installation & Maintenance Manual INVERTER-DRIVEN MULTI-SPLIT SYSTEM HEAT PUMP AIR CONDITIONERS - SET-FREE FSN - Models: Outdoor Units; RAS-34FSN RAS-36FSN RAS-38FSN RAS-40FSN RAS-42FSN IMPORTANT: READ AND UNDERSTAND THIS MANUAL BEFORE USING THIS HEAT-PUMP AIR CONDITIONER. KEEP THIS MANUAL FOR FUTURE REFERENCE.
- Page 2 IMPORTANT NOTICE G HITACHI pursues a policy of continuing improvement in design and performance of products. The right is therefore reserved to vary specifications without notice. G HITACHI cannot anticipate every possible circumstance that might involve a potential hazard. G This heat pump air conditioner is designed for standard air conditioning only. Do not use this heat pump air conditioner for other purposes such as drying clothes, refrigerating foods or for any other cooling or heating process.
- Page 3 Therefore, the utilization of the unit other than those indicated in these instructions is not recommended. Please contact your local agent, as the occasion arises. HITACHI’s liability shall not cover defects arising from the alteration performed by a customer without HITACHI’s consent in a written form.
-
Page 4: Table Of Contents
TABLE OF CONTENTS 1. Safety Summary ........................1 2. Structure ........................... 2 Outdoor Unit & Refrigerant Cycle ..................2 Necessary Tools and Instrument List for Installation ............2 3. Transportation and Handling ....................3 Combination of Indoor Unit and Outdoor Unit ..............3 Transportation ......................... -
Page 5: Safety Summary
1. Safety Summary G Use refrigerant R410A in the refrigerant cycle. Do not charge oxygen, acetylene or other flammable and poisonous gases into the refrigerant cycle when performing a leakage test or an air-tight test. These types of gases are extremely dangerous and can cause an explosion. -
Page 6: Structure
2. Structure Outdoor Unit & Refrigerant Cycle Regarding structure drawings and refrigerant cycle diagram, please refer to Technical Catalogue II. Necessary Tools and Instrument List for Installation Tool Tool Tool Tool Handsaw Copper Pipe Bender Spanner Leveller Phillips Clamper for Solder- Manual Water Pump Charging Cylinder Screwdriver... -
Page 7: Transportation And Handling
(2) Hanging Method The following indoor units can be combined Hang the unit under packing condition with with the HITACHI SET-FREE FSN outdoor unit. four (4) wire ropes. Push through the wire ropes into the hang hole and clamp the Table 3.1 Indoor Unit Type List... -
Page 8: Outdoor Unit Installation
4. Outdoor Unit Installation Factory-Supplied Accessories • When there are obstacles above the unit, the four (front, rear, right and left) sides of the unit Check to ensure that the following accessories shall be open in principle. are packed with the outdoor unit. •... -
Page 9: Foundation
(3) Install the outdoor unit in the front-rear and (mm) right-left direction horizontally. Min. 300 Check to ensure that the gradient in four directions (front, rear, right and left) is within 10mm. Min. 10 Min. 20 Min. 10 Min. 600 to 900 Front Side (1) Provide a open space above the unit. -
Page 10: Refrigerant Piping Work
G Use refrigerant R410A in the refrigerant refrigerant piping work. cycle. G For connecting φ31.75 pipe to RAS-34FSN Do not charge oxygen, acetylene or other flammable and poisonous gases into the unit, cut off the section which is used for refrigerant cycle when performing a leakage connecting with the longer pipe size. - Page 11 Thickness Material Thickness Material Outdoor Unit Models Gas Piping Liquid Piping φ6.35 O material O material φ31.75 (1-1/4) φ19.05 (3/4) RAS-34FSN φ9.53 O material O material φ38.1 (1-1/2) φ19.05 (3/4) RAS-36FSN φ12.7 O material O material φ38.1 (1-1/2) φ19.05 (3/4) RAS-38FSN φ15.88...
-
Page 12: Piping Connection
3. Make a drain hole at the lowest part of the conduit. Pipe Cable 159 ( Refrigerant Gas Piping Connection) (mm) 171 ( Refrigerant Liquid Model Piping Connection) RAS-34FSN 31.75 19.05 RAS-36FSN 38.1 19.05 RAS-38FSN 38.1 19.05 RAS-40FSN 38.1 19.05... - Page 13 • When tightening the flare nut, use two (4) Check for any gas leakage at the flare nut spanners. connections, or brazed parts by gas leakage tester or by use of a foaming Do not apply the double agent. spanner work here. Refrigerant leakage shall occur.
-
Page 14: Stop Valve
Stop Valve Operation of the stop valve should be performed G An excess or a shortage of refrigerant is the according to the following Table 5.4. main cause of trouble to the units. Charge the correct refrigerant quantity as Hexagonal Wrench Ref. -
Page 15: Additional Refrigerant Charge Calculation
Outdoor Unit Outdoor Unit Example Additional Charge W Total = 14.45 (kg) Ref. Charge (kg) Pipe Diameter Total Piping Length Additional Charge (kg) RAS-34FSN 28.5 φ22.2 ..x 0.390 = RAS-36FSN 31.0 φ19.05 ... x 0.280 = φ15.88 ... x 0.190 = RAS-38FSN 31.0... -
Page 16: Refrigerant Piping Work
Refrigerant Piping Work Table 5.6 Piping System < Outdoor Unit to First Branch > Gas/Liquid (φmm) Outdoor Unit Capacity Equivalent Piping Length < 100m Equivalent Piping Length ≥ 100m 34HP 31.75/19.05 38.1/22.2 36 to 42HP 38.1/19.05 38.1/22.2 < Multi-kit to Indoor Unit > Pipe Size Gas/Liquid Max. - Page 17 G Special Attention Regarding Refrigerant Gas Leakage Pay an attention to the critical gas concentration to avoid accidental refrigerant gas leakage before installing air conditioning systems. Totally Charged Refrigerant Quantity in System (kg) ≤ Critical Concentration (kg/m Room Space for each Indoor Unit (m 0.3 kg/m In the case that the calculated critical concentration is bigger than 0.3kg/m , take the following actions.
-
Page 18: Multi-Kit
Multi-Kit Table 5.7 Multi-Kit for Line Branch (1/2) Multi-Kit E-102SN ID 22.2 ID 12.7 ID 19.05 ID 15.88 ID 15.88 Line φ25.4 ID 19.05 φ19.05 ID 22.2 ID 15.88 φ22.2 ID 12.7 Q'ty: 2 φ12.7 ID 9.53 ID 9.53 Liquid φ9.53 ID 6.35 Line... - Page 19 Table 5.8 Multi-Kit for Line Branch (2/2) Multi-Kit E-242SN ID 25.4 φ22.2 ID 28.6 ID 25.4 ID 15.88 OD 28.6 φ25.4 ID 28.6 φ22.2 Line ID 12.7 ID 22.2 ID 25.4 ID 19.05 ID 19.05 ID 22.2 ID 15.88 ID 12.7 φ25.4 ID 9.53 ID 12.7...
- Page 20 Table 5.9 Multi-Kit for Header Branch Multi-Kit E-84HSN Q'ty: 2 ID 19.05 ID 15.88 φ19.05 ID 15.88 φ12.7 φ15.88 Line OD 12.7 ID 12.7 Q'ty: 2 ID 15.88 ID 12.7 OD 12.7 φ9.53 φ19.05 Q'ty: 7 ID 9.53 φ9.53 φ6.35 φ9.53 Liquid OD 6.35...
-
Page 21: Electrical Wiring
Electrical Wiring G Turn OFF the main power switch to the indoor unit and the outdoor unit and wait for Earth more than 3 minutes before electrical wiring Cord Clamp work or a periodical check is performed. (Fixed on Valve Stay) Electrical G Check to ensure that the indoor fan and the Connection Hole of Operation... -
Page 22: Electrical Wiring Connection
Electrical Wiring Connection 6.2.1 For Outdoor Unit 6.2.2 Electrical Wiring Between Indoor Unit and Outdoor Unit The electrical wiring connection for the outdoor unit is shown in Fig. 6.1 Connect the electrical wires between the indoor (1) Connect the power supply wires to L1, L2, unit and the outdoor unit, as shown in Fig. - Page 23 Max. 1 Outdoor Unit / Power Supply Line No. 0 System No. 1 System No. 3 System Outdoor Unit Outdoor Unit Outdoor Unit L1 L2 L3 N L1 L2 L3 N L1 L2 L3 N Operating Line (Shielded Twist Pair Cable) DC5V (Non-Pole Transmission H-LINK System) Distribution Box or Pull Box *2 Distribution Box or Pull Box *2...
- Page 24 3) The wire sizes marked with *2 in the table of this page are selected at the maximum current of the unit according to the wire, MLFC (Flame Retardant Polyflex Wire) manufactured by Hitachi Cable Ltd., Japan. 4) Use a shielded cable for the transmitting circuit and connect it to ground.
-
Page 25: Dip Switch Setting Of Outdoor Unit
And write the number in the space right. DSW1 Ref. Cycle No. Setting DSW2 Capacity Setting Setting is required. No setting is required. When wiring connections are H-Link, setting is needed. Model RAS-34FSN RAS-36FSN RAS-38FSN RAS-40FSN RAS-42FSN Setting 1 2 3 4 Position Unit No.0 Setting Condition... - Page 26 • Setting for Transmitting It is required to set the refrigerant cycle Nos. and end terminal resistance for this H-link system. • Setting of Refrigerant Cycle No. In the same refrigerant cycle, set the same refrigerant cycle No. for the outdoor unit and the indoor units as shown below.
- Page 27 • Indoor Unit Quantity Smaller than 16 (including 16) Outdoor Units Central Station, PSC-5C, CS-NET Set Dip SW to the same Refrigerant Cycle No. Indoor Units Remote Control Switch NOTE: Refrigerant System setting is available on the following dip switches. Outdoor Unit: DSW1 Indoor Unit:...
- Page 28 • Function Setting Turn OFF all power source before setting. SLo Defrost Not Available Start Setting PSW1 Available Turn ON DSW4 - No.4 Turn ON DSW5 - No.8 Cancellation of Outdoor Not Available Hot-Start PSW1 Limit. The next indication is shown by pressing PSW. PSW2: Available PSW3:...
- Page 29 • Selection of Input Signal Setting Table SEG1 Input Output Fixing Heating Mode Operation Signal Turn OFF all power source before setting. Fixing Cooling Mode Alarm Signal Start Demand Comp. ON Signal Outdoor Fan Run Defrost Signal Forced Stoppage Turn ON DSW4 - No.4 Demand (Current Limit 60%) Turn ON DSW5 - No.7 Demand (Current Limit 70%)
-
Page 30: Test Run
Test Run Test run should be performed according to the Table 7.2. And use the Table 7.1 for recording test run. G Do not operate the system until all the check (G) Check to ensure that the stop valves of points have been cleared. - Page 31 Caution for Insulation Resistance If total unit insulation resistance is lower than 1 megohm, the compressor insulation resistance may be low due to retained refrigerant in the compressor. This may occur if the unit has not been used for long periods. 1.
- Page 32 Table 7.1 Test Run and Maintenance Record MODEL: SERIAL. No. COMPRESSOR MFG. No. CUSTOMER'S NAME AND ADDRESS: DATE: 1. Is the rotation direction of the indoor fan correct? 2. Is the rotation direction of the outdoor fan correct? 3. Are there any abnormal compressor sounds? 4.
- Page 33 Table 7.2 Checking of Wire Connection by Test Run (1) Turn ON the power source of the indoor and outdoor units. Counting Number of (2) Set the TEST RUN mode by the remote control switch. Connected Units SET TEMP. HIGH COOL Depress the "MODE"...
- Page 34 Table 7.3 Alarm Code Code Category Content of Abnormality Leading Cause Failure of Fan Motor, Drain Discharge, Indoor Unit Tripping of Protection Device PCB, Relay. Failure of Compressor, Refrigerant Outdoor Unit Tripping of Protection Device Quantity, Inverse Phase. Abnormality between Indoor and Incorrect Wiring.
-
Page 35: Safety And Control Device Setting
(2) Oil Heater: This band type heater protects against oil foaming during cold starting, as it is energized while the compressor is stopped. RAS-34FSN RAS-40FSN Model RAS-36FSN RAS-42FSN RAS-38FSN... - Page 36 P5414034, 2006 Printed in Japan...