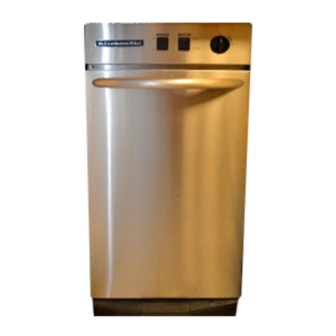
Table of Contents
Advertisement
TABLEOF
CONTENTS
Compactor Safety ..........................................................
3
................................................
4
How Your Compactor Works ........................................
4
Parts and Features ..........................................................
5
............................................
6
Space Requirements ....................................................
6
Unpacking Your Compactor ..........................................
7
Installation .................. 7
Adjusting the Toe Plate ..................................................
9
Changing
the Decorative Panel ....................................
g
Panel ..................................
9
................................................
10
Using the Charcoal Air Filter ........................................
10
............................................
11
Using Solid (Locked) Cycle ........................................
11
Removing a Filled Bag ................................................
12
Installing a New Bag ....................................................
12
..........................................
13
Changing the Charcoal Air Filter ................................ 13
..........................................
13
............................................................
14
Assistance or Service ..................................................
15
Warranty ........................................................................
16
Advertisement
Table of Contents

Summary of Contents for KitchenAid KCCC151EBL1
-
Page 1: Table Of Contents
TABLEOF CONTENTS Compactor Safety ............Electrical Requirements ..........How Your Compactor Works ........Parts and Features ............Installing Your Compactor ..........Space Requirements ............ Unpacking Your Compactor .......... Freestanding and Undercounter Installation ....7 Adjusting the Toe Plate ..........Changing the Decorative Panel ........ -
Page 2: Compactorsafety
COMPACTORSAFETY safety safety important. Your and the of others is very We have provided many important safety messages in this manual and on your appliance. Always read and obey all safety messages. This symbol alerts you to hazards that can kill or hurt you and others. All safety messages will be preceded by the safety alert symbol and the word "DANGER"... -
Page 3: Electrical Requirements
_,_L_,d_ :_',_ C The compacting ram is the part of the compactor which compresses the trash. The compacting ram does not go to the bottom of the drawer. You will not see compact- ing of trash the first few times you load the compactor. NOTE: The compactor drawer should be about 1/2 full before the compactor can begin to compress the load. -
Page 4: Parts And Features
PARTS AND FEATURES 9. Drawer monitor switch 5. Wraparound panel 1. Key-knob start switch 2. Charcoal air filter switch 10. Bag retainer buttons 6. Touch-toe bar drawer opener 3. Drawer handle 7. Compact switch 11. Bag carrier handle 4. Model and serial number 8. -
Page 5: Installing Your Compactor
Cutout dimensions INSTALLING YOUR leGc_°cU_r_doedle COMPACTOR from eiwthle.r " side IMPORTANT: 34¼"min. (87 cm) Installer: Leave Use and Care Guide with the homeowner. Homeowner: Keep Use and Care Guide for future reference and for local electrical inspector's use, if required. 18"... -
Page 6: Unpacking Your Compactor
Freestanding and Undercounter Installation NOTE: Proper installation is your responsibility. Make sure you have everything necessary for correct installa- tion. It is the personal responsibility and obligation of the customer to contact a qualified installer to assure that electrical installation meets all national and local codes IMPORTANT: and ordinances. - Page 7 Undercounter installation: countertop NOTE: Installation hardware is not provided with full cabinet models. 1. Measure the height of your cabinet opening. The top of the compactor should be at least _" (3 mm) from the top of the cabinet opening. The rear wheels are preset for a cabinet opening height of 341/4"(87 cm) (Position "A").
-
Page 8: Adjusting The Toe Plate
"Cleaning Inside the Cabinet" section.) Trim for custom front panel Order trim for installation of a custom front panel through your KitchenAid dealer or by calling the KitchenAid Consumer Assistance Center at 1-800-422-1230. The color panel on the front of your compactor's drawer Canada, call 1-800-461-5681. -
Page 9: Using Your Compactor
To use the filter USING YOUR 1. Set the Charcoal Air Filter switch to ON. The Air Filter indicator lights up. The fan creates air movement in the compactor for odor removal. COMPACTOR NOTE: The Charcoal Air Filter works even when the Key-Knob is in the OFF position. -
Page 10: Starting Your Compactor
ked} " The Solid (locked) cycle extends the use of a bag by 1. Set Compact switch to NORMAL putting constant pressure on the trash to keep it from (ADD TRASH). springing back. Regular use of the Solid (locked) cycle can increase bag capacity up to 25%. -
Page 11: Removing A Filled Bag
Removing a filled bag: Order replacement compactor bags through your local 1. Pull the drawer completely open. KitchenAid dealer or by calling the KitchenAid Consumer 2. Remove top of bag from retainer buttons. Pull up all Assistance Center at 1-800-422-1230. -
Page 12: Caring For Your Compactor
To order replacement charcoal filters (part number 7. Press the lever-action lock (or Side-Lock latch) down 4151750), call the KitchenAid Consumer Assistance while pressing the side to the upright position. Center at 1-800-422-1230. In Canada, call 8. -
Page 13: Troubleshooting
3. Note the tracks in which the drawer rollers move. TROUBLE- SHOOTING First try the solutions suggested here and possibly save the cost of a service call. Your compactor won't operate. 4. Lift the front to clear the drawer stops. •... -
Page 14: Assistance Or Service
To locate factory specified parts in your area, call our Consumer Assistance Center telephone number or your nearest designated service center. 3. For further assistance... You can write to KitchenAid with any questions or concerns at: Consumer Assistance Center KitchenAid... -
Page 15: Warranty
WILL PAY FOR: ONE-YEAR FULL Replacement parts and repair labor to correct defects in materials or workmanship. WARRANTY Service must be provided by an designated KitchenAid servicing outlet. FROM DATE OF PURCHASE KITCHENAID WILL NOT PAY FOR: A. Service calls to: 1.


