Table of Contents
Advertisement
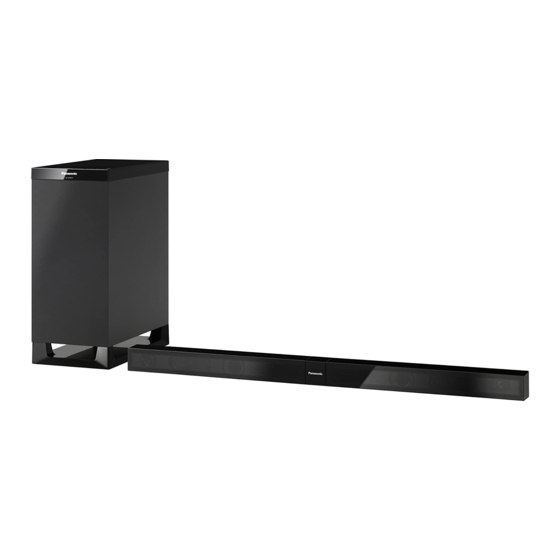
Operating Instructions
Home Theater Audio System
SC-HTB15
Model No.
Dear customer
Thank you for purchasing this product.
For optimum performance and safety, please read these instructions carefully.
Before connecting, operating or adjusting this product, please read the instructions completely.
Please keep this manual for future reference.
Model number suffix "EB" denotes UK model.
EB
EG GN GS
VQT3R83
Advertisement
Table of Contents

Related Manuals for Panasonic SC-HTB15


Summary of Contents for Panasonic SC-HTB15
-
Page 1: Operating Instructions
Operating Instructions Home Theater Audio System SC-HTB15 Model No. Dear customer Thank you for purchasing this product. For optimum performance and safety, please read these instructions carefully. Before connecting, operating or adjusting this product, please read the instructions completely. Please keep this manual for future reference. -
Page 2: Safety Precautions
Safety precautions WARNING CAUTION Unit Unit ≥ To reduce the risk of fire, electric shock or ≥ Do not place sources of naked flames, such as product damage, lighted candles, on this unit. jDo not expose this unit to rain, moisture, ≥... -
Page 3: Caution For Ac Mains Lead
Caution for AC Mains Lead WARNING: DO NOT CONNECT EITHER WIRE (For the United Kingdom and Ireland) TO THE EARTH TERMINAL WHICH IS MARKED For your safety, please read the following text WITH THE LETTER E, BY THE EARTH SYMBOL Ó... -
Page 4: Table Of Contents
Table of Contents Safety precautions ....................2 Caution for AC Mains Lead ................3 Before use Accessories ......................5 Unit care ....................... 5 Control reference guide ..................6 Active subwoofer ........................6 Remote control ........................7 Getting started Step 1 Selecting the placement method ............8 Speaker system ........................ -
Page 5: Accessories
≥ The illustrations shown may differ from your unit. ≥ These operation instructions are applicable to model SC-HTB15 for variety of regions. Unless otherwise indicated, illustrations in these Operating Instructions are of the model for the United Kingdom and Ireland. -
Page 6: Control Reference Guide
Control reference guide Active subwoofer (For South East Asia and the Middle East) 110-127V• •220-240V VOLT ADJ Active subwoofer Active subwoofer (front) (rear) Standby/on switch (Í/I) Audio format indicators § Press to switch the unit from on to standby C Dolby Digital indicator mode or vice versa. -
Page 7: Remote Control
Remote control Remove the insulation sheet A before using. ∫ To replace a button-type battery 1 While pressing the stopper B, pull out the battery holder. 2 Set the button-type battery with its (i) mark facing upward and then put the battery Turn the system on or off ( Select the input source ( holder back in place. -
Page 8: Step 1 Selecting The Placement Method
Step 1 Selecting the placement method ≥ These are examples of placement methods. When placing the speakers on a wall Place the speakers horizontally Page 10 Place the speakers vertically Page 12 When placing the speakers on a table Place the speakers using the stands Page 13 Place the speakers using... -
Page 9: Speaker System
Caution ≥ The active subwoofer and supplied speakers are to be used only as indicated in these instructions. Failure to do so may lead to damage to the amplifier and/or the speakers, and may result in the risk of fire. Consult a qualified service person if damage has occurred or if you experience a sudden change in performance. -
Page 10: Step 2 Assembling The Speakers
Step 2 Assembling the speakers When placing the speakers on a wall Place the speakers horizontally ∏ 1 Speaker (L) ∏ 1 Speaker (R) ∏ 2 Speaker cables (L): WHITE (R): RED ∏ 1 Speaker joint ∏ 4 Screws A (Large) ≥... -
Page 11: Connect The Speaker Cables
Connect the speaker cables. ≥ To make sure that the speaker cable is connected to the correct speaker, match the colour of the speaker connector with the colour of the L/R indicator on the speaker label so as not to connect the speaker cable to the wrong speaker. ≥... -
Page 12: Place The Speakers Vertically
Place the speakers vertically ∏ 1 Speaker (L) ∏ 1 Speaker (R) ∏ 2 Speaker cables (L): WHITE (R): RED ≥ For a safety measure to prevent the speakers from falling, refer to page 16. ≥ To prevent damage or scratches, lay down a soft cloth and perform the assembly on it. Connect the speaker cables. -
Page 13: When Placing The Speakers On A Table
When placing the speakers on a table Place the speakers using the stands ∏ 1 Speaker (L) ∏ 1 Speaker (R) ∏ 2 Speaker cables (L): WHITE (R): RED ∏ 1 Speaker joint ∏ 2 Stands ∏ 6 Screws A (Large) ≥... -
Page 14: Place The Speakers Using
Place the speakers using the speaker feet ∏ 1 Speaker (L) ∏ 1 Speaker (R) ∏ 2 Speaker cables (L): WHITE (R): RED ∏ 1 Speaker joint ∏ 4 Screws A ∏ 3 Speaker feet (Large) ≥ For a safety measure to prevent the speakers from falling, refer to page 16. ≥... -
Page 15: Place The Speakers Using The Base Stands
Place the speakers using the base stands ∏ 1 Speaker (L) ∏ 1 Speaker (R) ∏ 2 Speaker cables (L): WHITE (R): RED ∏ 2 Bases ∏ 2 Screws B (Small) ≥ For a safety measure to prevent the speakers from falling, refer to page 16. ≥... -
Page 16: Speaker Fall Prevention Measures
Connect the speaker cables. ≥ Insert the wire fully, taking care not to insert beyond the wire insulation. Insert the Pull the cable wire fully. straight along r: White the line and s: Blue line slide into the groove. ≥ Be sure to place the cable under the projecting part. - Page 17 When placing the speakers on a table Horizontal placement Vertical placement A Cord (not supplied) C Wall B Screw eye (not supplied) D Approx. 150 mm ≥ Depending on the placement of the speakers, the screwing position of the screw eye may differ.
-
Page 18: Step 3 Connections
The HDMI connection supports VIERA Link “HDAVI Control” ( 24) when used with a compatible Panasonic TV. ≥ Use High Speed HDMI Cables that have the HDMI logo (as shown on the cover). It is recommended that you use Panasonic’s HDMI cable. - Page 19 Not labelled “HDMI (ARC)” HDMI IN OPTICAL OUT Active subwoofer A HDMI cable (not supplied) B Optical digital audio cable (not supplied) VQT3R83...
-
Page 20: Connection With Hdmi Compatible Devices
Connection with HDMI compatible devices You can output the audio signal from the connected HDMI compatible Blu-ray Disc player, DVD player, etc. with this system and pass the signal through to your TV. ≥When connecting other external device such as a set top box, refer to the operating instructions for the Preparation ≥... -
Page 21: Speaker Cable Connection
Speaker cable connection Connect to the terminals of the same colour. A RED Front speaker (Rch) B WHITE Front speaker (Lch) Active subwoofer AC mains lead connection ≥ Connect only after all other connections are complete. (For South East Asia and the Middle East) Before connecting the AC mains lead Set the voltage. -
Page 22: Using This Unit
(Refer to page 25 to turn this function off.) ≥ The volume may be displayed on the TV if the active subwoofer is connected to a Panasonic TV capable of ≥ To cancel, press the button again or adjust the displaying this system’s volume setting. -
Page 23: 3D Sound
Speaker applied to Multi- 5.1ch. channel audio 2 Adding to the Dolby Virtual sources. Speaker effect, Panasonic has The effects are not applied its own sound field applied to 2 channel controlling technology to expand audio sources. 3D surround... -
Page 24: Linked Operations With The Tv (Viera Link "Hdavi Control Tm ")
VIERA Link “HDAVI Control” is a convenient function that offers linked operations of this To make sure that the audio is output from this system, and a Panasonic TV (VIERA) under system, select home cinema speaker from the “HDAVI Control”. -
Page 25: Advanced Operations
( ∫ Remote control code 1 Press and hold [MUTE] on the remote control When other Panasonic devices respond to this and [s VOL] on the active subwoofer for more system’s remote control, change the remote control than 2 sec. -
Page 26: Troubleshooting
Troubleshooting HDMI Before requesting service, make the following This system does not operate correctly. checks. If you are in doubt about some of the check If the HDMI cable is connected to the wrong points, or if the solutions indicated in the following terminal (HDMI IN or HDMI OUT), this system will guide do not solve the problem, consult your dealer not operate correctly. - Page 27 ( 18, 19) automatically lower the volume to the middle (50) ≥ If this system is connected to a Panasonic TV and turned on using the button on the active when this system is turned on. ( subwoofer or the remote control, sound might not be output from this system.
-
Page 28: Indicator Illumination
Indicator illumination The indicators display the condition of this system by flashing. The indicator patterns illustrated below are displayed during normal operational conditions. They do not refer to the indications of a problem. Refer to “Troubleshooting” ( 26) if the indicators do not light as illustrated below. Indicator Description The indicators blink from left to right (i) or from right to left (s). -
Page 29: Specifications
Specifications AMPLIFIER SECTION FRONT SPEAKER SECTION RMS output power 10 % total harmonic distortion 2 way, 2 speaker system (Bass reflex type) Subwoofer ch 120 W per channel (100 Hz, 3 ≠) Woofer 3.5 cmk10 cm cone typek1 Front ch (L, R ch) Tweeter 2.5 cm semi dome typek1 60 W per channel (1 kHz, 6 ≠) -
Page 30: Licenses
DTS, Inc. Product includes software. © DTS, Inc. All Rights Reserved. HDMI, the HDMI Logo, and High-Definition Multimedia Interface are trademarks or registered trademarks of HDMI Licensing LLC in the United States and other countries. HDAVI Control™ is a trademark of Panasonic Corporation. VQT3R83... - Page 31 Safety information for customers in Finland and Norway NORSK SUOMI ADVARSEL VAROITUS Produkt Laite ≥ For å redusere faren for brann, elektrisk støt eller ≥ Tulipalo-, sähköisku- tai vahinkovaaran skade på apparatet: välttämiseksi, jUtsett ikke produktet for regn, fukt, drypping jÄlä...
- Page 32 ≥ Or go on line through our Internet Accessory ordering application at www.pas-europe.com. ≥ Most major credit and debit cards accepted. ≥ All enquiries transactions and distribution facilities are provided directly by Panasonic UK. ≥ It couldn’t be simpler! ≥ Also available through our Internet is direct shopping for a wide range of finished products, take a browse on our website for further details.