
Related Manuals for Sharp Oven R-2398


Summary of Contents for Sharp Oven R-2398
-
Page 1: Table Of Contents
COMMERCIAL MICROWAVE OVEN R-2398 MODEL OPERATION MANUAL AND COOKING GUIDE CONTENTS Page Warning Special Notes Installation Instructions Oven Diagram Operation of Touch Control Panel Before Operating Volume and Sound Setting Stop/Clear Memory Operation Memory Programme Entry Cooking with Memory Cooking Double Quantity with Memory Memory Check Manual Operation... -
Page 2: Warning
Do not operate the oven if it is not working correctly or damaged until it has been repaired by a qualified service technician trained by SHARP. It is particularly important that the oven door closes properly and that there is no damage to: (1) Door (warped), (2) Hinges and Latches (broken or loosened), (3) Door Seals, Sealing Surfaces and oven cavity (buckled or deformed), (4) Burn marks on the door seal faces. -
Page 3: Special Notes
SPECIAL NOTES DON’T Eggs, fruits, * Puncture egg yolks and whites and * Cook eggs in shells. This prevents nuts, seeds oysters before cooking to prevent "explosion", which may damage the vegetables, "explosion". oven or injure yourself. sausages and * Pierce skins of potatoes, apples, * Reheat whole eggs. -
Page 4: Installation Instructions
If there is any damage, please do not operate the oven until it has been checked by a SERVICE CENTRE APPROVED BY SHARP and repaired, if necessary. -
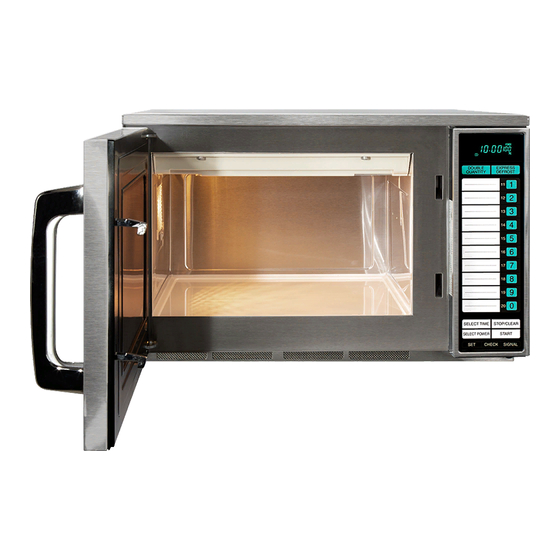
Page 5: Oven Diagram
OVEN DIAGRAM 9. Door hinges 1. Touch control panel 10. See through door 2. Door safety latches 11. Door handle 3. Splash cover 12. Access cover for oven lamp replace- 4. Ceramic shelf ment 5. Oven lamp 13. Ventilation openings 6. -
Page 6: Operation Of Touch Control Panel
OPERATION OF TOUCH CONTROL PANEL The operation of the oven is controlled by pressing the appropriate pads arranged on the surface of the control panel. An entry signal tone should be heard each time you press the control panel to make a correct entry. Before Operating •... -
Page 7: Memory Programme Entry
Memory Programme Entry You can change memory programmes for 20 memory banks. Your oven can be programmed for up to 3 cooking sequences and has 11 preset microwave power levels. COOKING TIME Cooking Microwave power level Cooking time that Sequence that can be used. - Page 8 TO PROGRAMME TIME AND POWER LEVEL INTO A MEMORY * Suppose you want to set 4 minutes at 60% at the 1st sequence and 2 minutes at 30% at the 2nd sequence for 1 serving in the memory 1. Step Pad Order Procedure Display...
-
Page 9: Cooking With Memory
Cooking with Memory * Suppose you want to cook by using memory 2, which was programmed for 10 seconds at 100%. Step Procedure Pad Order Display Press the NUMBER pad NUMBER POWER Cooking Double Quantity with Memory * Suppose you want to cook a double quantity using memory 2. Step Procedure Pad Order... -
Page 10: Memory Check
Memory Check You can check the information programmed into the memory. CHECKING TIME AND POWER LEVEL * Suppose you want to know the information programmed into the memory 1, programmed for 4 minutes at 60% at the 1st sequence and 2 minutes at 30% at the 2nd sequence. Step Display Procedure... -
Page 11: Manual Operation
MANUAL OPERATION Your oven can be programmed for up to 3 cooking sequences and has 11 preset microwave power levels. See page 6. Time Cooking * Suppose you want to cook for 2 minutes and 30 seconds at 50%. Step Procedure Pad Order Display... -
Page 12: Multiple Sequence Cooking
Multiple Sequence Cooking * Suppose you want to cook for 5 minutes at 70% followed by 3 minutes at 100% Step Procedure Pad Order Display The oven will display. Press the SELECT TIME pad. SELECT TIME After using the oven the dis- play will show the last pro- gramme. -
Page 13: Other Convenient Features
OTHER CONVENIENT FEATURES Express Defrost Use Express Defrost to defrost meat and poultry faster and better. Enter desired defrost time, refering to defrost chart. * Suppose you want to defrost for 3 minutes and 30 seconds. Step Procedure Pad Order Display Press the EXPRESS DEFROST pad. -
Page 14: Counter Check
Counter Check Set the counters to "0" before using your new oven (see COUNTER CLEAR below) to keep a record of the oven use. COUNTER CHECK * Suppose you want to know the total times the oven was used, and the number of times each programme was used. -
Page 15: Error Mode
Error Mode If ERROR messages are displayed, follow the below instructions. ERROR MESSAGES EE1 EE2 EE3 EE6 EE8 EE0 Please contact your dealer or an authorized service agent because the oven is EE10 EE16 malfunctioning. Exhaust air temperature is too high. Check that nothing is blocking the ventila- tion openings and air intake openings or that room temperature is too hot or that oven cavity is empty during operation. -
Page 16: Service Call Check
If “NO” is the answer to any of the above questions, please check your wall socket and the fuse in your meter box. If both the wall socket and the fuse are functioning properly, CONTACT YOUR NEAREST SERVICE CENTRE APPROVED BY SHARP. SPECIFICATIONS... -
Page 17: Helpful Hints
HELPFUL HINTS 1. THE ARRANGEMENT 2. TURNING Arrange foods carefully. Place thickest areas Foods such as poultry and joints of meat should be toward outside of dish. turned over after half the cooking time. 3. COVERING 4. PIERCING Cover foods in the microwave if you would nor- Pierce potatoes, eggs, tomatoes or any foods mally cover the food in your ordinary oven, or to with a skin or membrane to allow steam to... -
Page 18: Cookware And Utensil Guide
COOKWARE AND UTENSIL GUIDE Utensil Advice GLASSWARE/ GLASSWARE CERAMIC • Ordinary glass is not suitable for cooking but may be used for (HEAT RESISTANT) short periods for heating foods. CERAMIC • Most ovenproof china, and ceramics, are suited. • Avoid dishes that are decorated with gold or silver leaf. •... -
Page 19: Warranty
Sharp. Please retain your sales documentation, as this should be produced to validate a warranty claim. - Page 20 VISIT OUR WEBSITE AT www.sharp.net.au OR CALL SHARP CUSTOMER CARE 1300 135 022 (LOCAL CALL COSTS APPLY WITHIN AUSTRALIA) SHARP CORPORATION OF AUSTRALIA PTY LTD FOR LOCATION ENQUIRIES WITHIN NEW ZEALAND REGARDING YOUR LOCAL SHARP APPROVED SERVICE CENTRE VISIT OUR WEBSITE AT www.sharp.net.nz...
-
Page 21: Quick Reference Guide
To cancel counter check mode. CHECK CHECK (Total times used) (Times memory 1 was used) To clear the times of memory 1. Counter clear Memory Number To cancel counter clear mode. CHECK CHECK TINSEA 849 WRRZ-J01 SHARP CORPORATION Osaka Japan Printed in Japan...