Table of Contents
Advertisement
Advertisement
Table of Contents

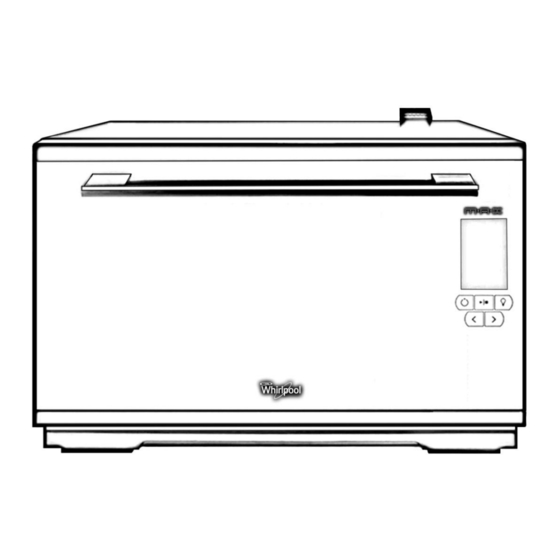
Summary of Contents for Whirlpool MAX-209S
- Page 1 MAX-209S Freestanding Combi Steamer Instruction Manual 座檯式蒸焗爐使用手冊...
- Page 2 重要安全資訊 本說明包含有關產品安全、使用、維護及保養的重要資訊,請仔細閱讀本說明書,並將本說明書存放於容 易提取的地方,以備將來查閱。 第一次使用前注意事項 此產品很重,需要兩個人或以上安裝或移動此產品,否則會造成身體傷害或產品損壞。 此產品只設計作家庭用途。請依照說明書內列明的煮食方法使用。切勿使用此產品作商業或其它用途。 確保家中使用的電壓與產品標籤上的電壓一致。 確保產品沒有損壞。如產品出現下列情況,請勿操作本產品: 例如電源線或插頭受損、產品無法正常操 作、產品受損或曾墜落,。 切勿把電源線或插頭浸入水中,並避免電源線接觸高溫的表面,以免發生觸電,火災或其他意外。 此座檯式蒸焗爐只設計作座檯式使用,不可以作嵌入式安裝。 此產品很重,必須將產品放置在堅固及平穩的表面。 確保爐的四周有足夠的通風空間,爐兩旁應與牆壁距離至少 5 厘米,爐背應與牆壁距離至少 10 厘米。 請勿阻擋或堵塞爐具的散熱通風口,以免對爐具造成損壞。 切勿在爐頂放置任何物件並與頂部壁櫃距離至少 20 厘米。 在使用爐具前, 以「消毒」模式進行 20 分鐘的消毒清潔。 生產商不承擔一切由於客戶不正確使用本產品以產生的問題。...
- Page 3 注意及建議事項 1. 不要於此爐/ 爐旁加熱或使用易燃物品,以免產生火警或爆炸。 2. 切勿使用本產品烘乾布料、紙張、香料、藥材、木材、花朵、生果或其他易燃的物件,否則可能會造成 火災。 3. 切勿過度烹調食物,否則可能引致火災。 4. 使用蒸焗爐時切勿離開,尤其當正在使用紙、塑膠或其他易燃材料的物件進行烹調。當用作為食物加熱 時,紙張可能會著火或燒焦,某些塑料則可能溶化。如發現有物件在蒸焗爐內或外被點燃或冒煙,請將 爐門關上並關掉蒸焗爐。同時拔掉電源線並將裝設有漏電斷路器的插座電源切斷。 5. 切勿在爐內使用腐蝕性化學品或氣體。此爐具專為加熱食物或烹煮食物而設計,並不適合工業或實驗用 途。 6. 此產品並非設計給身體,感官或精神上能力不足,或經驗及知識不足的人士使用(包括兒童),除非監 護其安全的負責人監督或指引其使用。 7. 當完成烹調並待蒸爐冷卻後,請抹走可能凝固於爐腔內的殘留物。爐腔頂部最容易出現燒焦情況,應將 爐腔頂部擦洗乾淨。為確保食物得到最佳烹調效果,請保持爐腔完全乾透。 8. 從蒸焗爐內提取食物及器皿時,應使用隔熱手套,以免燙傷。 9. 切勿將爐腔作存放物件之用。 10. 奶樽或嬰兒食物器皿中的食物或飲料加熱後,請務必在餵食前將食物或飲料加以攪拌,並檢查食物的 溫度,確保熱力分佈均勻,以避免燙傷或灼傷嬰兒。 11. 當使用「蒸焗模式烹調」模式或「熱風對流烹調」模式後,應等待 5-10 分鐘才進行其他烹調模式。...
- Page 4 12. 在使用「蒸焗模式烹調」模式或「熱風對流烹調」模式時,切勿用手觸摸爐門、爐窗及外框。 13. 請以自來水注入儲水箱,直至水位達到標註“MAX” (最高水位) 的位置。把儲水箱完整推進於凹位內, 確保固定到位。 14. 為確保衛生,並防止冷凝水在蒸爐內積聚,請於每次使用後清空水箱。 15. 烹調過程中儘量不要打開爐門,以免蒸氣流失,影響烹調效果。 16. 烹調過程中如需翻轉食物或因其它需要必須打開爐門時,請盡量不要靠近爐門 (特別是臉部) ,以免燙 傷。 17. 維修操作應該由專業人員進行。除專業人員外,任何維修操作均可能帶來危險。 18. 如發現爐門或爐門封邊損壞時,請停止使用產品並儘快聯絡惠而浦客顧服務部。 19. 產品操作時,可接觸部份的溫度可能較高,此時切勿讓兒童靠近。 20. 通電後,切勿用濕手或腳觸摸本產品、產品之電源線或插頭。 21. 切勿放置或懸掛任何物件於爐門或門上的把手柄, 以免影響門的開關及損壞門鉸。 22. 除清水外,切勿使用儲水箱盛載其他液體。...
- Page 5 操作指南 產品及配件結構圖 功能簡介 排氣口 用於排出爐腔內多餘的水蒸氣。 安全裝置 防止爐門未關上時蒸焗爐可以運作。 儲水箱 盛載清水以產生蒸氣。 層架 支撐用作烹調食物的托盤。 控制面板 用於操作蒸焗爐。 發熱管 產生熱能烹調食物。 排氣閥 排出爐腔內多餘的水蒸氣。 對流風扇 使熱量平均分佈在爐腔內。 進氣閥 讓蒸氣進入爐腔內。 水盤 盛載開門後流出的倒汗水 蒸盤(有疏氣孔) 主要用於「蒸煮模式」時使用。其疏孔的設計亦可用於其他煮食模 式。 如需進行多層煮食, 建議將此蒸盤放於較底層的位置,可使爐腔 內空氣更流通、讓爐腔溫度更平均。...
- Page 6 蒸焗盤(滴油盤) 主要用於「蒸焗模式」時使用,或於烹調肉類時放於底層,盛載煮 食中滴下來的油。 燒烤網架 主要用於「燒烤模式」或「蒸焗模式」時使用。 如需進行多層煮食, 建議將此蒸盤放於較底層的位置,可使爐腔 內空氣更流通、讓爐腔溫度更平均。 隔熱手套 由蒸焗爐拿出食物或托盤時使用。 海綿 用於清潔爐腔內的水蒸氣。...
- Page 7 操作面板 圖標 圖標說明 預校烹調時間 時間顯示 時鐘 / 響鬧 水位指示 溫度顯示 蒸煮模式 燒烤模式 熱風對流模式 蒸焗模式 消毒 保溫/發酵 解凍 兒童安全鎖...
- Page 8 按鍵 按鍵說明 功能介紹 功能鍵 1. 選擇不同的工作模式 2. 增加/減少烹調時間 3. 增加/減少烹調溫度 預校鍵 調節時間或選擇預校功能 爐燈鍵 控制爐燈的開關 確定/結束鍵 啟動烹調程式或取消正在進行的烹調程式 預校+爐燈鍵 手動啟動泵水,以作清潔 (先按爐燈鍵,再同時按住預校 鍵) 默認時間設置 默認溫度設置 時間選擇 溫度選擇 蒸煮模式 20 分鐘 100℃ 5 - 180 分鐘(3 小時) 50 - 110℃ 燒烤模式 20 分鐘 180℃ 5 - 180 分鐘(3 小時) 120 - 230℃...
- Page 9 豉汁蒸排骨(約 1 斤) 肉 蒸煮 100℃ 20 分鐘 牛油蛋糕(8 寸) 糕點 熱風對流 180℃ 25 分鐘 烤全雞 肉 熱風對流 180℃ 40 分鐘 原隻薯仔 蔬菜 燒烤 200℃ 25 分鐘 麵包(8 個) 麵包 熱風對流 180℃ 15 分鐘 梳乎厘(6 杯) 甜品 熱風對流 180℃ 15 分鐘 燒春雞...
- Page 10 操作說明 調校時間 例如:調校時間為 13 時 20 分。 操作步驟: 1. 在待機狀態下,按【 】鍵。 2. 小時雙位數值閃爍,按【>】鍵直到顯示 13:00。按【 】鍵確定。 3. 分鐘雙位數值閃爍,按【>】鍵直到顯示 13:20。按【 】鍵確定。 4. 成功調校時間。...
- Page 11 設定蒸煮模式 例如:設定蒸煮時間為 20 分鐘,溫度為 90°C 的程式。 操作步驟: 1. 在待機狀態下,按【+】鍵直到螢幕顯示此蒸煮模式圖示 。按【 】鍵確定。 2. 按【>】鍵直到顯示 00:20。按【 】鍵確定。 3. 按【>】鍵直到顯示烹調溫度為 90°C。按【 】鍵確定。 4. 確定水箱巳裝水;成功設定蒸煮模式。 設定燒烤模式 例如:設定燒烤時間為 30 分鐘,溫度為 150°C 的程式。 操作步驟: 1. 在待機狀態下,按【>】鍵直到螢幕顯示此燒烤模式 圖示。按【 】鍵確定。 2. 按【>】鍵直到顯示 30:00。按【 】鍵確定。 3. 按【>】鍵直到顯示烹調溫度為 150°C。按【 】鍵確定。 4.
- Page 12 設定熱風對流模式 例如:設定熱風對流烤焗時間為 35 分鐘,溫度為 190°C 的程式。 操作步驟: 在待機狀態下,按【>】鍵直到螢幕顯示此熱風對流烤焗模式 圖示。按【 】鍵確定。 按【>】鍵直到顯示 00:35。按【 】鍵確定。 按【>】鍵直到顯示烹調溫度為 190°C。按【 】鍵確定。 成功設定熱風對流烤焗模式。...
- Page 13 設定蒸焗模式 例如:設定蒸焗模式時間為 45 分鐘,溫度為 200°C 的程式。 操作步驟: 1. 在待機狀態下,按【>】鍵直到螢幕顯示此蒸焗模式 圖示。按【 】鍵確定。 2. 按【>】鍵直到顯示 00:45。按【 】鍵確定。 3. 按【>】鍵直到顯示烹調溫度為 200°C。按【 】鍵確定。 4. 成功設定蒸焗模式。 設定預校功能 例如:時間為 13 時 30 分。預校蒸煮時間為 40 分鐘,溫度為 100°C,結束時間為 15 時 10 分的程式。 操作步驟: 1. 在待機狀態下,按【>】鍵直到螢幕顯示此蒸煮功能 圖示。按【 】鍵確定。 2. 按【 】鍵一次。 3.
- Page 14 5. 設置烹調時間。按【>】鍵直到顯示 40:00。按【 】鍵確定。 6. 設置烹調結束時間。分鐘雙位數值閃爍,按【>】鍵直到顯示 15:00。按【 】鍵確定。 7. 分鐘雙位數值閃爍,按【>】鍵直到顯示 15:10。按【 】鍵確定。 8. 設定溫度。按【>】鍵直到顯示烹調溫度為 100°C。按【 】鍵確定。...
- Page 15 注意: 可以按【 】鍵一次,檢查預校功能結束時間。 ...
- Page 16 如要結束預校功能,按【 】鍵,然後按【 】鍵。 設定消毒功能 例如:對餐具進行消毒。 操作步驟: 1. 在待機狀態下,按【>】鍵直到螢幕顯示此消毒功能 圖示。按【 】鍵確定。 2. 按【 】鍵兩次,啟動此功能。 3. 成功設定消毒功能。...
- Page 17 設定解凍功能 例如:設置解凍時間為 15 分鐘的程式。 操作步驟: 1. 在待機狀態下,按【>】鍵直到螢幕顯示此解凍功能 圖示。按【 】鍵確定。 2. 按【>】鍵直到顯示 00:15。按【 】鍵確定。 3. 再按【 】鍵確定。 4. 成功設定解凍功能。 設定保溫功能 例如:保溫食物 50 分鐘。 操作步驟: 1. 在待機狀態下,按【>】鍵直到螢幕顯示此保溫功能 圖示。按【 】鍵確定。 2. 按【>】鍵直到顯示 00:50。按【 】鍵確定。 3. 成功設定保溫功能。...
- Page 18 設定兒童安全鎖功能 作用: 用來防止兒童在沒有成人指導的情況下使用蒸焗爐。 設置兒童安全鎖步驟: 1. 在待機狀態下,按【 】鍵 3 秒。 2. 當螢幕顯示此兒童安全鎖 圖示,蒸焗爐將不能操作。...
- Page 19 解除兒童安全鎖步驟: 1. 在待機狀態下,按【 】鍵 3 秒。 2. 螢幕顯示的兒童安全鎖 圖示消失,蒸焗爐則可以繼續操作。...
- Page 20 清潔和保養 清潔和保養說明 1. 在正常情況下,清潔產品是唯一所需的保養方法。 2. 蒸焗爐必須保持清潔,否則可能導致爐身受到腐蝕,縮短蒸焗爐的使用壽命,造成發生危險的可能。 3. 清洗蒸焗爐前,必須關掉電源。 4. 每次使用蒸焗爐後,必需進行清潔,尤其烹調過程曾溢出汁液後。 5. 切勿使用含金屬成份的清潔布、磨砂型潔具、鋼刷、表面粗糙的抹布,否則會對操作面板、蒸焗盤、蒸 焗爐內壁及爐身表面造成損害。應以沾有溫和洗潔精的海綿或軟布或染上玻璃清潔劑的廚房紙巾進行清 潔。每次使用後,確保爐腔(包括爐腔底部)是乾透。 6. 鹽份是具侵蝕性的物質,一旦積聚在爐腔內,將形成銹漬。一些帶酸性的醬汁,例如茄汁、芥末和醃製 食品含有氯和酸的化學成份。而該等成份會對鋼表面造成影響。 7. 切勿讓油脂及食物碎屑殘留於爐門及爐門封邊上。假如爐門封邊清潔處理不善,或會影響蒸爐操作時爐 門無法完全關上,繼而導致機前方及兩側部份損壞。 8. 每次使用後,清理蒸焗爐門底下的黑色水盤的積水,以防止積水滿瀉,濺濕及弄髒檯面。(黑色水盤是可 以拆下的。它會盛載每次蒸煮後玻璃門開門時滴下的倒汗水。) 9. 清理殘留在儲水箱未用完的水。 10. 每次使用後,打開爐門 10-15 分鐘,以風乾爐腔及門框。...
- Page 21 11. 如果爐腔非常骯髒,可於清潔前,先以「消毒」模式 (110°C) ,蒸煮 20 分鐘,以溶化油漬,待機身冷 卻後,始開始進行清潔。如遇上頑固的油漬,可重覆以上的步驟。切勿使用含金屬成份的清潔布、磨砂 型潔具、鋼刷、表面粗糙的抹布清潔。 12. 例行清潔,每月至少進行一次 (如經常使用,應增加清洗的頻率) i. 先以清水注滿水箱。 ii. 加入一些檸檬汁或少量食用醋 (約 10 毫升) ,把水箱完整推進到位。 iii. 關上爐門。 iv. 先按爐燈鍵,再同時按住預校鍵 (大約 25 秒,水會開始從爐腔內的蒸汽出口流出) 。 v. 如發現吐出的水有白色粉末(水垢)是正常的。 vi. 以隨機附送的海棉抹擦流出的水。 vii. 如爐腔非常骯髒,可再次注入清水,重覆步驟(iv) 。 13. 建議使用新鮮的自來水作烹調用。 14. 儲水箱必須每月至少檢查一次。如有需要,取出儲水箱,擦洗乾淨後再放回原處。 15. 若長時間不使用本產品時,應拔掉電源插頭,保持爐腔清潔,並將蒸焗爐放置在通風、乾燥及沒有腐蝕 性氣體的環境中。...
- Page 22 18. 每次使用後,應清潔和風乾爐腔 (包括爐腔頂部,左右兩側和底部)。如爐底有變黃的情況,可以使用不 銹鋼清潔劑去除污漬。(例如: Wpro 不銹鋼清潔劑)
- Page 23 層架與內隔熱罩拆卸 1. 順時針方向旋出固定在左、右層架的 4 顆螺母,分別取出左、右層架。 2. 順時針方向旋出固定在內隔熱罩的 4 顆螺絲,取出內隔熱罩。 3. 清洗層架和內隔熱罩。清洗後,重覆步驟 1 和 2 重新裝回層架和內隔熱罩。...
- Page 24 D. 故障排解 常見問題解答 如以下情況出現… 可能成因 解決方法 蒸焗爐沒有連接到電源 連接電源 1 顯示屏上顯示消失 電源線不能正常工作 與客戶服務部聯絡 電源插頭沒有插好 重新插好電源插頭 爐門沒有關好 重新關閉爐門 2 蒸焗爐不能操作 儲水箱沒有放置妥善 重新放回儲水箱 電路版損壞 與客戶服務部聯絡 兒童安全鎖被鎖住 解除兒童安全鎖 顯示屏損壞 3 顯示屏顯示異常 與客戶服務部聯絡 電路板損壞 爐門沒有關上 重新把爐門關上 4 烹調期間大量排出水或蒸氣 爐門封邊損壞 與客戶服務部聯絡 爐燈損壞 更換爐燈 5 爐燈不亮 主機電腦板損壞 與客戶服務部聯絡...
- Page 25 注水系統沒有密封好 沒有把儲水箱完整推進到位。 9 蒸焗爐漏水 錯誤代碼解說 代碼 代碼解釋 可能成因 啟動了爐腔高溫保護裝置 爐腔溫度超過安全設定 啟動了蒸盤高溫保護裝置 蒸盤溫度超過安全設定 啟動了爐腔低溫保護裝置 連續工作 3 分鐘而爐溫度低於 30°C 啟動了蒸盤低溫保護裝置 連續工作 3 分鐘而爐溫度低於 30°C 感測器連接發生故障 連接爐腔或蒸盤的感測器斷路 感測器感應發生故障 連接爐腔或蒸盤的感測器發生短路...
- Page 26 A. IMPORTANT SAFETY INFORMATION This manual contains important information regarding safety, the use and maintenance of your combi steamer. Read the manual and keep it in an easily accessible place for future consultation. PRECAUTIONS FOR FIRST USE Two or more people are required to install or move this appliance as it is heavy. Failure to do so can cause physical injuries or damage to the product.
- Page 27 PRECAUTIONS AND ADVICE Do not heat or use flammable materials in or near the appliance. Fumes can create a fire hazard or explosion. Do not use this appliance for drying cloth, paper, spices, herbs, wood, flowers, fruits or other flammable objects as it may cause fire.
- Page 28 17. It is dangerous to fix the appliance by anyone except professionally qualified person. 18. If the oven door or door’s sealing ring is damaged, please stop using the appliance and call Whirlpool customer service.
- Page 29 B. OPERATING INSTRUCTIONS CONSTRUCTURE OF APPLIANCE AND ACCESSORIES Function Air Exhaust Window To exhaust excess steam from the cavity. Safety Door Switch To unable the appliance from operating if the door is opened. Water Tank To be filled with water to generate steam. Shelves To support the trays during cooking.
- Page 30 Insulated Gloves To handle hot food or tray out of the oven. Sponge To clean the water in the cavity after using the oven.
- Page 31 CONTROL PANEL SIGNS FUNCTION Preset cooking time Time display Clock/ Alarm Water level display Temperature display Steam mode Grill mode Convection mode Convection + Steam mode Sterilization Keep warm/ proving Defrost Child Lock...
- Page 32 ICONS NAME FUNCTION Function Button 1. Select different working modes. 2. Increase and decrease time scale. 3. Increase and decrease temperature scale. Preset Button Use for adjusting clock time and select preset function. Lamp Button Use for controlling combi steamer lamp. Confirmation/ Stop Button Use for starting or cancelling programs.
- Page 33 Steam pork with black Meat Steam 20 Minutes 100℃ bean sauce(0.6kg) Butter Cake(8”) Pastry Convection 25 Minutes 180℃ Grilled whole chicken Meat Convection 40 Minutes 180℃ Baked Potato(Whole) Veggie Grill 25 Minutes 200℃ Bread (8pcs) Pastry Convection 15 Minutes 180℃ Soufflé(6 cups) Dessert Convection...
- Page 34 HOW TO USE Setting of time Example: To set the time to 13:20. Steps: 1. In standby mode, press the【 】button once. 2. The hour digits flash, press the【>】button until 13:00. Press the【 】button to confirm. 3. The minute digits flash, press the【>】button until 13:20. Press the【 】button to confirm. 4.
- Page 35 Setting of steam mode Example: 20 minutes of steaming at 90°C. Steps: ”, which will flash. Press the 【 】 1. In standby mode, press the【>】button to the steam icon“ button to confirm. 】button to confirm. 2. Press the【>】button to reflect 00:20. Press the【 】button to confirm.
- Page 36 The grill mode is set successfully. Setting of convection mode Example: 35 minutes of convection baking at 190°C. Steps: 】 1. In standby mode, press the【>】button to the convection icon“ ”, which will flash. Press the【 button to confirm. 】button to confirm. 2.
- Page 37 Setting of convection + steam mode Example: 45 minutes of steaming at 200°C. Steps: 1. In standby mode, press the 【>】button to the convection + steam icon“ ”, which will flash. Press the 【 】button to confirm. 】button to confirm. 2.
- Page 38 4. Set the cooking time. Press the 【>】button to 40:00. Press the【 】button to confirm. 5. Set the ending time. The hour digits flash, press the【>】button to 15:00. Press the【 】button to confirm. 6. The minute digits flash, press the【>】button to 15:10. Press the【 】button to confirm. 7.
- Page 39 Note: Preset ending time can be checked by pressing the【 】button once. If the preset function has to be ended, press the 【 】button, and then press the【 】button. ...
- Page 40 Setting of sterilization function Example: To disinfect tableware Steps: 1. In standby mode, press the 【>】button to the sterilization icon“ 】 ”, which will flash. Press the【 button to confirm. 2. Press the 【 】button twice to start this function. 3.
- Page 41 Setting of keep warm function Example: to keep the food warm for 50 minutes. Steps: 1. In standby mode, press the 【>】button to the keep warm icon“ 】 ”, which will flash. Press the【 button to confirm. 】button to confirm. 2.
- Page 42 Setting of child lock function Function: To prevent children from using the oven without adult’s supervision. Steps: 】button for 3 seconds. 1. In standby mode, press the【 2. The child lock icon“ ”will show and oven cannot be operated.
- Page 43 Releasing of child lock function 】button for 3 seconds. 1. In standby mode, press the【 2. The child lock icon“ ”will disappear and oven can be operated. C. CLEANING AND MAINTENANCE CLEANING AND MAINTENANCE GUIDE CLEANING IS THE ONLY MAINTENANCE normally required. FAILURE TO MAINTAIN THE OVEN in a clean condition could lead to deterioration of the surface that could adversely affect the life of the appliance and possibly result in a hazardous situation The appliance must be disconnected from the power supply before carrying out any cleaning or maintenance.
- Page 44 DO NOT ALLOW GREASE or food particles to build up around the door and door seal. Failure to keep the seal clean may result in damage on the fronts or adjacent units, due to the door not closing properly during operation.
- Page 45 14. Water tank should be checked at least once per month. If necessary, take the water tank out horizontally and put it back after cleaning. 15. If the appliance will not be used for long time, please disconnect the appliance from the power supply. Keep the cavity clean and put it in an environment without corrosive gas.
- Page 46 D. TROUBLE SHOOTING GUIDE PROBLEM DIAGNOSE Problem Cause Solution Nothing appears on the display Oven is not connected to the power supply Connect to power supply screen Power cords fail to work Contact after-sales service Plug in the power supply Power supply plug is not in proper position again Oven door is not closed properly...
- Page 47 Continue working for 3 minutes but temperature of cavity is lower than 30 Sensor connection failure. Sensor connection failure, causing of open circuit. Sensor sense failure. Sensor sense failure, causing of short circuit. Whirlpool Hong Kong Ltd. 17/F., Elite Centre, 22 Hung To Road Kwun Tong, Kowloon, H.K.