ABB UniSec Manual
Air-insulated switchgear
Hide thumbs
Also See for UniSec:
- Operation and maintenance manual (40 pages) ,
- Operation and maintenance manual (16 pages)

Related Manuals for ABB UniSec


Summary of Contents for ABB UniSec
-
Page 1: Table Of Contents
Medium voltage products UniSec Installation manual Safety For your safety! Skilled personnel Crucial information Contact us! 1. Introduction 1.1 General aspects 1.2 Installation manual 2. Product information 2.1 Unit dimensions 2.2 Weights 3. Transport and storage 3.1 Condition on delivery 3.2 Unpacking at installation site... -
Page 3: Safety
IEC safety regulations and those of other technical authorities, also respecting other overriding instructions. It is recommended that ABB service personnel be called in to perform the servicing Contact us! and repair work. -
Page 4: Introduction
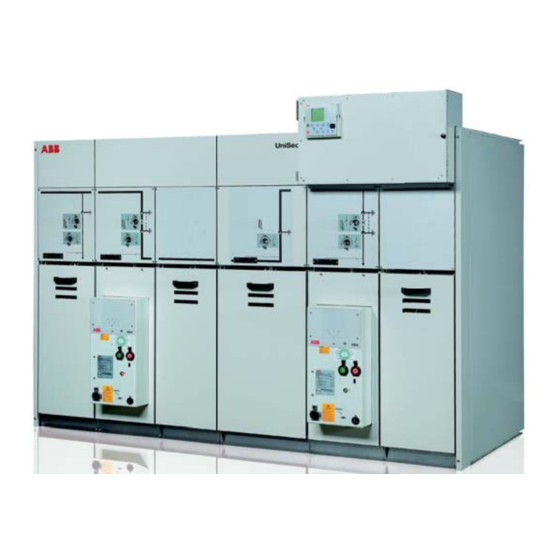
Safety, reliability, user-friendliness and simplicity of installation, as well environmental sustainability were the driving forces in developing this switchgear. UniSec is structured by placing standardized units side by side in a coordinated way. Construction and testing are carried out in the factory. -
Page 5: Product Information
2. Product information 2.1 Unit dimensions Drawings The following drawings illustrate the main dimensions and space requirements of the different units. Front views of the various units Figure 1. SDC 375 Figure 2. SFC 500 Figure 3. WBC 600 Figure 4. WBC 750 Figure 5. -
Page 6: Weights
1180 1037 102.5 1167 1139.5 1200 Figure 8. With large auxiliary circuits compartment Figure 9. With Vmax withdrawable circuit-breaker and VD4 circuit-breaker (without gas vent ducts) (without gas vent ducts) 1267 1300 Figure 10. WBC 24 kV 2.2 Weights The following table shows the maximum weights of the different Unit (mm) Weight (kg) units. -
Page 7: Transport And Storage
3.1 Condition on delivery Table 2. lists all the packing materials used in the switchgear: Delivery packing UniSec is delivered either as a single unit or in multiple switch- Raw material Possible recycling method gear units with a length of no more than 2.0 m, and with the... -
Page 8: Handling The Units As Far As The Installation Site
Install the lifting hooks on the roof frame. Transport units The transport units consist of individual units or small groups of units. The lifting hooks are suitable for all UniSec units (375 mm, 500 mm, 600 mm and 750 mm). Handling instructions... - Page 9 (4 units at the most, or a maximum length of 2 m). Lifting by crane Figure 19. 375 mm, 500 mm and 600 mm UniSec units Figure 20. 750 mm UniSec unit Lifting dimensions and angle When lifting using a crane, proceed as follows: a) Fit lifting ropes of an appropriate load capacity with spring catches.
-
Page 10: Temporary Storage
• in a dry place, packing is limited to a few months when • safe from any damage. stored indoors in a dry place. ABB should 2) Check the packing for any damage. be consulted in the case of longer storage periods or if the storage conditions differ from those indicated. -
Page 11: Assembly Of The Switchgear On Site
ABB must always be taken into account! All the necessary preparations, such as wall openings, ducts, etc. for laying the power and control cables as far as the switchgear, must already have been completed. - Page 12 Figure 25. Minimum distances to installation room wall with gas absorbers. Class ALFR. Figure 26. Minimum distances to the installation room walls with gas vent ducts. Class AFLR. Switchgear supplied with 1 m long external duct. 4.3.2 Cable passage hole dimensions and fixing points show the switchgear fixing points.
- Page 13 43.5 43.5 43.5 43.5 Figure 30. 750 mm wide units Figure 31. 750 mm wide for SBR unit Ø12.5 43.5 43.5 43.5 43.5 Figure 32. 600 mm width for units with Figure 33.750 mm width for unit with withdrawable circuit-breaker up to 17.5 kV withdrawable circuit-breaker at 24 kV...
- Page 14 4.3.3 Medium voltage cable locations and lengths The medium voltage cable lengths (distance of the cable con- nection point from the floor) depend on the units and acces- sories used. The following figures and table show the cable lengths and locations for the different units. RLC unit Figure 34.
-
Page 15: Foundations
4.4 Foundations If the switchgear only consists of a few units and no heavy units are included, it can be installed on the concrete floor. 4.4.1 Foundation types General aspects The switchgear must be erected on a foundation that fulfils the requirement of a 2 mm maximum horizontal height deviation in relation to the length and diagonal of the switchgear. - Page 16 Figure 38. 375 mm wide units Figure 41. Outline of lower joining plate in upper position b) Hammer the lower joining plate down so that the units are firmly fixed to each other at the back. Figure 39. 500 mm wide units 4.5.3 Connecting the units Note: for SBR units, do not remove the roof frame.
- Page 17 Figure 43. Screw for the lower joining plate d) Slide the joining plate to the fixing point of the units (on the inner rear wall). Figure 45. Screws for the top joining plate Figure 44. Installation of top joining plate Figure 46.
- Page 18 h) Use a screwdriver to trim the unit alignment. Tighten all the bolts from the front. NOTE Do not remove the roof frame for SBR functional units. i) For WBC and WBS units, insert 6 hexagonal bolts with the relative nuts. Figure 47.
- Page 19 4.5.5 Fixing the switchgear to the floor 4.5.6 Connecting the main busbars (See Figures 35, 36 and 37). General warnings and precautions Fixing to the metal frame DANGER a) The switchgear must be fixed to the metal frame by welding A warning sign is placed on the top plate to through the holes in the bottom of the unit (2 welding seams/ indicate the presence of high voltage under...
- Page 20 The following figures show the busbar connections for units with switch-disconnector. The components required are indi- cated in Table 5. The main busbar connections of each unit type with different rated currents and voltages are shown. Each figure gives a reference to the corresponding numbers of the components in Table 5.
- Page 21 Units with 12-17.5 kV, 630 A switch-disconnector Figure 53. 12-17.5 kV, 630 A middle unit Figure 54. 12-17.5 kV, 630 A end unit Figure 55. 12-17.5 kV, 630 A end unit Units with 24 kV, 630 A switch-disconnector Figure 56. 24 kV, 630 A middle unit Figure 57.
- Page 22 DRS/DRC end or isolating units For DRC and DRS units, the busbars are not installed directly on the top of the switch-disconnector or bushing. Therefore to tighten the screws properly, the nuts must be installed under the busbars. DRS/DRC 12-17.5 kV, 630 A end or isolating units Figure 62.
- Page 23 DRC 12-17.5 kV, 630 A middle unit DRC 24 kV, 630 A middle unit Figure 68. 12-17.5 kV, 630 A middle unit Figure 69. 24 kV, 630 A middle unit DRC 12-17.5 kV, 800 A middle unit Figure 70. 12-17.5 kV, 800 A middle unit For the SBR unit up to 24 kV, 630 A Units with insulators Figure 71.
- Page 24 Units with current transformers and Combisensors Figure 73. Busbar exit on the left Figure 74. Busbar exit on the right WBC - WBS, 630 A middle unit WBC - WBS, 1250 A middle unit Figure 75. 630 A middle unit Figure 76.
- Page 25 Panel for coupling unit with WBC – WBS to unit with 12 - 17.5 kV, 630 A switch-disconnector Figure 79. 12 -17.5 kV, 630 A middle unit Figure 80. 12-17.5 kV, 630 A end unit Panel for coupling unit with WBC – WBS to unit with 12 - 17.5 kV, 800 A switch-disconnector Figure 81.
-
Page 26: Gas Vent Ducts
4.5.7 Re-installing the roof plates 4.6 Gas vent ducts The installation operations are as follows: 4.6.1 Installation of the gas vent ducts 1) Install the roof plate. The gas vent ducts are usually already installed. 2) Remount the screws detached during dismantling. 3) For the end and isolating units: a) Install the vertical part of the gas vent duct. - Page 27 c) Insert screws in the vertical duct (6 Torx M6x20 screws) and e) Mount the horizontal duct onto the vertical duct as shown in in the bottom plate (5 Torx M6x12 screws), and tighten them Figure 89. Insert the screws and nuts in it as shown in Figure as shown in Figure 87.
- Page 28 Figure 93. Upper locking bracket Figure 91. Installed gas vent duct 4.6.2 Connecting the gas vent ducts a) Install the lower locking bracket Figure 94. Installation of the locking brackets Figure 92. Lower locking bracket Figure 95. Connected gas vent duct; additional duct and end plate b) Install the upper locking bracket bar and screw up the Figure 95 shows an additional duct and end plate.
-
Page 29: Coupling The Units With Switch-Disconnector To Wbc-Wbs Units
4.7 Coupling the units with switch- disconnector to WBC-WBS units Units up to 17.5 kV Figure 96. Figure 97. -
Page 30: Coupling The Units With Switch-Disconnector To Wbc Unit 24 Kv
4.8 Coupling the units with switch- disconnector to WBC unit 24 kV Figure 98. Figure 99. -
Page 31: Cable Connections
5. Cable connections 5.1 Installing the cables NOTE The position of the medium voltage cables are positioned L1, L2 and L3 front to back. 5.1.1 Installing the cables Parts Figure 101. Medium voltage cable cover 1. Cable cover 2. Cable seal 3. - Page 32 2. Cables 4. Floor plates and cable guide splines a) Pull the cables through the open bottom into the unit. Measure and cut the cables to sufficient length, taking into consideration the installation of the cable terminations and cable terminals. b) Adapt the fairleads to the cable diameter and fit them onto the cable.
- Page 33 5. Cable clamps 5.1.2 Installing the cables in the RLC unit a) Re-install the loose parts as shown in Figure 107. RLC unit cable compartment Figure 107. Installing the loose parts of the cable clamps b) Tighten all 6 nuts. Figure 109.
- Page 34 2) Unscrew the top and back part of the RLC side cover, lift it 4) Unscrew, lift and remove the cable protection sheet of the and remove the RLC side cover. RLC unit. Figure 113. RLC internal cover Figure 111. RLC cover Connect the MV cables.
- Page 35 Figure 118. RLC unit earthing cable terminals Figure 115. Cable glands on the bottom of the RLC unit Close the RLC unit cable compartment. Carry out the same operations in reverse order to open the RLC unit cable compartment. 5.1.3 Installing the WBC unit cables a) Open cable door A by unscrewing knurled screws A1.
- Page 36 c) If supplied, remove plate D of the voltage transformers (VT) f) Re-assembly of all components. by unscrewing screws D1 and D2 (depend on the type of VT). d) If supplied, remove surge arrester E by unscrewing screws E1, E2 and E3. Figure 123.
-
Page 37: Control Cables
5.2 Control cables 5.3 Earthing the switchgear The internal cables between units are easily laid through open- Each unit is fitted with earthing busbars that run longitudinally ings in the side walls of the auxiliary circuit compartment. in the lower front part of the unit. These busbars must be Depending on the delivery times, there are two different proce- connected together as shown in chapter 5.3.1. -
Page 38: Final Installation Work
c) Earthing busbar installed. NOTE Tightening must be carried out with the correct torque. 5.3.2 Main earthing circuit connections between the panels of the SBR functional unit a) Install the protection busbar conductor between panels of the SBR functional unit. Figure 127. -
Page 39: Tightening Torques For Steel Screws And Nuts/Bolts
A. Tightening torques for steel screws and nuts/bolts Nuts and bolts Hexagonal-head bolts with flange Max. tightening torque [Nm] Max. tightening torque [Nm] Type Steel class 8.8 Type Steel class 90 Cheese-head socket screws Cheese-head Torx Fastite screw Max. tightening torque [Nm] Max. - Page 40 Joint type Tightening torque [Nm] Bolts mounted on the CT, TPU type nominal Bolts mounted on electrical pliers nominal Cable connection nut nominal Busbar connections nominal Bolts mounted on the circuit-breaker nominal...
- Page 41 Joint type Tightening torque [Nm] Bolts mounted on the mandolin CT nominal Bolts mounted on the post insulator nominal Bolts mounted on the connection and switching busbar nominal Bolts for mounting CT nominal GSec and busbar nominal...
-
Page 42: Tools Required For Installation
B. Tools required for installation Torx wrench • TX30 Torx wrench Allen wrenches • 5 mm • 6 mm • 8 mm Socket wrenches • 10 mm • 15 mm • 17 mm • 19 mm Ring spanner • 13 mm... - Page 44 For more information please contact: Your sales contact: www.abb.com/contacts More product information: www.abb.com/productguide The data and illustrations are not binding. We reserve the right to make changes in the course of technical development of the product. © Copyright 2012 ABB.