
Related Manuals for ABB WaterMaster


Summary of Contents for ABB WaterMaster
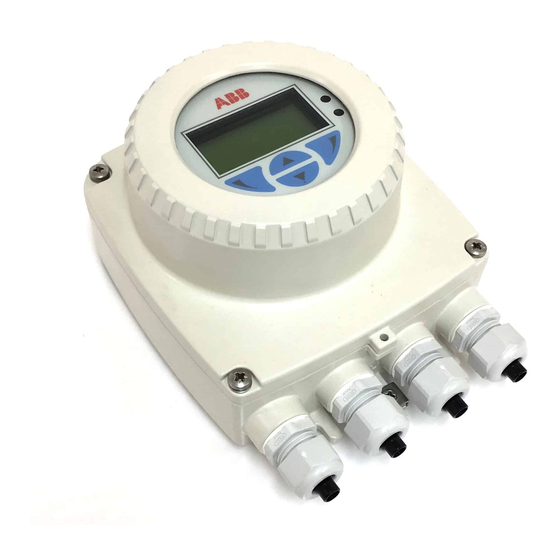
- Page 1 A B B M E A S U R E M E N T & A N A LY T I C S | U S E R G U I D E | I M/ W M R E V. M WaterMaster...
- Page 2 For more information Further publications for the WaterMaster electromagnetic flowmeter are available for free download from: www.abb.com/measurement or by scanning this code: Search for or click on Data Sheet DS/WM-EN WaterMaster | Electromagnetic flowmeter Programming Guide IM/WMP WaterMaster | Electromagnetic flowmeter User Guide Supplement –...
-
Page 3: Table Of Contents
5.3.2 Entering Passwords ........................34 Easy Setup ..............................35 WaterMaster Flow Performance ....................36 WaterMaster flow performance – m3/h ....................... 36 WaterMaster flow performance – gal/min ....................38 Specification – Sensor ........................39 Specification – Transmitter ......................42 Notes ..............................44... -
Page 4: Safety
WaterMaster Electromagnetic flowmeter 1 Safety 1 Safety Information in this manual is intended only to assist our customers in the efficient operation of our equipment. Use of this manual for any other purpose is specifically prohibited and its contents are not to be reproduced in full or part without prior approval of the Technical Publications Department. -
Page 5: Health & Safety
WaterMaster Electromagnetic flowmeter 1 Safety 1.3 Health & Safety To ensure that our products are safe and without risk to health, the following points must be noted: The safety requirements of this equipment, any associated equipment and the local environment must be taken into consideration during installation. -
Page 6: Introduction
2 Introduction 2 Introduction WaterMaster™ is a range of high performance electromagnetic flowmeters for the measurement of electrically conductive fluids and systems are normally supplied factory-configured and calibrated. This User Guide provides installation, connection, security, start-up and basic setup details. For programming and configuration information refer to the Programming Guide –... -
Page 7: Mechanical Installation
WaterMaster Electromagnetic flowmeter 3 Mechanical Installation 3 Mechanical Installation 3.1 Unpacking Sling Angle <90° Fig. 3.1 Unpacking Caution. Visually inspect equipment for damage before installing. Do not install damaged or faulty equipment. 3.2 Installation Conditions Caution. Do NOT exceed the maximum working pressure marked on the equipment. - Page 8 WaterMaster Electromagnetic flowmeter 3 Mechanical Installation Fig. 3.4 Localized Heat Allow room to read display Fig. 3.5 Siting 0 x Pipe Dia. >5 x Pipe Dia. Min. Min. Flow Direction Fig. 3.6 Straight Pipe Requirements Fig. 3.7 Fluid Level IM/WM–EN Rev. M...
- Page 9 WaterMaster Electromagnetic flowmeter 3 Mechanical Installation 60 °C (140 °F) Max. –20 °C (–4 °F) Min. Fig. 3.8 Within Temperature Limits Fig. 3.9 Shade Supports Fig. 3.10 Above Ground IM/WM–EN Rev. M...
- Page 10 1 m (3.3 ft) <12 hours Accrued time IP68 (NEMA 6) IP67 (NEMA 4X) Fig. 3.12 Within Environmental Rating Backfill Protection Plate Recommended Fig. 3.13 Underground Note. For further details when burying flow sensors contact the ABB Service Organization. IM/WM–EN Rev. M...
- Page 11 WaterMaster Electromagnetic flowmeter 3 Mechanical Installation 70 °C – 20 °C (158 °F) (– 4 °F) Max. Min. Fig. 3.14 Cable Routing Fit Gaskets Gaskets Same Size as Pipe Fig. 3.15 Gasket Fitting 0.7 m (2.3 ft) Min. Fig. 3.16 Separation of Sensors...
-
Page 12: Dimensions
WaterMaster Electromagnetic flowmeter 3 Mechanical Installation 3.3 Dimensions 3.3.1 Transmitter Dimensions Dimensions in mm (in). 202.5 (8) – Standard Gland 98 (3.9) 250 (9.8) Armored Gland 118 (4.6) Fig. 3.18 Integral Transmitter Dimensions (Standard Gland Shown) 98 (3.9) R3.2 (0.1 ) 71 (2.8) -
Page 13: Sensor Dimensions
WaterMaster Electromagnetic flowmeter 3 Mechanical Installation 3.3.2 Sensor Dimensions Note. Lay length – all sensors conform to ISO13359. DN 10 to 32 Full Bore Fig. 3.20 DN10 to 32 ( to 1 NB) Full-bore Meter Size Dimensions mm (in) NPS/NB 3/ 8 93 (3.7) - Page 14 WaterMaster Electromagnetic flowmeter 3 Mechanical Installation DN 40 to 200 Full Bore Max. Max. Fig. 3.21 DN40 to 200 (1 to 8 NB) Full-bore Meter Size Dimensions mm (in) NPS/NB 150 (5.9) 200 (7.9) 165 (6.5) 200 (7.9) 185 (7.2) 200 (7.9)
- Page 15 WaterMaster Electromagnetic flowmeter 3 Mechanical Installation DN 250 to 2200 Full Bore Max. Max. Fig. 3.22 DN 250 to 600 (10 to 24 NB) Full Bore Max. Max. Fig. 3.23 DN 700 to 2200 (28 to 84 NB) Full Bore...
- Page 16 WaterMaster Electromagnetic flowmeter 3 Mechanical Installation Meter Size Dimensions in mm (in) B (PN25, PN40, NPS/NB (<PN25) ASME, CL300) 405 (15.99) 450 (17.7)** 488 (19.2) 460 (18.1) 500 (19.7)** 538 (21.2) 535 (21.1) 550 (21.7)** 568 (22.3) 600 (23.6) 600 (23.6)** 618 (24.3)
-
Page 17: Electrical Installation
WaterMaster Electromagnetic flowmeter 4 Electrical Installation 4 Electrical Installation 4.1 Grounding Caution. For safety reasons and optimum performance, the flowmeter, pipelines and medium must be correctly bonded and grounded according to regulations. Note. The flow sensor must not be connected to a ground spike. - Page 18 WaterMaster Electromagnetic flowmeter 4 Electrical Installation Optional Fluid Metal Pipe Plastic Pipe Contact Ring Fig. 4.3 Flanged Metal Pipe to Plastic Pipe Metal Pipe Optional Fluid Plastic Pipe Contact Ring Fig. 4.4 Metal Pipe with Plastic Make-up Insert Refer to Section 4.2, page 17 Optional Fluid Contact Rings Fig.
-
Page 19: Remote Transmitter / Sensor Arrangement
WaterMaster Electromagnetic flowmeter 4 Electrical Installation Caution. Do NOT ground Bonding Cables (Supplied) cathodically protected systems Fluid Contact Rings Fig. 4.6 Pipelines with Cathodic Protection 4.2 Remote Transmitter / Sensor Arrangement Note. For bonding connections use 4mm (< 10AWG) cable. -
Page 20: Transmitter Terminal Connections
WaterMaster Electromagnetic flowmeter 4 Electrical Installation 4.3 Transmitter Terminal Connections Warning. Isolate the transmitter from power supplies before removing the cover. Fig. 4.8 Accessing the Transmitter Terminals Referring to Fig. 4.8: 1. Slacken (but do not remove) the four transmitter cover screws 2. - Page 21 WaterMaster Electromagnetic flowmeter 4 Electrical Installation Test Points for Output Connections AC/DC Power Sensor Supply Terminal Cable Terminal Output Connections Terminal Backplane Internal Earth Internal Earth (Alternative PE) (Alternative PE) External Earth Output Connections Power Cable Output Connections Sensor Cable Fig.
-
Page 22: Cable Preparation (Remote Systems Only)
WaterMaster Electromagnetic flowmeter 4 Electrical Installation 4.4 Cable Preparation (Remote Systems Only) Caution. Maintain Environmental Protection at all times – See Section 4.5.2, page 22. To prepare the cable for connection at the transmitter and sensor terminal blocks: 1. Remove the outer cable insulation and Mylar® wrap. -
Page 23: Sensor Cable Terminal Connections And Recommended Cable Lengths
WaterMaster Electromagnetic flowmeter 4 Electrical Installation 4.5.1 Sensor Cable Terminal Connections and Recommended Cable Lengths Cut cables to 60 mm (2.35 in) Cut cables to 70 mm (2.75 in) D1/TFE Brown Orange Yellow Green Blue Blue Violet Violet (Sleeve) (Screen) -
Page 24: Environmental Protection
WaterMaster Electromagnetic flowmeter 4 Electrical Installation 4.5.2 Environmental Protection Fig. 4.12 Potting the Sensor Terminal Box Warning. Potting materials are toxic. Read the manufacturers' instructions carefully before preparing the potting material and use suitable safety precautions. Power up and check all connections before potting. -
Page 25: Output Connections
Inductive loads must be suppressed or clamped to limit voltage swings. Operation of outputs is programmable. External isolators are not normally required as the pulse and alarm circuit is electrically separated from all other WaterMaster connections. 4.6.1 Frequency Outputs PLC or Datalogger XX XX XX XX 42... -
Page 26: Alarm Outputs
WaterMaster Electromagnetic flowmeter 4 Electrical Installation 4.6.2 Alarm Outputs XX XX XX XX 42 41 51 61 O/P3 Terminal connection IDs are HART, PROFIBUS & MODBUS-variant dependent Fig. 4.14 Alarm Output Connections 4.6.3 Current Output (4 to 20 mA) – HART (FEX100) Variant... -
Page 27: Rs485 Communications - Profibus (Fex100-Dp) And Modbus (Fex100-Mb) Variants
A1 / B1 – In A2 / B2 – Out Screen Clamp Fig. 4.16 WaterMaster RS485 Backplane Connections to PROFIBUS Network 4.6.5 Test Point Access Note. A typical DVM probe can access (fit) the PCB's test holes. 4 to 20 mA IC+* IC–*... -
Page 28: Power Supply Connections
WaterMaster Electromagnetic flowmeter 4 Electrical Installation 4.7 Power Supply Connections Warning. Electrical installation and earthing (grounding) must be in accordance with relevant national and local standards. Power must be connected via a suitable isolator and fused in accordance with relevant standards. -
Page 29: Dc (And Low Voltage Ac) Power Supply
WaterMaster Electromagnetic flowmeter 4 Electrical Installation 4.7.2 DC (and Low Voltage AC) Power Supply Power Supply Indicator LED *DC Fuse F2 2 A Type T (see table below for suppliers) Internal Earth Screws 2/– Black Green / Yellow External Earth >4 mm... -
Page 30: Configuration Dip Switches
WaterMaster Electromagnetic flowmeter 4 Electrical Installation 4.7.3 Configuration DIP Switches Three configuration DIP switches are mounted on the transmitter backplane board. These are factory set as follows: Remote transmitter – all OFF Integral transmitter – SW3 ON For MID-compliant flowmeters set the read-only / MID protection switch to 'ON' to ensure the meter is secure from tampering. - Page 31 WaterMaster Electromagnetic flowmeter 4 Electrical Installation Referring to Fig. 4.21: 1. Confirm that the cartridge to be fitted is of the correct power supply and for the correct communications bus type (HART, PROFIBUS or Modbus) by checking the label on the side of the cartridge: –...
-
Page 32: Start-Up And Operation
WaterMaster Electromagnetic flowmeter 5 Start-up and Operation 5 Start-up and Operation Note. This section describes the options available at the 'Easy Setup' menu. Refer to the Programming Manual (IM/WMP) for comprehensive details of all end-user menus and operating levels. 5.1 Navigating the Menus and Parameters The four keys below the display are used to navigate through the menus and to execute all system commands and selections. -
Page 33: Start-Up Screens
WaterMaster Electromagnetic flowmeter 5 Start-up and Operation 5.2 Start-up Screens At start-up, the type of screen displayed indicates the status of the system. There are four common start-up screen types as follows: System Start-up System Startup At system start-up, a progress bar is displayed for the duration LOADING SYSTEM DATA of the start-up period. - Page 34 WaterMaster Electromagnetic flowmeter 5 Start-up and Operation Installation Changed System Startup If the sensor data stored in the transmitter memory does not INSTALLATION CHANGED match the data of the connected sensor, the warning Identify Changed Item 'INSTALLATION CHANGED' is displayed.
-
Page 35: Security Levels And Password Access
WaterMaster Electromagnetic flowmeter 5 Start-up and Operation 5.3 Security Levels and Password Access At power-up, the 'Start-up Display' and 'Process Display' screens are activated in sequence. Note. Passwords at 'Standard' and 'Advanced' level can be set and changed by end-users. -
Page 36: Default Passwords
WaterMaster Electromagnetic flowmeter 5 Start-up and Operation 5.3.1 Default Passwords The WaterMaster transmitter is supplied with default passwords for access to 'Standard' and 'Advanced' level menus. The two passwords are: 'Standard' access password: 2 or blank 'Advanced' access password: 3 or blank Passwords can contain up to 5 characters and are not case sensitive. -
Page 37: Easy Setup
WaterMaster Electromagnetic flowmeter 5 Start-up and Operation 5.4 Easy Setup Easy Setup Menu Easy Setup The 'Easy Setup' level is used to set the system up quickly and contains a series of options for users with 'Standard' and 'Advanced' access permission. Users with 'Read Only' access cannot make selections at this level. -
Page 38: Watermaster Flow Performance
WaterMaster Electromagnetic flowmeter 6 WaterMaster Flow Performance 6 WaterMaster Flow Performance 6.1 WaterMaster flow performance – m Standard Calibration High Accuracy Calibration 0.4 % Class 2 0.2 % Class 1 0.4% 0.2% 0.167 0.013 0.008 0.31 0.02 0.012 7.88 0.42 0.032... - Page 39 WaterMaster Electromagnetic flowmeter 6 WaterMaster Flow Performance Standard Calibration High Accuracy Calibration 0.4 % Class 2 0.2 % Class 1 0.4% 0.2% 1000 31,250 25,000 2500 2500 42 in 31,250 25,000 2500 2500 1200 50,000 40,000 4000 4000 1400 78,750...
-
Page 40: Watermaster Flow Performance - Gal/Min
WaterMaster Electromagnetic flowmeter 6 WaterMaster Flow Performance 6.2 WaterMaster flow performance – gal/min Standard Calibration High Accuracy Calibration 0.4 % Class 2 0.2 % Class 1 0.4% 0.2% (gal/mi NPS/NB (DN) (gal/min) (gal/min) (gal/min) (gal/min) (gal/min) (gal/min) (gal/min) (10) 13.8 0.73... -
Page 41: Specification - Sensor
>5µS cm Transmitter mounting Integral or remote Electrical connections 20 mm glands in NPT 20 mm armored glands Sensor cable ABB WaterMaster cable available in two forms – standard and armored Maximum length 200 m (660 ft) IM/WM–EN Rev. M... - Page 42 WaterMaster Electromagnetic flowmeter 7 Specification – Sensor Physical Specification Wetted parts Lining material / potable water approvals Potable Water Approvals Product AZ/NZS Size Range Liner WRAS NSF-61 Code 4020 DN40 – Polypropylene Approved Meter DN250 – ...
- Page 43 WaterMaster Electromagnetic flowmeter 7 Specification – Sensor Non-wetted parts Flange material Carbon steel (DN20 to DN2200 [ to 84 NB]) Stainless steel (DN10 to DN15 [ NB]) Housing material Carbon steel FEV and FEF (DN40 to 200 [1 to 8 NB]...
-
Page 44: Specification - Transmitter
WaterMaster Electromagnetic flowmeter 8 Specification – Transmitter 8 Specification – Transmitter Functional Specification Power supply Mains 85 to 265 V AC @ <7 VA Low voltage 24 V AC +10 %/–30 % @ <7 VA 24 V ±30 % @ <0.4 A... - Page 45 Declaration of Conformance Copies of CE and PED certification will be available on request. WaterMaster has OIML R49 Certificate of Conformity to accuracy class 1 and 2 (FEV DN40 to 200). Copies of accuracy certification are available on request. WaterMaster (FEV DN40 to 200) has been type examined under directive MID 2004/22/EC, Annex MI-001. Copies of this certificate are available on request.
-
Page 46: Notes
WaterMaster Electromagnetic flowmeter Notes Notes IM/WM–EN Rev. M... - Page 47 Acknowledgments Microsoft is a registered trademark of Microsoft Corporation in the United States and / or other countries. Profibus and Profibus DP are registered trademarks of the Profibus Organization. Modbus is a registered trademark of the Modbus-IDA organization. HART is a registered trademark of the HART Communication Foundation. Sales Service Software...
- Page 48 We reserve the right to make technical changes or modify the contents of this document without prior notice. With regard to purchase orders, the agreed particulars shall prevail. ABB does not accept any responsibility whatsoever for potential errors or possible lack of information in this document.