Table of Contents
Advertisement
Advertisement
Table of Contents

Related Manuals for Panasonic VL-MWD501


Summary of Contents for Panasonic VL-MWD501
- Page 1 1 by Multi Video Intercom System Installation Guide...
-
Page 2: Table Of Contents
Table of Contents - 1 1. Specifications 2. Features 3. Monitor Line Up Comparison Stylish Design P.14 P.23 VL-MWD501 series Compact Design P.15 System Overview P.24 VL-MVN511 series Customization with Each Module – 1 P.16 Product Line-up P.25 VL-MV10EX1/EX2(French Model) Customization with Each Module –... - Page 3 Table of Contents -2 4. Installation 5. Appendix Lobby Station Assembly-1 P.28 Lobby Station Assembly-2 P.29 Setting for Lobby Station P.30 System Overview P.31 Wiring & Power Supply Unit P.33 (Star Shape Wiring) Room No. Setting P.34 (Star Shape Wiring) Setting for Distributer ID (Bus-wiring) P.36 Room No.
-
Page 4: Specifications
1. Specifications... -
Page 5: Comparison
1. Specifications 1-1. Comparison Item VL-VM Series ( 1 by Multi ) VL-V900 series (Analog) Bus wiring Monitor Monitor Distribution Box Star-shape wiring Lift Controller distributor Distribution Box System diagram Example Lobby station Door Station distributor Control Box CCTV Terminal Security Camera Expandability... -
Page 6: System Overview
Call & Talk Lobby Party Station Vigik E-lock Panasonic system is only available for both wiring topology. *Some Power Supply Units (PSUs) are abbreviated in figures. The configuration of PSUs depends on system requirement and specification of devices selected in each system. -
Page 7: Product Line-Up
*Vigik module is sold by 3 party. Surface Mount Cover Surface Mount Cover Back Box (Small Type) Back Box (Large Type) Extension Cable VL-VM602 VL-VM603 VL-VM801 (Smaller Type) (Large Type) VL-VM502 VL-VM503 Distributor VL-VM701 Room Monitor VL-MWD501/VL-MVN511/VL-MV10EX High Power Type PSU VL-PS2410 VL-PS240... -
Page 8: Module Line-Up
1. Specifications 1-4. Module Line-up Model No. Module Image Size Description Central unit with a camera , speaker and microphone. VL-VM101EX Camera module Full module size *Camera = 1M pixels VL-VM301EX 1-button module VL-VM302EX 2-buttons module Half module size Call button with backlight VL-VM303EX 3-buttons module VL-VM304EX... -
Page 9: Lobby Station-1
1. Specifications 1-5. Lobby Station-1 Role of the Lobby Station Door entry panel for the public entrance of housing complexes. Direct button to call resident. Features - 1M pixels camera Wide angle camera (Horizontally=approx.170˚, Vertically=approx.110˚) - White key backlit with illuminance sensor. Front accessible name plate (Inaccessible type is also available) ※... -
Page 10: Lobby Station-2
1. Specifications 1-6. Lobby Station-2 (11) (9) (10) (12) (13) (14) (15) (16) (1) Camera lens (9) Dip switch for setting (2) Light (for night vision) (10) Connector cable for module connection (3) Speaker (11) Connector for DDA module (TBD) (4) Mic (12) Connector for 12key module (TBD) (5) Status indicator... -
Page 11: Distributor : Vl-Vm701
1. Specifications 1-7. Distributor : VL-VM701 Role of the Distributor Distribution box for the room monitor in “Bus Wiring”. This unit is not necessary for “Star-Shape Wiring”. Features - Up to 4 room monitors can be connected per a distributor. - Powered by PSU(PS240 or PS2410), or bus-powered by previous distributor. -
Page 12: High Power Type Psu : Vl-Ps2410
1. Specifications 1-8. High Power Type PSU : VL-PS2410 Role of the High Power Type PSU High power type PSU which is suitable for apartment system. Input : 220-240 VAC. Output : 24 VDC. / 2.5A Features - Up to 6 outputs. Total output current <... -
Page 13: Features
2. Features... -
Page 14: Stylish Design
2. Features 3. Features 2-1. Stylish Design Stylish Lobby Station ・Hairline Finish ・Compact Design ・Big Button ・LED Indicator... -
Page 15: Compact Design
【Problem of the smaller lobby station】 Big buttons combined with There are 8 buttons. front accessible name plates Name Plate is big. But button and name But there are only 4 buttons. plate is small. A company F company ( 8 button type ) Panasonic... -
Page 16: Customization With Each Module
2. Features 3. Features 2-3. Customization with Each Module -1 It is possible to select according to the customer requirement. Fully configured system VL-VM301 VL-VM101 VL-VM304 VL-VM603 VL-VM503 VL-VM303 VL-VM901 VL-VM302... -
Page 17: Customization With Each Module
2. Features 3. Features 2-4. Customization with Each Module -2 Small size Back Box (VM602) Large size Back Box (VM603) Full Module Size Full Module Half Size Module Size Half Half Module Module Size Size Half Half Module Module Size Size Half Module... -
Page 18: Customization With Each Module
2. Features 3. Features 2-5. Customization with Each Module -3 It is possible to select according to the customer requirement. *1 When the flush mount installation method is used, a Surface Mount Cover cannot be installed. -
Page 19: Easy Accessible Name Plate
2. Features 3. Features 2-6. Easy Accessible Name Plate 【Back Ground】 Building managers can not change the name plate by themselves. ■Factor To change the name plates, have to remove the panel and access to rear side. Not comfortable to ask installers just to change name plates. Manager Just changing name plates does not generate profit. -
Page 20: Camera Angle
2. Features 3. Features 2-7. Camera Angle The wide-angle camera gives a wide view of the front porch area. Left/right angle comparison image (Horizontally) Industry average Approx. 170° Approx. 90° If lobby station installed vertically toward the door, it is Almost the full width is visible. -
Page 21: E-Lock & Access Control
2. Features 3. Features 2-8. E-lock & Access Control ■ Wiring schematic (VL-VM101) (Access Control, E-lock & Lobby Station) 2 (N/P) Wiring Schematic Electrical Lock K-OUT L-IN Power Switch DC-IN L1 L2 (Inside) Supply K-OUT Access Control To AC power /Card Reader 2 (N/P) outlet... -
Page 22: Monitor Line Up
3. Monitor Line Up... -
Page 23: Vl-Mwd501 Series
Wireless monitor VL-V554 VL-MWD501 VL-WD613 2. Super wide angle camera Power supply unit for VL-MWD501 Wide view with horizontal 170 degree Easy and smooth zoom Up to 3. Picture recording function into SD card Much memory capacity of SD card... -
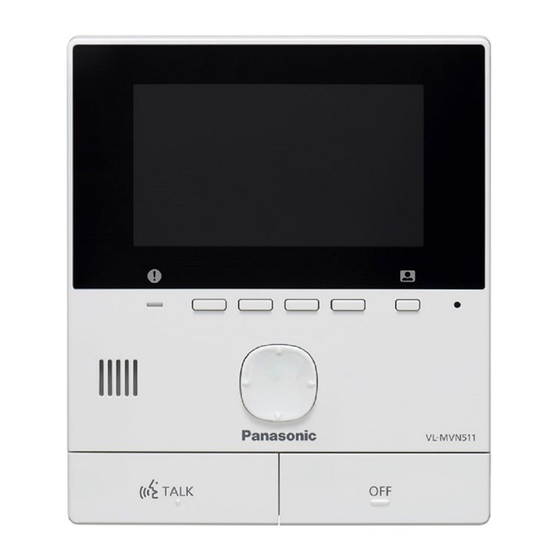
Page 24: Vl-Mvn511 Series
3. Monitor Line Up 3-2. VL-MVN511 Series Enhance our product line-up with unique intercom system with smart phone connect Sales point Product image 1. Smart phone connectivity Easy setup Easy install with Wi-Fi connection. Door Station Main Monitor VL-V555 VL-MVN511 2. -
Page 25: Vl-Mv10Ex1/Ex2(French Model)
3. Monitor Line Up 3-5. VL-MV10EX1/EX2(French Model) Price conscious monitor which reduce the system price. Bus power supply makes installation easier. Sales point Product image 1. Simple feature and affordable price Contribute to reduce system price. Main Monitor Main Monitor 2. -
Page 26: Function Table
3. Monitor Line Up 3-4. Function Table VL-MWD501 VL-MVN511 VL-MV10EX1/EX2 Power supply unit Power supply unit Bus power Power source VL-PS240/or 241 VL-PS240/or 241 (No PSU required.) 5-inch WVGA wide colour Display 5-inch WQVGA wide colour 3.5-inch colour / Touch panel Frequency range 1.88 GHz –... -
Page 27: Installation
4. Installation... -
Page 28: Lobby Station Assembly-1
2. Specifications IP Video Intercom Product 4. Installation 4-1. Lobby Station Assembly-1 Step-1 Step-2 Attach the every modules to the frame. Connect each modules by wire connector. Put the module cable cover on each. Wire connector *Need to attach upper side module first... -
Page 29: Lobby Station Assembly-2
2. Specifications IP Video Intercom Product 4. Installation 4-2. Lobby Station Assembly-2 Detail for connector cable Multi panel cabling Cable:VL-VM801 [option] Cable length : TBD Camera module side Connect camera module Flush Box with 1 button module. Hole Through hole in the wall Wall Long connector cable for flush mount Cable:VL-VM801... -
Page 30: Setting For Lobby Station
2. Specifications IP Video Intercom Product 4. Installation 4-3. Setting for Lobby Station Setting DIP switch bit1 : 0 Star shape wiring 1 2 3 4 5 6 7 8 Wiring Method bit1 : 1 Bus wiring 1 2 3 4 5 6 7 8 bit 2-3 : 00 Turns on in dark condition 1 2 3 4 5 6 7 8... -
Page 31: System Overview
2. Specifications IP Video Intercom Product 4. Installation 4-4. System Overview 2 wiring style are available. Bus Wiring Star Shape Wiring • Suitable for small size apartment • Suitable for medium size apartment • Easy to replace from the door chime equipment •... -
Page 32: (Star Shape Wiring)
Star Shape Wiring... - Page 33 2. Specifications IP Video Intercom Product 4. Installation 4-5. Wiring & Power Supply Unit (Star Shape Wiring) Normal type PSU (VL-PS240) Room Monitor Lobby Station Room monitor is connected with button module.
-
Page 34: Room No. Setting (Star Shape Wiring)
2. Specifications IP Video Intercom Product 4. Installation 4-6. Room No. Setting (Star Shape Wiring) Star shape wiring David Brown John Smith Each room monitor are connected to the button directly. John David Smith Brown No setup required. Room Monitor Room Monitor Lobby Station... - Page 35 Bus Wiring...
- Page 36 2. Specifications IP Video Intercom Product 4. Installation 4-7. Setting for Distributor ID (Bus-wiring) Setting DIP switch Distributor ID # Far end Distributor ID #1 bit1 : 1 1 2 3 4 5 6 7 8 Distributor Distributor bit2 : 1 Distributor ID #2 ID # 1 2 3 4 5 6 7 8...
-
Page 37: Room No. Setting -1 (Bus Wiring)
2. Specifications IP Video Intercom Product 4. Installation 4-8. Room No. Setting -1 (Bus Wiring) Bus wiring Distributor John Smith Each room monitor are connected to distributor randomly. David Brown Need to set the room number David Brown John Smith on each distributor. -
Page 38: Room No. Setting -2 (Bus Wiring)
2. Specifications IP Video Intercom Product 4. Installation 4-9. Room No. Setting -2 (Bus Wiring) Set the DIP switch to “Room No.#30”. John Smith David Brown DIP switch for room number setting John Smith David Brown The button number is fixed Set the DIP switch to “Room No.#20”. -
Page 39: Room No. Setting -3 (Bus Wiring)
2. Specifications IP Video Intercom Product 4. Installation 4-10. Room No. Setting -3 (Bus Wiring) Setting DIP switch bit1-6 : 100000 Button #1 1 2 3 4 5 6 7 8 bit1-6 : 010000 Button #2 1 2 3 4 5 6 7 8 Button #3 bit1-6 : 110000 1 2 3 4 5 6 7 8... -
Page 40: Room No. Setting -4 (Bus Wiring)
2. Specifications IP Video Intercom Product 4. Installation 4-11. Room No. Setting -4 (Bus Wiring) Setting DIP switch bit1-6 : 100010 Button #17 1 2 3 4 5 6 7 8 bit1-6 : 010010 Button #18 1 2 3 4 5 6 7 8 Button #19 bit1-6 : 110010 1 2 3 4 5 6 7 8... -
Page 41: Wiring & Power Supply Unit
IP Video Intercom Product 4. Installation 4-12. Wiring & Power Supply Unit (Bus Wiring) Distributor Lobby Station Up to 8 distributors by high power type PSU (VL-PS2410) Room Monitor Up to 4 distributors by normal type PSU (VL-PS240) Normal type PSU (VL-PS240) Power Supply Unit (PSU) -
Page 42: Install Lobby Station
4. Installation 4-13. Install Lobby Station Flush Mount (1) Fix the mount box into the wall (2) Install the lobby station Surface Mount (1) Fix the mount box onto the wall (2) Install the lobby station Surface mount cover is required. -
Page 43: Bundled Items
2. Specifications IP Video Intercom Product 4. Installation 4-14. Bundled Items Spare Button Connector Cable Middle length cable is bundled to camera module. Short length cable is bundled to button module. Spare buttons are bundled to button module. Button qty Spare qty 1 Button module 1 pc... - Page 44 5. Appendix...
- Page 45 • The actual product may vary slightly from photograph. • All pictures of the LCD display are simulated. • Weights and dimensions are approximate. • Design and Specifications are subject to change without notice. • These products may be subject to export control regulations.