Table of Contents
Advertisement
Available languages
Available languages
Quick Links
简体中文
繁體中文
Bahasa Melayu
English
在使用本按摩椅之前,请仔细阅读使用说明书。
在使用本按摩椅子之前,請仔細閱讀使用說明書。
Sebelum mengendalikan unit ini, sila baca arahan ini sepenuhnya.
Before operating this unit, please read these instructions completely.
6
EP-MS41_ASIA.indb
1
Arahan Pengendalian
Operating Instructions
Kerusi Rehat Urutan (Rumah)
(Household) Massage Lounger
C1
T1
M1
1
使用说明书
使用說明書
(家用) 电动按摩椅
(家用)電動按摩椅子
型号
Model No.
EP-MS41
2014-10-21
13:20:31
Advertisement
Table of Contents

Related Manuals for Panasonic EP-MS41


Summary of Contents for Panasonic EP-MS41
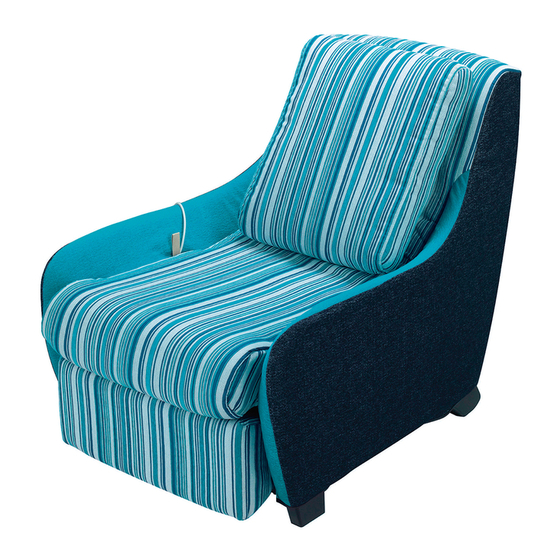
- Page 1 使用说明书 使用說明書 Arahan Pengendalian Operating Instructions (家用) 电动按摩椅 (家用)電動按摩椅子 Kerusi Rehat Urutan (Rumah) (Household) Massage Lounger 型号 EP-MS41 Model No. 简体中文 繁體中文 Bahasa Melayu English 在使用本按摩椅之前,请仔细阅读使用说明书。 在使用本按摩椅子之前,請仔細閱讀使用說明書。 Sebelum mengendalikan unit ini, sila baca arahan ini sepenuhnya. Before operating this unit, please read these instructions completely.
- Page 2 重要的安全说明 使用该电器设备时,一定要遵守包括下列项目在内的基本预防措施。 使用该按摩椅之前,须阅读全部说明。 危险 ─ 为了减少触电危险: 1. 使用之后,一定要拔掉本机的插头。 2. 清洁之前,一定要拔掉本机的插头。 警告 ─ 为了减少灼伤、火灾、触电或人员伤害的危险: 1. 当插头插在插座上时,绝对勿丢下本机不管。不用时,一定要拔掉本机的插头。 2. 当行动不便或沟通能力不足的人使用本机时,必须要有严密和持续不断的看护。 3. 只能将本机用于本说明书中阐明的用途。 4. 勿站立在本机上。 5. 勿使用制造商所推荐以外的任何辅助装置。 6. 儿童不宜使用本机。请让儿童远离本机。拔出锁匙,保管在儿童无法触及的地方。 7. 如果电源线或插头已损坏,则绝对勿使用本机。如果本机运转不正常、已摔落或损坏、已落入水中,请将其送到 附近指定的维修中心。 8. 大约每月一次掀开椅罩,检查本机按摩轮移动区域的面料有没有开裂。 安装椅罩之前,请务必检查本机按摩轮移动区域的面料有没有开裂。此外,还要检查椅罩的前后面料有没有开 裂。 如果您发现了裂口,无论裂口多么小,都要立即停止使用本机,拔掉电源线,并将本机送交指定的维修中心进行 修理。 9. 让电源线远离热源。勿拉扯电源线来移动本机。小心勿让插头接触针头、垃圾或湿气。(用干燥的布擦掉灰 尘。) 10. 勿在加热设备,如电热地毯等的上面使用本机。请勿在毛毯或枕头下面使用本机。否则,将导致过热,并可能引 发火灾、触电或人身伤害。 11.
- Page 3 警告: 28. 确认本机部件之间不存在任何异物后方可坐到本机上。 (检查靠背、椅座或腿部 / 足部按摩部分没有嵌入异物。 ) 如果未能遵守该注意事项,将可能导致事故或受伤。 29. 移动本机前应将腿部/足部按摩部分恢复至原来的位置。 若未能遵循该注意事项,可能会导致受伤,因为在移动本机时腿部/足部按摩部分会恢复至原来的位置。 30. 请勿在已安装好的状态下拖动或推动本机。 请勿使用滑轮在地板上移动本机。 否则可能损坏地板。 31. 请勿将您的手或脚伸到本机与腿部/足部按摩部分之间。 如果未能遵守该注意事项,将可能导致受伤。 32. 儿童不得使用本机。此外,请勿让儿童在本机上玩耍,或者爬到腿置台、椅座、靠背或扶手上。 请勿站在或坐在腿置台上。 33. 请勿站在腿部/足部按摩部分上。 否则可能被足部外罩的边缘绊倒。 腿部/足部按摩部分的末端部分可能会转动,或者主体可能会倾翻,导致事故或受伤。 另外,腿部/足部按摩部分的底部还可能接触并刮擦地板。 34. 请勿将您的脚伸到腿部/足部按摩部分的足底部分和小腿部分之间并尝试站起来。 如果未能遵守该注意事项,将可能导致事故或跌伤。 35. 请勿将您的手、手臂、头部等伸到腿部/足部按摩部分之间的间隙内。 为确保安全,完成按摩后应收拢腿部/足部按摩部分。 如果未能遵守该注意事项,将可能导致受伤。 接地说明 该产品必须接地。如果本机发生功能失常,接地将为电流提供阻力最小的通道,以减少触电危险。 该产品装备了具有设备接地导体和接地插头的电线。必须将该插头插入已完全依照当地代码和法令进行正确安装和接地的、合适 的插座。 危险 若设备接地导体的连接不当,则会导致触电危险。如果您对该产品的接地是否正确存有疑问,请委托专业电工进行检查。即使该 产品附带的插头与插座不配,也不能对其进行改造。请委托专业电工安装合适的插座。 该产品具有接地插头。请确认该产品连接至具有与该插头相配的插座。...
- Page 4 规格 电源: AC 220 V 50 Hz (仅适用于中国,香港特别行政区),AC 230 V 50 Hz (仅限用于新加 坡),AC 240 V 50 Hz (仅适用于马来西亚),AC 110 V 60 Hz (仅适用于台湾地区) 消耗电力: 70 W 上半身按摩 可治疗范围(上下方向): 约 65 cm(按摩轮移动的总距离约为 60 cm) 可治疗范围(左右方向): 在使用本机过程中按摩轮间的距离 颈部、肩部、背部、腰部:约 4 cm – 15 cm 可治疗范围(前后方向):...
- Page 5 各部位名称和功能 主体 正面 背面 没有靠垫时 1 扶手 9 本机按摩轮移动区域的面料 2 座面 10 靠垫 3 腿部/足部按摩解锁带 11 规格标签 • 参照第 C9 页。 12 电源线 • 用于取出和收起腿部/足部按摩部分。 • 电源线长度:约1.8 m 4 腿部/足部按摩部分 13 电源插头 按摩时 用作腿置台时 14 滑轮...
- Page 6 操作器 *根据本机购买区域的不同,操作器的显示语言可能有所差别。 显示 1 自动程序显示 • 选择程序时: 当前选定程序的 标志闪烁。 • 按摩期间: 显示当前程序的框。 2 个性程序显示 • 选择程序时: 当前选定程序的 标志闪烁。 • 按摩期间: 显示当前程序( 或 )。 3 个性程序设定时间显示 • 选择了个性程序时显示。 4 程序强度显示 • 分3级显示当前程序的强度。 5 肩部确认操作显示 • 肩部确认操作期间闪烁。 6 肩部位置调节模式显示 • 在肩部位置调节模式中,仅虚线部分( )闪烁 (约15秒)。...
- Page 7 设置 确定放置场所 • 腿部/足部按摩部分 请勿将按摩椅暴露于阳光直射或高温环境下(如,加热设备 约 40 cm 前),因为这样可能导致按摩椅表面材料褪色或硬化。 深度 约 108 cm • 建议您在按摩椅主体的下面铺设垫子或布,以防止损伤地板。 垫子需足够大(至少65 cm × 115 cm)以覆盖本机接触地板 宽度 的区域和腿部/足部按摩部分可能接触地板的的区域。 约 70 cm • 请于靠近出口处放置本机。 • 安置本机时应避免背面与任何 其他物体接触(此类接触可能 会产生变形并导致损坏)。 留出间隙 垫子 家具等 本机和腿部/足部按摩部分接触地板的面积 约 115 cm 警告第10、12条见第C1页。 1 打开包装箱 确认按摩椅主体和附件。 主体 附件 靠垫 电源线 操作器 加锁匙 • 出厂时,加锁匙已预先插入锁中。 EP-MS41_ASIA.indb 2014-10-21 13:20:33...
- Page 8 2 搬动商品 由于本机较重(约48 k ),因此搬运时请小心,以免造成背部拉伤。(本机必须由两人搬运。) 缓慢地放下本机,小心脚部被压伤。 警告第13条见第C2页。 抬起本机以安装和设置本机 • 如果没有抓牢致使本机掉落,可能会损伤地板。 • 确认腿部/足部按摩部分已被收起并锁定。 将操作器和电源线放在椅座上 在狭窄的走廊等地方,握住主体的前部和后部。 请勿握此处。 否则可能导致损坏或 将操作器和电源线放在椅座上 受伤。 握住主体的侧面 安置区域(铺上垫子以保护地板) 安置区域(铺上垫子以保护 地板) 在前部 用您的手指勾住主体下面 的缺口 握住主体内坚硬的 金属部分 用滑轮安装和设置本机 如果间隙不够大而难以通过 将本机抬起至不超过腰部的 可尝试以下方法。 高度 安装前,检查间隙是否足够宽,间隙前后是否有足够的空间。 此外,安装过程中请注意不要使本机碰到墙面或柱子。 1 将 本机侧面平放,前端先穿过间隙。 将操作器和电源线放 在椅座上 <俯视图> A 间隙前方空间的宽度: 从间隙一侧边缘开始,需要...
- Page 9 3 将操作器放入操作器袋 操作器袋 4 将靠垫安放到适当的位置 用作椅子时,装上靠垫。 5 将电源线连接到本机 检查电源开关部分的设备电源输入插口和 电源线的接口是否脏污或损坏。 将接口插入设备电源输入插口。 务必将接口完全推入。 设备电源输入插口 电源线 电源开关部分 接口 EP-MS41_ASIA.indb 2014-10-21 13:20:34...
- Page 10 如何使用腿置台 警告第15条见第C2页。 1 笔直向上拉起腿部/足部按摩解锁带。 腿部/足部按摩部分将略微移出。 2 将脚放到足底台上。 3 将脚往前蹬,直至其发出“咔哒”声锁定。 它将被锁定而不会返回收起位置。 (足底台或小腿部分的角度不固定。) 咔哒声 4 将脚从足底台上挪开。 足底台将向上移动。 将小腿放到上面。 收起 笔直向上拉腿部/足部按摩 向下推腿置台。 用双手推动,将其收到椅座下面。 解锁带,解除锁定。 • 稳固地持续推动直至您听到它锁定时发出的咔 嗒声。 EP-MS41_ASIA.indb 2014-10-21 13:20:34...
- Page 11 每次按摩之前(检查本机) 取下靠垫。 用手触摸按摩轮,确认按摩轮处于收藏位 检查 置。 按摩轮不处于回缩位置时, • 在步骤6之后,按下 按钮两次将按摩轮返回回 缩位置。 确认本机部件之间不存在异物。 警告第11条见第C2页。 检查腿部/足部按摩部分 1 笔直向上拉起腿部/足部按摩解锁带。 • 腿部/足部按摩部分将在足底部分关闭的状态下部分弹出。 2 向下折叠足底台,确认没有卡入异物。 检查收纳部分 3 用双手推动,将其收到椅座下面。 • 稳固地持续推动直至您听到它锁定时发出的咔嗒声。 检查电源线及电源插头。 检查有无损坏 检查是否脏污和损坏 警告第7、9条见第C1页。 务必将接口完全推入设备电源输入插口。 EP-MS41_ASIA.indb 2014-10-21 13:20:35...
- Page 12 打开电源。 1 将电源插头插入电源插座。 2 将锁定开关钥匙转到“open”(打开)的位置。 3 将电源开关滑到“on”(开)的位置。 每月检查一次。 检查 警告第8条见第C1页。 检查本机按摩轮移动区域的面料没有开裂。 • 拆下椅罩。 如何拆下椅罩 (参照第 C25 页、第 C26 页。) 将头的后部与靠背的上部对齐,坐在椅子 上。 仅限于使用腿部/足部按摩时 取出腿部/足部按摩部分,将您的脚放在上 面。 1 笔直向上拉起腿部/足部按摩解锁带。 • 腿部/足部按摩部分将略微向前伸出。 2 将您的脚放到足底部分上。 3 将脚往前蹬,直至其发出“咔哒”声锁定。 (足底台或小腿部分的角度不固定。) 咔哒声 • 如果将脚从足底台上挪开,它就 会变成腿置台。 EP-MS41_ASIA.indb 2014-10-21 13:20:35...
- Page 13 由于您的身高的关系,您的膝部以不舒服的姿势蜷在椅座上时 可使用以下方法 或 。 用腿置台仅按摩上身(参见下图)。 • 单独使用腿部/足部按摩功能。 向上滑动您的身体,使您的膝部不再被迫蜷起。 • 在这种情况下,请使用个性程序单独按摩您的颈部和肩部。 如果您够不到腿部/足部按摩部分以将其向前蹬 向前滑动您的身体。 仅按摩上身时 可以在腿置台上伸开腿进行按摩。 如何使用腿置台 (参照第 C9 页。) • 按摩期间身体可能会向前移动。 此时,可向后滑动身体。 EP-MS41_ASIA.indb 2014-10-21 13:20:36...
- Page 14 选择菜单并开始按摩 • 使用15分钟后,建议您休息10分钟。 • 每天最多使用2次,共计30分钟。 警告第4、7条见第C2页。 按 按钮打开电源。 菜单选择按钮闪烁。 您是否已取下了靠垫? (参照第 C10 页。) (如果在打开电源后3分钟内仍未选择菜单或启动腿部/足部按摩,将自动关闭 腿部/足部按摩部分是否 电源。) 已弹出? (参照第 C11 页。) 上半身按摩 从自动程序、个性程序以及手动控制当中选择菜单。 自动程序 参照第 C14 页。 您可以从4种程序当中作出选择以自动放松颈部至腰部的部位。 个性程序 参照第 C17 页。 您可以选择“颈部和肩部”或“背部和腰部”。您还可以选择按摩时间(15 分钟或以下)。 手动控制 参照第 C19 页。 您可以对所需的部位进行集中按摩。 腿部/足部按摩 请按 按钮。 参照第 C21 页。 * 即 使已经取下了靠垫并且腿部/足部按摩 部分已弹出,也会出现以上显示。 腿部/足部按摩可单独使用或与上半身按摩同时使用。 EP-MS41_ASIA.indb 2014-10-21 13:20:36...
- Page 15 使用自动程序 [程序选择模式] 按 按钮进入自动程序的程序选择模式。 (如果在进入程序选择模式后3分钟内不进行任何操作,电源将自动关闭。) 按 或 选择程序。 选择“揉按解乏”、“8分钟速按”、“舒适放松”和“恢复身心”之一。 当前选定程序的 标志将闪烁。 选择程序,然后按 按钮。 1 将您的头部放在靠背上。 按摩轮 按摩轮将缓慢地向上移动, 本机发出哔声。 2 按摩轮到达顶部时,将启动一项用以确定您肩部的大概位置的 操作。 [肩部确认操作] 按摩轮一边执行敲打动作一 按摩轮 边慢慢地下降。 ( 的框闪烁。) • 采用某些坐姿时,按摩轮可 能会暂时到达靠近腰部的位 置。 自动程序的特点 揉按解乏 8分钟速按 舒适放松 恢复身心 通过揉按、柔和指压和敲打 本程序在揉按解乏程序的基 采用刺激性较弱的动作放松 逐渐降低按摩强度,然后再 动作放松从颈部到腰部的肌...
- Page 16 3 双重哔声和 的闪烁表示按摩轮正在被微调到肩部位置。 [肩部位置调整模式] <调整方法> 按 或 调整位置。 (每按下一次按钮按摩轮都会移动约 1.5 cm。 ) 4 肩部位置匹配时,按 启动程序。 • 如果未按下 按钮,15秒后程序将自动启动。 注 <目标肩部位置> 过高 按摩轮的正确位置 (应感觉到敲打的点) 过低 自定义设定 要调节程序强度 显示的内容 强度 调节 按 – + 调节按钮。 要同时使用腿部/足部按摩 请按 按钮。 (参照第 C21 页。) EP-MS41_ASIA.indb 2014-10-21 13:20:37...
- Page 17 要改变按摩的内容 要从自动程序当中选择不同的程序 按 按钮,然后选择不同的程序。 上半身按摩将暂时停止。 (参照第 C14 页。) 要改为个性程序 按 按钮并选择程序。 上半身按摩将暂时停止。 (参照第 C17 页。) 要改为手动控制 请按 按钮。 动作将立即启动。 (参照第 C19 页。) 程序期间的显示 显示当前程序的框。 程序强度(上半身)分3级显示。 当前的大概按摩位置闪烁。 显示当前的按摩操作。 EP-MS41_ASIA.indb 2014-10-21 13:20:37...
- Page 18 使用个性程序 [程序选择模式] 按 按钮进入个性程序的程序选择模式。 (如果在进入程序选择模式后3分钟内不进行任何操作,电源将自动关闭。) 按 或 选择程序。 选择“颈部和肩部”或“背部和腰部”。 当前选定程序的 标志将闪烁。 选择程序,然后按 按钮。 设定按摩时间。 按 – + 调节按钮。 时间指示 约15分钟 约12分钟 约9分钟 约6分钟 约3分钟 • 从其他按摩中途改为“个性程序”时,您可以对剩余时间作出选择。 例) 最多4 段 最多1 段 按 按钮完成设定。 EP-MS41_ASIA.indb 2014-10-21 13:20:38...
- Page 19 选择了“颈部和肩部”时 将启动用于确定您的肩部大概位置的操作。 (参照第 C14 页。) 1 双重哔声和 的闪烁表示按摩轮正在被微调到肩部位置。 [肩部位置调整模式] <调整方法> 按 或 调整位置。 (每按下一次按钮按摩轮都会移动约1.5 cm。) 2 肩部位置匹配时,按 启动程序。 • 如果未按下 按钮,15秒后程序将自动启动。 选择了“背部和腰部”时 按摩轮将移动到背部或腰部,程序启动。 自定义设定 要调节程序强度 显示的内容 强度 调节 按 – + 调节按钮。 要同时使用腿部/足部按摩 请按 按钮。 (参照第 C21 页。) EP-MS41_ASIA.indb 2014-10-21 13:20:38...
- Page 20 要改变按摩的内容 • 使用个性程序时,您不能设定比您最初设定的按摩时间更长的按摩。 如果您误设了较短的时间,可结束按摩,然后再重新按 按钮输入新设定。 要从个性程序中选择不同的程序 按 按钮,然后选择不同的程序。 上半身按摩将暂时停止。 (参照第 C17 页。) 要改为自动程序 按 按钮并选择程序。 上半身按摩将暂时停止。 (参照第 C14 页。) 要改为手动控制 请按 按钮。 动作将立即启动。 (参见下图。) 使用手动控制 警告第4条见第C2页。 请按 按钮。 连续执行包括柔和指压、揉按和敲打在内的6种动作。 <按摩操作的顺序> 向上揉按 敲打 柔和指压 向上揉按和敲打 向下揉按 向下揉按和敲打 [按摩期间的显示] 按摩操作显示 操作自动变更。 • 当同一点已经持续按摩了5分钟时,按摩位置将自动向上移动约3 cm。 EP-MS41_ASIA.indb 2014-10-21 13:20:39...
- Page 21 自定义设定 要调整位置 按 或 进行调整。 • 每按一次按钮按摩轮都会移动约1.5 cm。 • 当您按住按钮时,操作将继续进行直至您松开 按钮。 闪烁表示当前的大致位置。 要调节程序强度 显示的内容 强度 调节 按 – + 调节按钮。 要继续执行单一的操作,例如柔和指压或揉按 在操作期间按 按钮便可继续单独执行相同的操作。 • 要更改操作,请再次按 按钮。操作便会按顺序自动更改。 要同时使用腿部/足部按摩 请按 按钮。 (参照第 C21 页。) 要改变按摩的内容 要改为个性程序 按 按钮并选择程序。 上半身按摩将暂时停止。 (参照第 C17 页。) 要改为自动程序 按 按钮并选择程序。 上半身按摩将暂时停止。 (参照第 C14 页。) EP-MS41_ASIA.indb 2014-10-21 13:20:39...
- Page 22 使用腿部/足部按摩 请按 按钮。 腿部/足部按摩启动。 • 再次按 按钮即可结束按摩。 当您单独使用腿部/足部按摩时,可使用 按钮终止 按摩。 要调节腿部/足部按摩的强度 显示的内容 按腿部/足部按摩按钮 调节强度。 强度 腿部/足部按摩时间 要单独使用腿部/足部按摩: 按 摩持续约15分钟。 要结合上半身按摩: 上半身按摩结束时,腿部/足部按摩也会同时结束。 腿部/足部按摩的操作 小腿 足底 从两侧夹住小腿,进行挤压式按摩。 用气囊从侧面和底部来挤压脚部。 EP-MS41_ASIA.indb 2014-10-21 13:20:40...
- Page 23 按摩结束后 定时器功能 操作开始后 约 15分钟 按摩将自动结束。 中断按摩 请按 按钮。 • 按摩轮恢复至收缩的位置。 如果您遇到任何问题 请按 按钮。 • 所有操作将立即停止。 • 小心走下按摩椅,以防按摩椅翻倒。 将按摩椅恢复原状 警告第15条见第C2页。 为了您的安全,一旦腿置台用完后请务必将其收起。 收起腿部/足部按摩部分。 1 笔直向上拉起腿部/足部按摩解锁带。 2 检查收纳部分有无阻碍。 3 用手将腿部/足部按摩部分推到椅座下面。 • 稳固地持续推动直至您听到它锁定时发出的咔嗒声。 如何收起腿置台(参照第 C9 页。) 将靠垫安放到适当的位置。 EP-MS41_ASIA.indb 2014-10-21 13:20:40...
- Page 24 切断电源 警告第1、6条见第C1页,第10条见第C2页。 将电源开关滑到“off”(关)的位置。 将锁定开关钥匙转到“lock”(锁定)的位置。 从电源插座上拔下电源插头。 锁定开关钥匙必须存放在儿童无法触及的地方。 清洗及维护 危险第2条请见第C1页。 座椅面料、塑料部位 日常清洁和保养 用柔软、干燥的布擦掉灰尘和轻微的污垢。 变脏时 1 将软布浸泡在水中或用温水稀释到3–5%的温和清洁剂中,然后完全 拧干。 2 擦拭表面。 (以轻轻的拍打动作擦拭面料部分。) 3 用仅沾水的布拧干后擦掉清洁液。 4 用干燥的软布擦拭。 5 使其自然风干。 (请勿使用吹风机等装置快速干燥。) 污垢不易清除时 可在步骤1中尝试以下方法。 <适用于面料> 用沾水或温和清洁剂的刷子刷。 (注意不要过度刷面料部分,否则会造成损坏。) EP-MS41_ASIA.indb 2014-10-21 13:20:41...
- Page 25 可以拆下外罩进行清洗。 靠垫外罩 足部外罩 椅罩 清洗方法 清洗注意事项 手洗(避免机洗) 将椅罩、靠垫外罩和足部外罩拉上拉链或扣上搭扣进行清洗。 1 将外罩浸没在不超过30℃的水中,然后轻轻地向下按压。 注意: • 清洗时请勿揉搓。 • 使用柔和的洗涤剂。含有漂白剂的洗涤剂会使外罩脱色。 请勿使用此类洗涤剂。 • 应分别清洗以免面料串色。 2 漂洗干净。 3 轻轻地挤出水。 注意: • 不要用力拧干,否则可能损坏面料或拉长纤维。 4 轻轻地展开并挂在阴暗处晾干。 注意: • 在阳光下暴晒可能会导致面料缩水或褪色,因此应当避免。 • 清洗后应立即挂起晾干,以免串色。 清洗外罩之后,您可以通过熨烫消除皱痕。 (使用熨斗的注意事项) 椅罩 足部外罩、靠垫外罩 请将蒸汽熨斗与外罩隔开一点距离进行熨烫。 将熨斗放在面料上,使用上限为150℃的中等温度。 (不要让熨斗直接接触面料。) 干洗 干洗时请采用石油系洗涤剂,请勿采用滚筒烘干方式。...
- Page 26 如何拆下外罩 拆下 靠垫外罩 拉开拉链并取出靠垫。 足部外罩 1 解开搭扣。 2 一次拆下一侧的外罩。 椅罩 1 拉开拉链(2处)。 2 将电源线穿过孔放到后面。 3 解开搭扣A和B,提起侧面(另一侧相同)。 • 搭扣A和B从外面看不到。 4 拉开靠背侧面的拉链。 2处 EP-MS41_ASIA.indb 2014-10-21 13:20:41...
- Page 27 5 按照1,2和3的顺序,解开椅座上的搭扣(3处), 从外罩的缝中拉出操作器。 6 取下本机的外罩。 装上 靠垫外罩 1 向前折叠靠垫并将其插入拉链开口。 靠垫已完全插入时,请握住外罩 的顶端边角将其上下晃动几下。 2 拉上拉链。 3 要确保靠垫均匀分布在外罩内,可将外罩前后拍打几下。 足部外罩 1 拉出腿部/足部按摩部分。 2 将外罩拉到足底台的侧面上。 有带子的一侧是上侧 如何顺利地拉上 1 先对准一侧的缝合线,然后捏着外罩的边缘拉上。 2 以相同的方式拉到另一侧上。 3 将带子末端的搭扣扣到足底台的底部。 确保外罩也完全覆盖后侧 EP-MS41_ASIA.indb 2014-10-21 13:20:42...
- Page 28 椅罩 1 将外罩放到本机上。 2 穿过外罩的缝插入操作器和电源线。 3 拉上靠背侧面的拉链(2处)。 4 扣上椅座侧面的搭扣(2处)。 拉住外罩的同时将其塞入。 扶手 5 将操作器袋拉到扶手A的外侧,将外罩铺在 扶手B上。 6 将外罩拉到靠背的顶部。 将外罩的缝合线对准靠背的顶部边角 7 拉上拉链(2处)。 伸展。 拉住扶手侧面的外罩的同时,一点一点地交替拉拉 链,便可干净利索地拉上拉链。 8 穿过孔拉出电源线。 EP-MS41_ASIA.indb 2014-10-21 13:20:42...
- Page 29 9 拉着外罩,扣上搭扣A、B和C(5处)。 • 搭扣B和C从外面看不到。 • 用手掌抚平皱褶,扣上底部的搭扣C。 C(另一侧相同) (另一侧相同) 10 从外罩的缝中拉出腿部/足部按摩解锁带。 靠垫外罩或椅罩上有明显的皱褶和松垂时 椅罩 靠垫外罩 1 靠背上的皱褶:可轻轻地搓向边缘。 前后轻轻拍打几下,可以使靠垫分布更均匀并减少 皱褶的数量。 2 椅座皱褶:解开搭扣,然后在向前拉面料的同时 重新扣上搭扣。 * 在 使用过程中,面料可能会略微伸长,以至于形成皱褶。 如果折痕比较明显,可熨平外罩。(参照第 C24 页。) 选购部件 改换不同的颜色或担心本机脏污时,推荐使用这些部件。 产品名称: 按摩椅外罩套件 EP-2M41 EP-MS41_ASIA.indb 2014-10-21 13:20:42...
- Page 30 按摩程序的综合内容 自动程序的内容 揉按解乏 通过短暂的揉 通过柔和指压 通过揉按充分 通过揉按和敲 通过轻柔的揉 通过轻柔的揉 揉按至结束* 按放松颈部和 和揉按放松背 放松颈部和肩 打充分放松背 按放松颈部和 按放松腰部 肩胛骨之间的 部和腰部 胛骨之间的部 部和腰部 肩胛骨之间的 部位 位 部位 8分钟速按 通过短暂的揉 通过柔和指压 通过集中揉按 通过集中揉按 揉按至结束* 按放松颈部和 和揉按放松背 充分放松颈部 充分放松腰部 肩胛骨之间的 部和腰部 和肩部 部位 舒适放松 轻柔地揉按以 以略高的速度...
- Page 31 故障检修 问题 原因和处理方法 电机噪声 • 听起来像是按摩轮正在挤压布料,令其产生褶皱。 • 发出揉按或敲打等动作的操作噪音。 • 按摩轮在工作时发出咯吱声。 • 按摩轮上移或下移时发出咔哒声。 • 可听到传动带正在转动的声音。 • 当电机启动时发出嘎吱声。 • 按摩轮向里及向外移动时发出沉闷的金属声或摩擦声。 • 施加气压时发出工作噪声。 • 放气时发出噪声。 • 当您向后靠着坐下时有滑动声。 • 当按摩轮在座椅面料上按擦时发出摩擦声音。 • 腿部/足部按摩部分发出咔哒声。 这些声音很正常,不会对本机的使用有任何影响。 按摩轮中途停止。 在使用中施加外力不适当时,为了确保安全,按摩轮会停止运动。 一旦动作显示部或按钮全部闪烁,按摩机停止工作时,请暂时切断椅子的电源开关,约10秒钟之后,重新置于“开”,再进 行操作。若再次停止时,请起身谨慎使用。 按摩轮没有达到肩部或颈部的位置。 如果您的头部或背部没有接触到靠背,在肩部确认操作过程中检测的肩部位置可能低于实际位置。您可以坐在座椅的最深位 置,将头部靠在靠背上,然后从头开始重新操作。 (参照第 C14 页。) 左右按摩轮的高度不同。 采用其它敲打方法时,这属于自然现象。 本机并无任何问题。 本机根本无法运行。...
- Page 32 — 為了減少觸電危險: 1. 使用之後,一定要拔掉本機的插頭。 2. 清潔之前,一定要拔掉本機的插頭。 警告 — 為了減少灼傷、火災、觸電或人員傷害的危險: 1. 當插頭插在插座上時,絕對勿丟下本機不管。不用時,一定要拔掉本機的插頭。 2. 當行動不便或溝通能力不足的人使用本機時,必須要有嚴密和持續不斷的看護。 3. 只能將本機用於本說明書中闡明的用途。 4. 勿站立在本機上。 5. 勿使用製造商所推薦以外的任何輔助裝置。 6. 兒童不宜使用本機。請讓兒童遠離本機。不使用時請將鑰匙拔出並保存在兒童無法觸及的場所。 7. 如果電源線或插頭已損壞,則絕對勿使用本機。如果本機運轉不正常、已摔落或損壞、已落入水中,請將其委託 Panasonic服務中心處理。 8. 大約每月一次把本體外罩往下折,檢查本機按摩輪移動處的布料無撕裂。 安裝本體外罩之前,務必檢查本機按摩輪移動處的布料無撕裂。此外,還要檢查本體外罩前、後布料無撕裂。 如果您發現了裂口,無論裂口多麼小,都要立即停止使用本機,拔掉電源線,並將本機委託Panasonic服務中心處 理。 9. 讓電源線遠離熱表面。勿拉扯電源線來移動本機。勿讓插頭接觸針頭、不潔物或濕汽。 (用乾燥的布擦掉灰 塵。) 10. 請勿在加熱設備上(如電熱毯等)使用本機。勿在毛毯或枕頭下面使用本機。否則將導致過熱而引起火災、觸電 或人身傷害。 11. 在操作期間,千萬勿堵塞氣孔,必須讓所有的氣孔避開棉絨或頭髮等。勿將任何異物落入或塞入本機的開口之 內。 12. 勿在浴室或其他濕氣較重的地方使用本機。否則可能會導致觸電或本機功能異常。請勿將水等濺灑在操作器上。...
- Page 33 因患血栓症或動脈瘤、急性靜脈曲張或其他循環系統紊亂疾病而被醫生禁止接受按摩的人。 f) 脊椎異常、側彎的人。 2. 切勿將身體的任何部位放入按摩輪之間,否則,按摩輪的擠壓運動會導致受傷。切勿將您的膝部伸入腿部/腳掌按 摩區。 3. 請勿緊貼裸露的皮膚使用本機。薄衣服可增強按摩效果,而按摩器直接接觸皮膚可能會刺激皮膚。 頭部佩戴有任何硬質飾物(如髮飾等)時請勿使用本機。 請勿過重地按摩後頸部。 4. 使用本機持續按摩身體同一部位時,每次不得超過5分鐘。超過5分鐘,請您按下開關,停止本機。 過度按摩會過分刺激肌肉和神經,從而產生負作用或導致傷害。 為避免過度按摩,每次使用本機時不得超過15分鐘。 5. 使用本按摩椅時,如感不適或有疼痛感,請立即停止使用。 6. 勿在使用本機時入睡或酒後使用本機。 7. 初次使用按摩椅時,請務必以輕度按摩強度開始。 8. 如本機功能出現異常,請立即關閉電源並委託Panasonic服務中心處理。 9. 請勿擅自維修本機。委託Panasonic服務中心處理。 10. 每次按摩完畢後,應將電源開關推至“off”(關)位置,並將鎖定開關撥到“lock”(鎖)位置,拔出鑰匙和電 源插頭。 11. 確認本機的零件之間無任何異物之後,方可坐在本機上。(檢查靠背、座位或腿部/腳掌按摩區無夾帶異物。) 若未注意此事可能導致意外或人體傷害。 12. 移動本機時,請把腿部/腳掌按摩區縮回原來的位置。 若未注意此事可能將因腿部/腳掌按摩區在移動時突然縮回而造成的人體傷害。 13. 請勿在已安裝好的狀態下拖動或推動本機。 請勿使用輪子在地板上移動本機。 否則可能損壞地板。 14. 請勿將您的手或腳伸到本機與腿部/腳掌按摩區之間。 若未注意此事可能導致人體傷害。...
- Page 34 約54 cm×22 cm 尺寸 約211 cm×76 cm 生產國 中國 生產國 中國 生產國 中國 緊急處理方法 : 發生異常時 ( 有燒焦味等 ) 需立即停止運轉並拔掉電源插頭。 • 若在異常狀態下繼續運轉,會因發熱等情形,造成火災及觸電的發生。 • 請速與Panasonic服務中心洽詢。 • 電源線損壞時,需由Panasonic服務中心更換以避免危險。 製 造 商:Panasonic Corporation 生產國別:中國 進 口 商:台松電器販賣股份有限公司(僅限台灣) 公司地址:新北市中和區建六路57號 連絡地址:新北市中和區員山路579號 電 話:(02) 2223-5121 EP-MS41_ASIA.indb 2014-10-21 13:20:44...
- Page 35 各部位名稱和功能 主機體 正面 背面 不帶靠墊 1 扶手 9 本機按摩輪移動處的布料 2 座位 10 靠墊 3 腿部/腳掌按摩解鎖帶 11 規格標簽 • 參照T9頁。 12 電源線 • 用於取出和存放腿部/腳掌按摩區。 • 電源線長度︰ 約1.8 m 4 腿部/腳掌按摩區 13 電源插頭 按摩時 作為腿置台使用時 14 輪子 小腿部分 腿置台 15 操作器 腳底區 16 安全注意標誌(貼紙)...
- Page 36 操作器 *根據本機購買區域的不同,操作器的顯示語言可能有所差別。 顯示部份 1 自動程序顯示 • 選擇程序時︰ 當前選定程序的 標誌閃爍。 • 按摩期間︰ 顯示當前程序(框)。 2 定位模式顯示 • 選擇程序時︰ 當前選定程序的 標誌閃爍。 • 按摩期間︰ 顯示當前程序( 或 )。 3 定位模式設定時間顯示 • 選擇了定位模式時顯示。 4 三種程序強度顯示 • 分3級顯示當前程序的強度。 5 肩部確認操作顯示 • 肩部確認操作期間閃爍。 6 肩部位置調節模式顯示 • 在肩部位置調節模式中,僅虛線部分( )閃爍 (約15秒)。...
- Page 37 設置 確定放置場所 • 腿部/腳掌按摩區 不得將按摩椅暴露於陽光直射或放在熱源前面之高溫下,以免 約40 cm 導致按摩椅表面材料褪色或變硬。 深度 約108 cm • 為避免損壞地板,建議您在按摩椅下方地板鋪設一層墊子或 布。 墊子大小(至少65 cm × 115 cm)應足以覆蓋本機接觸 寬度 地板的區域和腿部/腳掌按摩區可能接觸地板的區域。 約70 cm • 將本機放在通風的場所。 • 安置本機時應避免背面與任何 其他物體接觸(此類接觸可能 會產生變形並導致損壞)。 留出 間隙 腳踏墊 家具等 本機和腿部/腳掌按摩區可碰觸地板的區域 約115 cm 請參看第T1頁的警告的第10條和第12條。 1 打開包裝箱 確認按摩椅主體和附件。 主機體 配件 靠墊 電源線 操作器 上鎖鑰匙 •...
- Page 38 2 設置按摩椅 因本機極重 (約48 k ),請小心處理,避免受到傷害。 (必須由兩人搬運本機。) 慢慢放下本機並小心您的腳步。 請參看第T2頁的警告的第13條。 提升本機以安裝和設置本機 • 若搬運方法不正確,可能使本機落地,損壞地板。 • 確認腿部/腳掌按摩區已被收起並鎖定。 操作器‧電源線放在座位上 在狹窄的走廊等地方,握住主機體的前部和後部。 請勿握住此處。 否則可能造成損壞或 操作器‧電源線放在座位上 受傷。 握住主機體的側面 安置區域(鋪上墊子以保護地板) 安置區域(鋪上墊子以保護 地板) 在前部 用您的手指勾住主機體下 握住主機體內堅硬的 面的缺口。 金屬部分 使用輪子安裝和設置本機 如果間隙不夠大,無法穿過 嘗試以下操作。 腿置台抬起至腰部以下 安裝之前檢查間隙是否夠寬,間隙的前、後空間是否充足。 此外,安裝過程中小心不要讓本機碰到牆壁或柱子。 操作器‧電源線放在 1 本 機側躺穿過間隙時,前端先過。 座位上 <頂視圖> A 間隙前的空間寬度︰...
- Page 39 3 將操作器置於操作器袋內 操作器袋 4 將靠墊安放到適當的位置 作為椅子使用時安裝靠墊。 5 將電源線連接到本機 檢查電源開關部分的設備電源輸入插座和 電源線的插頭是否髒污和損壞。 將設備電源輸入插頭插入設備電源輸入插 座。 務必將設備電源輸入插頭完全推入。 設備電源輸入插座 電源線 電源開關部分 設備電源輸入插頭 EP-MS41_ASIA.indb 2014-10-21 13:20:46...
- Page 40 如何使用腿置台 請參照T2頁的警告的第15條。 1 筆直向上拉起腿部/腳掌按摩解鎖帶。 腿部/腳掌按摩區稍向外移出。 2 將您的腳置於腳底區上。 3 向前推腳,直至聽到鎖定的“哢嗒”聲。 它將被鎖定而不會返回收起位置。 (腳底區或小腿部分的角度不固定。) 哢嗒 4 將腳從腳底區移出。 腳底區會上移。 將小腿置於其上。 存放 筆直向上拉動腿部/腳掌按摩 向下推動腿置台。 用雙手推動,將其存放於座位下方。 解鎖帶解鎖。 • 穩固地持續推動直至您聽到它鎖定時發出的哢 嗒聲。 EP-MS41_ASIA.indb 2014-10-21 13:20:47...
- Page 41 每次按摩之前(檢查本機) 取下靠墊。 用手碰觸按摩輪,檢查按摩輪位於縮回位 檢查 置。 當按摩輪尚未在縮回的位置 • 在步驟6之後,按兩次操作器的 按鈕,將按摩 輪縮回。 確認與本機之間無任何異物。 請參照T2頁的警告的第11條。 檢查腿部/腳掌按摩區 1 筆直向上拉起腿部/腳掌按摩解鎖帶。 • 腿部/腳掌按摩區將在腳掌部分關閉的狀態下部分彈出。 2 往下折腳底區,檢查無異物陷落其中。 檢查收納部分 3 用雙手推動,將其存放於座位下方。 • 穩固地持續推動直至您聽到它鎖定時發出的哢嗒聲。 檢查電源線和電源插頭。 檢查有無損壞 檢查是否髒污和損壞 請參照T1頁的警告的第7條和第9條。 務必將設備電源輸入插頭完全推入設備電 源輸入插座。 EP-MS41_ASIA.indb 2014-10-21 13:20:47...
- Page 42 開啟電源。 1 將插頭插入電源插座內。 2 確認鑰匙鎖定是設定在“open”(開啟)的 位置。 3 確認電源切換是設定在“on”(開)的 位置。 每月檢查一次。 檢查 請參照T1頁的警告的第8條。 檢查本機按摩輪移動處的布料無撕裂。 • 移除本體外罩。 如何移除本體外罩 (參照T25頁、T26頁。) 坐下並將後腦靠齊靠背上部。 僅限於使用腿部/腳掌按摩時 取出腿部/腳掌按摩區,將您的腳放在上 面。 1 筆直向上拉起腿部/腳掌按摩解鎖帶。 • 腿部/腳掌按摩區將略微向前伸出。 2 將您的腳放到腳掌部分上。 3 向前推腳,直至聽到鎖定的“哢嗒”聲。 (腳底區或小腿部分的角度不固定。) 哢嗒 • 如果您把腳從腳底區移出,它將 變成腿置台。 EP-MS41_ASIA.indb 2014-10-21 13:20:47...
- Page 43 體型高大的人,膝部被迫蜷起時 可使用以下方法 或 。 僅按摩您的上半身 • 腿部/腳掌按摩功能請分開單獨使用 向上滑動您的身體,使您的膝部不再被迫抬起。 • 在這種情況下,請使用定位模式單獨按摩您的頸部和肩部。 體型嬌小的人,如果踏不到腿部/腳掌按摩區 向前滑動您的身體。 僅按摩上半身時 可在腿置台上將腿伸出進行按摩。 如何使用腿置台 (參照T9頁。) • 在按摩中,您的身體可能向前移。 在這種情況下,向後滑動身體。 EP-MS41_ASIA.indb 2014-10-21 13:20:48...
- Page 44 由選單中選擇按摩程序並開始按摩 • 使用15分鐘後,建議您休息10分鐘。 • 每天最多使用2次,共計30分鐘。 請參看第T2頁的警告的第4條和第7條。 按 開啟電源。 選單選擇按鈕閃爍。 您是否已取下了靠墊? (參照T10頁。) (若在開啟電源後3分鐘內仍未選擇選單或啟動腿部/腳掌按摩,電源將自動關 腿部/腳掌按摩區是否已 閉。) 彈出? (參照T11頁。) 上半身按摩 從自動程序、定位模式以及手動控制當中選擇選單。 自動程序 參照T14頁。 您可以從4種程序當中作出選擇以自動放鬆頸部至腰部的部位。 定位模式 參照T17頁。 您可以選擇“頸部和肩部”或“背部和腰部”。 您還可以選擇按摩時間 (15分鐘或以下)。 手動控制 參照T19頁。 您可以對所需的部位進行集中按摩。 腿部/腳掌按摩 按 按鈕。 參照T21頁。 * 即使已經取下了靠墊並且腿部/腳掌按摩 區已彈出,也會出現以上顯示。 腿部/腳掌按摩可單獨使用或與上半身按摩同時使用。 EP-MS41_ASIA.indb 2014-10-21 13:20:48...
- Page 45 使用自動程序 [程序選擇模式] 按 按鈕進入自動程序的程序選擇模式。 (如果在進入程序選擇模式後3分鐘內不進行任何操作,電源將自動關閉。) 按 或 選擇程序。 選擇“揉按鬆弛”、“8分鐘速按”、“揉撫放鬆”和“元氣恢復”之一。 當前選定程序的 標誌將閃爍。 選擇程序,然後按 按鈕。 1 將您的頭部放在靠背上。 按摩輪 按摩輪將緩慢地向上移動, 本機發出嗶聲。 2 按摩輪到達頂部時,將啟動一項用以確定您肩部的大概位置的 操作。 [肩部確認操作] 按摩輪一邊執行敲打動作一 按摩輪 邊慢慢地下降。 ( 的框閃爍。) • 採用某些坐姿時,按摩輪可 能會暫時到達靠近腰部的位 置。 自動程序的特點 揉按鬆弛 8分鐘速按 揉撫放鬆 元氣恢復 通過揉按、柔和指壓和敲打 本程序在揉按鬆弛程序的基 採用刺激性較弱的動作放鬆 逐漸降低按摩強度,然後再 動作放鬆從頸部到腰部的肌 礎上,集中按摩易疲勞的部 您的身體。...
- Page 46 3 雙重嗶聲和 的閃爍表示按摩輪正在被微調到肩部位置。 [肩部位置調整模式] <調整方法> 按 或 調整位置。 (每按下一次按鈕按摩輪都會移動 約1.5 cm。) 4 肩部位置匹配時,按 啟動程序。 • 如果未按下 按鈕,15秒後程序將自動啟動。 註 <目標肩部位置> 太高 按摩輪的正確位置 (也就是應該感到敲打動作的位置) 太低 為了更符合自己的偏好 要調節程序強度 顯示的內容 強度 調節 按 – + 調節按鈕。 要同時使用腿部/腳掌按摩 按 按鈕。 (參照T21頁。) EP-MS41_ASIA.indb 2014-10-21 13:20:49...
- Page 47 要改變按摩的內容 要從自動程序當中選擇不同的程序 按 按鈕,然後選擇不同的程序。 上半身按摩將暫時停止。 (參照T14頁。) 要改為定位模式 按 按鈕並選擇程序。 上半身按摩將暫時停止。 (參照T17頁。) 要改為手動控制 按 按鈕。 動作將立即啟動。 (參照T19頁。) 程序期間的顯示 顯示當前程序的框。 程序強度(上半身)分3級顯示。 當前的大概按摩位置閃爍。 顯示當前的按摩操作。 EP-MS41_ASIA.indb 2014-10-21 13:20:49...
- Page 48 使用定位模式 [程序選擇模式] 按 進入定位模式的程序選擇模式。 (如果在進入程序選擇模式後3分鐘內不進行任何操作,電源將自動關閉。) 按 或 選擇程序。 選擇“頸部和肩部”或“背部和腰部”。 當前選定程序的 標誌將閃爍。 選擇程序,然後按 按鈕。 設定按摩時間。 按 – + 調節按鈕。 時間指示 約15分鐘 約12分鐘 約9分鐘 約6分鐘 約3分鐘 • 從其他按摩中途改為“定位模式”時,您可以對剩餘時間作出選擇。 例) 最多4 格 最多1 格 按 按鈕完成設定。 EP-MS41_ASIA.indb 2014-10-21 13:20:49...
- Page 49 選擇了“頸部和肩部”時 將啟動用於確定您的肩部大概位置的操作。 (參照T14頁。) 1 雙重嗶聲和 的閃爍表示按摩輪正在被微調到肩部位置。 [肩部位置調整模式] <調整方法> 按 或 調整位置。 (每按下一次按鈕按摩輪都會移動約1.5 cm。) 2 肩部位置正確時,按 啟動程序。 • 如果未按下 按鈕,15秒後程序將自動啟動。 選擇了“背部和腰部”時 按摩輪移動至您的背部或下背部,程序開始。 為了更符合自己的偏好 要調節程序強度 顯示的內容 強度 調節 按 – + 調節按鈕。 要同時使用腿部/腳掌按摩 按 按鈕。 (參照T21頁。) EP-MS41_ASIA.indb 2014-10-21 13:20:50...
- Page 50 要改變按摩的內容 • 使用定位模式時,您不能設定比您最初設定的按摩時間更長的按摩。 如果您誤設了較短的時間,可結束按摩,然後再重新按 按鈕輸入新設定。 要從定位模式中選擇不同的程序。 按 按鈕,然後選擇不同的程序。 上半身按摩將暫時停止。 (參照T17頁。) 要改為自動程序 按 按鈕並選擇程序。 上半身按摩將暫時停止。 (參照T14頁。) 要改為手動控制 按 按鈕。 動作將立即啟動。 (見下。) 使用手動控制 請參看第T2頁的警告的第4條。 按 按鈕。 將按順序執行6種動作,包括柔和指壓、揉按和敲打。 <按摩操作的順序> 向上揉按 敲打 柔和指壓 向上揉按和敲打 向下揉按 向下揉按和敲打 [按摩期間的顯示] 按摩操作顯示 操作自動變更。 • 當同一點已經持續按摩了5分鐘時,按摩位置將自動向上移動約3 cm。 EP-MS41_ASIA.indb 2014-10-21 13:20:50...
- Page 51 為了更符合自己的偏好 要調整位置 按 或 進行調整。 • 每按一次按鈕按摩輪都會移動約1.5 cm。 • 當您按住按鈕時,操作將繼續進行直至您鬆開 按鈕。 閃爍表示當前的大致位置。 要調節程序強度 顯示的內容 強度 調節 按 – + 調節按鈕。 要繼續執行單一的操作,例如柔和指壓或揉按 在操作期間按 按鈕便可繼續單獨執行相同的操作。 • 要更改操作,請再次按 按鈕。 操作便會按順序自動更改。 要同時使用腿部/腳掌按摩 按 按鈕。 (參照T21頁。) 要改變按摩的內容 要改為定位模式 按 按鈕並選擇程序。 上半身按摩將暫時停止。 (參照T17頁。) 要改為自動程序 按 按鈕並選擇程序。 上半身按摩將暫時停止。 (參照T14頁。) EP-MS41_ASIA.indb 2014-10-21 13:20:51...
- Page 52 使用腿部/腳掌按摩 按 按鈕。 腿部/腳掌按摩啟動。 • 再次按 按鈕即可結束按摩。 當您單獨使用腿部/腳掌按摩時,可使用 按鈕終止按 摩。 要調節腿部/腳掌按摩的強度 顯示的內容 按腿.腳掌 強度調節按鈕 調節強度。 強度 腿部/腳掌按摩時間 要單獨使用腿部/腳掌按摩︰ 按摩持續約15分鐘。 要結合上半身按摩︰ 上半身按摩結束時,腿部/腳掌按摩也會同時結束。 腿部/腳掌按摩的操作 小腿 腳掌 從兩側夾住小腿,進行擠壓式按摩。 用氣壓從水平和下方來壓迫腳。 EP-MS41_ASIA.indb 2014-10-21 13:20:51...
- Page 53 停止按摩 定時器功能 操作開始後,按摩將在約15分鐘後自動完成。 中途停止按摩 按 按鈕。 • 按摩輪將移至縮回的位置。 若遇任何問題 按 按鈕。 • 所有操作將立即自動停止。 • 小心離開本機,以免本機翻倒。 將按摩椅恢復原狀 請參照T2頁的警告的第15條。 為安全起見,用完之後務必要立即將腿置台存放起來。 收起腿部/腳掌按摩區。 1 筆直向上拉起腿部/腳掌按摩解鎖帶。 2 檢查收納部分有無阻礙。 3 用雙手將腿部/腳掌按摩區推入座位下方。 • 穩固地持續推動直至您聽到它鎖定時發出的哢嗒聲。 如何存放腿置台 (參照T9頁。) 將靠墊安放到適當的位置。 EP-MS41_ASIA.indb 2014-10-21 13:20:51...
- Page 54 切斷電源 請參照T1頁的警告的第1條和第6條,和T2頁的第10條。 確認電源切換是設定在“off”(關閉)的位置。 確認鎖定切換鑰匙是設定在“lock”(鎖定)的 位置。 將插頭從插座中拔下。 鎖定切換鑰匙必須儲存在兒童無法取得的地方。 清潔和保養 請參照T1頁所載危險注意事項第2條。 座位布料、塑膠部分 日常清潔和維護 使用柔軟乾燥的布擦去塵埃和輕度污垢。 髒污時 1 將柔軟的布浸入水中或用溫水稀釋至3-5 %的柔和清潔劑中,然後完 全擰乾。 2 擦拭表面。 (以輕拍的方式擦拭布料部分。) 3 用一塊只浸泡水並且完全擰乾的布將清潔液擦拭乾淨。 4 使用乾燥、柔軟的布擦拭。 5 讓本機自動風乾。 (請勿使用電吹風等工具快速乾燥。) 當塵埃難以擦除時 在步驟1中嘗試以下方法。 <針對布料> 使用水或溫和的清潔劑刷洗。(請使用軟毛刷) (請注意不要太用力刷布料,否則可能造成損壞。) EP-MS41_ASIA.indb 2014-10-21 13:20:52...
- Page 55 可以拆下機罩洗滌。 靠墊外罩 足部外罩 本體外罩 清洗方法 清洗注意事項 手洗(避免機器洗滌) 洗滌本體外罩、靠墊外罩和足部外罩時不要打開拉鏈或貼合物。 1 將外罩浸泡在不超過30℃的水中,然後輕輕地向下按壓。 注意︰ • 洗滌時請勿揉按。 • 使用柔和的洗滌劑。 含有漂白劑的洗滌劑會使外罩脫色。 請勿使用此類洗滌劑。 • 由於顏色可能會染到其他物質,請分開洗滌。 2 清洗乾淨。 3 輕輕地擠出水。 注意︰ • 不要用力擰乾,否則可能損壞面料或拉長纖維。 4 輕輕地展開並掛在暗處晾乾。 注意︰ • 用直射的陽光晒乾可能會導致面料縮水或褪色,因此應當避免。 • 由於顏色可能會染到其他物質,洗滌好之後請立即懸掛晾乾。 清洗外罩之後,您可以經過熨燙消除皺痕。 (使用熨斗的注意事項) 本體外罩 足部外罩、靠墊外罩 使蒸汽熨斗經過外罩上方進行熨燙。 將熨斗放在面料上,使用上限為150℃的中等溫度。 (不要讓熨斗直接接觸面料。) 乾洗...
- Page 56 如何拆下外罩 拆下 靠墊外罩 拉開拉鏈並取出靠墊。 足部外罩 1 解開貼合物。 2 一次拆下一側機罩。 本體外罩 1 拉開拉鏈(2處)。 2 將電源線穿過孔放回。 3 鬆開貼合物A和B,提起兩側(及其他側)。 • 從外面看不到貼合物A和B。 4 拉開靠背兩側的拉鏈。 2處 EP-MS41_ASIA.indb 2014-10-21 13:20:52...
- Page 57 5 按1、2、3順序鬆開座位上的貼合物(3處),將操 作器從機罩縫隙內拉出。 6 將外罩從本機上拆除。 裝上 靠墊外罩 1 向前摺疊靠墊並將其插入拉鏈開口。 靠墊已完全插入時,握住外罩的 頂端邊角將其上下晃動幾下。 2 拉上拉鏈。 3 要確保靠墊均勻分布在外罩內,可將外罩前後拍打幾下。 足部外罩 1 拉出腿部/腳掌按摩區。 2 拉到腳底部分的側面上。 有帶子的一側是上側 如何順利地拉上 1 先 對準一側的縫合線,然後捏著外罩的邊緣拉上。 2 以相同的方式拉到另一側上。 3 拉下帶子,用貼合物將帶子末端扣到腳底區的底部。 確保外罩也完全覆蓋後側 EP-MS41_ASIA.indb 2014-10-21 13:20:53...
- Page 58 本體外罩 1 將外罩置於本機上。 2 插入操作器並將線纜從外罩上的縫隙穿過。 3 拉上靠背兩側的拉鏈(2處)。 4 扣緊座位兩側的貼合物(2處)。 拉伸外罩並將其塞入。 扶手 5 拉伸操作器袋至扶手A的外側,並將外罩鋪 到扶手B上。 6 將外罩拉到靠背的頂部上。 將外罩的縫合線對準靠背的頂部邊角 7 拉上拉鏈(2處)。 拉伸。 拉住扶手側的外罩,同時交替地一點點拉攏,可以順 利地將合上。 8 將電源線從孔中拉過。 EP-MS41_ASIA.indb 2014-10-21 13:20:53...
- Page 59 9 拉住外罩的同時緊扣A、B和C貼合物(5 處)。 • 從外面看不到貼合物B和C。 • 用手掌撫平皺褶,緊扣底部的貼合物C。 C(另一側相同) (另一側相同) 10 從外罩縫隙中拉出腿部/腳掌按摩解鎖帶。 靠墊或本體外罩上的皺褶和凹陷很明顯時 本體外罩 靠墊外罩 1 靠背上的皺褶︰ 輕輕地搓向邊緣。 輕拍前、後部幾次讓靠墊分布更加均勻並減少皺褶 數量。 2 椅座皺褶︰ 解開貼合物,然後在向前拉面料的 同時重新扣上貼合物。 * 在使用過程中,面料可能會略微伸長,更易於形成皺褶。 如果折痕比較明顯,可熨平外罩。 (參照T24頁。) 可選部件 更換為其他顏色或者擔心本機上的塵埃時推薦。 產品名稱: 按摩椅子外罩套件 EP-2M41 EP-MS41_ASIA.indb 2014-10-21 13:20:53...
- Page 60 按摩程序的綜合內容 自動程序的內容 揉按鬆弛 短暫的揉按放 柔和指壓和揉 揉按充分放鬆 揉按和敲打充 輕柔的揉按放 輕柔的揉按放 全身揉按後程序 鬆頸部和肩胛 按放鬆背部和 頸部和肩胛骨 分放鬆背部和 鬆頸部和肩胛 鬆腰部 結束* 骨之間的部位 腰部 之間的部位 腰部 骨之間的部位 8分鐘速按 短暫的揉按放 柔和指壓和揉 集中揉按充分 集中揉按充分 全身揉按後程 鬆頸部和肩胛 按放鬆背部和 放鬆頸部和肩 放鬆腰部 序結束* 骨之間的部位 腰部 部 揉撫放鬆 輕柔地揉按以 以略高的速度 以略高的速度 以逐漸降低的...
- Page 61 • 電源線被切斷。 (參照T10頁、T11頁。) • 未開啟本機的電源切換。 • 按開/關鈕之後沒有按下選單選擇按鈕或腿.腳掌 開/關按鈕。 腿部/腳掌按摩區無法彈出。 • 確認腿部/腳掌按摩區的底部沒有被地毯或其他物體卡住。 • 確認腿部/腳掌按摩區沒有被椅座前部的面料卡住。 無法收起腿部/腳掌按摩區。 確認腿部/腳掌按摩解鎖帶沒有被操作器線或面料卡住,致使其無法縮回。 有時候當按摩完成後再按 鈕,還是無法開啟電源。 按摩完成後約需5秒,程式才會完全終止。 一旦所有動作皆停止,請等待最少5秒,再按 鈕。 本機已毀損。 立即停止使用本機。 並立刻聯絡Panasonic服務中心處理。 電源線或插頭溫度過高。 立即停止使用本機。 並立刻聯絡Panasonic服務中心處理。 請參照T1頁的警告的第17條,和T2頁的警告的第8條和第9條。 故障顯示 故障顯示 內容 內容由於內部通信系統出現異常,動作中止。 由於揉按結構部出現異常,動作中止。 * 請 與Panasonic服務中心聯繫。 聯繫時,請提供故障顯示代碼,檢查‧處置會變得更順利。 EP-MS41_ASIA.indb 2014-10-21 13:20:54...
-
Page 62: Arahan Keselamatan Penting
ARAHAN KESELAMATAN PENTING Pengawasan asas perlu sentiasa diikuti apabila menggunakan unit elektrik, termasuk yang berikut. Sila pastikan bahawa anda telah membaca semua arahan sebelum menggunakan Kerusi Rehat Urutan. BAHAYA – Untuk mengurangkan risiko renjatan elektrik: 1. Sentiasa cabut palam unit serta-merta selepas digunakan. 2. - Page 63 AMARAN: 1. Sesiapa dengan mana-mana syarat disenaraikan di bawah atau sesiapa yang menjalani rawatan perubatan perlu berunding dengan pakar perubatan mereka sebelum menggunakan unit: a) Wanita mengandung, orang yang sakit, dalam keadaan fizikal yang lemah. b) Orang yang mempunyai sakit belakang, leher, bahu atau pinggul. c) Orang yang memakai perentak jantung, defibrilator atau peranti perubatan peribadi lain yang cenderung kepada interferens elektron. d) Orang yang mempunyai penyakit jantung. e) Orang yang dilarang daripada menerima urutan oleh pakar perubatan disebabkan oleh trombosis atau aneurisme, vena varikos akut atau gangguan peredaran lain.
- Page 64 ARAHAN PEMBUMIAN Unit mesti dibumikan dengan betul. Jika ia pincang tugas atau rosak, pembumian memberikan laluan kurang rintangan untuk arus elektrik bagi mengurangkan risiko renjatan elektrik. Unit ini dilengkapi kord dengan konduktor pembumian perkakasan dan palam pembumian. Palam mesti dipalam masuk ke salur keluar bersesuaian dan dipasang dengan betul selaras dengan semua kod dan ordinan setempat.
-
Page 65: Unit Utama
NAMA DAN FUNGSI BAHAGIAN Unit utama Hadapan Belakang Tanpa kusyen kerusi rehat 1 Tempat letak lengan 9 Fabrik Unit Di Kepala Urutan yang Bergerak 2 Tempat duduk 10 Kusyen Kerusi Urut 3 Jalur Lepas Kunci Urutan Kaki/Tapak Kaki 11 Label Spesifikasi Lihat halaman M9. - Page 66 Alat Pengawal *Bahasa dipaparkan pada alat pengawal mungkin berbeza bergantung kepada rantau unit dibeli. Paparan 1 Paparan Praprogram • Apabila memilih program: Tanda untuk program semasa yang dipilih berkelip. Semasa urutan: • Bingkai program semasa dipaparkan. 2 Paparan Program Kendiri Apabila memilih program: • Tanda untuk program semasa yang dipilih berkelip. Semasa urutan: •...
- Page 67 MENYEDIAKAN UNIT Tempat untuk menggunakan unit Bahagian urutan kaki/tapak kaki Jangan dedahkan kerusi rehat urutan ke sinaran matahari • Lebih kurang 40 cm secara terus atau suhu tinggi, seperti di hadapan sumber Kedalaman lebih kurang 108 cm pemanasan, kerana ini boleh menyebabkan penyahwarnaan atau pengerasan bahan permukaan.
- Page 68 2 Cara untuk mengalihkan unit Oleh kerana unit adalah sangat berat (lebih kurang 48 kg), berhati-hati untuk mengelakkan kecederaan belakang. (Unit mesti dibawa oleh dua orang.) Letakkan unit ke bawah perlahan-lahan dan berhati-hati dengan langkah anda. Lihat Amaran No. 13 pada halaman M2. Mengangkat unit untuk memasang dan menyediakan unit Anda mungkin merosakkan lantai dengan menjatuhkan unit jika anda tidak memegangnya dengan betul.
- Page 69 3 Letakkan alat pengawal di dalam poket alat pengawal Poket alat pengawal 4 Letakkan kusyen kerusi rehat pada tempatnya Muatkan kusyen kerusi rehat semasa menggunakan kerusi rehat. 5 Sambungkan kord kuasa kepada unit Periksa kotoran dan kerosakan pada salur masuk perkakas bagi bahagian suis kuasa dan penyambung kord kuasa.
- Page 70 CARA UNTUK MENGGUNAKAN TEMPAT LETAK KAKI Lihat Amaran No. 15 pada halaman M2. 1 Tarik tegak ke atas pada jalur lepas kunci urutan kaki/tapak kaki. Bahagian urutan kaki/tapak kaki bergerak keluar sedikit. 2 Letakkan kaki anda pada bahagian tapak kaki. 3 Tolak kaki anda ke hadapan sehingga ia terkunci dengan bunyi “klik”. Ia akan terkunci supaya ia tidak akan kembali ke kedudukan disimpan.
- Page 71 SEBELUM SETIAP URUTAN (PERIKSA UNIT) Keluarkan kusyen kerusi rehat. Periksa kepala urutan supaya dalam Periksa kedudukan yang ditarik balik dengan menyentuhnya dengan tangan anda. Apabila kepala urutan tidak berada dalam kedudukan ditarik balik Selepas langkah 6, tekan butang pada alat •...
- Page 72 Hidupkan bekalan kuasa. 1 Masukkan palam kuasa ke dalam salur keluar elektrik. 2 Pusingkan kekunci suis kunci ke kedudukan “open” (buka). 3 Luncurkan suis kuasa ke kedudukan “on” (hidupkan). Periksa Periksa sekali setiap bulan. Lihat Amaran No. 8 pada halaman M1. Periksa fabrik unit apabila kepala urutan gerak masih tidak terkoyak.
- Page 73 Apabila, disebabkan ketinggian anda, lutut anda diangkat atas daripada tempat duduk dalam kedudukan yang tidak selesa Gunakan atau berikut. Mengurut hanya tubuh bahagian atas anda menggunakan tempat letak kaki (lihat di bawah). Gunakan fungsi urutan kaki/tapak kaki secara berasingan. • Luncurkan tubuh anda ke atas supaya lutut anda tidak lagi dipaksa ke atas.
- Page 74 MEMILIH MENU DAN MEMULAKAN URUTAN Selepas 15 minit penggunaan, kami menyarankan anda untuk berehat 10 minit. • Gunakan unit sehingga dua kali sehari, untuk jumlah 30 minit. • Lihat Amaran No. 4 dan 7 pada halaman M2. Tekan butang untuk menghidupkan kuasa. Butang pemilihan menu berkelip. Adakah anda telah mengeluarkan kusyen kerusi rehat? (Lihat halaman M10.)
- Page 75 MENGGUNAKAN PRAPROGRAM [Mod Pemilihan Program] Tekan butang untuk memasukkan mod pemilihan untuk Praprogram. (Kuasa akan dimatikan secara automatik jika tiada pengendalian dilaksanakan dalam masa 3 minit selepas memasukkan mod pemilihan program.) Tekan atau untuk memilih program. Pilih salah satu daripada “DEEP“ (dalam), “QUICK (8 min.)” [pantas (8 min.)], “RELAX“...
- Page 76 3 Bunyi bip dua kali dan yang berkelip menunjukkan bahawa kepala urutan diselaraskan dengan baik ke kedudukan bahu. [Mod Pelarasan Kedudukan Bahu] <Cara untuk selaraskan> Tekan atau untuk menyelaraskan kedudukan. (Setiap kali tekan menggerakkan kepala urutan lebih kurang 1.5 cm.) 4 Apabila kedudukan bahu disepadankan, tekan untuk mulakan program.
- Page 77 Untuk mengubah kandungan urutan Untuk memililh program berbeza daripada Praprogram Tekan butang dan kemudian pilih program berbeza. Urutan bahagian atas tubuh akan berhenti buat sementara. (Lihat halaman M14.) Untuk mengubah ke Program Kendiri Tekan butang dan pilih program. Urutan bahagian atas tubuh akan berhenti buat sementara. (Lihat halaman M17.) Untuk mengubah ke pengendalian Manual Tekan butang...
- Page 78 MENGGUNAKAN PROGRAM KENDIRI [Mod Pemilihan Program] Tekan butang untuk memasukkan mod pemilihan program untuk Program Kendiri. (Kuasa akan dimatikan secara automatik jika tiada pengendalian dilaksanakan dalam masa 3 minit selepas memasukkan mod pemilihan program.) Tekan atau untuk memilih program. Pilih sama ada “Leher dan bahu” atau “Belakang dan bahagian bawah belakang”.
- Page 79 Apabila anda memilih “Leher dan bahu” Pengendalian untuk menentukan kedudukan anggaran bahu anda akan bermula. (Lihat halaman M14.) 1 Bunyi bip dua kali dan yang berkelip menunjukkan bahawa kepala urutan diselaraskan dengan baik ke kedudukan bahu. [Mod Pelarasan Kedudukan Bahu] <Cara untuk selaraskan>...
- Page 80 Untuk mengubah kandungan urutan Dengan Program Kendiri, anda tidak boleh menetapkan masa lebih lama daripada masa urutan yang mula-mula anda • tetapkan. Jika anda tersalah menetapkan masa singkat, tamatkan urutan dan kemudian tekan butang semula dan masukkan tetapan baharu. Untuk memilih program berbeza daripada Program Kendiri Tekan butang dan kemudian pilih program berbeza.
- Page 81 Untuk Menyesuaikan Untuk menyelaraskan kedudukan Tekan atau untuk selaraskan. Setiap tekan menggerakkan kepala urutan • anggaran sebanyak 1.5 cm. Apabila anda memegang butang ke bawah, • Kelipan menunjukkan anggaran kedudukan pengendalian akan diteruskan sehingga anda semasa. melepaskannya. Untuk menyelaraskan kekuatan program Kandungan paparan Kekuatan...
- Page 82 MENGGUNAKAN URUTAN KAKI/TAPAK KAKI Tekan butang Urutan kaki/tapak kaki bermula. Tekan butang sekali lagi dan tamatkan urutan. • Apabila anda menggunakan urutan kaki/tapak kaki sahaja, hentikan urutan menggunakan butang Untuk menyelaraskan kekuatan urutan kaki/tapak kaki Kandungan paparan Tekan butang urutan kaki/tapak kaki untuk selaraskan kekuatan.
- Page 83 SELEPAS MELENGKAPKAN URUTAN Fungsi pemasa Urutan akan dilengkapkan secara automatik lebih kurang 15 minit selepas permulaan pengendalian. Mengganggu urutan Tekan butang Kepala urutan bergerak ke kedudukan yang ditarik balik. • Jika anda mengalami sebarang masalah Tekan butang Semua pengendalian akan berhenti dengan serta-merta. •...
-
Page 84: Pembersihan Dan Penyelenggaraan
Putuskan sambungan kuasa Lihat Amaran No. 1 dan 6 di halaman M1, dan No. 10 pada halaman M2. Luncurkan suis kuasa ke kedudukan “off” (matikan). Pusingkan kekunci suis kunci ke kedudukan “lock” (kunci). Keluarkan palam kuasa daripada salur keluar elektrik. Kekunci suis kunci mesti disimpan jauh daripada kanak- kanak. PEMBERSIHAN DAN PENYELENGGARAAN Lihat Bahaya No. 2 pada halaman M1. Fabrik Tempat Duduk, Kawasan Plastik Pembersihan dan penyelenggaraan rutin Sapu habuk dan kotoran ringan dengan kain kering lembut. - Page 85 Anda boleh mengeluarkan pelapik untuk dibasuh. Pelapik kusyen kerusi rehat Pelapik hadapan Pelapik unit Cara untuk membasuh Pengawasan untuk membasuh Untuk basuhan tangan (elakkan basuhan mesin) Basuh pelapik unit, pelapik kusyen kerusi rehat dan pelapik hadapan dengan zip atau kancing ditutup. 1 Rendamkan pelapik dalam air dengan suhu tidak melebihi daripada 30 °C, dan basuh dengan menolak ke bawah dengan perlahan. Berhati-hati: Jangan picitnya semasa membasuh.
- Page 86 CARA UNTUK MENGELUARKAN PELAPIK Mengeluarkan Pelapik kusyen kerusi rehat Buka zip belakang dan keluarkan kusyen. Pelapik hadapan 1 Buka cangkuk. 2 Keluarkan pelapik satu sisi pada satu masa. Pelapik unit 1 Buka zip (2 lokasi). 2 Letakkan kembali kord kuasa melalui lubang. 3 Buka cangkuk A dan B dan angkat sisinya (sisi lain juga).
- Page 87 5 Buka cangkuk pada tempat duduk (3 lokasi) dalam turutan 1, 2, kemudian 3 dan keluarkan alat pengawal daripada celahan dalam pelapik. 6 Keluarkan pelapik daripada unit. Pemadanan Pelapik kusyen kerusi rehat 1 Lipat kusyen ke hadapan dan masukkannya ke dalam bukaan zip. Apabila kusyen dimasukkan sepenuhnya, pegang sudut atas pelapik dan...
- Page 88 Pelapik unit 1 Letakkan pelapik pada unit. 2 Masukkan alat pengawal dan kord melalui celahan dalam pelapik. 3 Mengancing zip pada sisi penyandar (2 lokasi). 4 Mengancing cangkuk pada sisi tempat duduk (2 lokasi). Masukkan pelapik ke dalam semasa menariknya. Tempat letak lengan 5 Tarik poket alat pengawal ke luar daripada tempat letak tangan A dan baringkan pelapik pada tempat letak tangan B.
- Page 89 9 Mengancing cangkuk A, B dan C (5 lokasi) semasa menarik pelapik. Cangkuk B dan C tidak kelihatan dari luar. • Ratakan kedutan menggunakan tapak tangan anda • dan mengancing C di bawah. C (Sisi lain juga) (Sisi lain juga) 10 Tarik keluar jalur lepas kunci urutan kaki/ tapak kaki daripada celahan dalam pelapik.
- Page 90 KANDUNGAN AM PROGRAM URUTAN Kandungan Praprogram DEEP (dalam) Picit sekejap untuk Shiatsu lembut dan Picit untuk Picit dan tepuk Picit dengan Picit dengan Picit seluruhnya meregangkan picitan untuk meregangkan untuk meregangkan perlahan untuk perlahan untuk untuk leher dan di antara meregangkan belakang seluruh leher seluruh belakang...
- Page 91 PENCARISILAPAN Masalah Sebab dan Pemulihan Kebisingan Motor Ia berbunyi dan berasa seperti kepala urutan berusaha untuk menghilangkan kedutan pada kain. • Terdapat bunyi pengendalian bagi tindakan memicit atau menepuk. • Terdapat bunyi berkeriut apabila kepala urutan sedang dikendalikan. • • Terdapat bunyi berdetar-detar apabila kepala urutan bergerak ke atas atau ke bawah.
-
Page 92: Important Safety Instructions
IMPORTANT SAFETY INSTRUCTIONS Basic precautions should always be followed when using an electrical unit, including the following. Please ensure that you read all instructions before using the Massage Lounger. DANGER – To reduce the risk of electric shock: 1. Always unplug the unit immediately after use. 2. Always unplug the unit before cleaning. WARNING – To reduce the risk of burns, fire, electric shock, or injury to persons: 1. The unit should never be left unattended when plugged in. Always unplug the unit when not in use. 2. Close and continuous supervision is necessary when the unit is used by people who are limited in their ability to move or communicate. 3. Only use the unit for the purpose described in these instructions. 4. Do not stand on the unit. 5. Do not use any accessories other than those recommended by the manufacturer. 6. This unit should not be used by children. Keep children away from the unit. Remove key when not in use and store out of reach of children. 7. Never operate the unit if it has a damaged power cord or plug. Return the unit to the nearest authorized service center if it is not working properly, if it has been dropped or damaged, or if it has been immersed in water. 8. About once a month, fold down the unit cover to check that the fabric of the unit where the massage heads move has not been ripped. Always check that the fabric of the unit where the massage heads move has not been ripped before attaching the unit cover. Also, check that the fabric in front and back of the unit cover has not been ripped. No matter how small the rip, if you find one then immediately stop using the unit, unplug the power cord and have the unit repaired at an authorized service center. 9. Keep power cords away from heated surfaces. Do not carry the unit by the power cord. Take care that pins, garbage and moisture do not come into contact with the plug. (Wipe any dust with a dry cloth.) 10. The unit should not be used on top of heating appliances, such as electric carpets, etc. Do not operate the unit under blanket or pillow. Excessive heating can occur and cause fire, electric shock, or injury to persons. - Page 93 WARNING: 1. Persons with any of the conditions listed below or who are undergoing medical treatment should consult with their physicians before using the unit: a) Pregnant women, people who are ill, in poor physical shape. b) People suffering from back, neck, shoulder, or hip pain. c) People who have a pacemaker, defibrillator, or other personal medical devices prone to electronic interference. d) People suffering from heart disease. e) People who are prohibited from receiving massage by a physician due to thrombosis or aneurism, acute varicose veins, or other circulatory disorders. f) People with irregular curvatures of the spine. 2. Make sure that no part of your body is between the massage heads as their squeezing action may cause injury. Do not insert your knee in the calf/sole massage section. 3. The unit should not be used against bare skin. While thin clothing may increase effectiveness, exposing the skin directly to the unit may irritate the skin. Avoid wearing anything hard on your head like a hair accessory, etc. when using this unit. Excessively strong massage action should be avoided on the back of the neck. 4. Avoid massaging any one part of your body for more than 5 minutes at a time. Excessive massaging can overstimulate the muscles and nerves and result in an adverse effect or injury. The unit should not be used for more than a total of 15 minutes each session to avoid excessive massaging. 5. While using the unit, if you start feeling sick or if the massage seems painful, stop using it immediately. 6. You should not fall asleep while using the unit or use the unit after drinking alcohol. 7. Be sure to start on the gentle massage program if using the unit for the first time. 8. If the unit functions abnormally, immediately turn off the power and have the unit checked by an authorized service center. 9. Avoid attempting to repair the unit yourself. 10. After each massage, slide the power switch to the “off” position, turn the lock switch to the “lock” position, remove the key and power plug. 11. Sit on the unit after confirming there is no foreign matter between the parts of the unit. (Check that there are no foreign objects stuck in the backrest, the seat, or leg/foot massage section.) Failure to observe this precaution may result in accident or injury.
-
Page 94: Grounding Instructions
GROUNDING INSTRUCTIONS The unit must be properly grounded. If it should malfunction or break down, grounding provides a path of least resistance for electric current in order to reduce the risk of electric shock. This unit is equipped with a cord with an equipment-grounding conductor and a grounding plug. The plug must be plugged into an appropriate outlet that has been properly installed in accordance with all local codes and ordinances. DANGER Improper connection of the equipment-grounding conductor may lead to electric shock. Check with a qualified electrician if you are in doubt as to whether or not the unit is properly grounded. Do not modify the plug provided with the unit if it will not fit the power outlet. Instead, have a proper outlet installed by a qualified electrician. This unit has a grounding plug. Make sure that the product is connected to a power outlet with the same configuration as the plug. Do not use an adaptor with this unit. SPECIFICATIONS Power Supply: AC 220 V 50 Hz (only available in China, Hong Kong), AC 230 V 50 Hz (only available in Singapore), AC 240 V 50 Hz (only available in Malaysia), AC 110 V 60 Hz (only available in Taiwan) Power Consumption: 70 W Upper Body Massage Massage area (Up-Down): Approx. 65 cm (The massage heads move a total of approx. 60 cm) Massage area (Left-Right): Distance between massage heads during operation Neck, Shoulder, Back, Lower back: Approx. 4 cm – 15 cm Massage area (Forward-Back): Projected amount of massage head (Intensity adjustable) Approx. 6 cm Massage speed: Soft shiatsu: Approx. 285 cycles/minute – 400 cycles/minute (single side) Knead: Approx. 14 cycles/minute – 25 cycles/minute Tap: Approx. 375 cycles/minute – 495 cycles/minute (single side) Vertical travel: Vertical travel (Long): Approx. 65 cm up-down auto return Massage width: Same as massage area (left-right) -
Page 95: Part Names And Functions
PART NAMES AND FUNCTIONS Main unit Front Back Without the lounger cushion 1 Armrest 9 Fabric of the Unit Where the Massage Heads Move 2 Seat 10 Lounger Cushion 3 Leg/Foot Massage Lock Release Band 11 Specification Label • See page 9. 12 Power Cord • This is used to take out and store away the leg/foot •... - Page 96 Controller *Display language on the controller may differ depending on the region the unit was purchased. Display 1 Pre-Programs Display • When selecting a program: The mark for the currently selected program flashes. • During the massage: The frame of the current program is displayed. 2 Self Program Display • When selecting a program: The mark for the currently selected program flashes. • During the massage: The current program ( or ) is displayed. 3 Self Program Set Time Display • Displayed when the Self Program is selected. 4 Program Intensity Display • Displays current program intensity in 3 levels. 5 Shoulder Checking Operation Display •...
-
Page 97: Setting Up The Unit
SETTING UP THE UNIT Where to use the unit Leg/foot massage section • Do not expose the massage lounger to direct sunlight or high Approx. 40 cm temperatures, such as in front of heating sources, because Depth approx. 108 cm this can cause discoloration or hardening of the surface material. Width • Placing a mat or cloth under the unit is recommended to approx. 70 cm prevent floor damage. The size of the mat should be sufficient (at least 65 cm × 115 cm) to cover the areas where the unit touches and where the leg/foot massage section could touch the floor. • Set the unit near the outlet. • Position the unit so that the back is not in contact with any other object (such contact may cause warping and lead to Leave damage). - Page 98 2 How to move the unit Since the unit is very heavy (approximately 48 kg), be careful to avoid back injuries. (The unit must be carried by two persons.) Put the unit down slowly and carefully watch your step. See Warning No. 13 on page 2. Lifting the unit to install and setup the unit • You may damage the floor by dropping the unit if you do not hold it correctly. • Check that the leg/foot massage section is stored away and locked. Place the controller and power cord on the seat. In narrow corridors etc., hold the front and rear of the main unit.
- Page 99 3 Place the controller inside the controller pocket Controller pocket 4 Put the lounger cushion in place Fit the lounger cushion when using as a lounger. 5 Connect the power cord to the unit Check for dirt and damage on appliance inlet of the power switch section and the connector of the power cord.
- Page 100 HOW TO USE THE LEGREST See Warning No. 15 on page 2. 1 Pull straight up on the leg/foot massage lock release band. The leg/foot massage section moves out slightly. 2 Put your foot on the sole section. 3 Push your feet forward until it locks with a “click”. It will be locked so it will not return to the stored position. (Angle of the sole section or the calf section will not be fixed.) Click 4 Remove your feet from the sole section.
- Page 101 BEFORE EVERY MASSAGE (CHECK THE UNIT) Remove the lounger cushion. Check that the massage heads are in Check the retracted position by touching them with your hand. When the massage heads are not in the retracted position • After step 6, press the button on the controller twice to return the massage heads to the retracted position.
-
Page 102: Switch On The Power Supply
Switch on the power supply. 1 Insert the power plug into an electrical outlet. 2 Turn the lock switch key to the “open” position. 3 Slide the power switch to the “on” position. Check once a month. Check See Warning No. 8 on page 1. Check that the fabric of the unit where the massage heads move has not been ripped. - Page 103 When, due to your height, your knees are held above the seat in an uncomfortable position Use as following or Massaging only your upper body using the legrest (see below). • Use the leg/foot massage function separately. Slide your body upwards so that your knees are no longer forced upwards. •...
-
Page 104: Manual Operation
SELECTING A MENU AND STARTING THE MASSAGE • After 15 minutes of use, we recommend that you take a 10 minute break. • Use the unit up to twice per day, for a total of 30 minutes. See Warning No. 4 and 7 on page 2. Press the button to turn on the power. The menu selection buttons flash. Have you removed the lounger cushion? (See page 10.) (The power will turn off automatically if you do not select a menu or start a leg/ Is the leg/foot massage foot massage within 3 minutes after turning on the power.) section ejected? (See page 11.) Upper body massage Select a menu from among Pre-Programs, Self Program and Manual operation. - Page 105 USING PRE-PROGRAMS [Program Selection Mode] Press the button to enter the program selection mode for Pre-Programs. (The power will turn off automatically if no operation is performed within 3 minutes after entering the program selection mode.) Press to select a program. Select one of “DEEP”, “QUICK (8 min.)”, “RELAX” and “REFRESH”.
- Page 106 3 A double beep and the flashing of indicate that the massage heads are being finely adjusted to the shoulder position. [Shoulder Position Adjustment Mode] <How to adjust> Press to adjust the position. (Each press moves the massage heads approximately 1.5 cm.) 4 When the shoulder position is matched, press begin the program. • The program will begin automatically after 15 seconds if the button is not pressed. Notes <Target shoulder position> Too high Correct position of the massage head (The point where the tapping action should be felt.)
- Page 107 To change the content of the massage To select a different program from Pre-Programs Press the button, and select a different program. Upper body massage will stop temporarily. (See page 14.) To change to Self Program Press the button and select a program. Upper body massage will stop temporarily. (See page 17.) To change to Manual operation Press the button.
- Page 108 USING SELF PROGRAM [Program Selection Mode] Press the button to enter the program selection mode for Self Program. (The power will turn off automatically if no operation is performed within 3 minutes after entering the program selection mode.) Press to select a program. Select either “Neck and shoulders” or “Back and lower back”.
- Page 109 When you have selected “Neck and shoulders” The operation to determine your approximate shoulder position will begin. (See page 14.) 1 A double beep and the flashing of indicate that the massage heads are being finely adjusted to the shoulder position. [Shoulder Position Adjustment Mode] <How to adjust> Press adjust the position. (Each press moves the massage heads approximately 1.5 cm.) 2 When the shoulder position is matched, press to begin the program.
- Page 110 To change the content of the massage • With Self Program, you cannot set a massage longer than the massage time you first set. If you set a short time by mistake, end the massage, and then press the button again and enter new settings. To select a different program from Self Program Press the button, and select a different program. Upper body massage will stop temporarily. (See page 17.) To change to Pre-Programs Press the button and select a program. Upper body massage will stop temporarily.
- Page 111 To Customize To adjust the position Press to adjust. • Each press moves the massage heads approximately 1.5 cm. • When you hold down the button, the operation Flashing indicates the approximate current will continue until you release it. position. To adjust program intensity Content of display Intensity Adjustment Press the – + adjustment buttons. To continue exclusively with a single operation such as Soft Shiatsu or Knead Press the button during an operation to continue the same operation only.
- Page 112 USING LEG/FOOT MASSAGE Press the button. The leg/foot massage begins. • Press the button again to end the massage. When you are using leg/foot massage only, terminate the massage using the button. To adjust the intensity of the leg/foot massage Content of display Press the leg/foot massage buttons to adjust the intensity. Intensity Leg/foot massage duration To use leg/foot massage only: The massage lasts for approximately 15 minutes.
-
Page 113: After Completing The Massage
AFTER COMPLETING THE MASSAGE Timer function The massage will complete automatically approximately 15 minutes after the start of operations. Interrupting the massage Press the button. • The massage heads move to the retracted position. If you experience any problems Press the button. • All operations will stop immediately. • Get off the unit carefully to prevent the unit tipping over. Returning to the lounger state See Warning No. 15 on page 2. -
Page 114: Disconnecting The Power
Disconnecting the power See Warning No. 1 and 6 on page 1, and No. 10 on page 2. Slide the power switch to the “off” position. Turn the lock switch key to the “lock” position. Remove the power plug from the electrical outlet. The lock switch key must be stored out of the reach of children. -
Page 115: How To Wash
You can remove the cover for washing. Lounger cushion cover Front cover Unit cover How to wash Cautions for washing To hand wash (avoid machine washing) Wash the unit cover, lounger cushion cover and front cover with the zippers or fasteners closed. 1 Immerse the cover in water of no more than 30 °C, and wash by pushing down gently. - Page 116 HOW TO REMOVE THE COVERS Removing Lounger cushion cover Unfasten the rear zipper and remove the cushion. Front cover 1 Unfasten the fastener. 2 Remove the cover one side at a time. Unit cover 1 Unfasten the zippers (2 locations). 2 Put back the power cord through the hole.
- Page 117 5 Unfasten the fasteners on the seat (3 locations) in order of 1, 2, then 3, and pull out the controller from the slit in the cover. 6 Remove the cover from the unit. Fitting Lounger cushion cover 1 Fold the cushion forwards and insert it into the zipper opening.
- Page 118 Unit cover 1 Put the cover on the unit. 2 Insert the controller and the cord through the slit in the cover. 3 Fasten the zippers at the sides of the backrest (2 locations). 4 Fasten the fasteners at the sides of the seat (2 locations).
-
Page 119: Optional Parts
9 Fasten the A, B, and C fasteners (5 locations) while pulling on the cover. • Fasteners B and C are not visible from the outside. • Flatten the wrinkles using your palms, and fasten C at the bottom. C (Other side too) (Other side too) 10 Pull out the leg/foot massage lock release band from the slit in the cover. When wrinkles and sags are noticeable in the lounger cushion or unit cover Unit cover Lounger cushion cover... - Page 120 GENERAL CONTENT OF MASSAGE PROGRAMS Contents of Pre-Programs DEEP Brief knead to Soft shiatsu Knead to fully Knead and tap Gentle knead to Gentle knead Knead all over loosen neck and and kneading loosen neck and to fully loosen relax neck and to relax lower to finish between the to loosen back between the back and lower between back shoulder blades and lower back shoulder blades back shoulder blades QUICK (8 min.) Brief knead to Soft shiatsu Knead Knead Knead all over loosen neck and...
-
Page 121: Troubleshooting
TROUBLESHOOTING Problem Cause and Remedy Motor Noises • It sounds and feels like the massage heads are straining to get over wrinkles in the cloth. • There is operational noise of kneading or tapping actions. • There is a creaking noise when the massage heads are in operation. • There is a rattling sound when the massage heads move up or down. • The belt can be heard rotating. • The motor groans when it comes under load. • There is clunking or grinding sound when the massage heads move in and out. • There is operational noise when applying air pressure. • There is a noise of discharging air. • There is a slipping sound when you sit back. • There is a rubbing sound produced by the massage heads rubbing on the seat fabric. • Leg/foot massage section rattles. These sounds are perfectly normal and will not have any effect on the operation of the unit. The massage heads stop during operation. When excessive force is applied to the massage heads during operation, in the interests of safety the massage heads may stop moving. If all markings and buttons on the controller start to flash, which is extremely unusual, turn off the power switch, wait for approximately 10 seconds and then turn the power switch on again. If the massage heads stop again, position yourself so that your back is not completely in contact with the backrest. - Page 122 Panasonic Corporation 发行:2016年6月 © Panasonic Corporation 2010 中国印刷 http://www.panasonic.com P9310MS41496 Y0311-5066 No. 6 CH, TW, MY, EN Printed in China EP-MS41_ASIA.indb 2014-10-21 13:21:18...