Table of Contents
Advertisement
Quick Links
Advertisement
Table of Contents

Related Manuals for Electrolux ESF8725ROX


Summary of Contents for Electrolux ESF8725ROX
- Page 1 ESF8725ROX Dishwasher User Manual...
-
Page 2: Table Of Contents
15. WARRANTY ....................24 WE’RE THINKING OF YOU Thank you for purchasing an Electrolux appliance. You’ve chosen a product that brings with it decades of professional experience and innovation. Ingenious and stylish, it has been designed with you in mind. So whenever you use it, you can be safe in the knowledge that you’ll get great results every time. -
Page 3: Safety Information
ENGLISH SAFETY INFORMATION Before the installation and use of the appliance, carefully read the supplied instructions. The manufacturer is not responsible for any injuries or damages that are the result of incorrect installation or usage. Always keep the instructions in a safe and accessible location for future reference. -
Page 4: Safety Instructions
Put knives and cutlery with sharp points in the cutlery • basket with the points down or in a horizontal position. Do not keep the appliance door open without • supervision to prevent to fall on it. Before any maintenance operation, deactivate the •... - Page 5 ENGLISH • Before connection to new pipes, pipes • Do not drink and play with the water in not used for a long time, where repair the appliance. work has been carried out or new • Do not remove the dishes from the devices fitted (water meters, etc.), let appliance until the programme is the water flow until it is clean and...
-
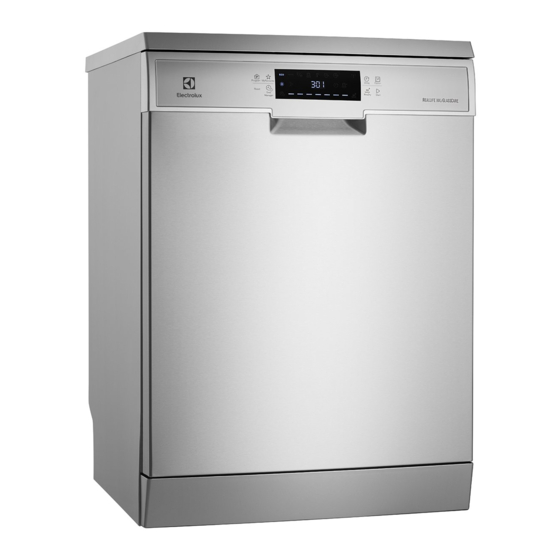
Page 6: Product Description
3. PRODUCT DESCRIPTION Work-top Rinse aid dispenser Top spray arm Detergent dispenser Upper spray arm Cutlery basket Lower spray arm Lower basket Filters Upper basket Rating plate Air vent... -
Page 7: Control Panel
ENGLISH 4. CONTROL PANEL 13 12 13 12 11 10 11 10 On/off button XtraDry touchpad Program touchpad Display MyFavourite touchpad Programme bar Programme indicators Indicators Indicators TimeManager touchpad Delay touchpad Reset touchpad Option touchpad Start touchpad 4.1 Indicators Indicator Description XtraDry indicator. -
Page 8: Programmes
4.2 Programme bar The programme bar shows information related to the programme and to the option TimeManager. Start and progress of the programme When the programme starts, the 2 lateral segments of the programme bar flash. As the programme is in progress, the middle segments come on with fixed light , while the 2 lateral segments contin‐... - Page 9 ENGLISH Programme Degree of soil Programme pha‐ Options Type of load • Heavy soil • Prewash • XtraPower • Crockery, cut‐ • Wash 70 °C • TimeManager lery, pots and • Rinses • XtraDry pans • Dry • Normal or light •...
-
Page 10: Settings
Water Energy Duration Programme (kWh) (min) 1) The pressure and the temperature of the water, the variations of the mains supply, the options and the quantity of dishes can change the values. 5.2 Information for test info.test@dishwasher-production.com institutes Write down the product number (PNC) that is on the rating plate. - Page 11 ENGLISH 6.4 Acoustic signals – Level 0 = no rinse aid is released. Acoustic signals sound when a 3. Press TimeManager again and malfunction of the appliance occurs. It is again to change the setting. not possible to deactivate these acoustic 4.
-
Page 12: Options
2. Press and hold MyFavourite until the • The indicators that are related to segments of the programme bar flash the MyFavourite programme and quickly. options come on. • The display shows the duration of the programme. How to set the MyFavourite programme Press MyFavourite. -
Page 13: Before First Use
ENGLISH 8. BEFORE FIRST USE 1. Fill the rinse aid dispenser. 1. Open the lid (C). 2. Open the water tap. 2. Fill the dispenser (B) until the rinse 3. Start a program to remove any aid reaches the marking ''MAX''. processing residuals that can still be 3. - Page 14 Only the programme bar and the CAUTION! programme duration are visible in the Only use detergent display specifically designed for If you want to see the programme dishwashers. settings, press any button except for the on/off button. The indicators of the 1.
-
Page 15: Hints And Tips
ENGLISH Cancelling the delay start while End of the programme the countdown operates When the programme is completed the display shows 0:00. All the segments of When you cancel the delay start you the programme bar are on with fixed have to set the programme and options light. -
Page 16: Care And Cleaning
• Put hollow items (cups, glasses and • The position of the items in the pans) with the opening down. baskets is correct. • Make sure that cutlery and dishes do • The programme is applicable for the not bond together. Mix spoons with type of load and for the degree of soil. - Page 17 ENGLISH 8. Put back the filter (B) in the flat filter (A). Turn it clockwise until it locks. 2. Remove the filter (C) out of filter (B). 3. Remove the flat filter (A). CAUTION! An incorrect position of the filters can cause bad washing results and damage 4.
-
Page 18: Troubleshooting
11.3 External cleaning • Clean the appliance with a moist soft cloth. • Only use neutral detergents. • Do not use abrasive products, abrasive cleaning pads or solvents. 11.4 Internal cleaning • Carefully clean the appliance, including the rubber gasket of the door, with a soft damp cloth. - Page 19 ENGLISH Problem and alarm code Possible solution You cannot activate the • Make sure that the mains plug is connected to the appliance. mains socket. • Make sure that there is no damaged fuse in the fuse box. The programme does not •...
- Page 20 Problem and alarm code Possible solution Rattling/knocking sounds • The tableware is not properly arranged in the bas‐ from inside the appliance. kets. Refer to basket loading leaflet. • Make sure that the spray arms can rotate freely. The appliance trips the cir‐...
- Page 21 ENGLISH Problem Possible cause and solution The dishes are wet. • For the best drying performance activate the option XtraDry. • The programme does not have a drying phase or has a drying phase with low temperature. • The rinse aid dispenser is empty. •...
-
Page 22: Technical Information
13. TECHNICAL INFORMATION Dimensions Width / height / depth (mm) 596 / 850 / 610 Voltage (V) 200 - 240 Electrical connection Frequency (Hz) 50 / 60 Wattage (W) 1550-2200 Water supply pressure bar (minimum and maximum) 0.5 - 8... - Page 23 The drain hose can be lengthened using additional lengths and connectors. These 14.2 Water connection must be purchased from Electrolux Spare Parts. The extension length must Water inlet hose not exceed 2 metres. The drain hose must be free of Connect the inlet hose to a water tap obstructions.
-
Page 24: Warranty
‘acceptable quality’ as referred to 3. During the Warranty Period in clause 10 of this warranty has Electrolux or its ASC will, at no extra the same meaning referred to in charge if your Appliance is readily the ACL;... - Page 25 Electrolux and its and liabilities (other than as ASC may exchange information in contained in this document) including relation to you to enable Electrolux to liability for any loss or damage meet its obligations under this whether direct or indirect arising from warranty.
- Page 26 SERVICE NEW ZEALAND FOR SPARE PARTS or to find the address of or to find the address of your nearest authorised your nearest state spare ELECTROLUX (NZ) Limi‐ service centre in New Zea‐ parts centre in New Zea‐ land land www.electrolux.co.nz...
- Page 27 ENGLISH...
- Page 28 www.electrolux.com/shop...