Chapters
Table of Contents

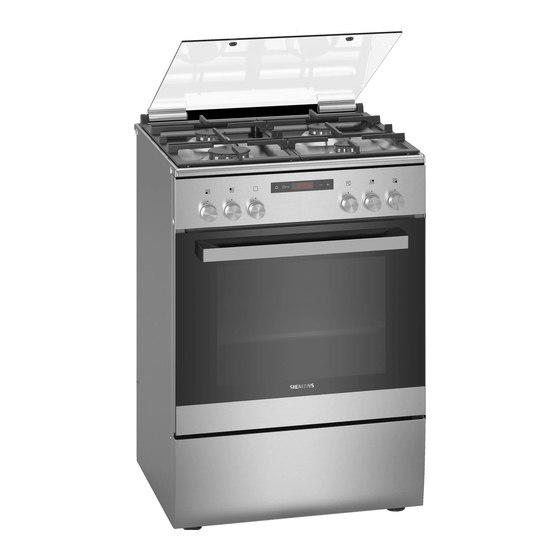
Related Manuals for Siemens HX8P3AE50M


Summary of Contents for Siemens HX8P3AE50M
- Page 1 Free standing cooker HX8P3AE50M User manual and installation instructions Register your product on My Siemens and discover exclusive ser- vices and offers. siemens-home.bsh-group.com/welcome The future moving in. Siemens Home Appliances...
-
Page 2: Table Of Contents
en Safety Futher information and explanations are available online: Table of contents 1 Safety Observe the following safety instructions. 1.1 Intended use INFORMATION FOR USE Read the information on intended use to en- Safety .............. 2 sure that you use the appliance correctly and Preventing material damage ....... - Page 3 Safety en Escaping gas may cause an explosion. If the Do not use the appliance: liquefied gas bottle is not upright, liquefied ¡ On boats or in vehicles. propane/butane can enter the appliance. In- ¡ as a room heater. tense darting flames may therefore escape ¡...
-
Page 4: Safety
en Safety The cooking surface becomes very hot. When gas burners are in operation without ▶ Never place flammable objects on the any cookware placed on them, they can build cooking surface or in its immediate vicinity. up a lot of heat. The extractor hood above it ▶... - Page 5 Safety en ▶ Never operate an appliance with a cracked The hinges on the appliance door move when or fractured surface. the door is opened and closed, which could ▶ Never pull on the power cord to unplug the trap your fingers. ▶...
- Page 6 en Preventing material damage 1.5 Plinth drawer WARNING ‒ Risk of tipping! If the appliance is placed on a base and is WARNING ‒ Risk of fire! not secured, it may slide off the base. The surfaces of the plinth drawer may be- come very hot. ▶...
-
Page 7: Preventing Material Damage
Preventing material damage en Leaving the appliance to cool down with the door open If a control knob is in the wrong position, this could will damage the front of neighbouring kitchen units over lead to malfunctions. ▶ time. Always turn the control knob to the "Off" position ▶... -
Page 8: Environmental Protection And Saving En- Ergy
en Environmental protection and saving energy 2.3 Drawer area Do not place oven accessories that exceed the height of the drawer into the plinth drawer. Otherwise, this Follow the corresponding instructions when using the may damage the appliance. drawer. ▶ Do not place oven accessories that exceed the ATTENTION! height of the drawer into the plinth drawer. -
Page 9: Installation And Connection
Installation and connection en 4 Installation and connection A gas leak could occur. If you move the appliance after You can find out where and how best to install your ap- the gas supply has been established, a gas leak could pliance here. - Page 10 en Installation and connection ¡ Do not use any multiple plugs or multi-connectors ¡ Raise or lower the feet by turning the feet with an Al- and extension cords. len key until the appliance is in a horizontal position. ¡ The earthing system is correctly installed. Setting the base height of the appliance with a ¡...
-
Page 11: Familiarising Yourself With Your Appliance
Familiarising yourself with your appliance en 5 Familiarising yourself with your appliance 5.1 Your appliance 5.2 Hob You can find an overview of the parts of your appliance You can view an overview of the hob here. here. Note: On certain models, specific details such as col- Note: On certain models, specific details such as col- our and shape may differ from those pictured. - Page 12 en Familiarising yourself with your appliance Control Explanation Control Explanation Function selector Temperature selector Use the function selector Use the temperature se- to set the types of heating lector to set the temperat- and other functions. ure for the type of heating You can turn the function and select settings for selector clockwise or anti-...
- Page 13 Familiarising yourself with your appliance en Symbol Type of heating What it's used for and how it works Full-surface grill Grill flat items such as steak, sausages, or toast. Gratinate food. The entire area below the grill element becomes hot. Hot air grilling Roast poultry, whole fish or large pieces of meat.
-
Page 14: Accessories
en Accessories Lighting You can remove the rails, e.g. for cleaning. → "Rails", Page 23 The oven light lights up the cooking compartment. With most types of heating and functions, the lighting lights up during operation. If you use the function se- lector to end the operation, the lighting switches off. Cooling fan The cooling fan switches on and off depending on the appliance's temperature. - Page 15 Slide the tray in with the sloping your appliance in our brochures and online: E.g. univer- edge facing the appliance door. siemens-home.bsh-group.com sal pan or Accessories vary from one appliance to another. When baking tray purchasing accessories, always quote the exact product number (E no.) of your appliance.
- Page 16 en Cookware 8 Cookware This information has been provided to help you save ¡ Position the cookware energy and avoid damaging your cookware. in the middle of the burner, otherwise it 8.1 Using cookware may tip over. ¡ Do not position large The selection and positioning of the cookware affects cookware on the burn- the safety and energy efficiency of your appliance.
-
Page 17: 9.3 Operating The Hotplate
Operating the hotplate en 9 Operating the hotplate 9.3 Operating the hotplate You can find out everything you need to know about operating your hotplate here. You can ignite the gas burner as follows. ATTENTION! 9.1 Fitting burner parts The burner may not ignite or the burner flame is not You can find out how to correctly position the burner even. -
Page 18: Basic Operation
en Basic operation Example Food Hotplate Power level Melting Chocolate, butter, margarine Economy burner Small flame Warming Stock, tinned vegetables Standard output Small flame burner Heating and keeping Soups Economy burner Small flame warm Steaming* Fish Standard output Between large and small flame burner Braising* Potatoes and miscellaneous ve-... - Page 19 Time-setting options en 12 Time-setting options Cancelling the timer Your appliance has different time-setting options which ensure that operation can be controlled. The timer duration can be cancelled at any time. Requirement: is highlighted in the display. 12.1 Overview of the time-setting options ▶...
-
Page 20: Childproof Lock
en Childproof lock ¡ Food will spoil if you leave it in the cooking com- Requirement: is highlighted in the display. partment for too long. ▶ Use the or button to delay the end time. a The appliance applies the change after a few Requirements seconds. -
Page 21: Cleaning And Servicing
Cleaning and servicing en Suitable cleaning agents Only use cleaning agents that are suitable for the differ- Follow the instructions on cleaning the appliance. → "Cleaning the appliance", Page 22 ent surfaces on your appliance. Appliance Surface Suitable cleaning agents Information Stainless steel ¡... - Page 22 en Cleaning and servicing Area Suitable cleaning agents Information Self-cleaning sur- Follow the instructions for self-cleaning surfaces. faces → "Cleaning self-cleaning surfaces in the cooking compartment", Page 22 Glass cover on ¡ Hot soapy water Use oven cleaner to remove very heavy soiling. the oven light Rails ¡...
- Page 23 Rails en 14.5 Discoloration of the burners Dry with a soft cloth. Apply a thin layer of the stainless steel cleaning After long use, the brass burner parts become darker product with a soft cloth. due to natural oxidation. This discolouration does not Tip: You can obtain stainless steel cleaning products affect their usability.
- Page 24 en Rails Pull the entire shelf support downwards first and ATTENTION! then pull it forwards and remove it. Incorrect assembly ▶ Never move the rail before the two hooks are se- cured fully in the upper holes. Otherwise the enamelled coating may be damaged and break. 15.2 Attaching the rails Place the two hooks at the top of the rail into the up- Both hooks must be inserted fully into the upper...
- Page 25 Appliance door en 16 Appliance door It is normally sufficient if you clean the outside of the Open the locking levers on the left- and right-hand appliance door. If the appliance door is very dirty on hinges. the inside and outside, you can remove the appliance door and clean it.
- Page 26 en Appliance door To remove the upper cover of the oven door, press 16.5 Attaching the appliance door in the tabs on the left and right using your fingers. Reattach the oven door in the reverse sequence to re- Pull out and remove the cover. moval.
-
Page 27: Troubleshooting
Top cover en 16.6 Additional door safety WARNING ‒ Risk of burns! During long cooking times, the oven door may become Additional safety devices have been fitted to prevent very hot. contact with the oven doors. Always attach these safety ▶ Supervise small children when the oven is in opera- devices when children could come near the oven. - Page 28 en Troubleshooting Fault Cause and troubleshooting The appliance is not There has been a power cut. working. ▶ Check whether the lighting in your kitchen or other appliances are working. The appliance does At the end of a cooking time, the appliance stops heating up. The oven light and cooling fan not switch off fully at do not switch off.
-
Page 29: Transportation And Disposal
Transportation and disposal en Fault Cause and troubleshooting The burner flame is Openings on the burner are soiled. not uniform. ▶ Clean and dry the openings on the burner. The burner flame Gas cylinder is empty. goes out while the ▶ Replace the gas cylinder. -
Page 30: Customer Service
en Customer Service If the original packaging is no longer available Slide all accessories, such as baking trays, into the corresponding slots with thin cardboard at the In order to guarantee sufficient protection against edges, in order to avoid damaging the appliance. any transport damage, pack the appliance in pro- Place cardboard or similar between the front and tective packaging. - Page 31 How it works en 21.3 Good to know 21.4 Notes on baking Observe this information when preparing food. When baking, use the shelf positions indicated. ¡ The temperature and cooking time depend on the Baking on one level Shelf posi- amount of food and the recipe. Settings ranges are tion specified for this reason.
- Page 32 en How it works Topic Topic You do not want small Leave a minimum clear- You want to bake accord- Use similar items in the baked goods to stick to ance of 2 cm around ing to your own recipe. baking tables as a guide. each other when baking.
- Page 33 How it works en Meal Accessory/cookware Shelf posi- Type of Temperature Cooking tion heating in °C time, minutes Yeast cake with moist topping, 2 levels Universal pan 150–170 40–65 Baking tray Plaited loaf, plaited ring Universal pan 160–170 35–40 Swiss roll Universal pan ...
- Page 34 en How it works Meal Accessory/cookware Shelf posi- Type of Temperature Cooking tion heating in °C time, minutes Biscuits, 3 levels 5+3+1 130–150 30–40 Baking tray Universal pan Meringues Universal pan 80-100 100-150 Meringues, 2 levels Universal pan 90-100 100-150 Baking tray...
-
Page 35: Accessory/Cookware Shelf Posi
How it works en 21.6 Bread and bread rolls ATTENTION! When the cooking compartment is hot, any water in- The values for bread dough apply to both dough side it will create steam. The change in temperature placed on a tray and dough placed in a loaf tin. may cause damage. -
Page 36: Accessory/Cookware Shelf Posi
en How it works Meal Accessory/cookware Shelf posi- Type of Temperature Cooking tion heating in °C time, minutes Pizza, frozen, deep-pan, x 1 Wire rack 200–210 20–30 Pizza, frozen, deep-pan, x 2 Universal pan 170–190 20–30 Wire rack Savoury bakes in a tin Springform cake tin ... - Page 37 How it works en Roasting in cookware ¡ Use tongs to turn the pieces of food you are grilling. If you pierce the meat with a fork, the juices will run If you cook food in cookware, you can remove it from out and it will become dry.
- Page 38 en How it works ¡ When stewing, add two to three tablespoons of li- Topic quid and a little lemon juice or vinegar into the Keep the cooking com- ¡ Cook the food in a cookware. partment as clean as pos- covered roasting dish sible.
- Page 39 How it works en Food Accessories/cook- Shelf posi- Type of Temperature Cooking ware tion heating in °C/grill time in mins setting Knuckle of veal, 1.5 kg Cookware with lid 210–230 130–150 Leg of lamb, boned, medium, 1.5 kg Cookware without lid ...
-
Page 40: Universal Pan Universal Pan Universal Pan
en How it works 21.10 Vegetables and side dishes This is where you can find information about preparing vegetable products that you can use as a side dish for your meals. Recommended settings Vegetables and side dishes Use the settings listed in the table. Food Accessories/cook- Shelf posi-... - Page 41 How it works en be preserved. The thinner you cut the slices, the Ensure that neither fruit nor mushrooms overlap on quicker the drying process will be and the more flavour the wire rack. the dried food will retain. Settings ranges are specified Grate vegetables and then blanch them.
-
Page 42: Type Of Temperature Cooking Heating In °C Time, Minutes
en How it works Recommended settings Proving dough The temperature and time are dependent on the type and quantity of the ingredients. The values in the table are therefore guide values only. Meal Accessory/cookware Shelf posi- Type of Temperature Cooking time, tion heating in °C... -
Page 43: General Information
How it works en Recommended settings Cooking more than one dish/course at a time Meal Accessory/cookware Shelf pos- Type of Temperature Cooking ition heating in °C time, minutes Fish, whole Baking tray 5+3+1 Muffins, x 12 30–40 Pasta bake Universal pan 50–60 Ovenproof dish 21.17 Test dishes... - Page 44 en Installation instructions Meal Accessory/cookware Shelf posi- Type of Temperature Cooking tion heating in °C time, minutes Small cakes Universal pan 25–35 Small cakes, 2 levels Universal pan 25–35 Baking tray Small cakes, 3 levels 5+3+1 35–45 Baking tray Universal pan Hot water sponge cake Springform cake tin,...
- Page 45 Installation instructions en 22.3 Selecting the gas connection side ¡ After converting the appliance from one gas type to another, the new gas type must On many appliances, you can carry out the gas con- be labelled on the rating plate. nection on the right- or left-hand side. If necessary, you can change the connection side.
- Page 46 en Installation instructions Connection in accordance with EN ISO 228-1 G½ (TS Secure the connecting piece using a 24 mm span- EN ISO 228-1 G½) ner. Use a 24 mm spanner to place the threaded fit- ting of the gas pipe or safety gas hose on the con- Insert the new seal in the connecting piece.
- Page 47 Installation instructions en Fit the safety gas hose and use a pipe union or ¡ In the "Technical data – Gas" → Page 50 table, de- cable clamp to tighten it securely. termine the correct nozzle diameter. ¡ Always use a new seal. ¡...
- Page 48 en Installation instructions Adjusting or replacing bypass nozzles (small Removing the control panel flame setting) If the appliance has an upper cover, remove this. You can set the minimum flame height for the burners To do this, open the hob cover, grip the sides ‒...
- Page 49 Installation instructions en Note: To ensure that no scratches are formed on Note: In order to access the bypass nozzles on the the matte glass plate, do not allow the underside of right-hand side, turn the control panel clockwise the hob to come into contact with objects. slightly.
- Page 50 en Installation instructions At this stage, it is important to test for leaks. You Follow the same instructions for the part that is can find additional information about this in the sec- sealed with the blind plug. tion entitled "Leak and function test" → Page 50. Checking the cooker burner nozzles Fitting the control panel Check the leak tightness of each nozzle.
- Page 51 Installation instructions en Type of gas Explanation Type of gas Explanation G2.350 For Poland G30 (50 mbar) The after-sales service must order (13 mbar) the nozzle set HEZ353110. Nozzle values for the auxiliary burner Note the following information for the gas types that are listed in the table for some burners. G20/ G25.3 G30/ G2.350...
- Page 52 en Installation instructions G20/ G25.3 G30/ G2.350 Gas flow at 15 °C and 0.285/ 0.285 0.285 0.332 0.332 0.325 0.348 0.397 1013 mbar m 0.332 Gas flow at 15 °C and 218/21 1013 mbar g/h Use the bypass nozzle with the appropriate diameter that is included in the set.
- Page 56 BSH Hausgeräte GmbH Carl-Wery-Straße 34 81739 München, GERMANY siemens-home.bsh-group.com Manufactured by BSH Hausgeräte GmbH under the trademark licence of Siemens AG *9001715161* 9001715161 (020722)