Table of Contents
Advertisement
Quick Links
Advertisement
Table of Contents

Related Manuals for Epson VT Series


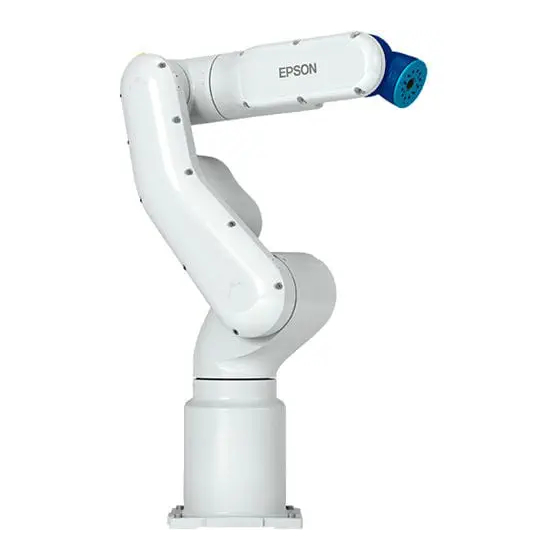
Summary of Contents for Epson VT Series
- Page 1 6-Axis Robots VT series Maintenance Manual Rev.2 EM221R5170F...
- Page 3 6-Axis Robots VT series Maintenance Manual Rev.2 Copyright 2021 SEIKO EPSON CORPORATION. All rights reserved. -2022 VT series Maintenance Manual Rev.2...
- Page 4 Contact information is described in “SUPPLIERS” in the first pages of the following manual: Robot System Safety Manual Read this manual first DISPOSAL When disposing this product, dispose in accordance with the laws and regulations of each country. VT series Maintenance Manual Rev.2...
- Page 5 For more details on available collection facilities please contact your local government office or the retailer where you purchased this product. For California customers only The lithium batteries in this product contain Perchlorate Material - special handling may apply, See www.dtsc.ca.gov/hazardouswaste/perchlorate VT series Maintenance Manual Rev.2...
- Page 6 “T” and “VT series” described in this manual are the following models. VT6L series NOTE VT series Manipulators can use the Teach Pendant (TP2, TP3). Do not connect the other devices to TP port except TP2 and TP3. Connecting other devices may result in malfunction of the device since the pin assignments are different.
- Page 7 Structure of Robot System The VT series Manipulators can be used with the following combinations of software. Controller Firmware VT6-A901S, VT6-A901C, VT6-A901P Ver.7.4.56.2 or later VT6-A901S-DC Ver.7.4.57.1 or later Before Ver.7.4.6 EPSON RC+ 7.0 Ver.7.4.7 or later OK: Compatible All functions of the EPSON RC+ 7.0 and the robot system are available.
- Page 8 - The method of firmware update and controller setting backup etc. EPSON RC+ 7.0 User’s Guide (PDF) This manual describes general information about program development software. EPSON RC+ 7.0 SPEL+ Language Reference (PDF) This manual describes the robot programming language “SPEL+”. Other Manual (PDF) Manuals for each option are available.
-
Page 9: Table Of Contents
6.4 Firmware Initialization Procedure ............27 6.5 Adding Confirmation Steps by Strengthening Security of EtherNet Connection ..................29 7. Covers 7.1 Arm #1 Cover ..................34 7.2 Arm #2 Cover ..................36 7.3 Arm #3 Cover ..................37 VT series Maintenance Manual Rev.2... - Page 10 14.1 Replacing Joint #6 Motor ............... 113 14.2 Replacing Joint #6 Reduction Gear Unit ........118 14.3 Replacing Joint #6 Timing Belt ............119 15. AMP Board 15.1 Replacing AMP Board on Joint #1, #2, and #3 ......122 viii VT series Maintenance Manual Rev.2...
- Page 11 18.7.1 Standard, Cleanroom model ..........151 18.7.2 Protection Model ..............152 18.8 RESET Switch ................171 19. Calibration 19.1 Overview ..................173 19.2 Calibration Procedures ..............176 20. Error Code Table 21. Maintenance Parts List 22. Option Parts List VT series Maintenance Manual Rev.2...
- Page 12 Table of Contents VT series Maintenance Manual Rev.2...
-
Page 13: Vt6L Maintenance
VT6L Maintenance This volume contains maintenance procedures with safety precautions for VT series Manipulators. -
Page 15: Safety Maintenance
WARNING not followed properly. This symbol indicates that a danger of possible harm to people or physical damage to equipment and facilities exists if the CAUTION associated instructions are not followed properly. VT series Maintenance Manual Rev.2... - Page 16 Manipulator falls and is not hot when you touch it. Then perform teaching or maintenance. CAUTION ■ When performing maintenance on the Manipulator, secure an empty space of about 50 cm around the Manipulator. VT series Maintenance Manual Rev.2...
-
Page 17: General Maintenance
9 months (2250 h) √ √ 10 months (2500 h) √ 11 months (2750 h) √ 12 months (3000 h) √ √ √ √ 13 months (3250 h) √ √ 20000 h h = hour VT series Maintenance Manual Rev.2... -
Page 18: Inspection Point
Use a hexagonal wrench to check that the end effector mounting bolts and the Manipulator mounting bolts are not loose. Check looseness or backlash of When the bolts are loose, refer to “VT Series Manual Regular Inspection 2.3 bolts/screws. Tightening Hexagon Socket Head Cap Bolts” and tighten them to the proper torque. -
Page 19: Overhaul (Parts Replacement)
Manipulator. NOTE For EPSON RC+ 7.0, the recommended replacement time for the parts subject to maintenance (motors, reduction gear units, and timing belts) can be checked in the [Maintenance] dialog box. Reference: 4. Alarm. - Page 20 The Manipulator operation hours can be checked in [Controller Status Viewer] dialog box - [Motor On Hours]. (1) Select EPSON RC+ menu-[Tools]-[Controller] to open the [Controller Tools] dialog box. (2) Click the <View Controller Status> button to open the [Browse For Folder] dialog box.
-
Page 21: Tightening Hexagon Socket Head Cap Bolts
Execute the following command from the [Command Window]. EPSON >PULSE PULSE: [Joint #1 Pulse value] pls [Joint #2 Pulse value] pls [Joint #3 Pulse value] pls [Joint #4 Pulse value] pls[Joint #5 Pulse value]pls [Joint #6 Pulse value]pls VT series Maintenance Manual Rev.2... -
Page 22: Layout Of Maintenance Parts
Joint #5 Timing Belt Joint #5 Electromagnetic Brake Joint #3 Motor Joint #3 Electromagnetic Brake Joint #2 Motor Joint #2 Electromagnetic Brake Joint #2 Timing Belt Power Supply Board AC specification: two boards DC specification: one board VT series Maintenance Manual Rev.2... -
Page 23: Manipulator Structure
VT6L Maintenance 3. Manipulator Structure 3. Manipulator Structure 3.1 AC Specification Manipulator Standard, Cleanroom model VT series Maintenance Manual Rev.2... - Page 24 VT6L Maintenance 3. Manipulator Structure Protection model VT series Maintenance Manual Rev.2...
-
Page 25: Dc Specification Manipulator
VT6L Maintenance 3. Manipulator Structure 3.2 DC Specification Manipulator Standard model VT series Maintenance Manual Rev.2... -
Page 26: Alarm
- Battery replacement - Grease up - Replacement of the timing belt - Replacement of the motor - Replacement of the reduction gear unit VT series Maintenance Manual Rev.2... -
Page 27: Maintenance
Initial installation : Maintenance is enabled. Upgrade : Maintenance inherits the previous data. (Disables as default) For details for enabling or disabling the Maintenance, refer to the EPSON RC+ 7.0 User’s Guide 5.12.2 [System Configuration] Command (Setup Menu) - [Setup]-[System Configuration]-[Controller]-[Preferences] Page. NOTE ... -
Page 28: Maintenance Information
VT6L Maintenance 4. Alarm 4.2 Maintenance Information 4.2.1 How to Check the Maintenance Information The configured Maintenance information can be checked in the EPSON RC+. (1) Select EPSON RC+ 7.0 menu-[Tools]-[Maintenance] to display the [Controller Tools] dialog box. (2) To check the Controller Maintenance information, click the <Maintenance> button and display the [Maintenance] dialog box. -
Page 29: How To Edit The Maintenance Information
L10 life (time until 10% failure probability). In the dialog box, the L10 life is displayed as 100%. 4.2.2 How to Edit the Maintenance Information The configured Maintenance information can be edited in the EPSON RC+. (1) Select the EPSON RC+ 7.0 menu-[Tools]-[Maintenance] to display the [Controller Tools] dialog box. -
Page 30: Alarm Notifying Method
Status Code / Error Code List The alarm notifying method can be configured by the output bit of the Remote I/O. The Remote I/O can be configured in the EPSON RC+ 7.0- [Setup] - [System Configuration] - [Controller] - [Remote Control]. -
Page 31: Backup And Restore
For some problems, backup may not be available before maintenance has to be performed. Be sure to backup the data after making changes before problems occur. “Controller Status Storage” is one of the VT series Manipulator functions. It saves the NOTE ... -
Page 32: Backup
VT6L Maintenance 5. Backup and Restore 5.3 Backup Backup the Manipulator status from EPSON RC+ 7.0. (1) Select EPSON RC+ 7.0 menu-[Tools]-[Controller] to display the [Controller Tools] dialog box. (2) Click the <Backup Controller…> button to display the [Browse For Folder] dialog box. -
Page 33: Restore
■ Do not edit the backup files. Otherwise, operation of the robot system after CAUTION data restoration to the Manipulator is not assured. (1) Select the EPSON RC+ 7.0 menu-[Tools]-[Controller] to display the [Controller Tools] dialog box. (2) Click the <Restore Controller…> button to display the [Browse For Folder] dialog box. - Page 34 When a project is restored, the values of Global Preserve variables are loaded. For details about Global Preserve variable backup, refer to the following manual. EPSON RC+ 7.0 User’s Guide 5.10.10 Display Variables Command (Run Menu). Vision hardware configuration This checkbox allows you to restore the vision hardware configuration.
- Page 35 Click the <No> button (do not restore data) except for special situations such a Manipulator replacement. NOTE When restoring the backup including the robot information other than VT series, an error occurs. You cannot restore the backup including T series robot created in the virtual Controller of NOTE ...
-
Page 36: Firmware Update
Firmware is supplied by CD-ROM as needed. Please contact the supplier of your region for information. You must use a PC running EPSON RC+ 7.0 connected to a Manipulator with USB to update the Manipulator firmware. Firmware cannot be updated with an Ethernet connection. - Page 37 Click the <Next> button. (7) Check the current firmware version and the new firmware version and click the <Install> button. (8) The firmware upgrade starts. It takes several minutes to complete. (9) Continuous data file transfer starts. VT series Maintenance Manual Rev.2...
-
Page 38: Manipulator Recovery
If the Manipulator becomes inoperable, use the procedures described in this section to recover. Controller Backup is recommended for easy recovery of the Controller operation. NOTE For details of Controller Backup, refer to refer to the following manual. 5. Backup and Restore. VT series Maintenance Manual Rev.2... -
Page 39: Firmware Initialization Procedure
(1) Connect the development PC to the Manipulator with a USB cable (the firmware cannot be changed with an Ethernet connection). (2) Turn ON the Manipulator. Do not start the development software EPSON RC+ 7.0 until firmware initialization is complete. - Page 40 (10) The following dialog box appears after the Manipulator reboot. Click the <Finish> button. The firmware upgrade is completed. Start EPSON RC+ 7.0 and restore the Controller settings. For details of restoring the operating system, refer to “5. Backup and Restore”. NOTE ...
-
Page 41: Adding Confirmation Steps By Strengthening Security Of Ethernet Connection
Controller IP address is set to global IP address Firmware version is Ver.7.4.58 or later EPSON RC+7.0 is Ver.7.4.7 or before When the Controller firmware is updated under the following conditions, additional steps to confirm whether to continue the firmware update may be execute depending on the configuration settings of the Controller. - Page 42 When the <OK> button is clicked, Step3 window is displayed. Go to the step (6). When the <Cancel> button is clicked, Step3 window is displayed. The [Disable connection password] checkbox and the <Install> button will be grayed out and cannot be selected. VT series Maintenance Manual Rev.2...
- Page 43 When the <OK> button is clicked, Step 4 window is displayed. Go to the step (7). When the <Cancel> button is clicked, the window is closed. (7) Firmware installation starts. When the firmware is installed, click the <Next> button. Reboot the Controller. VT series Maintenance Manual Rev.2...
- Page 44 VT6L Maintenance 6. Firmware Update (8) When the Controller is rebooted, the following window is displayed. Confirm that the firmware is installed. Click the <Finish> button. VT series Maintenance Manual Rev.2...
-
Page 45: Covers
Arm #4 Cover 2 Arm #4 Cover 1 Arm #3 Cover Arm #2 Cover Arm #1 Cover Connector Plate Power Cable Cover VT series Maintenance Manual Rev.2... -
Page 46: Arm #1 Cover
When routing the cables, observe the cable locations after removing the cover. Be sure to place the cables back to their original locations. Arm #1 Cover 5-M4×12 Sems VT series Maintenance Manual Rev.2... - Page 47 Hexagon socket head cap bolts with captive washer: 5-M4×12 Sems Tightening torque: 4 ± 0.2 Nm NOTE When installing the cover, be careful not to get the gaskets and cables caught between the arm and cover. VT series Maintenance Manual Rev.2...
-
Page 48: Arm #2 Cover
Hexagon socket head cap bolts with captive washer: 10-M4×12 Sems Tightening torque: 4 ± 0.2 Nm NOTE When installing the cover, be careful not to get the gaskets and cables caught between the arm and cover. VT series Maintenance Manual Rev.2... -
Page 49: Arm #3 Cover
Hexagon socket head cap bolts with captive washer: 3-M4×12 Sems Tightening torque: 4 ± 0.2 Nm NOTE When installing the cover, be careful not to get the gaskets and cables caught between the arm and cover. VT series Maintenance Manual Rev.2... -
Page 50: Arm #4 Cover 1
Hexagon socket head cap bolts with captive washer: 6-M4×12 Sems Tightening torque: 4 ± 0.2 Nm NOTE When installing the cover, be careful not to get the gaskets and cables caught between the arm and cover. VT series Maintenance Manual Rev.2... -
Page 51: Arm #4 Cover 2
Do not remove the cover forcibly when removing it. (2) Disconnect the connector from the board mounted on the rear side of the Arm #4 Cover 2. Only for Protection model: Remove Arm #4 gasket 2 from the Arm #4 Cover 2. VT series Maintenance Manual Rev.2... - Page 52 Hexagon socket head cap bolts with captive washer: 6-M4×12 Sems Tightening torque: 4 ± 0.2 Nm NOTE When installing the cover, be careful not to get the gaskets and cables caught between the arm and cover. VT series Maintenance Manual Rev.2...
-
Page 53: Power Cable Cover
Hexagon socket head cap bolts with captive washer: 2-M4×8 Sems Installation Tightening torque: 0.9 ± 0.1 Nm NOTE When installing the cover, be careful not to get the cables caught between the arm and cover Protection model: There is no Power Cable Cover. VT series Maintenance Manual Rev.2... -
Page 54: Connector Plate
(3) Unscrew the Connector Plate mounting bolts and then remove the Connector Plate. Protection model: (1) Unscrew the Connector Plate mounting bolts and then remove the Connector Plate. (2) Remove the base gasket from the base. VT series Maintenance Manual Rev.2... - Page 55 Hexagon socket head cap button bolt: 10-M4×10 Tightening torque: 4.0 ± 0.2 N·m NOTE When installing the connector plate, be careful not to get the gaskets and cables caught between the arm and cover. VT series Maintenance Manual Rev.2...
-
Page 56: Cable
The unnecessary strain on the cables may result in damage to the cables, disconnection, and/or contact failure. Damaged cables, disconnection, CAUTION or contact failure is extremely hazardous and may result in electric shock and/or improper function of the robot system. VT series Maintenance Manual Rev.2... -
Page 57: Replacing Cable Unit
Reference: 10.1 Joint #2 - Replacing the Motor, Removal step (2) When removing the Joint #3 motor unit, tilt the Arm #3 and press it against the Arm #2. Reference: 11.1 Joint #3 - Replacing the Motor, Removal step (2) VT series Maintenance Manual Rev.2... - Page 58 Gently push to the right Unit to the right (see the picture) gently, then remove the thermal conductive sheet on the base and the Controller Unit. Next, pull the Controller Unit forward. Pull it forward VT series Maintenance Manual Rev.2...
- Page 59 (9) Cut off the wire ties bound inside the Arm #1. Wire ties : AB150 × 2 AB100 × 1 (10) Remove the ground wire terminals of Arm #1. Cross recessed head screws: 2-M4× 6 VT series Maintenance Manual Rev.2...
- Page 60 : AB150 ×6 AB100 ×5 NOTE Be careful not to cut the harness. Wire ties × 3 本 (14) Remove the cable fixing plate of Arm #2. Hexagon socket head cap bolts with captive washer: 4-M4×12 VT series Maintenance Manual Rev.2...
- Page 61 (17) Remove the Joint #3 motor. Reference: 11.1 Replacing Joint #3 Motor (18) Remove the light guide plate. Cross recessed head screws: 2-M3×10 (19) Unscrew the cross recessed head screws fixing the LED board. Cross recessed head screws: 2-M3×6 VT series Maintenance Manual Rev.2...
- Page 62 Joint #4 motor. Wire ties: AB100 × 2 NOTE Be careful not to cut the harness. (24) Remove the ground wire terminals of Arm #3. Cross recessed head screws: 2-M4×6 VT series Maintenance Manual Rev.2...
- Page 63 Be careful not to cut the harness. (29) Remove the ground wire terminals of Arm #4. Cross recessed head screws: M4×6 (30) Remove the signal cable connectors (for motor × 3) of the the Joint #5 motor and Joint #6 motor. VT series Maintenance Manual Rev.2...
- Page 64 LED cable × 1 (32) Pass the power cable through the sleeve of each joint and pull it out in the following order. Arm #4 → Arm #3 → Arm #2 → Arm #1 → Base VT series Maintenance Manual Rev.2...
- Page 65 (For the Joint #6 motor, only black colored connecter is connected.) (5) Install the Joint #2 motor. Reference: 10.1 Replacing Joint #2 Motor (6) Install the Joint #3 motor. Reference: 11.1 Replacing Joint #3 Motor VT series Maintenance Manual Rev.2...
- Page 66 Cross recessed head screws: 2-M4×6 Tightening torque: 2.0 ± 0.1 N·m Arm #2 side: Ground wire terminal marked “ARM2” on the wire marker. Arm #3 side: Ground wire terminal marked “ARM3” on the wire marker. VT series Maintenance Manual Rev.2...
- Page 67 Connectors: LED_CN1 (13) Fix the LED board. Cross recessed head screws: 2-M3×6 Tightening torque: 0.45 ± 0.1 N·m (14) Fix the light guide plate. Cross recessed head screws: 2-M3×10 Tightening torque: 0.45 ± 0.1 N·m VT series Maintenance Manual Rev.2...
- Page 68 Bind the following cables with the wire tie. Wire tie : AB150 × 3 AB100 × 3 Power cable LED cable (Joint #2 side only) Signal cable (for motor) Ground wire Wire ties × 3 VT series Maintenance Manual Rev.2...
- Page 69 (21) Pass the LED cable through the groove for LED cable wiring of Arm #2. Pass the wire tie through the mount base C and bind the LED cable with the wire tie. Wire tie : AB150 × 1 Pass through the groove VT series Maintenance Manual Rev.2...
- Page 70 Power cable Signal cable (for motor) Ground wire (26) Bind the following cables and the ground wire with the wire tie. Wire tie: AB100 Motor cable (Joint #5) Signal cable Motor cable (Joint #6) Ground wire VT series Maintenance Manual Rev.2...
- Page 71 Then, gently move the plate of the Controller Unit to the left and let the thermal conductive sheet contacts with the wall inside the base. Move it to the right to insert Push to the left gently VT series Maintenance Manual Rev.2...
- Page 72 Tightening torque: 4.0 ± 0.2 N·m (31) Install the following covers the plate. Arm #1 Cover Arm #2 Cover Arm #3 Cover Arm #4 Cover 1 Arm #4 Cover 2 Connector Plate Reference: 7 Covers VT series Maintenance Manual Rev.2...
-
Page 73: Insert Or Pull Out Of Power Cable
When removing the power cable connector, pull it out with pushing clips on both sides of the connector. Power Cable (1) Connect the power cable connector. Insertion (2) Mount the power cable clamp. (3) Mount the power cable cover. Standard Cleanroom Reference: 7.6 Power Cable Cover VT series Maintenance Manual Rev.2... -
Page 74: Joint #1
Because of that, it is necessary to perform calibration (encoder rest and calibration) to match these origins. After replacing the parts, refer to the following section to perform calibration. 19. Calibration. Joint #1 Motor Joint #1 Reduction Gear Unit Joint #1 Electromagnetic Brake Joint #1 Timing Belt VT series Maintenance Manual Rev.2... -
Page 75: Replacing Joint #1 Motor
Hexagon socket head cap bolts: 2-M4×12 (with washer) NOTE Be careful not to cut the harness. (5) Remove the motor unit from the Arm #1. Hexagon socket head cap bolts: 3-M4×22 (with slotted hole washer) VT series Maintenance Manual Rev.2... - Page 76 B: Signal cable connector (for AMP board) NOTE The cables will be necessary again. Be careful not to lose them. (8) Remove the AMP board fixing plate (with AMP board) from the motor unit. Hexagon socket head cap bolts: 2-M3×6 VT series Maintenance Manual Rev.2...
- Page 77 When securing the motor unit loosely, make sure that the motor unit can be moved by hand and it does not tilt when being pulled. If the unit is secured too loose or too tight, the belt will not have proper tension. VT series Maintenance Manual Rev.2...
- Page 78 (8) Bind the following cables between the Joint #1 motor and the Controller Unit with the wire tie. Wire tie: AB100 Signal cable (for motor) Signal cable (for AMP board) (9) Mount the Arm #1 cover. Reference: 7.1 Arm #1 Cover VT series Maintenance Manual Rev.2...
- Page 79 VT6L Maintenance 9. Joint #1 (10) Turn ON the Manipulator. Reference: VT series Manual VT6L Manipulator 6.5 LED NOTE When starting the manipulator for the first time after replacing the motor unit, the motor unit firmware is automatically updated. DO NOT turn OFF the Manipulator until it starts.
-
Page 80: Replacing Joint #1 Reduction Gear Unit
VT6L Maintenance 9. Joint #1 9.2 Replacing Joint #1 Reduction Gear Unit Reduction gear unit is replaced by serviceman who has taken maintenance training. For replacement of the reduction gear unit, please contact the supplier of your region. VT series Maintenance Manual Rev.2... -
Page 81: Replacing Joint #1 Timing Belt
The brake is mounted on each joint to prevent the arm from lowering due to its own weight while the Controller power is OFF or the motor is OFF status. The brake does not work during replacement. Be careful when performing maintenance work. VT series Maintenance Manual Rev.2... - Page 82 Controller Unit. Next, pull the Controller Unit forward. Pull it forward (5) Disconnect the following connectors of the Controller Unit. A: Power cable connector B: Signal cable connector C: LED connectors × 2 VT series Maintenance Manual Rev.2...
- Page 83 Reference: 9.1 Replacing Joint #1 Motor Joint #1 Motor Removal (3) through (7) Pull out the following cables from the Arm #1 side and remove the Joint #1 timing belt. Power cable Signal cable (for motor) LED cable Ground wire VT series Maintenance Manual Rev.2...
- Page 84 Wire tie: AB150 Power cable LED cable Signal cable (for motor) Ground wire (5) Connect the following connectors to the Controller Unit. A: Power cable connector B: Signal cable connector C: LED connectors × 2 VT series Maintenance Manual Rev.2...
- Page 85 Tightening torque: 4.0 ± 0.2 N·m (8) Mount the Arm #1 cover and the connector plate. Reference: 7. Covers (9) Turn ON the Manipulator. Reference: VT series Manual VT6L Manipulator 6.5 LED (10) Calibrate the Joint #1. Reference: 19. Calibration VT series Maintenance Manual Rev.2...
-
Page 86: Joint #2
Because of that, it is necessary to perform calibration (encoder rest and calibration) to match these origins. After replacing the parts, refer to the following section to perform calibration. 19. Calibration. Joint #2 Reduction gear Unit Joint #2 Motor Joint #2 Timing Belt Joint #2 Electromagnetic Brake VT series Maintenance Manual Rev.2... -
Page 87: Replacing Joint #2 Motor
OFF or the motor is OFF status. The brake does not work during replacement. Be careful when performing maintenance work. When removing the Joint #2 motor, tilt the Arm #2 and press it against the Arm #1. Reference: 10.1 Joint #2 - Replacing the Motor, Removal step (2) VT series Maintenance Manual Rev.2... - Page 88 Hexagon socket head cap bolts: 3-M4×22 (with slotted hole washer) (9) Disconnect the following connectors from the AMP board. A: Power cable connector B: Brake connector C: Signal connector (for AMP board) D: Motor connector VT series Maintenance Manual Rev.2...
- Page 89 B: Signal cable connector (for AMP board) NOTE The cables will be necessary again. Be careful not to lose them. (11) Remove the AMP board fixing plate (with AMP board) from the motor unit. Hexagon socket head cap bolts: 2-M3×6 VT series Maintenance Manual Rev.2...
- Page 90 Match the corners Make sure that the entire surface of the thermal conductive NOTE sheet contacts with the rear side of the motor unit without lifting up the center of the sheet. Wrong Correct VT series Maintenance Manual Rev.2...
- Page 91 When you replace with a new belt, belt extends and the belt tension may decrease in the initial stage. Make sure to operate the robot two to three days and check the belt tension again VT series Maintenance Manual Rev.2...
- Page 92 Bind the following cables with the wire tie. Wire tie: AB100 Power cable Signal cable (for motor) Brake cable LED cable (mount base A only) (10) Mount the Arm #2 cover. Reference: 7.2 Arm #2 Cover VT series Maintenance Manual Rev.2...
- Page 93 VT6L Maintenance 10. Joint #2 (11) Turn ON the Manipulator. Reference: VT series Manual VT6L Manipulator 6.5 LED NOTE When starting the Manipulator for the first time after replacing the motor unit, the motor unit firmware is automatically updated. DO NOT turn OFF the Manipulator until it starts.
-
Page 94: Replacing Joint #2 Reduction Gear Unit
VT6L Maintenance 10. Joint #2 10.2 Replacing Joint #2 Reduction Gear Unit Reduction gear unit is replaced by serviceman who has taken maintenance training. For replacement of the reduction gear unit, please contact the supplier of your region. VT series Maintenance Manual Rev.2... -
Page 95: Replacing Joint #2 Timing Belt
Removal Joint #2 Motor Removal Step (1) through (7) Joint #2 (1) Install the Joint #2 timing belt. Timing Belt Reference: 10.1 Replacing Joint #2 Motor Installation Joint #2 Motor Removal Step (5) through (11) VT series Maintenance Manual Rev.2... -
Page 96: Joint #3
Because of that, it is necessary to perform calibration (encoder rest and calibration) to match these origins. After replacing the parts, refer to the following section to perform calibration. 19. Calibration. Joint #3 Reduction Gear Unit Joint #3 Timing Belt Joint #3 Motor Joint #3 Electromagnetic Brake VT series Maintenance Manual Rev.2... -
Page 97: Replacing Joint #3 Motor
OFF or the motor is OFF status. The brake does not work during replacement. Be careful when performing maintenance work. When removing the Joint #3 motor, tilt the Arm #3 and press it against the Arm #2. Reference: 11.1 Joint #3 - Replacing the Motor, Removal step (2) VT series Maintenance Manual Rev.2... - Page 98 Hexagon socket head cap bolts: 3-M4×22 (with slotted hole washer) Disconnect the following connectors from the AMP board. A: Power cable connector B: Brake connector C: Signal cable connector (for AMP board) D: Motor connector VT series Maintenance Manual Rev.2...
- Page 99 B: Signal cable connector (for AMP board) NOTE The cables will be necessary again. Be careful not to lose them. (11) Remove the AMP board fixing plate (with AMP board) from the motor unit. Hexagon socket head cap bolts: 2-M3×6 VT series Maintenance Manual Rev.2...
- Page 100 Match the corners Make sure that the entire surface of the thermal conductive NOTE sheet contacts with the rear side of the motor unit without lifting up the center of the sheet. Wrong Correct VT series Maintenance Manual Rev.2...
- Page 101 When you replace with a new belt, belt extends and the belt tension may decrease in the initial stage. Make sure to operate the robot two to three days and check the belt tension again VT series Maintenance Manual Rev.2...
- Page 102 (9) Pass the wire tie to the mount base inside the Arm Bind the following cables with the wire tie. Wire tie: AB100 Power cable Signal cable (for motor) Brake cable (10) Mount the Arm #2 cover. Reference: 7.2 Arm #2 Cover VT series Maintenance Manual Rev.2...
- Page 103 VT6L Maintenance 11. Joint #3 (11) Turn ON the Manipulator. Reference: VT series Manual VT6L Manipulator 6.5 LED When starting the Manipulator for the first time after replacing the motor unit, the NOTE motor unit firmware is automatically updated. DO NOT turn OFF the Manipulator until it starts.
-
Page 104: Replacing Joint #3 Reduction Gear Unit
VT6L Maintenance 11. Joint #3 11.2 Replacing Joint #3 Reduction Gear Unit Reduction gear unit is replaced by serviceman who has taken maintenance training. For replacement of the reduction gear unit, please contact the supplier of your region. VT series Maintenance Manual Rev.2... -
Page 105: Replacing Joint #3 Timing Belt
Removal Joint #3 Motor Removal Step (1) through (7) Joint #3 (1) Install the Joint #3 timing belt. Timing Belt Reference: 11.1 Replacing Joint #2 Motor Installation Joint #3 Motor Removal Step (5) through (11) VT series Maintenance Manual Rev.2... -
Page 106: Joint #4
Because of that, it is necessary to perform calibration (encoder rest and calibration) to match these origins. After replacing the parts, refer to the following section to perform calibration. 19. Calibration. Joint #4 Reduction Gear Unit Joint #4 Electromagnetic Brake Joint #4 Motor Joint #4 Timing Belt VT series Maintenance Manual Rev.2... -
Page 107: Replacing Joint #4 Motor
Wire tie: AB100 × 2 Power cable Signal cable NOTE Be careful not to cut the harness. (5) Remove the plate (with AMP board) inside the Arm #3. Hexagon socket head cap bolts with captive washer: 2-M4×12 VT series Maintenance Manual Rev.2... - Page 108 (8) Disconnect the following connectors of the motor. A: Signal cable connectors (for motor × 2) B: Signal cable connector (for AMP board) NOTE The cables will be necessary again. Be careful not to lose them. VT series Maintenance Manual Rev.2...
- Page 109 Make sure to operate the robot two to three days and check the belt tension again Mount the plate on the Arm #3. Hexagon socket head cap bolts with captive washer: 2-M4×12 Tightening torque: 4.0 ± 0.2 N·m VT series Maintenance Manual Rev.2...
- Page 110 #4 motor and the Joint #3 motor with the wire tie. Wire tie: AB100 Signal cable (for AMP board) Signal cable (for motor) Brake cable Mount the Arm #3 cover. Reference: 7.3 Arm #3 Cover VT series Maintenance Manual Rev.2...
- Page 111 VT6L Maintenance 12. Joint #4 (10) Turn ON the Manipulator. Reference: VT series Manual VT6L Manipulator 6.5 LED NOTE When starting the Manipulator for the first time after replacing the motor unit, the motor unit firmware is automatically updated. DO NOT turn OFF the Manipulator until it starts.
-
Page 112: Replacing Joint #4 Reduction Gear Unit
VT6L Maintenance 12. Joint #4 12.2 Replacing Joint #4 Reduction Gear Unit Reduction gear unit is replaced by serviceman who has taken maintenance training. For replacement of the reduction gear unit, please contact the supplier of your region. VT series Maintenance Manual Rev.2... -
Page 113: Replacing Joint #4 Timing Belt
(5) Cut off the wire tie that binds the following cables and the ground wire. Wire tie: AB100 Joint #5 motor cable Signal cable (for motor) Joint #6 motor cable Ground wire NOTE Be careful not to cut the harness. VT series Maintenance Manual Rev.2... - Page 114 Arm #3 side. Cables disconnected connectors in the step (2) through (7) Power cable (Joint #5, 6 connector parts) Joint #5 signal cable (for motor) Ground wire (9) Remove the Joint #4 timing belt. VT series Maintenance Manual Rev.2...
- Page 115 Wire tie: AB100 Motor cable(Joint #5) Signal cable (Joint #5) Motor cable (Joint #6) Ground wire (7) Mount the following covers. Arm #3 Cover Arm #4 Cover 1 Arm #4 Cover 2 Reference: 7 Covers VT series Maintenance Manual Rev.2...
- Page 116 VT6L Maintenance 12. Joint #4 (8) Turn ON the Manipulator. Reference: VT series Manual VT6L Manipulator 6.5 LED NOTE When starting the Manipulator for the first time after replacing the motor unit, the motor unit firmware is automatically updated. DO NOT turn OFF the Manipulator until it starts.
-
Page 117: Joint #5
Because of that, it is necessary to perform calibration (encoder rest and calibration) to match these origins. After replacing the parts, refer to the following section to perform calibration. 19. Calibration. Joint #5 Timing Belt Joint #5 Motor Joint #5 Electromagnetic Brake VT series Maintenance Manual Rev.2... -
Page 118: Replacing Joint #5 Motor
The brake is mounted on each joint to prevent the arm from lowering due to its own weight while the controller power is OFF or the motor is OFF status. The brake does not work during replacement. Be careful when performing maintenance work. VT series Maintenance Manual Rev.2... - Page 119 (5) Disconnect the following connectors of the motor. A: Signal cable connectors (for motor × 2) B: Signal cable connector (for AMP board) NOTE The cables will be necessary again. Be careful not to lose them. VT series Maintenance Manual Rev.2...
- Page 120 (3) Connect the following connectors of the motor. A: Signal cable connectors (for motor × 2) B: Signal cable connector (for AMP board) Connector for the signal cable connector (for motor) is the same color. VT series Maintenance Manual Rev.2...
- Page 121 Arm #4 Cover 1 Arm #4 Cover 2 Reference: 7. Covers (6) Turn ON the Manipulator. Reference: VT series Manual VT6L Manipulator 6.5 LED NOTE When starting the Manipulator for the first time after replacing the motor unit, the ...
-
Page 122: Replacing Joint #5 Reduction Gear Unit
VT6L Maintenance 13. Joint #5 13.2 Replacing Joint #5 Reduction Gear Unit Reduction gear unit is replaced by serviceman who has taken maintenance training. For replacement of the reduction gear unit, please contact the supplier of your region. VT series Maintenance Manual Rev.2... -
Page 123: Replacing Joint #5 Timing Belt
Arm #4 Cover 1 Arm #4 Cover 2 Reference: 7. Covers (4) Turn ON the Manipulator. Reference: VT series Manual VT6L Manipulator 6.5 LED When starting the Manipulator for the first time after replacing the motor unit, the NOTE ... -
Page 124: Joint #6
Because of that, it is necessary to perform calibration (encoder rest and calibration) to match these origins. After replacing the parts, refer to the following section to perform calibration. 19. Calibration. Joint #6 Electromagnetic Brake Joint #6 Motor Joint #6 Timing Belt VT series Maintenance Manual Rev.2... -
Page 125: Replacing Joint #6 Motor
The brake is mounted on each joint to prevent the arm from lowering due to its own weight while the controller power is OFF or the motor is OFF status. The brake does not work during replacement. Be careful when performing maintenance work. VT series Maintenance Manual Rev.2... - Page 126 (5) Disconnect the following connectors of the motor. A: Signal cable connectors (for motor × 2) B: Signal cable connector (for AMP board) NOTE The cables will be necessary again. Be careful not to lose them. VT series Maintenance Manual Rev.2...
- Page 127 NOTE The direction to install the motor is the direction in which the connector of the motor faces Joint #5 side Be careful for the installation direction VT series Maintenance Manual Rev.2...
- Page 128 Wire tie: AB100 Motor cable (Joint #5) Signal cable (Joint #5) Motor cable (Joint #6) Ground wire (6) Mount the following covers. Arm #4 Cover 1 Arm #4 Cover 2 Reference: 7. Covers VT series Maintenance Manual Rev.2...
- Page 129 VT6L Maintenance 14. Joint #6 (7) Turn ON the Manipulator. Reference: VT series Manual VT6L Manipulator 6.5 LED NOTE When starting the Manipulator for the first time after replacing the motor unit, the motor unit firmware is automatically updated. DO NOT turn OFF the Manipulator until it starts.
-
Page 130: Replacing Joint #6 Reduction Gear Unit
VT6L Maintenance 14. Joint #6 14.2 Replacing Joint #6 Reduction Gear Unit Reduction gear unit is replaced by serviceman who has taken maintenance training. For replacement of the reduction gear unit, please contact the supplier of your region. VT series Maintenance Manual Rev.2... -
Page 131: Replacing Joint #6 Timing Belt
Arm #4 Cover 1 Arm #4 Cover 2 Reference: 7. Covers (3) Turn ON the Manipulator. Reference: VT series Manual VT6L Manipulator 6.5 LED NOTE When starting the Manipulator for the first time after replacing the motor unit, the motor unit firmware is automatically updated. -
Page 132: Amp Board
The shock may shorten the life cycle of the motors and encoder and/or damage them. CAUTION ■ Never disassemble the motor and encoder. A disassembled motor and encoder will cause a positional gap and cannot be used again. VT series Maintenance Manual Rev.2... - Page 133 VT6L Maintenance 15. AMP Board Joint #4 AMP Board Joint #6 AMP Board Joint #3 AMP Board Joint #5 AMP Board Joint #2 AMP Board Joint #1 AMP Board VT series Maintenance Manual Rev.2...
-
Page 134: Replacing Amp Board On Joint #1, #2, And #3
Cross-recessed screws with a washer: 3-M3×6 NOTE If the thermal conductive sheet is attached on the rear side of the AMP board, remove it. The thermal conductive sheet will be necessary again. Be careful not to lose it. VT series Maintenance Manual Rev.2... - Page 135 Tightening torque: 0.45 ± 0.1 N·m (3) Fix the plate (with AMP board) to the motor unit and mount the motor unit. Reference: 9.1 Joint #1 Motor Installation 10.1 Joint #2 Motor Installation 11.1 Joint #3 Motor Installation VT series Maintenance Manual Rev.2...
-
Page 136: Replacing Amp Board On Joint #4
Cross-recessed screws with a washer: 3-M3×6 NOTE If the thermal conductive sheet is attached on the rear side of the AMP board, remove it. The thermal conductive sheet will be necessary again. Be careful not to lose it. VT series Maintenance Manual Rev.2... - Page 137 (2) Mount the AMP board on the plate. Cross-recessed screws with a washer: 3-M3×6 Tightening torque: 0.45 ± 0.1 N·m (3) Mount the plate (with AMP board) on the Arm #3. Reference: 12.1 Joint #4 Motor Installation VT series Maintenance Manual Rev.2...
-
Page 138: Replacing Amp Board On Joint #5 And #6
(1) Fix the AMP board on the Arm #4 Cover 2. Installation Cross-recessed screws with a washer: 3- M3×6 Tightening torque: 0.45 ± 0.1 N·m (2) Mount the Arm #4 Cover 2. Reference: 7.5 Arm #4 Cover 2 VT series Maintenance Manual Rev.2... -
Page 139: Led Plate
Performing any replacement procedure with the power ON is extremely hazardous and may result in electric shock and/or malfunction of the robot system. LED Plate VT series Maintenance Manual Rev.2... -
Page 140: Replacing Led Plate
Mount the LED gasket in the groove of the Arm #2. (2) Install the LED plate. Cross-recessed screws: 2-M3×10 Tightening torque: 0.45 ± 0.1 N·m (3) Mount the Arm #2 Cover. Reference: 7.2 Arm #2 Cover VT series Maintenance Manual Rev.2... -
Page 141: Felt Sheet
Joint #1 Felt Sheet (Inside of Arm) Joint #1 Felt Sheet (Back of Arm #1 cover) Joint #3 Felt Sheet Joint #2 Felt Sheet VT series Maintenance Manual Rev.2... -
Page 142: Replacing Joint #1 Felt Sheet
One side of the felt sheet is a seal. See the position specified in the figure and attach the felt sheet on Arm #1 Cover. (3) Mount the Arm #1 Cover. Reference: 7.1 Arm #1 Cover VT series Maintenance Manual Rev.2... -
Page 143: Replacing Joint #2 Felt Sheet
One side of the felt sheet is a seal. Attach the felt sheet at the position where the Joint 2 screw holes and the holes of the Joint #2 felt sheet matches. (2) Mount the Arm #2 Cover. Reference: 7.2 Arm #2 Cover VT series Maintenance Manual Rev.2... -
Page 144: Replacing Joint #3 Felt Sheet
One side of the felt sheet is a seal. Attach the felt sheet so that it fits in the groove of the Joint #3 of Arm #2. (2) Mount the Arm #2 Cover. Reference: 7.2 Arm #2 Cover VT series Maintenance Manual Rev.2... -
Page 145: Controller Unit
Controller is energized. If warnings of voltage reduction occur, replace the lithium metal battery even if it has not reached the above product life. For EPSON RC+ 7.0, the recommended replacement time for the battery can be checked in NOTE ... -
Page 146: Replacing Controller Unit
The brake is mounted on each joint to prevent the arm from lowering due to its own weight while the Controller power is OFF or the motor is OFF status. The brake does not work during replacement. Be careful when performing maintenance work. VT series Maintenance Manual Rev.2... -
Page 147: Standard, Cleanroom Model
Controller Unit. Next, pull the Controller Unit forward. Pull it forward (6) Disconnect the following connectors of the Controller Unit. A: Power cable connector B: Signal cable connector C: LED connectors × 2 VT series Maintenance Manual Rev.2... - Page 148 Push to the left gently NOTE Push the Controller Unit while fixing the cables from the Joint #1 motor at the base opening. Be careful not to push the cables to the back of the base. VT series Maintenance Manual Rev.2...
- Page 149 Hexagon socket head cap bolts: 3- M4×10 (with a plain washer) Tightening torque: 4.0 ± 0.2 N·m (4) Connect the TP connector inside the connector plate. (5) Mount the connector plate. Reference: 7.7 Connector Plate VT series Maintenance Manual Rev.2...
-
Page 150: Protection Model
Gently push to the right then remove the thermal conductive sheet on the base and the Controller Unit. Next, pull the Controller Unit forward. Pull it forward (5) Disconnect the TP connector which is connected (inside) the connector plate. VT series Maintenance Manual Rev.2... - Page 151 (10) Disconnect the following connectors of the Controller Unit. A: Power cable connector B: Signal cable connector C: LED connectors × 2 D: USB type A connector E: USB type B connector F: LAN connector VT series Maintenance Manual Rev.2...
- Page 152 Then, gently move the plate of the Controller Unit to the left and let the thermal conductive sheet contacts with the wall inside the base. Move it to the right to insert Push to the left gently VT series Maintenance Manual Rev.2...
- Page 153 (6) Connect I/O connector on the Controller Unit. (7) Connect EMERGENCY connector on the Controller Unit. (8) Connect the following connectors on the Controller Unit. D: USB (type A) connector E: USB (type B) connector F: LAN connector VT series Maintenance Manual Rev.2...
- Page 154 VT6L Maintenance 18. Controller Unit (9) Mount the connector plate. Reference: 7.7 Connector Plate VT series Maintenance Manual Rev.2...
-
Page 155: Replacing Power Board
Tightening torque: 0.45 ± 0.1N·m (2) Connect the connectors of the power board. Power connectors: AC specification: (IN/OUT ×2 for each) DC specification: (IN/OUT ×1 for each) (3) Mount the Controller Unit. Reference: 18.1 Replacing Controller Unit VT series Maintenance Manual Rev.2... -
Page 156: Replacing Cpu/Dpb Board
Remember the cable layout for reconnecting after replacement. specification specification E-OUT E-IN (3) Remove the CPU/DPB board. Binding head screws: 5-M3×6 Firstly, unscrew the mounting screws. NOTE Next, pull the CPU/DPB board to the arrow direction. VT series Maintenance Manual Rev.2... - Page 157 (4) Remove the heat release sheet attached on the CPU board. NOTE The heat release sheet will be necessary again. Be careful not to lose them. Be careful not to break the heat release sheet. VT series Maintenance Manual Rev.2...
- Page 158 H: Regenerative resistor connector 2 NOTE Be careful not to connect the wrong connectors or forget to connect it. AC specification DC specification E-OUT E-IN (4) Mount the power board. Reference: 18.2 Replacing Power Board VT series Maintenance Manual Rev.2...
-
Page 159: Replacing Lithium Battery
(2) Remove the cooling fan. Binding head screws: 4-M4×30 Cooling Fan (1) Mount a new cooling fan. Installation Binding head screws: 4-M4×30 Tightening torque: 0.45 ± 0.1N·m Cooling Fan (2) Mount the Controller Unit. Reference: 18.1 Replacing Controller Unit VT series Maintenance Manual Rev.2... -
Page 160: Replacing Sd Card
(1) Push the SD card and inset to the SD card slot near the optional slot. Installation (2) Mount the optional slot cover. Pan head screws: 2-M3×6 Sems Standard, Tightening torque: 0.45 ± 0.1 N·m Cleanroom VT series Maintenance Manual Rev.2... -
Page 161: Protection Model
(4) Push the SD card which is inserted near the optional slot to eject. SD Card (1) Push the SD card and inset to the SD card slot near the optional slot. Installation (2) Mount the connector plate. Reference: 7.7 Connector Plates Protection VT series Maintenance Manual Rev.2... -
Page 162: Fieldbus I/O
VT6L Maintenance 18. Controller Unit 18.7 Fieldbus I/O Fieldbus I/O of the VT series supports the following model. DeviceNet™ CC-Link PROFIBUS-DP PROFINET EtherNet/IP™ EtherCAT® Modbus For details, refer to the following manuals. Robot Controller Option Fieldbus I/O EPSON RC+ 7.0 User’s Guide 11.7 Fieldbus Slave I/O ... -
Page 163: Standard, Cleanroom Model
(1) Unscrew the screws by using special tool until fieldbus I/O module is loosened. I/O Module (2) Remove the fieldbus I/O module. Removal You can remove the module by pulling loosened screws toward. Standard, (3) Mount the optional slot cover. Cleanroom model VT series Maintenance Manual Rev.2... -
Page 164: Protection Model
Insert the fieldbus I/O module into the optional slot. NOTE Make sure that the fieldbus I/O module is completely inserted. Move the module up and down lightly and check whether the module is fixed in place. VT series Maintenance Manual Rev.2... - Page 165 (The cable is supplied with the module.) Relay Cable Install the spacers to the gasket. (6 spacers: the gasket is supplied with the module.) Gasket + Gasket, Spacers Spacers Pass the relay cable through the gasket. Gasket Relay Cable VT series Maintenance Manual Rev.2...
- Page 166 Duct Covers ensured. NOTE Be sure to use the dedicated cable (supplied with the module) for communication. If other cables are used, water protection performance may not be ensured. VT series Maintenance Manual Rev.2...
- Page 167 If the seal washers are not embedded, water protection performance may not be ensured. Make sure that there is no scratch and dust on the gasket mounting surface. If the gasket is damaged or dusty, water protection performance may not be ensured. VT series Maintenance Manual Rev.2...
- Page 168 Insert the fieldbus I/O module into the optional slot. Make sure that the fieldbus I/O module is NOTE completely inserted. Move the module up and down lightly and check whether the module is fixed in place. VT series Maintenance Manual Rev.2...
- Page 169 3: Yellow wire 4: Blue wire Connect the supplied connector to the fieldbus I/O module. Install the spacers to the gasket. (6 spacers: the gasket is supplied with the module.) Gasket + Gasket, Spacers Spacers VT series Maintenance Manual Rev.2...
- Page 170 Be sure to install the dust cover (supplied NOTE with the module) on the unused connector. If the dust cover is not installed on connector completely, water protection Dust cover performance may not be ensured. VT series Maintenance Manual Rev.2...
- Page 171 Shield cable Communication cable Shield reinforcing Shield reinforcing spacer spacer T-branch connector Reserve 240mm of cable space on the back of the Manipulator base. Cable space (240mm) required on the Manipulator back VT series Maintenance Manual Rev.2...
- Page 172 If the seal washers are not embedded, water protection performance may not be ensured. Make sure that there is no scratch and dust on the gasket mounting surface. If the gasket is damaged or dusty, water protection performance may not be ensured. VT series Maintenance Manual Rev.2...
- Page 173 Insert the fieldbus I/O module into the optional slot. NOTE Make sure that the fieldbus I/O module is completely inserted. Move the module up and down lightly and check whether the module is fixed in place. VT series Maintenance Manual Rev.2...
- Page 174 4: White wire 5: Blue wire Connect the supplied connector to the fieldbus I/O module. Install the spacers to the gasket. (6 spacers: the gasket is supplied with the module.) Gasket + Gasket, Spacers Spacers VT series Maintenance Manual Rev.2...
- Page 175 Be sure to install the dust cover (supplied NOTE with the module) on the unused connector. If the dust cover is not installed on connector completely, water protection Dust cover performance may not be ensured. VT series Maintenance Manual Rev.2...
- Page 176 There are three methods to NOTE connect the communication cable. Select the method according to your system. Reserve 240mm of cable space on the back of the Manipulator base. Cable space (240mm) required on the Manipulator back VT series Maintenance Manual Rev.2...
- Page 177 If the seal washers are not embedded, water protection performance may not be ensured. Make sure that there is no scratch and dust on the gasket mounting surface. If the gasket is damaged or dusty, water protection performance may not be ensured. VT series Maintenance Manual Rev.2...
- Page 178 If you touch the SD card while installing the NOTE fieldbus I/O module, it may come out. Manipulator (Controller part) will not operate properly if the SD card is not inserted. SD card VT series Maintenance Manual Rev.2...
- Page 179 (6 spacers: the gasket is supplied with the module.) Gasket + Gasket, Spacers Spacers Pass the relay cable through the gasket. Relay cable Gasket Temporarily secure the relay cable connector to the optional block with a nut (M12). VT series Maintenance Manual Rev.2...
- Page 180 the module) for communication. If other cables are used, water protection performance may not be ensured. There are three methods to NOTE connect the communication cable. Select the method according to your system. VT series Maintenance Manual Rev.2...
- Page 181 VT6L Maintenance 18. Controller Unit Reserve 240mm of cable space on the back of the Manipulator base. Cable space (240mm) required on the Manipulator back VT series Maintenance Manual Rev.2...
- Page 182 If the seal washers are not embedded, water protection performance may not be ensured. Make sure that there is no scratch and dust on the gasket mounting surface. If the gasket is damaged or dusty, water protection performance may not be ensured. VT series Maintenance Manual Rev.2...
-
Page 183: Reset Switch
Push the RESET switch for three seconds when booting the Manipulator. Manipulator reboots. Shape of RESET switch is difficult to push. Use a sharp edged object when pushing the RESET switch. There is no RESET switch for Protection model. VT series Maintenance Manual Rev.2... - Page 184 VT6L Maintenance 18. Controller Unit VT series Maintenance Manual Rev.2...
-
Page 185: Calibration
Manipulator moves unexpectedly. In EPSON RC+, a coordinate point including the arm pose is defined as “point” and its data is called “point data”. - Page 186 NOTE - For details about the basic orientation, refer to “VT series Manual VT6L Manipulator 3.9 Checking the Basic orientation”. - Calibrate one joint at a time. (Also, replace parts of one joint at a time.) If you calibrate the origins for multiple joints simultaneously, it will be more difficult to verify their origins and obtain the origin correct positions.
- Page 187 VT6L Maintenance 19. Calibration Calibration Flowchart Start 1. Basic Orientation Confirmation 2. Part Replacement 3. Encoder Initialization 4. Calibration 5. Calibration More accurate positioning ···························· Perform these steps if necessary 6. Accuracy Testing Re-calibrate? VT series Maintenance Manual Rev.2...
-
Page 188: Calibration Procedures
1. Basic Orientation Confirmation Calibration is performed with the basic orientation of the Manipulator. For details about the basic orientation, refer to “VT series Manual VT6L Manipulator 3.9 Checking the Basic Orientation”. When the Manipulator cannot have the basic orientation, define the reference orientation in advance, and record the point data. - Page 189 EPSON Set the jog mode to “Joint” in the [Jog & Teach] panel from EPSON RC+ menu - [Tools] - [Robot Manager], and then move the Manipulator in Jog motion so that the target joint matches the basic orientation as much as possible.
- Page 190 VT6L Maintenance 19. Calibration 4-5 Set the specified pulse value to the encoder Execute the command in the [Command Window] from EPSON RC+ menu - EPSON [Tools] according to the joint to adjust as follows. Joint #1 >calib 1 Joint #2 >calib 2 Joint #3 >calib 3...
- Page 191 Set the pulse values again at the adjusted point. Execute the following command in the [Command Window] from EPSON RC+ menu - [Tools] to specify the pulse values to set. >calpls J1 pulse, J2 pulse, J3 pulse, J4 pulse, J5 pulse, J6 pulse * Manipulator will not move.
-
Page 192: Error Code Table
VT6L Maintenance 20. Error Code Table 20. Error Code Table For error code, refer to the following manual. Status Code / Error Code List VT series Maintenance Manual Rev.2... - Page 193 DPB board, VT65T02*** Controller Unit 2207771 18.1 Cooling fan only unit DC specification All DC 2216965 specification model AC specification 2188638 Power board 2207410 S/N: VT65T02*** only 18.2 DC specification 2216953 All DC specification model VT series Maintenance Manual Rev.2...
- Page 194 Due to the chemicals regulations of individual countries (the UN GHS), we are requesting our customers to purchase grease and other materials required for maintenance from the manufacturers listed in the table below as of April 2015. VT series Maintenance Manual Rev.2...
- Page 195 Regarding purchase of grease and other materials, please contact the following manufacturers. If there is anything unclear, please contact the suppliers of your region. Product name Manufacturer Harmonic Grease SK-1A Harmonic Drive Systems Inc. https://www.harmonicdrive.net/ Harmonic Grease SK-2 https://www.chemours.com/en/brands-and- Krytox®GPL-224 Chemours products LOCTITE641 LOCTITE http://loctite.com/ LOCTITE243 VT series Maintenance Manual Rev.2...
- Page 196 Part Name Code Note Reference* Camera plate unit R12NZ900ZZ 11.1 Tool Adapter (ISO flange) R12NZ900ZX 11.2 R12NZ90101 Adjustable Mechanical Stops R12NZ90102 11.3 R12NZ90103 External Wiring Kit R12NZ900ZW 11.4 * Refer to VT series Manual VT6L Manipulator VT series Maintenance Manual Rev.2...