
Related Manuals for Electrolux ELAI3 Series


Summary of Contents for Electrolux ELAI3 Series
- Page 1 Under Counter dishwasher Installation manual * 59566V201- 2021.11 *Original instructions...
- Page 2 Installation diagram (750..1000) (0..100) XD WI...
- Page 3 EI = Power supply entry D = Drain pipe with internal diameter: WI = Water Inlet pipe with ⌀ =3/4″ G fittings ⌀ = 40 mm (Only for model with free-fall drainage) XD = Inlet pipe for detergents ⌀ = 20 mm (Only for model with drain pump) EQ = Equipotential screw...
- Page 4 Foreword Read the following instructions, including the warranty terms before installing and using the appliance. Visit our website www.electroluxprofessional.com and open the Support section to: Register your product Get hints & tips of your product, service and repair information The installation, use and maintenance manual (hereinafter Manual) provides the user with information necessary for correct and safe use of the appliance.
-
Page 5: Table Of Contents
Contents A SAFETY INFORMATION ......................... 6 General information ........................6 General safety ..........................6 Personal protection equipment ......................7 Transport, handling and storage ...................... 8 Installation and assembly ....................... 8 Water connection.......................... 8 Electrical connection ........................8 Machine cleaning and maintenance....................9 Service............................. -
Page 6: Asafety Information
SAFETY INFORMATION General information These appliance is intended to be used for commercial applications, for example in kitchens of restaurant, canteens, hospitals. It must be used for washing plates, dishes, glassware, cutlery and similar articles. To ensure safe use of the machine and a proper understanding of the manual it is necessary to be familiar with the terms and typographical conventions used in the documentation. -
Page 7: Personal Protection Equipment
• Do not remove or tamper with the machine’s safety devices. • Before carrying out any machine installation, always consult the installation manual, which gives the correct procedures and contains important information on safety. • Unauthorized personnel must not enter the work area. •... -
Page 8: Transport, Handling And Storage
Transport, handling and storage • Due to their size, the machines cannot be stacked on top of each other during transport, handling and storage; this eliminates any risks of loads tipping over due to stacking. • Do not stand under suspended loads during loading or unloading operations. Unauthorized personnel must not enter the work area. -
Page 9: Machine Cleaning And Maintenance
• Make sure to install the machine in accordance with the safety regulations and local laws of the country where used. • If the power cable is damaged it must be replaced by the Customer Care Service or in any case by specialised personnel, in order to prevent any risk. •... -
Page 10: Service
the intervention of an unauthorized technician by the Manufacturer and the original manufacturer warranty will be invalidated. Service • Only original spare parts can ensure the safety standards of the appliance. A.10 Disposal of packing • Dispose of each packaging items respecting the current regulation in the country of installation. -
Page 11: Cgeneral Information
Risk a combination of probabilities and risks of Electrolux Professional spa - Viale Treviso, 15 - 33170 Pordenone (Italy) injury or harm to health in a hazardous situation. The dataplate gives the product identification and technical data;... -
Page 12: How To Identify The Technical Data
Nominal 9.9 kW IPX4 P = Drain pump installed Electrolux Professional spa - Viale Treviso, 15 - 33170 Pordenone (Italy) G = Detergent and drain pumps installed W = Water Softener installed A060 = Compliant with A 60 level according... -
Page 13: Responsibility
This manual is intended solely for consultation by the operator and can only be given to third parties with the permission of • non-compliance with the instructions contained in this Electrolux Professional company. manual; • repairs not carried out in a workmanlike fashion, and... -
Page 14: Main Technical Characteristics For Three Phases Appliances
ELAI1G ELAI1WG ELAI1G8 ELAI1G4 Model ELAI1GCL ELI1G36M CLAI1G NLAI1WG VLAI1G8 VLAI1G4 Rinse cycle water [gal] [0.66] [0.66] consumption Boiler capacity [gal] Tank capacity Standard cycle 120 - 180 - 120 - 180 - 240 time with water 90 - 120 - 90 - 120 - sec. - Page 15 ELAI3... ELI3G6M ZLAI3... ELAI3WP ELAI3- NLAI3... ELI3 ELI3CG ELI3G5M Model ZLAI3WP GUSPH6 VLAI3... ZLI3 ZLI3CD ELI3G35M ZLAI3WG ELAI3- XLAI3... GUSPH5 DW6-38 Tank capacity 90 - 120 - Standard cycle 90 - 120 - 240 time with water 90 - 120 - 90 - 120 - sec.
-
Page 16: Characteristics Of Power Supply Cable
EUCA060 VUCA060 Model ELAI3GTL ELAI3GCL ELAI3GWL ZUCA060 ET5AI ET5AIP ELAI3PML ELAI3WGML Standard cycle 90 - 120 - 240 time with water 90 - 120 - 90 - 120 - 90 - 120 - sec. 90 - 113 - 173 90 - 120 - 120 supply at 50℃... -
Page 17: Shifting
CAUTION For correct and safe lifting operations: Do not make modifications to the parts • use the type of equipment most suitable for characteristics supplied with the appliance. Any missing and capacity (e.g. electric pallet truck or lift truck); or faulty parts must be replaced with •... -
Page 18: Disposal Of Packing
CAUTION • Lift the equipment with a lift truck, remove the base and During the washing cycles, small amounts position it the place of use. of steam may escape from the dishwasher door. Protect all unsuitable materials exposed to the dishwasher steam and detergents. -
Page 19: Plumbing Connections
Plumbing connections Plumbing circuits • Connect the appliance water supply pipe “WI“ (see the Appliance with atmospheric water supply - with drain pump Installation diagram) to the mains, fitting a cut-off tap, the filter provided and a pressure gauge between the appliance and the mains (see figure below). -
Page 20: Electrical Connections
Power supply 400 - 440V 3 Appliance with pressure water supply - with cold rinse cycle but without drain pump Open the power supply terminal board and insert the jumpers provided as follows: one jumper between terminals 2 and 4 and another between terminals 4 and 6. -
Page 21: Safety Devices
Dishwashers with incorporated peristaltic rinse-aid dispenser pump The pump “S“ dispenses about 0.1 g/s of rinse-aid. It dispenses 0.3 g in 3 sec. at each rinse. Dispenser operating time may be changed, following the instructions given in the next paragraph. Insert the hose provided in the kit into the rinse-aid container (in the versions without incorporated rinse-aid dispenser only). -
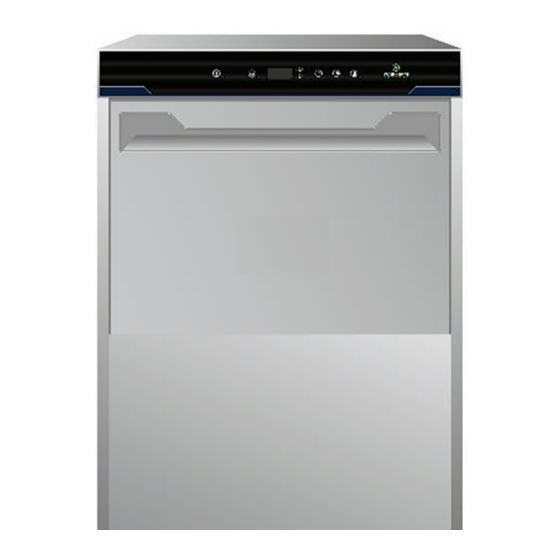
Page 22: Gcontrol Panel Description
• Connect the rinse-aid dispenser between terminals 8 and 9. These connection points are live during filling of the tank and at the end of the rinse cycle for a set time (see I.2 Setting the dispensers paragraph). CONTROL PANEL DESCRIPTION Control panel description NOTE! On/Off... -
Page 23: Hcommissioning
On/Off Wash cycle 3 This button indicates equipment status: on or off. When the This button starts Wash cycle 3. When the cycle is selected, equipment is on, the button indicator is lit up. the button indicator is lit up. This cycle is recommended for washing very dirty dishes. -
Page 24: Ibasic Machine Setup
Check the positioning of tank components • Make sure the upper and lower wash and rinse arms are correctly fitted. • Make sure that, the overflow “A“, the tank filter “B“, and the flat filters “C“ are correctly fitted. BASIC MACHINE SETUP Manual activation In the appliances with pressure boiler, the diaphragm dis- penser pump may be manually activated by pressing screw... -
Page 25: Rinse-Aid Diaphragm Dispenser
NOTE! To obtain excellence washing performance, use detergent, rinse aid and descaling agent sug- gested by Electrolux Professional. In the Electrolux Professional web site, open the “Accessories and 3. Initial amount of detergent: Consumables“ web page and navigate into the dishwashing equipment tab to order most suitable detergents and accessories. -
Page 26: Jdishwasher With Incorporated Continuous Water Softener
CAUTION If changing to a different detergent/rinse- aid type (even one by the same manufac- turer), you must rinse the suction and pressure hoses with fresh water before connecting the new detergent/rinse-aid container. Otherwise, the mixing of differ- ent types of detergent/rinse-aid will cause crystallization, which may result in a breakdown of the dosing pump. -
Page 27: Ktroubleshooting
• Pour approx. 1.5 kg of coarse salt [NaCl] in container “A“ (an • Remove any traces of salt from the filling hole, the container amount sufficient to fill the salt container up to the rim) using thread and the closing cap seal. the special funnel supplied (see figure below). - Page 30 Electrolux Professional SPA Viale Treviso 15 33170 Pordenone www.electroluxprofessional.com...