
Related Manuals for Beko B3WFU57415WSPB


Summary of Contents for Beko B3WFU57415WSPB
- Page 1 Pralka automatyczna Instrukcja obsługi Washing Machine User Manual B3WFU57415WSPB PL/EN Numer dokumentu:1911862075_AA_PL/ 17-02-23.(14:02)
- Page 2 Przed użyciem przeczytaj niniejszą instrukcję obsługi! Drodzy Klienci, Dziękujemy za wybranie produktu firmy Grundig. Mamy nadzieję, że ta pralka, wyprodukowana z zachowaniem najwyższych wymogów jakościowych i przy zastosowaniu najnowszej technologii, będzie Wam służyła jak najlepiej. Prosimy zatem przed jej uruchomieniem uważnie przeczytać całą instrukcje obsługi. Stosujcie się...
-
Page 3: Ogólne Instrukcje Dotyczące Bezpieczeństwa
Ogólne instrukcje dotyczące bezpieczeństwa Rozdział ten zawiera instrukcje dotyczące bezpieczeństwa, które pomogą zabezpieczyć się przed zagrożeniem obrażeniami ciała i szkodami materialnymi. Nasza firma nie ponosi odpowiedzialności za jakiekolwiek szkody, które mogą powstać w przypadku nieprzestrzegania instrukcji. Instalację i naprawy zawsze zlecaj autoryzowanemu przedstawicielowi serwisu. Używaj wyłącznie oryginalnych części zamiennych i akcesoriów. -
Page 4: Bezpieczeństwo Elektryczne
Opuszczając pomieszczenie, w którym stoi pralka, należy pamiętać, aby zamknąć jej drzwiczki. Dzieci i zwierzęta mogą zostać zamknięte w środku i utonąć. Dzieci nie powinny wykonywać czyszczenia i prac konserwacyjnych bez nadzoru osoby dorosłej. Opakowania trzymać z dala od dzieci. Niebezpieczeństwo obrażeń i utonięcia. - Page 5 Produkt jest ciężki. W przypadku schodów powinien być przenoszony ostrożnie przez dwie osoby. Przewrócenie się urządzenia może spowodować obrażenia. Nie uderzaj i nie upuszczaj urządzenia podczas przenoszenia. Przenoś produkt w pozycji pionowej. Upewnij się, że węże oraz kabel zasilający nie są zagięte, ściśnięte lub zgniecione po zamontowaniu lub czyszczeniu urządzenia.
-
Page 6: Bezpieczeństwo Użytkowania
Podłącz wąż doprowadzający wodę bezpośrednio do kranu. Ciśnienie powinno wynosić minimum 0,1 MPa (1 bar) i maksymalnie 1 MPa (10 barów). Aby produkt działał prawidłowo, z kranu powinno wypływać od 10 do 80 litrów wody na minutę. Jeśli ciśnienie wody przekracza 1 MPa (10 barów), należy zamontować... - Page 7 Nie należy myć elementów zanieczyszczonych benzyną, naftą, benzenem, rozcieńczalnikiem, alkoholem lub innymi materiałami łatwopalnymi lub wybuchowymi oraz chemikaliami przemysłowymi. Nie używaj bezpośrednio detergentu do czyszczenia na sucho i nie pierz, nie płucz ani nie wiruj rzeczy zanieczyszczonych detergentem do czyszczenia na sucho. Nie wkładaj rąk do obracającego się...
-
Page 8: Zgodność Z Dyrektywą Weee I Usuwanie Odpadów
Ważne wskazówki ochrony środowiska 2.1 Zgodność z dyrektywą WEEE i usuwanie odpadów: Niniejszy wyrób jest zgodny z dyrektywą Parlamentu Europejskiego i Rady (2012/19/WE). Wyrób ten oznaczony jest symbolem klasyfikacji zużytych urządzeń elektrycznych i elektronicznych (WEEE). Ten symbol oznacza, że sprzęt nie może być umieszczany łącznie z innymi odpadami gospodarstwa domowego po okresie jego użytkowania. -
Page 9: Dane Techniczne
Dane techniczne Beko Nazwa lub znak towarowy dostawcy B3WFU57415WSPB Nazwa modelu 7002740010 Pojemność znamionowa (kg) 1400 Maksymalna prędkość wirowania (obr/min) Do zabudowy Wysokość (cm) Szerokość (cm) 49.6 Głębokość (cm) Pojedynczy wlot wody/ Podwójny wlot wody • / - • Dostępny 230 V / 50Hz Napięcie i częstotliwość... -
Page 10: Właściwe Miejsce Instalacji
4.1 Instalacja Najpierw przeczytaj Instrukcje bezpieczeństwa. • Zwróć się do najbliższego autoryzowanego punktu serwisowego w celu zainstalowania produktu. • Przygotowanie miejsca na pralkę oraz instalacji elektrycznej i wodno-kanalizacyjnej w tym miejscu jest obowiązkiem klienta. • Upewnij się, że węże dopływu i odpływu wody, a także elektryczny przewód zasilający nie uległy zagięciu, zakleszczeniu lub uszkodzeniu przy ustawianiu pralki w jej miejscu po zainstalowaniu lub czyszczeniu. -
Page 11: Przyłączanie Zasilania W Wodę
4.1.4 Przyłączanie zasilania w wodę Modeli z pojedynczym dopływem wody nie należy podłączać do kranu z gorącą wodą. W takim przypadku pranie ulegnie zniszczeniu lub pralka przełączy się w tryb ochronny i nie będzie działać. OSTRZEŻENIE: Do nowej pralki nie zakładaj starych ani używanych węży. Może to spowodować wyciek wody z pralki i poplamić pranie. -
Page 12: Połączenie Elektryczne
4.1.6 Wyrównywanie nóżek Aby zapewnić cichą i pozbawioną wibracji pracę maszyny należy ustawić ją pewnie i równo na nóżkach. Ustawić pralkę równo, regulując nóżki. W przeciwnym razie pralka może przesunąć się ze swego miejsca i spowodować OSTRZEŻENIE: zgniecenie, hałas i problemy mechaniczne. Nie używaj narzędzi do poluzowania nakrętek blokujących. -
Page 13: Sortowanie Odzieży
4.2 Przygotowanie Najpierw przeczytaj Instrukcje bezpieczeństwa. 4.2.1 Sortowanie odzieży • Odzież przeznaczoną do prania należy posortować według typu tkaniny, koloru i stopnia zabrudzenia oraz dopuszczalnej temperatury prania. • Zawsze przestrzegaj instrukcji z metek odzieży. 4.2.2 Przygotowanie rzeczy do prania • Rzeczy do prania z elementami metalowymi, jak np. biustonosze ze stelażem drucianym, klamry pasków i metalowe guziki powodują... - Page 14 4.2.5 Prawidłowa ładowność Maksymalny wsad zależy od rodzaju tkaniny, stopnia zabrudzenia i wybranego programu prania. Pralka automatycznie reguluje ilość wody w zależności od masy włożonego do niej prania. Postępować zgodnie z informacjami zawartymi w „Tabeli programów”. Przeładowanie skutkuje zmniejszeniem sprawności pralki.
- Page 15 Stosowanie środków zmiękczających Nalać środek zmiękczający do właściwej komory szuflady na detergent. • Nie przekraczać maksymalnego poziomu oznaczonego znakiem (>max<) w komorze na środek zmiękczający. • Jeśli zmiękczacz nie jest płynny, rozcieńcz go wodą przed umieszczeniem w przegródce na środek zmiękczający.
- Page 16 4.2.7 Wskazówki dotyczące skutecznego prania Odzież Tkaniny Kolory ciemne/ delikatne/ Kolory jasne i biały Kolory czarny wełniane/ jedwabne Zalecana temperatura (Zalecana temperatura Zalecana temperatura zależna (Zalecana temperatura zależna zależna od stopnia zależna od stopnia od stopnia zabrudzenia: pranie od stopnia zabrudzenia: 40- zabrudzenia: pranie zabrudzenia: pranie na zimno lub w temperaturze...
-
Page 17: Panel Sterowania
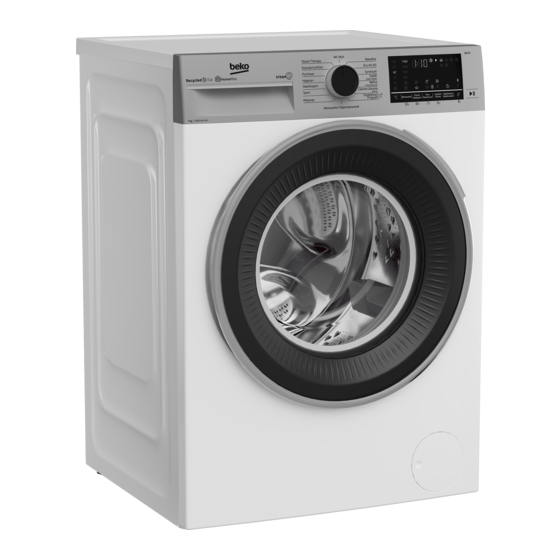
4.3 Obsługa produktu 4.3.1 Panel sterowania 1 – Pokrętło wyboru programów 7 – Przycisk nastawiania godziny zakończenia 2 – Wskaźniki świetlne temperatury 8 – Przycisk funkcji dodatkowej 3 3 – Wskaźniki świetlne prędkości wirowania 9 – Przycisk funkcji dodatkowej 2 4 –... -
Page 18: Tabela Programów I Zużycia
4.3.3 Tabela programów i zużycia Funkcja pomocnicza Wybór zakresu Program temperatur °C 2,30 1400 • • • • • Na zimno Bawełna 1,70 1400 • • • • • Na zimno 0,95 1400 • • • • • Na zimno 40*** 7 0,645 1400 40-60... -
Page 19: Wybór Programu
Funkcje pomocnicze podane w tabeli mogą się różnić w zależności od modelu pralki. Zużycie wody i energii może różnić się w zależności od ciśnienia, twardości i temperatury wody, temperatury otoczenia, typu i ilości rzeczy do prania, wyboru funkcji pomocniczych, prędkości wirowania oraz wahań napięcia w sieci elektrycznej. Czas trwania prania można zobaczyć... - Page 20 4.3.5 Programy • Eco 40-60 Program Eco 40-60 umożliwia pranie normalnie zanieczyszczonej odzieży bawełnianej przystosowanej do prania w temperaturze 40°C lub 60°C razem w tym samym cyklu. Ten program jest używany do oceny zgodności z przepisami UE w sprawie ekoprojektu. Choć...
- Page 21 Na tym programie zalecane jest dodanie do komory na detergent w proszku specjalnych detergentów do prania firanek. • Koszule Iron Fast Program ten służy do prania razem koszul wykonanych z bawełny oraz z tkanin syntetycznych lub z ich domieszką. Program redukuje zagniecenia. Parę stosuje się po zakończeniu programu w celu ułatwienia działania funkcji redukcji zagnieceń.
-
Page 22: Wybór Temperatury
• Downloaded Program (Dodatkowy Program) Jest to specjalny program, który umożliwia pobieranie na żądanie różnych programów. Na początku jest to program wyświetlany w aplikacji HomeWhiz jako domyślny. Za pomocą aplikacji HomeWhiz można jednak wybrać żądany program z wcześniej określonego zestawu programów, a następnie zmienić go i użyć. Aby użyć... -
Page 23: Wybór Prędkości Wirowania
4.3.7 Wybór prędkości wirowania Po wybraniu nowego programu wskaźnik prędkości wirowania wyświetla prędkość wirowania zalecaną dla wybranego programu. Może się zdarzyć tak, że zalecana wartość prędkości wirowania nie będzie prędkością maksymalną, którą można wybrać dla bieżącego programu. Nacisnąć przycisk nastawiania prędkości wirowania, aby ją zmienić. Prędkość wirowania zmniejsza się stopniowo. - Page 24 4.3.8.1 Funkcje pomocnicze • Pranie Wstępne Pranie wstępne warto stosować tylko do rzeczy bardzo zabrudzonych. Rezygnując z prania wstępnego, oszczędza się energię, wodę, detergent i czas.. • Szybkie Pranie Po wybraniu programu można nacisnąć przycisk szybkiego prania, aby skrócić czas trwania programu. Czas prania dla niektórych programów można skrócić...
- Page 25 • Dodatkowe płukanie Aby wybrać tę funkcję, należy nacisnąć i przytrzymać przez 3 sekundy przycisk funkcji pomocniczej 2. Funkcja ta umożliwia pralce wykonanie kolejnego płukania oprócz płukania po praniu głównym. W ten sposób zmniejsza się zagrożenie podrażnieniem wrażliwej skóry (dzieci, alergików itp.) minimalnymi pozostałościami detergentów na wypranych rzeczach.
-
Page 26: Uruchamianie Programu
4.3.9 Godzina zakończenia Wyświetlacz czasu W trakcie programu czas pozostały do jego zakończenia wyświetlany jest w formacie godzin i minut, np. „01:30”. Czas trwania programu może się różnić od podanego w „Tabeli programów i zużycia” zależnie od ciśnienia wody, jej twardości oraz temperatury, temperatury otoczenia, ilości i rodzaju prania, wybranych funkcji pomocniczych oraz wahań... - Page 27 4.3.11 Blokada drzwiczek Drzwiczki pralki zaopatrzono w blokadę zapobiegającą ich otwarciu w przypadku, gdy poziom wody jest nieodpowiedni. Po zablokowaniu drzwiczek na wyświetlaczu pojawia się symbol blokady drzwiczek. Jeśli wybrana jest funkcja zdalnego sterowania, drzwiczki będą zamknięte. W celu otwarcia drzwiczek należy wyłączyć funkcję...
-
Page 28: Anulowanie Programu
4.3.12 Zmiana wyboru po rozpoczęciu programu Dodawanie prania po rozpoczęciu programu Jeśli poziom wody w pralce jest odpowiedni po naciśnięciu przycisku Start/Pauza, blokada drzwiczek zostanie wyłączona, drzwiczki otworzą się i będzie można dodać pranie. Symbol blokady drzwiczek na wyświetlaczu gaśnie po wyłączeniu blokady drzwiczek. Po dodaniu prania zamknąć drzwiczki i jeszcze raz nacisnąć... -
Page 29: Koniec Programu
4.3.14 Koniec programu Po zakończeniu programu na wyświetlaczu pojawi się symbol zakończenia. Jeśli przez 10 minut nie zostanie naciśnięty żaden przycisk, pralka przełączy się w tryb wyłączenia. Wyłączy się wyświetlacz i wszystkie wskaźniki. Zakończone etapy programu zostaną wyświetlone po naciśnięciu przycisku Wł./Wył. 4.3.15 Funkcja HomeWhiz i funkcja zdalnego sterowania Aplikacja HomeWhiz umożliwia kontrolowanie pralki i uzyskiwanie informacji o jej stanie za pomocą... - Page 30 • Wykonywać instrukcje wyświetlane na ekranie, aż aplikacja HomeWhiz wyświetli pytanie o wyrób, który użytkownik chce połączyć z urządzeniem inteligentnym. • Powrócić do aplikacji HomeWhiz i zaczekać na ukończenie konfiguracji. Po ukończeniu konfiguracji nadać pralce nazwę. Można teraz stuknąć i wyświetlić wyrób dodany do aplikacji HomeWhiz. Jeśli w ciągu 5 minut nie uda się...
- Page 31 Gdy funkcja zdalnego sterowania jest włączona, na pralce można zarządzać jedynie jej włączaniem i wyłączaniem oraz kontrolować jej stan. Wszystkimi funkcjami, z wyjątkiem blokady dostępu dzieci, można zarządzać poprzez aplikację. Stan uruchomienia funkcji zdalnego sterowania można sprawdzić dzięki wskaźnikowi funkcji na przycisku. Jeśli funkcja zdalnego sterowania jest wyłączona, wszystkie działania są...
-
Page 32: Konserwacja I Czyszczenie
4.4 Konserwacja i czyszczenie Najpierw przeczytaj Instrukcje bezpieczeństwa! Okres użytkowania pralki wydłuża się, a częste występowanie problemów zmniejsza, jeśli pralkę czyści się z regularną częstotliwością. 4.4.1 Czyszczenie szuflady na detergent Szufladę na detergent należy myć regularnie (raz na 4 do 5 prań), jak opisano poniżej, co pozwoli zapobiec gromadzeniu się... -
Page 33: Spuszczanie Pozostałej Wody I Czyszczenie Filtra Pompy
Zakręć krany. Zdejmij nakrętki z węży dopływu wody aby dostać się do filtrów na zaworach dopływu wody i wyczyść je za pomocą szczotki. Jeśli filtry są bardzo brudne, wyjmij je szczypcami z ich gniazd i oczyść w ten sposób. Filtry na płaskim końcu węży dopływu wody należy wyjąć... -
Page 34: Rozwiązywanie Problemów
Rozwiązywanie problemów Najpierw przeczytaj Instrukcje bezpieczeństwa. Problem Przyczyna Rozwiązanie Programy nie uruchamiają się po Nie naciśnięto przycisku Start/Pauza/Anuluj. • Nacisnąć przycisk Start/Pauza/Anuluj. zamknięciu drzwiczek. W przypadku załadowania zbyt dużej ilości prania • W takim przypadku należy zmniejszyć ilość mogą wystąpić problemy z zamykaniem drzwiczek. prania i upewnić... - Page 35 Problem Przyczyna Rozwiązanie Pranie trwa dłużej niż podano w Ciśnienie wody jest niskie. • Pralka czeka, aż napełni się odpowiednią ilością instrukcji obsługi(*). wody, aby zapobiec pogorszeniu jakości prania z powodu mniejszej ilości wody. Powoduje to przedłużenie czasu prania. Niskie napięcie. •...
- Page 36 Problem Przyczyna Rozwiązanie Wydajność prania jest mała: Użyto niewystarczającej ilości detergentu. • Używać zalecanej ilości detergentu odpowiedniej plamy pozostają lub pranie nie jest do twardości wody i do rodzaju prania. całkiem białe(**). Zbyt dużo prania w pralce. • Nie wkładać do pralki nadmiernych ilości prania.
- Page 37 Problem Przyczyna Rozwiązanie Pozostałości detergentu w Detergent podano do wilgotnej szuflady. • Przed wsypaniem detergentu wysuszyć szufladę szufladzie dozownika(**). na detergent. Detergent zawilgotniał. • Trzymać detergent zamknięty w środowisku wolnym od wilgoci i nie narażać go na działanie nadmiernych temperatur. Ciśnienie wody jest niskie.
- Page 38 Gdy urządzenie jest wyłączone, naciśnięcie i przytrzymanie przycisków funkcji pomocniczych 1 i 2 przez dłuższy czas powoduje odliczanie 3-2-1 i wyświetlenie całkowitej liczby zakończonych cykli. Po wyświetleniu całkowitego cyklu wyświetlane są ewentualne kody awarii. Sprawdź informacje na ekranie, korzystając z poniższej tabeli. Informacje wyświetlane na Przyczyna...
- Page 39 Użytkownik końcowy może dokonać samodzielnej naprawy następujących części zamiennych: drzwi, zawiasy i uszczelki drzwi, inne uszczelki, zespół zamka drzwi i plastikowe urządzenia peryferyjne, takie jak dozowniki detergentu (zaktualizowana lista jest również dostępna w na stronie support.beko.com od 1 marca 2021).
-
Page 41: Washing Machine
Washing Machine User Manual B3WFU57415WSPB Document Number : 1911862075_EN/ 17-02-23.(15:48) -
Page 42: Explanation Of Symbols
Please read this user manual first! Dear Customer, Thank you for selecting a Beko product. We hope that you get the best results from your product which has been manufactured with high quality and state-of-the-art technology. Therefore, please read this entire user manual and all other accompanying documents carefully before using the product. -
Page 43: General Safety Instructions
General safety instructions This section contains safety instructions that will help protect from risk of personal injury or property damage. Our company shall not be liable for any damages that may arise in case of failure to follow these instructions. Always have the installation and repairing procedures carried out by the Authorised Service Agent. -
Page 44: Electrical Safety
Children should not perform cleaning and user maintenance works without an adult’s supervision. Keep packaging materials away from children. Danger of injury and drowning. Keep all detergents and additives used for the product away from children’s reach. Cut the power cable and break and deactivate the locking mechanism of the loading door before disposing of the product for children’s safety. -
Page 45: Installation Safety
1.5 Installation Safety Check the information on the manual and installation instructions to prepare the product for installation and make sure the electrical mains, clean water mains and water outlet are suitable. If not, call a qualified electrician and plumber to have them make the necessary arrangements. These operations are the responsibility of the customer. -
Page 46: Usage Safety
Do not install the product behind a door, a sliding door or at another location that will prevent the door from opening completely. If a drier is to be placed on the product, fix with a suitable connection apparatus obtained from the authorized service. There is a risk of contact with electrical pieces when the upper trays is removed. - Page 47 Do not place your hand or a metal object under the washing machine. If washing laundry at high temperatures, the discharged washing water would burn your skin if in contact with your skin, for ex. When the discharge hose is connected to the tap. Do not touch the discharge water. Take the following precautions to prevent formation of biofilm and malodours: - Make sure the room where the washing machine is placed is well ventilated.
-
Page 48: Important Instructions For Environment
Important instructions for environment 2.1 Compliance with the WEEE Directive and Disposing of the Waste Product: This product complies with EU WEEE Directive (2012/19/EU). This product bears a classification symbol for waste electrical and electronic equipment (WEEE). This product has been manufactured with high quality parts and materials which can be reused and are suitable for recycling. -
Page 49: Technical Specifications
Technical specifications Supplier name or trademark Beko B3WFU57415WSPB Model name 7002740010 Rated capacity (kg) Maximum spin speed (rpm) 1400 Built-in Height (cm) Width (cm) Depth (cm) 49.6 Single Water inlet / Double Water inlet • / - • Available Electrical input (V/Hz) -
Page 50: Appropriate Installation Location
4.1 Installation Please read the “Safety Instructions” section first! • Apply to the nearest authorized service agent for the installation of your product. • Preparation of the location and electrical, tap water and waste water installations at the place of installation is under customer's responsibility. -
Page 51: Connecting To Water Supply
4.1.4 Connecting to water supply Models with a single water inlet shall not be connected to the hot water tap. In such a case the laundry will get damaged or the product will switch to protection mode and will not operate. WARNING Do not use old or used water inlet hoses on a new product. -
Page 52: Adjusting The Feet
4.1.6 Adjusting the feet In order to ensure that the product operates more silently and vibration-free, it must stand level and balanced on its feet. Ensure that the product is balanced by adjusting the feet. Otherwise, the product may move from its place and cause WARNING crushing, noise and vibration problems. -
Page 53: Preparing Laundry For Washing
4.2 Preparation Please read the “Safety Instructions” section first! 4.2.1 Sorting the laundry • Sort laundry according to type of fabric, colour, and degree of soiling and allowable water temperature. • Always observe the instructions given on the garment care labels. 4.2.2 Preparing laundry for washing •... -
Page 54: Using Detergent And Softener
4.2.6 Using detergent and softener Read the manufacturer instructions on the package while using detergents, softeners, starch, bleach and decolourants, anti- WARNING limescale and follow the dosage information provided. Use a measuring cup, if any. The detergent drawer comprises of three compartments: –... -
Page 55: Using Liquid Detergents
Using liquid detergents If the product has a liquid detergent apparatus • Press and rotate the apparatus at where it is shown when you want to use liquid detergents. The part falling below will serve as a barrier for liquid detergent. •... -
Page 56: Tips For Efficient Washing
4.2.7 Tips for efficient washing Clothes Light Colours and Black/Dark Delicates/ Colours Whites Colours Woollens/Silks (Recommended (Recommended (Recommended temperature (Recommended temperature temperature range temperature range range based on soiling level: range based on soiling level: based on soiling level: based on soiling level: 40-90 oC) cold -40°C) cold -40°C) -
Page 57: Operating The Product
4.3 Operating the product Please read the “Safety Instructions” section first! 4.3.1 Control panel 1 - Programme Selection knob 7 - End Time Setting button 2 - Temperature level lights 8 - Auxiliary Function button 3 3 - Spin level indicator lights 9 - Auxiliary Function button 2 4 - Display 10 - Auxiliary Function button 1... -
Page 58: Programme And Consumption Table
4.3.3 Programme and consumption table Auxiliary functions Selectable Program temperature range °C 2,30 1400 • • • • • Cold - 90 Bawełna 1,70 1400 • • • • • Cold - 90 0,95 1400 • • • • • Cold - 90 40*** 7 0,645 1400... -
Page 59: Programme Selection
The auxiliary functions in the table may vary according to the model of your machine. Water and power consumption may vary subject to the changes in water pressure, water hardness and temperature, ambient temperature, type and amount of laundry, selection of auxiliary functions and spin speed, and changes in electric voltage. You can see the washing duration on the display of your machine while selecting a programme. - Page 60 • Cottons (Bawełna) You can wash your durable cotton laundry (sheets, bedlinen, towels, bathrobes, underwear etc.) in this programme. When the quick wash function button is pressed, programme duration becomes notably shorter but effective washing performance is ensured with intense washing movements. If the quick wash function is not selected, superior washing and rinsing performance is ensured for your heavily soiled laundry.
- Page 61 • Xpress / Super Xpress (Szybkie / Super Szybkie) Use this programme to wash your lightly soiled or unspotted cotton clothes in a short time. The programme duration can be reduced down to 14 minutes when the quick wash function is selected. When the quick wash function is selected, maximum 2 (two) kg of laundry must be washed.
-
Page 62: Temperature Selection
• Towel***** Use this programme to wash durable cotton laundry such as towels. Load the towels into the machine paying attention to place them in a way that they will not contact the bellow or the glass. 4.3.6 Temperature selection Whenever a new programme is selected, the recommended temperature for the programme appears on the temperature indicator. -
Page 63: Auxiliary Function Selection
4.3.8 Auxiliary function selection Select the desired auxiliary functions before starting the programme. Whenever a programme is selected, icons of the auxiliary function symbol that is selected together with it illuminates. When an auxiliary function button that cannot be selected with the current programme is pressed, the washing machine will make a warning sound. -
Page 64: Functions/Programmes Selected By Pressing The Function Keys For 3 Seconds
4.3.8.2 Functions/Programmes Selected by Pressing the Function Keys for 3 Seconds • Drum Clean Press and hold the auxiliary function button 1 for 3 seconds to select the programme. Use regularly (once in every 1-2 months) to clean the drum and provide the required hygiene. Steam is applied before the programme to soften the residues in the drum. -
Page 65: Starting The Programme
4.3.9 End Time Time display Remaining time for the completion of the programme while it is running is displayed as “01:30” in hours and minutes format. Programme time may differ from the values in section "Programme and consumption table" depending on the water pressure, water hardness and temperature, ambient temperature, amount and the type of laundry, auxiliary functions selected and the changes at the mains voltage. -
Page 66: Loading Door Lock
4.3.11 Loading door lock There is a locking system on the loading door of the machine that prevents opening of the loading door in cases when the water level is unsuitable. "Door Locked" symbol appears on the display when the loading door is locked. If the Remote Control Function is selected, the door will be locked. -
Page 67: Changing The Programme Selection After Programme Has Started
If the temperature of the water inside the machine is above 50°C, you cannot deactivate the door lock for safety reasons, even if the water level is suitable. Switching the machine to pause mode: Press the Start/Pause button to switch the machine to pause mode. Pause symbol will flash on the display. Changing the programme selection after programme has started: The programme change is allowed when the current programme is running unless the Child Lock is enabled. - Page 68 To use the HomeWhiz function, the app must be installed on your smart device and your washing machine must be paired to your smart device via bluetooth. If your washing machine is not paired to your smart device it works as an appliance which does not have a HomeWhiz feature.
- Page 69 4.3.15.2 Setting up a washing machine that is connected to someone else's account If the washing machine you want to use was previously introduced to the system with someone else‘s account, you must establish a new connection between your HomeWhiz Application and the appliance. •...
-
Page 70: Troubleshooting
4.3.15.4 Troubleshooting Do the following if you have a problem with controlling or connection. Observe whether the problem persists or not after the action you have performed. Do the following if the problem is not resolved. • Check whether your smart device is connected to the relevant home network. •... -
Page 71: Maintenance And Cleaning
4.4 Maintenance and cleaning Please read the "Safety Instructions" section first! Service life of product extends and frequently experienced problems will be reduced if it is cleaned at regular intervals. 4.4.1 Cleaning the detergent drawer Clean the detergent drawer at regular intervals (once every 4 to 5 wash) as mentioned below to prevent accumulation of powder detergent. -
Page 72: Draining Remaining Water And Cleaning The Pump Filter
Close the taps. Remove the nuts of the water intake hoses to access the filters on the water intake valves and clean them with an appropriate brush. If the filters are too dirty, remove them from their places with a pliers and clean in this way. - Page 73 Troubleshooting Please read the “Safety Instructions” section first! Problem Cause Solution Programmes do not start after the Start / Pause / Cancel button is not pressed. • Press Start / Pause / Cancel button. loading door is closed. It may be difficult to close the loading door in case of •...
- Page 74 Problem Cause Solution Washing takes longer than Water pressure is low. • Product waits until taking in adequate amount specified in the user manual.(*) of water to prevent poor washing quality due to the decreased amount of water. Therefore, the washing time extends.
- Page 75 Problem Cause Solution Washing performance is poor: Insufficient amount of detergent is used. • Use the recommended amount of detergent Stains persist or the laundry is not appropriate for water hardness and the laundry. whitened. (**) Excessive laundry is loaded in. •...
- Page 76 Problem Cause Solution Detergent residue in the detergent Detergent was put in wet drawer. • Dry the detergent drawer before putting in drawer. (**) detergent. Detergent has gotten damp. • Keep detergents closed in an environment free of humidity and do not expose them to excessive temperatures.
- Page 77 When the appliance is turned off, pressing 1 and 2 auxiliary function buttons are pressed for a long time, a 3-2-1 countdown, and the total washing cycles completed on the appliance is displayed. After the total washing cycle is displayed, the failure codes, if any, are displayed. Check the information on the screen through the table below.
- Page 78 Beko, and will void the warranty of the product. Therefore, it is highly recommended that end-users refrain from the attempt to carry out repairs falling outside the mentioned list of spare parts, contacting in such cases authorized professional repairers or registered professional repairers.
- Page 80 1911862075_AA_PL_EN...