Table of Contents
Advertisement
Quick Links
Advertisement
Chapters
Table of Contents

Related Manuals for LG LTEL7337F.BRSLLGA


Summary of Contents for LG LTEL7337F.BRSLLGA
- Page 1 Scan to see the online manual. OWNER'S MANUAL ELECTRIC RANGE Read this owner's manual thoroughly before operating the appliance and keep it handy for reference at all times. ENGLISH LTEL7337* www.lg.com MFL68920545 Copyright © 2022-2023 LG Electronics Inc. All Rights Reserved. Rev.02_041123...
-
Page 2: Table Of Contents
TABLE OF CONTENTS IMPORTANT SAFETY 21 Test the Range Before Use INSTRUCTIONS 23 OPERATION READ ALL INSTRUCTIONS BEFORE USE Control Panel 4 Safety Messages 23 Control Panel Features 4 Anti-tip Device 24 Knob Positions WARNING 24 Knob/Display Lighting 5 Installation Changing Oven Settings 5 Operation 24 Clock... - Page 3 53 RF Module Specifications 53 FCC Notice 54 FCC RF Radiation Exposure Statement 54 Open Source Software Notice Information Smart Diagnosis Feature 54 Using LG ThinQ to Diagnose Issues 54 Using Audible Diagnosis to Diagnose Issues 56 MAINTENANCE Cleaning 56 Interior...
-
Page 4: Important Safety Instructions
IMPORTANT SAFETY INSTRUCTIONS IMPORTANT SAFETY INSTRUCTIONS READ ALL INSTRUCTIONS BEFORE USE Download this owner's manual at http://www.lg.com Safety Messages Your safety and the safety of others are very important. We have provided many important safety messages in this manual and on your appliance. Always read and follow all safety messages. -
Page 5: Installation
IMPORTANT SAFETY INSTRUCTIONS • Do not step or sit on the oven door. The range could be tipped and injury might result from spilled hot liquid, food, or the range itself. • Never remove the oven legs. The range will not be secured to the anti-tip bracket if the legs are removed. -
Page 6: Maintenance
IMPORTANT SAFETY INSTRUCTIONS • Never attempt to dry a pet in the oven. • Never use your appliance for warming or heating the room. • Always use pot holders or oven mitts when removing food from the oven or the surface element. Cookware will be hot. -
Page 7: Caution
IMPORTANT SAFETY INSTRUCTIONS • Wear proper apparel. Do not wear loose-fitting or hanging garments, which may ignite if they contact hot surfaces, and cause severe burns. • Do not use the oven for drying clothes. Only use the oven for its intended purpose. •... -
Page 8: Product Overview
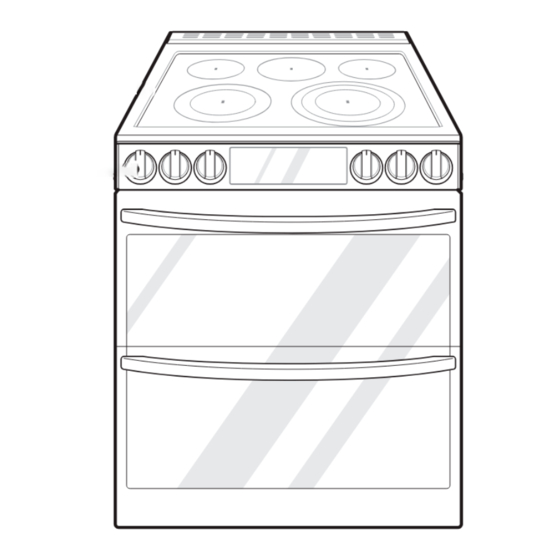
PRODUCT OVERVIEW PRODUCT OVERVIEW Product Features Exterior & Interior Cooktop Oven Mode Knob Cooktop Controller Model & Serial Number Plate Upper Oven Door Gasket Lower Oven Door Rack Product Specifications The appearance and specifications listed in this manual may vary due to constant product improvements. Oven Range Models LTEL7337* Description... - Page 9 Gliding Rack (1 ea) Optional Accessories (sold separately) Grid Broiler Pan NOTE • Contact LG Customer Service at 1-800-243-0000 (1-888-542-2623 in Canada) if any accessories are missing. • For your safety and for extended product life, only use authorized components.
-
Page 10: Installation
10 INSTALLATION INSTALLATION Before Installing Installation Overview Please read the following installation instructions first after purchasing this product or transporting it to another location. The images in this guide may be different from the actual components and accessories, which are subject to change by the manufacturer without prior notice for product improvement purposes. -
Page 11: Parts
INSTALLATION Parts Doing so can result in serious damage to the range. Parts Provided • Do not push or pull the range by grabbing the open oven door or cooktop only. Doing so can Anti-tip bracket (1 ea) result in serious damage to the range. Screws (6 ea) Anchors (6 ea) Template (1 ea) -
Page 12: Choosing The Proper Location
12 INSTALLATION • Remove packing material, tape and any NOTE temporary labels from your range before using. Do not remove any warning-type labels, the • Your range is heavy and can be installed on soft model and serial number label, or the Tech floor coverings such as cushioned vinyl or Sheet that is located on the back of the range. - Page 13 INSTALLATION Dimensions LTEL7337* Depth (Includes only the product body that is loaded into the cabinet. 24 3/4" (629.4 mm) Excludes door, drawer, and handles) Depth (Excludes Door Handle) 26 7/8" (683 mm) Depth when upper door is fully opened 38 5/8" (981.2 mm) Depth when lower door is fully opened 42 3/16"...
-
Page 14: Electricity
14 INSTALLATION Clearances Acceptable Electrical Outlet Area Normal Countertop Depth Countertop Height Cabinet Wall Center Cabinet opening = 30" (76.2 cm) For U.S.A = 30" (76.2 cm) ~ 31" (78.7 cm) For CANADA Electricity The range should always be plugged into its own individual properly grounded electrical outlet. •... -
Page 15: Leveling
INSTALLATION Leveling A range cord rated at 40 amps with 120/240 minimum volt range is required. If a 50 amp range cord is used, it should be marked for use with 13/ Leveling the Range 8" diameter connection openings. This appliance may be connected by means of a conduit or power Level the range by adjusting the leveling legs with cord. -
Page 16: Connecting The Power Cord / Conduit
16 INSTALLATION • Diameter (inches) of range connection opening located below the rear of the oven. Insert the power cord through the strain relief and tighten it. - Power cord: 1 3/8" - Conduit: 1 1/8" Case 4 • Voltage: 120/208 volts (3-wire) •... - Page 17 INSTALLATION 4-Wire Connection: Power Cord Insert the power cord through the strain relief and tighten it. WARNING CAUTION • Only a 4-conductor power-supply cord kit rated 120/240 volts, 50 amperes and marked for use • Do not install the power cord without a strain with ranges with closed-loop connectors or relief.
- Page 18 18 INSTALLATION Tighten the 3 screws securely into the terminal block. • The center screw now attaches the bent up ground strap to the block. Cord/Conduit connection plate Install the conduit strain relief. 1) Insert the strain relief in the 1 1/8 in. (2.8 cm) conduit hole.
- Page 19 INSTALLATION Tighten the 3 screws securely into the Prepare the conduit wires as shown below. terminal block. (approximately 35 - 50 IN-LB) Cord/Conduit Connection Plate Ground Wire Install the conduit strain relief. Black 1) Insert the strain relief in the 1 1/8 in. (2.8 White cm) conduit hole.
-
Page 20: Optional Rear Filler
20 INSTALLATION • If the countertop depth is less than 24 3/4", the Insert the two side bare wire ends into the left control panel will not sit flush with the and the right terminal block openings. countertop. Tighten the 3 screws securely into the terminal block. -
Page 21: Test Run
INSTALLATION engaged when the range is moved by following Leveling Leg the guide on the anti-tip bracket template. Slide the range against the wall, making sure • Re-engage the anti-tip device if the range is moved. Do not operate the range without the the back leg slides into and engages the anti- anti-tip device in place and engaged. - Page 22 22 INSTALLATION The oven should finish preheating in 15 minutes, and the convection fan should operate while the oven is preheating. After checking the oven's operation, turn the temperature up to 450 °F and leave the oven on for at least an hour to help remove any oil which might cause smoke and odors when first using the oven.
-
Page 23: Operation
OPERATION OPERATION Control Panel Control Panel Features Display Light Press any button on the control panel to Press the button to turn the light in both ovens activate the display. on or off. Control Lock START Press and hold the button for 3 seconds to lock Press the button to start all oven features. -
Page 24: Knob Positions
24 OPERATION Knob Positions After cleaning the oven knobs, make sure to replace each knob in the correct position. Failure to do so can result in improper operation of the burners. Dual (Mark A) Single (Mark C) Triple (Mark B) Oven Mode Knob Dual Single... -
Page 25: Oven Light
The Timer feature can be used during any of the Connect the appliance to the Wi-Fi network other oven control functions. using the LG ThinQ smartphone app. For example, to set 5 minutes: To disconnect the appliance from the network, delete it from the connected Press Timer On/Off once. -
Page 26: Settings
26 OPERATION Settings (Hour Mode, Convection Press Start Time repeatedly until Avto Auto Conversion, Calibrating the appears in the display. Oven Temperature, Preheat Alarm Light, Beeper Volume, Fahrenheit Press 1 to disable or enable auto conversion. or Celsius, Cooktop on Alert Volume) Press START to accept the change. -
Page 27: Control Lock
OPERATION To adjust the lower oven, press the Start Press START to accept the change. Time button repeatedly until shows L_AJ b in the display. Adjusting the Beeper Volume To adjust the upper oven, press the Start Time button repeatedly until shows U_AJ b Press and hold the Start Time button for 3... -
Page 28: Start Time (Delayed Timed Cook)
28 OPERATION Press and hold Control Lock for three Press Cook Time. Timed flashes in the seconds. display. Bake, 0:00 and 300 °F appear in the display. The lock melody sounds. and the lock icon Set the baking time: press 3 and 0 (for 30 appear in the display. -
Page 29: Minimum & Maximum Default Settings
OPERATION Turn the oven mode knob to select Bake for Min. Max. the upper or lower oven. 350 °F appears in the Temp. Temp. display. Feature Default Time Time Set the temperature. Press 3, 0 and 0. 1:00 12:59 hr. / hr. -
Page 30: Cooktop
30 OPERATION contact of cookware to burner also will improve Min. Max. efficiency. Boilovers cause smoking and greasy Temp. Temp. spills that may catch on fire. Feature Default • Clean cooktop with caution. Do not use sponges Time Time or cloth to wipe spills on a hot cooking area. Use a proper metal scraper. -
Page 31: Using The Cooktop Elements
OPERATION When a control is turned on, a glow can be seen exposed surface of the element is a burn or fire through the glass cooktop surface. hazard. NOTE NOTE • It is normal for the surface elements to cycle on •... -
Page 32: Turning On The Warm Zone
32 OPERATION Turn the knob to use it as a single element or a dual unit • To use it as a single element, turn the knob counterclockwise. • To use it as a dual unit, turn the knob clockwise. Icon Type 1 Icon Type 2 Single... -
Page 33: The Recommended Surface Cooking Setting
OPERATION Heating 1/2 quart of water requires more energy Turn the knob in either direction to the in a 3-quart pot than in a 1-quart pot. desired setting • The control knob clicks when it is positioned Cookware should have flat bottoms that make at OFF, HI and LO. -
Page 34: Oven
• Do not use foil or foil-type containers. Foil may Before Using the Oven melt onto the glass. Do not use the cooktop if metal has melted on it. Call an authorized LG NOTE Service Center. • Because the oven temperature cycles, an oven... -
Page 35: Using Oven Racks
OPERATION openings or nearby surfaces during any CAUTION cooking operation. • Do not hit the glass door panel with excessive force. Do not allow hard objects like cookware or glass bottles to hit the glass door panel. The Using Oven Racks glass could break, resulting in a risk of personal injury. -
Page 36: Convection Mode (Lower Oven Only)
36 OPERATION Convection Mode (Lower Oven NOTE Only) • As the oven preheats, the temperature is The convection system uses a fan to circulate the displayed and rises in 5-degree increments. heat evenly within the oven. Improved heat Once the oven reaches the set temperature, a distribution allows for even cooking and excellent tone sounds and the oven light blinks on and off. -
Page 37: Meat Probe
OPERATION Setting the Meat Probe Function • Cakes, cookies and muffins have better results when using multiple racks. (example for roast at 375 °F with probe The Convection Roast feature is designed to give temp. 160 °F) optimum roasting performance. Convection Roast combines cooking with the convection fan to roast Insert the meat probe into the meat. -
Page 38: Recommended Baking And Roasting Guide
38 OPERATION • Do not pull the wire to remove the probe. Hold Set the oven temperature. the probe head, not the wire, when inserting or removing the probe. Press Start. Set the probe temperature. Recommended Probe Temperature Press Start. Chart IMPORTANT NOTE Desired... -
Page 39: Upper Oven
OPERATION Multiple rack baking Rack Rack (Position 1) (Position 3) Single rack baking Rack Rack (Upper Oven) (Lower Oven) Baking Rack Guide Rack Position Food Upper Lower Oven Oven Layer cakes Cakes Bundt cakes Sugar cookies Cookies Chocolate chips Brownies Fresh Pizza Frozen... -
Page 40: Proof (Lower Oven Only)
40 OPERATION Roasting Rack Guide Rack Position Food Lower Oven Rare Medium Well done Rare Beef Boneless rib, top sirloin Medium Well done Beef Rare tenderloin Medium Pork Bone-in, sirloin Ham, cooked Whole chicken Poultry Chicken pieces Turkey Proof (Lower Oven Only) NOTE This feature maintains a warm oven for rising •... -
Page 41: Broil
OPERATION Setting the Warm Function and "door" appears on the display. Close the door and reset the Broil function. Opening the door turns off the broil burner during broiling. If Turn the oven mode knob to select Warm for the door is opened during broiling, the broil the upper or lower oven. - Page 42 42 OPERATION - Using the Hi broil setting to achieve the level of searing you desire, and then either switching to the Lo broil setting, or switching to the Bake function. • As a rule, fattier cuts of meat and fish will produce more smoke than leaner items.
-
Page 43: Recommended Broiling Guide
OPERATION Recommended Broiling Guide The size, weight, thickness, starting temperature, and your preference of doneness will affect broiling times. This guide is based on meats at refrigerator temperature. For best results when broiling, use a pan designed for broiling. Grid (sold separately) Broiler pan (sold separately) Upper Oven First... -
Page 44: Ground
44 OPERATION First Second Rack Food Quantity and/or Thickness Side Side Comments Positio (min.) (min.) Increase time 5 to 10 Ham Slices minutes per side for 1 (precooked " thick 1/2" thick or home- cured ham. Pork " thick) Chops Well done 2 (1"... - Page 45 OPERATION First Second Rack Food Quantity and/or Thickness Side Side Comments Positio (min.) (min.) Handle and turn very carefully. Brush with Fish Fillets lemon butter before " thick and during cooking, if desired. Increase time 5 to 10 Ham Slices minutes per side for 1 (precooked "...
-
Page 46: Frozen Meal (Lower Oven Only)
46 OPERATION • Seafood - When broiling skin-on fish, always use the Lo broil setting and always broil the skin side last. - Seafood is best consumed immediately after cooking. Allowing seafood to rest after cooking can cause the food to dry out. - It is a good idea to rub a thin coating of oil on the surface of the broiling pan before cooking to reduce sticking, especially with fish and seafood. -
Page 47: Recommended Air Sous-Vide Guide
OPERATION Once cooking is finished, allow the oven to cool completely. Recommended Air Sous-Vide Guide Time Rack Temp. Food Quantity Position (°F) Min. Target Max. 1” thick Beef Steaks 2.5 hr. 3 hr. 14 - 17 oz. Breasts 4 - 6 oz. 2 hr. -
Page 48: Recommended Air Frying Guide
• Use either the optional air fry tray available from • Never cover slots, holes, or passages in the oven LG or a dark baking tray with no sides or short bottom or cover entire racks with materials such sides that does not cover the entire rack. This as aluminum foil. - Page 49 OPERATION Quantity Rack Recommended Items Temp. (°F) Time Guide (oz.) Position Frozen French Fries (Crinkle cut, 3/4" or 10 20-30 Frozen Sweet Potato 15-30 Fries Frozen Tater Tots 20-30 Frozen Hash Browns 25-35 POTATOES-Fresh/Homemade Homemade French Fries Cut the potatoes and soak (3/4"...
-
Page 50: Remote Start
Start. Once Remote Start is selected on the appliance, you can start or stop it remotely using Disconnect the probe. The probe function is the LG ThinQ smartphone app. Follow the not available in Sabbath mode. instructions in the Smart Functions section to connect the appliance to the network. - Page 51 OPERATION • Always close the oven door before engaging Sabbath Mode.
-
Page 52: Smart Functions
LG ThinQ Application Features Before Using LG ThinQ Application • Product Upgrades - On models with the LG UP Home Appliance Use a smartphone to check the strength of feature, experience new features by the wireless router (Wi-Fi network) near the upgrading the product through the LG ThinQ appliance. -
Page 53: Installing The Lg Thinq Application
• If the security protocol of the router is set to WEP, network setup may fail. Change the The Wi-Fi button, when used with the LG ThinQ security protocol (WPA2 is recommended), and application, allows the appliance to connect to a connect the product again. -
Page 54: Fcc Rf Radiation Exposure Statement
This equipment complies with FCC radiation LG ThinQ application. exposure limits set forth for an uncontrolled • Launch the LG ThinQ application and select the environment. This transmitter must not be co- Smart Diagnosis feature in the menu. Follow located or operating in conjunction with any other the instructions provided in the LG ThinQ antenna or transmitter. - Page 55 SMART FUNCTIONS • Launch the LG ThinQ application and select the Smart Diagnosis feature in the menu. Follow the instructions for audible diagnosis provided in the LG ThinQ application. Press the START button for 3 seconds. • If the display has been locked, you must deactivate the lock and then reactivate it.
-
Page 56: Maintenance
56 MAINTENANCE MAINTENANCE Cleaning CAUTION • Do not use abrasive cleansers, strong liquid CAUTION cleaners, plastic scouring pads or oven cleaners • Do not clean this appliance with bleach. on the manifold panel. Doing so will damage the finish. • To prevent burns, wait until the cooktop has cooled down before touching any of its parts. - Page 57 MAINTENANCE • Remove the grid from the pan. Carefully pour NOTE out the grease from the pan into a proper container. • To clean the stainless steel surface, use warm sudsy water or a stainless steel cleaner or polish. • Wash and rinse the broiler pan and grid in hot water with a soap-filled or plastic scouring pad.
-
Page 58: Cooktop Surface
58 MAINTENANCE Cooktop Surface Glass-Ceramic Cooktop WARNING • To protect hands from burns, always wear oven mitts or use pot holders while using a scraper on the hot cooking surface. CAUTION • If any sugar or food containing sugar spills, or plastic or foil melts on the cooktop, remove the material IMMEDIATELY with a metal razor scraper while the cooking surface is still hot to avoid the risk of damage to the glass-ceramic surface. - Page 59 Use a metal scraper cleaner. Rub with a towel, then wipe mild detergent towel. dry. Regular (Recommended after each use) Occasional (Recommended every week) Thorough (Recommended for tough stains or burnt-on food) NOTE • For additional product information, visit our website at www.lg.com...
-
Page 60: Easyclean
Compared to the NOTE more intense Self Clean process, your LG oven gives you the option of cleaning with LESS HEAT, • For models without Self Clean option LESS TIME, and virtually NO SMOKE OR FUMES. - Page 61 MAINTENANCE When to Use EasyClean • Example of oven soiling • Suggested plastic scrapers: - Hard plastic spatula - Plastic pan scraper - Plastic paint scraper - Old credit card Case 1 - Soil pattern: Small drops or spots - Types of soils: Cheese or other ingredients Fill a spray bottle (10 oz or 300 ml) with water - Common food items that can soil your oven: and use the spray bottle to thoroughly spray...
-
Page 62: Self Clean
62 MAINTENANCE that the oven cavity surface is dry before CAUTION running the Self Clean cycle. Consult the Self Clean section of your owner’s manual • During the EasyClean cycle, the oven becomes for further details. If a Self Clean option is hot enough to cause burns. - Page 63 MAINTENANCE • Make sure that the oven light cover is in place door to allow hot air or steam to escape. The and the oven light is off. oven may still be VERY HOT. • Clean the frame of the oven and door with hot soapy water.
- Page 64 64 MAINTENANCE When to Use Self Clean Press Self Clean. Press repeatedly to switch between the upper and lower oven. • Example of oven soiling The oven defaults to the recommended four- hour Self Clean for a moderately soiled oven. Press buttons as below to select a self clean time from 3 to 5 hours.
-
Page 65: Removing/Assembling Lift-Off Oven Doors
MAINTENANCE NOTE • It may become necessary to cancel or interrupt a Self Clean cycle due to excessive smoke or fire in the oven. To cancel the Self Clean function, press CLEAR/OFF. Press the hinge release buttons on either Removing/Assembling Lift-Off side of the door. - Page 66 66 MAINTENANCE Fully open the door. Push the hinge locks down onto the door frame. about 5° Lift door up and out until the hinge arms are clear of the slots. Close the oven door. Assembling the Door Lower Oven Firmly grasp both sides of the door at the top.
-
Page 67: Removing/Assembling The Vent Trim
MAINTENANCE Hinge arm Hinge lock Assembling the Vent Trim Close the oven door. Assemble the vent trim in the reverse sequence of its removal. Removing/Assembling the Vent Periodic Maintenance Trim Changing the Oven Light Removing the Vent Trim The oven light is a standard 40-watt appliance Using a screwdriver, remove the two screws halogen lamp. - Page 68 68 MAINTENANCE Plug in the range or reconnect the power.
-
Page 69: Troubleshooting
TROUBLESHOOTING TROUBLESHOOTING FAQs Frequently Asked Questions What types of cookware are recommended for use with the cooktop? • The pans must have a flat bottom and straight sides. • Only use heavy-gauge pans. • The pan size must match the amount of food to be prepared and the size of the surface element. - Page 70 70 TROUBLESHOOTING What should I do if my racks are sticky and have become hard to slide in and out? Over time, the racks may become hard to slide in and out. Apply a small amount of olive oil to the sides of the racks.
-
Page 71: Before Calling For Service
TROUBLESHOOTING Yes. It is highly recommended that 1 cup (8 oz or 240 ml) of water be sprayed or poured on the bottom and an additional ¼ cup (2 oz or 60 ml) of water be sprayed on walls and other soiled areas to fully saturate the soils for better cleaning performance. - Page 72 72 TROUBLESHOOTING Problem Possible Cause & Solution Oven will not work Oven controls improperly set. • See the "Oven" section in the Operation chapter. Oven too hot. • Allow the oven to cool to below locking temperature. Steam is exhausted Cooking foods with high moisture produces steam.
-
Page 73: Parts & Features
TROUBLESHOOTING Problem Possible Cause & Solution Food does not broil Aluminum foil used on the broiling pan and grid has not been fitted properly and slit as properly recommended. • See the "Oven" section in the Operation chapter. In some areas the power voltage may be low. •... - Page 74 74 TROUBLESHOOTING Problem Possible Cause & Solution Surface units do not Cooktop controls improperly set. work properly. • Check to see the correct control is set for the surface unit you are using. Surface unit stops The unit is still on and hot. glowing when •...
-
Page 75: Noises
TROUBLESHOOTING Problem Possible Cause & Solution Loc is on in the The oven is locked because of the Control Lock / Lockout feature. display when you • Deactivate the Control Lock / Lockout feature. want to cook (On some models) Oven light does not It is time to replace the lamp or the lamp is loose. -
Page 76: Wi-Fi
During Wi-Fi setup, the app is requesting a password to connect to the product (on certain phones). • Locate the network name which starts with "LG" under Settings > Networks. Note the last part of the network name. - If the network name looks like LGE_Appliance_XX-XX-XX, enter lge12345. -
Page 77: Limited Warranty
Should your LG Electric Range ("Product") fail due to a defect in materials or workmanship under normal and proper use, during the warranty period set forth below, LG will, at its option, repair or replace the Product. This limited warranty is valid only to the original retail purchaser of the Product (“You”) and applies only when purchased lawfully and used within the United States including U.S. - Page 78 • Damage or failure of the Product resulting from misuse, abuse, improper installation, repair, or maintenance. Improper repair includes the use of parts not authorized by LG. Improper installation or maintenance includes installation or maintenance contrary to the Product owner’s manual.
- Page 79 LIMITED WARRANTY Problem Possible Cause & Prevention Cooktop enamel Improper usage chipping off • Do not hit enamel cooktop. Pitting of the If not removed immediately, sugary spillovers (such as preserves, ketchup, cooktop glass tomato sauce, jellies, fudge, candy, syrups, or chocolate) or melted plastic or foil can cause surface pitting of the cooktop.
-
Page 80: Procedure For Resolving Disputes
Notice of Dispute. In the event you intend to commence an arbitration proceeding, you must first notify LG in writing at least 30 days in advance of initiating the arbitration by sending a letter to LG at LG Electronics, USA, Inc. Attn: Legal Department- Arbitration 111 Sylvan Avenue, Englewood Cliffs, NJ 07632 USA. - Page 81 LIMITED WARRANTY subject of the claim; and describe the nature of the claim and the relief being sought. If you and LG are unable to resolve the dispute within 30 days, either party may proceed to file a claim for arbitration.
- Page 82 82 LIMITED WARRANTY You may only opt out of the dispute resolution procedure in the manner described above (that is, by e-mail or telephone); no other form of notice will be effective to opt out of this dispute resolution procedure. Opting out of this dispute resolution procedure will not affect the coverage of the Limited Warranty in any way, and you will continue to enjoy the full benefits of the Limited Warranty.
- Page 83 Memo...
- Page 84 84 Memo...
- Page 85 Memo...
- Page 86 86 Memo...
- Page 87 Memo...
- Page 88 LG Customer Information Center For inquiries or comments, visit www.lg.com or call: U.S.A. 1-800-243-0000 1-888-542-2623 CANADA Register your product Online! www.lg.com...