Panasonic EP-MA70 Operating Instructions Manual
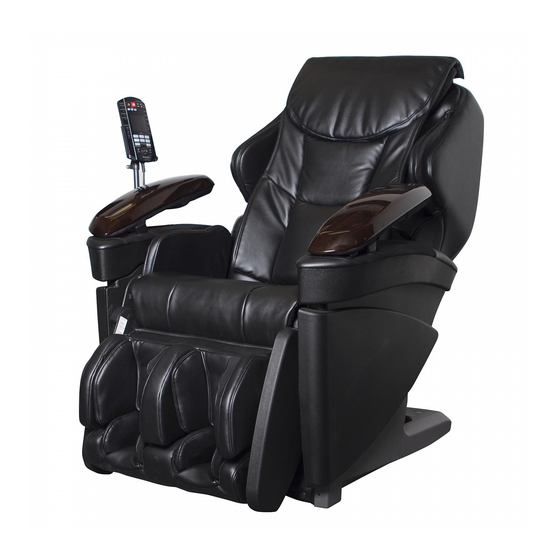
Household massage lounger
Hide thumbs
Also See for EP-MA70:
- Operating instructions manual (324 pages) ,
- Service manual (83 pages) ,
- Manual (13 pages)
Table of Contents
Advertisement
English
Français
Before operating this unit, please read these instructions completely.
Specifications and shapes of massage loungers may vary depending on the model.
Antes de utilizar esta unidad, lea compleatamente estas instrucciones y guárdelas para referencia futura. Las especificaciones y el
tipo de las mecedoras de masaje podrían variar dependiendo del modelo.
Avant d'utiliser cet appareil, nous vous recommandons de lire l'ensemble de ces instructions et de les ranger dans un endroit
accessible pour une consultation ultérieure. Caractéristiques et formes des fauteuils de massage pourraient varier selon les modèles.
QR
code
1
Operating Instructions
Household Massage Lounger
1
F1
Mode d'emploi
Fauteuil vibromasseur
Model No./N º dee modèle
EP-MA70
Advertisement
Table of Contents

Related Manuals for Panasonic EP-MA70


Summary of Contents for Panasonic EP-MA70
-
Page 1: Operating Instructions
Operating Instructions Mode d’emploi Household Massage Lounger Fauteuil vibromasseur EP-MA70 Model No./N º dee modèle English Français Before operating this unit, please read these instructions completely. Specifications and shapes of massage loungers may vary depending on the model. Antes de utilizar esta unidad, lea compleatamente estas instrucciones y guárdelas para referencia futura. Las especificaciones y el tipo de las mecedoras de masaje podrían variar dependiendo del modelo. -
Page 2: Important Safety Instructions
IMPORTANT SAFETY INSTRUCTIONS Basic precautions should always be followed when using an electrical unit, including the following. Please ensure that you read all instructions before using the Household Massage Lounger. DANGER – To reduce the risk of electric shock: 1. Always unplug this unit from the electrical outlet immediately after using and before cleaning. WARNING –... -
Page 3: Safety Precautions
SAFETY PRECAUTIONS CAUTION: To avoid the risk of injury: 1. Persons with any of the conditions listed below or who are undergoing medical treatment or suffer from medical conditions should consult with their physicians before using the unit: a) Pregnant women, people who are ill, in poor physical shape. b) People suffering from back, neck, shoulder, or hip pain. - Page 4 15. Always raise the comfort cushion to check that the fabric of the unit itself has not been ripped before using the unit. Please also check other areas to ensure that the fabric has not been ripped. No matter how small the rip, if you find one then immediately stop using the unit, unplug the power cord and have the unit repaired at an authorized service center.
-
Page 5: Operating Precautions
12. The unit must not be used in “wet rooms” (sauna, swimming pool) or outdoors. 13. Do not attempt to open or disassemble any part of the unit. Only use an authorized Panasonic servicer to fix your unit. 14. Do not drag or push the unit in an installed state. -
Page 6: Grounding Instructions
GROUNDING INSTRUCTIONS This product must be grounded. If it should malfunction or break down, grounding provides a path of least resistance for electric current to reduce the risk of electric shock. This product is equipped with a cord having an equipment-grounding conductor and a grounding plug. -
Page 7: Specifications
SPECIFICATIONS Power Supply: AC 230 V 50 Hz Power Consumption: 120 W (Electric heating equipment 23 W) Upper Body Massage Massage area (Up-Down): Approx. 30.7 in. (78 cm) (The massage heads move a total of approx. 24.4 in. (62 cm)) Massage area (Left-Right): Distance between massage heads during operation (massage width adjustable) Neck, Shoulder, Back, Lower back: Approx. -
Page 8: Main Unit Overview
Part names and functions Main unit Front Controller Seat/Thigh side massage section • See pages 9 –10. • Includes integrated air massage function. Retracted position of massage heads Legrest Leg/Sole massage section • Includes air massage function. Shoulder side massage section •... - Page 9 Back The legrest can be stored away when the massage is not used. Legrest is rotated manually while pulling on the lever. Back Cover Child Safety Label Controller Holder Leg/Sole massage section Controller Stand Power switch section Lock Switch Power Switch Lock Switch Key Lock Switch Key Tag •...
- Page 10 Controller On/Off Speaker User Memory Back Intensity Adjustment • See pages 24 –25. • See page 23. Quick Stop Position • Press this button to stop the massage immediately. • See page 21. Ottoman Angle Adjustment Confirmation Reclining Angle Adjustment Air Massage Intensity Adjustment •...
- Page 11 Display Massage Area Current approximate Currently selected air Currently selected massage position massage operation stretch operation lights flashes. lights up. Current air massage Current stretch position position flashes. flashes. Voice Guidance Volume Body Scanning • This will light up when the body scanning is completed. Time Remaining Air Intensity Massage Ending...
-
Page 12: Setting Up The Massage Lounger
Setting up the massage lounger 1 Where to use the unit Keep at least 4" (10 cm) away from the wall. • Ensure adequate space to recline. • Do not expose the massage lounger to direct sunlight or high temperatures, such as in front of heating sources, because this can cause Approx. - Page 13 Confirm that the main unit and all accessories are in the box. Main unit Controller Accessories Armrests (Right/Left) Comfort cushion Controller Stand Controller Holder Fixing screw Clip Pillow Right/Left indication • Small holes on the inside fabric are an intentional part of the functional design.
-
Page 14: Controller Stand To Right/Left Side Panel
Assembly 1 Attaching the controller stand to the right or left side panel Fasten the controller stand with the <When attaching on the right side panel> attachment screws. (4 positions) Use this screw: Attachment screws (M6 × 13) × 4 pcs. (Black) How to tighten the screws Attachment screw •... -
Page 15: Connecting The Air Plugs
3 Connecting the air plugs (On both sides) • Insert the air plugs into the lower part of the armrest. * Arm massage will not operate unless the air plugs are inserted securely. View from bottom Air plug jack Front Air plug Push on the air plugs until you hear it click... - Page 16 5 Placing the controller Placing the controller into the controller stand. Fasten the controller cord using the clip. • Fasten so the cable under the clip will not sag too much with the backrest raised. (Because there is a chance of your legs, etc., getting caught) When the controller stand is attached on the left side •...
- Page 17 6 Fasten the pillow and the comfort cushion. Fasten the pillow using the Fasten the comfort cushion using the zip. fasteners. • See page 19 for guidelines on positioning the pillow during the massage. Fasteners Fasteners Comfort cushion Pillow...
-
Page 18: Before Sitting Down
Before sitting down Check the following before using the unit 1 Check the surrounding area. Make sure there are no objects, people, or pets in the vicinity of the unit. 2 Flip up the comfort cushion and deploy the leg/sole massage section. See Warning No. - Page 19 4 Switching on the power supply Insert the power plug into an electrical socket. Turn the lock switch key to the “open” position. Slide the power switch to the “on” position. 5 Check the unit. Make sure there are no tears or rips in the fabric. Fabric See Safety Precautions No.
- Page 20 Adjust the pillow position. Remove the pillow. Adjust the height of the pillow so that the bottom edge is at ear level. • If positioned too low, the pillow may interfere with a massage of the area around the neck. Pillow •...
- Page 21 If you want a complete massage Automatic programmes Press the button to turn on the power. • The power is turned off automatically if 3 minutes or more pass without operation. Press one of the buttons ) to select the programme. Characteristics of Automatic programmes (Upper Body) REFRESH...
- Page 22 Body scanning will commence when the programme is selected. ( will flash.) • The body scanning will properly detect height ranges between approximately 55 and 72.8 in. (140 and 185 cm). The unit will automatically recline to the correct Sit as far back in the seat as possible with massage position.
- Page 23 To customize Turning the air or stretch massage on or Operation can be turned on/off by pressing the buttons on the left. On/off for the air massage or stretch can be confirmed on the display. (Lit: On, Off: Off ) Chest Shoulder Hand/Arm...
- Page 24 To repeat the current massage Contents of current massage action will be repeated by pressing • The “REPEAT” command may not be accepted when the massage action is changing in that moment. • will flash while the massage is repeated. Changing the intensity of the air massage When performing a massage the shoulder, arm, lower back or legs, adjust the intensity by pressing the...
- Page 25 To save your preferences Automatic programmes You can save your preferred settings set during the Automatic programmes, and have them reproduced next time you are being massaged. You can save the settings for each programme. Example: When using the “REFRESH” programme 1.
- Page 26 To start a saved programme Press the button to turn on the power. • The power is turned off automatically if 3 minutes or more pass without operation. Select the User button with your saved settings. • The selected User button will light. (Example: Press.
- Page 27 To turn the “Heat” massage heads on or off Automatic programmes See Safety Precaution No. 21 on page 3. Press the button to turn on the power. • The power is turned off automatically if 3 minutes or more pass without operation.
-
Page 28: Selection Of Massage Technique/Body Region
Selection of a massage technique and body region Manual Operation See Safety Precautions No. 6 on page 2. Press the button to turn on the power. • The power is turned off automatically if 3 minutes or more pass without operation. Select the part you want to massage •... - Page 29 To change the technique in the middle of a massage Select your favourite technique in Steps • Press the button within approximately 40 seconds after reselecting the technique in Step , otherwise the reselection will be cancelled automatically. If you want to massage with tap technique only Press the button to turn on the power.
- Page 30 Adding tapping actions to the current operation • You can select tap on/off every time it is pressed. * You cannot select on/off when you are massaging only with the Press the button. tap action. To turn the “Heat” massage heads on or off You can turn the “Heat”...
- Page 31 Performing Air massage or Stretch action Air actions/Stretch actions Press the button to turn on the power. • The power is turned off automatically if 3 minutes or more pass without operation. The operation can be turned on/off by pressing the buttons on the left.
- Page 32 Effective method for using the leg/foot air massage/stretch Adjust the legrest so that your feet fit in it completely. For a person with small body dimensions For a person with large body dimensions • If the legrest is raised, it is easier to fit your sole on it. •...
- Page 33 How to use the Hand/Arm massage See Safety Precautions No. 14 on page 2. Lift up the Hand/Arm massage section. Insert the hand with fingers extended. Effective method for using the Hand/Arm massage Position the forearm and hand at the centre of the armrest. Insert the hand all the way.
- Page 34 Operation of the Shoulder, Hand/Arm, Lower back, Leg/Foot Air massage Operation of the Shoulder massage Lateral pressure is applied to squeeze your shoulders to your arms. Operation of the Lower back massage Lateral pressure is applied to squeeze from your lower back to your thighs.
- Page 35 Operation of the Shoulder Blade, Pelvis, Leg Stretch Operation of the Shoulder Blade Stretch The muscles in the region from your shoulder blades to your chest are stretched by holding your shoulders with the shoulder side massage section and pressing your back with the massage heads. Operation of the Pelvis Stretch The muscles are loosened by widely twisting and swaying around your pelvis.
- Page 36 Adjustment of the reclining angle and/or legrest Press the button to turn on the power. • The power is turned off automatically if 3 minutes or more pass without operation. Press the button to adjust the angle. • The movement will continue until a “beep-beep-beep” sound is heard if the buttons are held down. •...
-
Page 37: After Completing The Massage
After completing the massage Timer function The massage will complete automatically approximately 16 minutes after the start of operations. • The feet massage section will retract, and the legrest will be lowered automatically so you can stand up safely. The feet massage section will not retract all the way when the legrest is extended, since the sole massage section will hit the floor. - Page 38 Store the legrest. SeeSafety Precautions No. 3 on page 2, and No. 17 and No. 18 on page 3. Pull the lever in the direction of the arrow. Rotate from top. Rotate until it locks into place. Release the lever. Check that the legrest is locked.
-
Page 39: Cleaning And Maintenance
Cleaning and Maintenance See Danger No. 1 on page 1. Areas covered with synthetic leather Wipe these areas with a soft, dry cloth. • When using commercially available leather-care products (wipes), follow its instructions. • If the synthetic leather is particularly dirty, wipe it in the following manner: 1. -
Page 40: Moving The Unit
Moving the Unit See Operating Precautions No. 14 on page 4. Moving by lifting it with 2 or more persons Move the unit with 2 or more people in front and back of the unit holding on the side of the legrest and the groove on the back cover of the backrest. - Page 41 Using the wheels to move the unit Move the unit by holding onto the side of the legrest and using the wheels. Hold onto the sides. Roll the unit slowly Do not hold onto the front side. The sole massage section might slide, and injuries may occur.
- Page 42 About the Automatic programmes/About the massage techniques/About the voice guidance function About the Automatic programmes (* Time spent on “Finishing Touches” differs depending on your height and intensity setting.) Refresh programme 1) Tap/Swedish 2) Tap/knead on 3) Tap/knead on neck/ 4) Tap/knead on 5) Leg stretch 6) Tap/Swedish...
- Page 43 About the massage techniques (The figures are images of the respective operations.) ULTRA KNEAD SHIATSU KNEAD SWEDISH Fast kneading in small circles. Strong pointed massage. Deep kneading action. Softer planar massage action. ROLL FULL BACK ROLL • The respective techniques are Regional roll &...
-
Page 44: Troubleshooting
Troubleshooting Problem Cause and Remedy Motor Noises • It sounds and feels like the massage heads are straining to get over wrinkles in the cloth. • There is operational noise of kneading or tapping actions. • There is a creaking noise when the massage heads are in operation. •... - Page 45 Problem Cause and Remedy “Heat” massage heads do not get warm. • button is set to Off. • Sense of warmth from the massage heads will differ depending on your body shape, massage area, massage action, clothing, and ambient temperature. The “Heat”...
-
Page 46: Error Display
Error display Contents of the error will be displayed in the remaining time display area when an error occurs during the operation. Time Remaining <Example of error display> Display • For the error “U10” will flash alternately. Error display Contents For safety reasons, operation will terminate automatically when it cannot detect if someone is seated.