
Related Manuals for Huawei RP Series


Summary of Contents for Huawei RP Series
- Page 1 HUAWEI RP Series Telepresence Systems V100R001C04 Install Guide Issue Date 2013-10-18 HUAWEI TECHNOLOGIES CO., LTD.
- Page 2 Notice The purchased products, services and features are stipulated by the contract made between Huawei and the customer. All or part of the products, services and features described in this document may not be within the purchase scope or the usage scope. Unless otherwise specified in the contract, all statements, information, and recommendations in this document are provided "AS IS"...
-
Page 3: About This Document
About This Document About This Document Overview This document mainly describes installation and configuration of the RP series telepresence systems and IMS networks. This document aims to provide guidance through the deployment of serialized RP systems, whether standard or customized. - Page 4 HUAWEI RP Series Telepresence Systems V100R001C04 Commissioning Guide About This Document Change History Version Date Changed Description Author Section V1.0 2013-06-18 Released the first version. Guangxing Add new TCL TV Maweifen boot delay mode setting instructions. Version Mapping Table RP system version:...
-
Page 5: Table Of Contents
2.5 Powering Devices On ..............................17 2.6 Setting IP Addresses for the HD Videoconferencing Endpoints ................. 17 3 Installation ........................... 20 3.2 Installation Tools ................................22 3.3 Installing the Rack ................................ 23 Issue 01 Huawei Confidential... - Page 6 6.2 Setting the System Language ............................79 6.3 Disabling No Signal Stand By ............................79 6.4 Setting the Image Size ..............................80 6.5 Troubleshooting ................................80 7 System Settings ........................... 81 Issue 01 Huawei Confidential...
- Page 7 7.9.1 Importing an Address Book ............................98 7.9.2 Exporting an Address Book ............................99 8 Camera Settings ........................101 9 Appendix-Physical Buttons ....................104 9.1 MODE Button ................................104 9.2 SELECT Button ................................. 105 Issue 01 Huawei Confidential...
-
Page 8: Product Overview
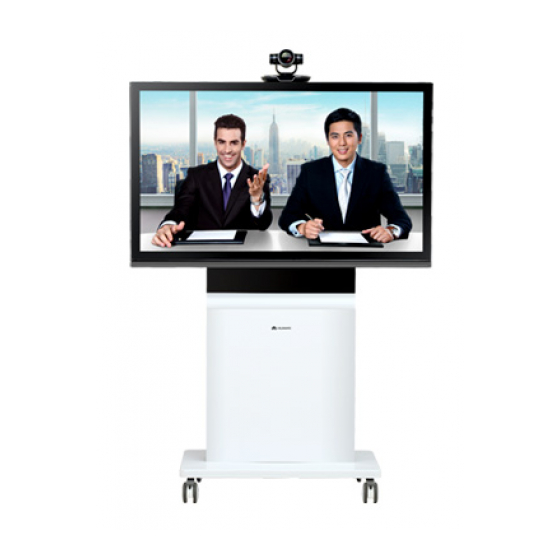
HUAWEI RP Series Telepresence Systems V100R001C04 Commissioning Guide 1 Product Overview Product Overview 1.1 RP100-46S 1.1.1 Appearance Figure 1-1 shows the RP100-46S. Figure 1-1 RP100-46S 1.1.2 System Components TE30 HD videoconferencing endpoint l 46-inch display (with speakers) l Integrated support (TV rack and equipment cabinet) l... -
Page 9: Product Features
HUAWEI RP Series Telepresence Systems V100R001C04 Commissioning Guide 1 Product Overview 5-socket PDU l 1.1.3 Product Features Be highly integrated, neat, and movable. l Support for round-table conferences with four to six participants. l Provide a camera that supports PTZ. -
Page 10: Product Features
HUAWEI RP Series Telepresence Systems V100R001C04 Commissioning Guide 1 Product Overview M220 microphone l 5-socket PDU l 1.2.3 Product Features Be highly integrated, neat, and movable. l Support for round-table conferences with four to six participants. l Provide a camera that supports PTZ. -
Page 11: System Components
HUAWEI RP Series Telepresence Systems V100R001C04 Commissioning Guide 1 Product Overview 1.3.2 System Components TE30 HD videoconferencing endpoint l 55-inch display (with speakers) l Integrated support (TV rack and equipment cabinet) l M220 microphone l 5-socket PDU l 1.3.3 Product Features Be highly integrated, neat, and movable. -
Page 12: System Components
HUAWEI RP Series Telepresence Systems V100R001C04 Commissioning Guide 1 Product Overview Figure 1-4 RP200-55S 1.4.2 System Components TE30 HD videoconferencing endpoint l 55-inch display (with speakers) l Integrated support (TV rack and equipment cabinet) l M220 microphone l 5-socket PDU l... -
Page 13: Deployment Preparation
HUAWEI RP Series Telepresence Systems V100R001C04 Commissioning Guide 2 Deployment Preparation Deployment Preparation 2.1 Planning To deploy an RP system, complete the tasks listed in the flowchart shown in Figure 2-1 and ensure that all verification items are passed. Figure 2-1 Deployment workflow... -
Page 14: Tools
HUAWEI RP Series Telepresence Systems V100R001C04 Commissioning Guide 2 Deployment Preparation Task Description Remarks Installing Install the devices in the RP devices system. Placing Place the devices according devices to the guide diagram. Connecting Connect the devices in the devices specified order using prepared cables. -
Page 15: Checking Devices
HUAWEI RP Series Telepresence Systems V100R001C04 Commissioning Guide 2 Deployment Preparation 2.3 Checking Devices 2.3.1 RP100-46S Device List Table 2-3 Devices of the RP100-46S Device Model Power Single Device Quantity Total Power Remarks Supply Power Consumption Consumption TE30 45 W... -
Page 16: Rp100-55S Device List
HUAWEI RP Series Telepresence Systems V100R001C04 Commissioning Guide 2 Deployment Preparation Device Model Power Single Device Quantity Total Power Remarks Supply Power Consumption Consumption Integrated The display support rack and equipment cabinet are included. Total power consumption of the RP200-46S... -
Page 17: Rp200-55S Device List
HUAWEI RP Series Telepresence Systems V100R001C04 Commissioning Guide 2 Deployment Preparation 2.3.4 RP200-55S Device List Table 2-6 Devices of the RP200-55S Device Model Power Single Device Quantity Total Power Remarks Supply Power Consumption Consumption TE30 45 W 45 W videoconf 100–240 V,... -
Page 18: Powering Devices On
HUAWEI RP Series Telepresence Systems V100R001C04 Commissioning Guide 2 Deployment Preparation Type Description Part Quantity Remarks Number Network RJ45-RJ45 cable 04046011 cable Chinese-standard 04041104 power cable 1 m power cable 04050206 Power cable HD display One piece is provided with an... - Page 19 HUAWEI RP Series Telepresence Systems V100R001C04 Commissioning Guide 2 Deployment Preparation Figure 2-2 Connecting the computer to the videoconferencing endpoint Computer Videoconferencing endpoint 192.168.1.2 192.168.1.1 Network cable Step 2 Connect the videoconferencing endpoint's standard power adapter to a power supply. Set the power switch on the videoconference endpoint to ON so that the videoconferencing endpoint automatically starts after it is powered on.
- Page 20 HUAWEI RP Series Telepresence Systems V100R001C04 Commissioning Guide 2 Deployment Preparation Figure 2-4 IP settings ----End Table 2-9 IP settings Parameter Default Value Remarks IPv6 Disable Recommended value. DNS server Set this parameter based on the address actual network environment.
-
Page 21: Installation
Gateway address Installation Table 3-1 lists HUAWEI RP C04 series telepresence systems. This document uses the RP100-46S and RP200-46S as examples. The RP100-46S comes with one HD display as standard. The RP200-46S comes with two HD displays as standard. "46"... - Page 22 HUAWEI RP Series Telepresence Systems V100R001C04 Commissioning Guide 3 Installation Each size of HD displays has a different ID. For details, see Figure 3-2. The installation method for each HD display varies slightly depending on the model, while the installation methods for the other telepresence system components remain similar.
-
Page 23: Installation Tools
HUAWEI RP Series Telepresence Systems V100R001C04 Commissioning Guide 3 Installation Figure 3-4 RP200 telepresence system 3.2 Installation Tools Table 3-2 lists the tools required for installing the telepresence system. Illustrations listed in Table 3-2 are for your reference only. l... -
Page 24: Installing The Rack
HUAWEI RP Series Telepresence Systems V100R001C04 Commissioning Guide 3 Installation Name Illustration Quantity Specifications and Functions Diagonal Not delivered with the pliers telepresence system. Prepare it based on your needs. This tool is used to cut cables and straps. ESD gloves Not delivered with the telepresence system. - Page 25 HUAWEI RP Series Telepresence Systems V100R001C04 Commissioning Guide 3 Installation Figure 3-5 Carton Step 4 Unpack the carton. Then, use an H6 Allen wrench to remove the four M8 hex socket screws from the top of the fasteners on the left and right of the packing case, as shown in Figure 3-6.
- Page 26 For details about where you can place the rack, see the Standard Document to the Decoration of Huawei RP Series Telepresence Conference Room. The rack is heavy. At least two persons are required to hold and move it. When lifting or moving the rack, pay special attention to your safety.
-
Page 27: Wheel Rack
HUAWEI RP Series Telepresence Systems V100R001C04 Commissioning Guide 3 Installation Figure 3-7 Holding and moving the rack ----End 3.3.2 Wheel Rack If the wheel rack is to be used, you do not need to make any preparation for the installation. -
Page 28: Free Standing Rack
HUAWEI RP Series Telepresence Systems V100R001C04 Commissioning Guide 3 Installation Figure 3-8 Toggling the pulley lock 3.3.3 Free Standing Rack Step 1 Loosen the four wheels from the rack. Step 2 Remove the wheels using an open-end wrench. Figure 3-9 Wheel ----End 3.4 Adjusting the Camera Mounting Bracket... - Page 29 HUAWEI RP Series Telepresence Systems V100R001C04 Commissioning Guide 3 Installation CAUTION Before adjusting the camera mounting bracket, ensure that the wheel locks are toggled down if a wheel rack is used. Step 1 Align the silkscreen holes corresponding to the HD display size with the rack fixing holes.
-
Page 30: Installing The Hd Display
HUAWEI RP Series Telepresence Systems V100R001C04 Commissioning Guide 3 Installation 3.5 Installing the HD Display Before installing the HD display, ensure that it can be powered on and that the video source can be switched without artifacts. Pay attention to the following items when installing the HD display: The left and right sides of the HD display support are defined when you stand with your l... - Page 31 HUAWEI RP Series Telepresence Systems V100R001C04 Commissioning Guide 3 Installation Figure 3-11 Single-screen HD display support Figure 3-12 Dual-screen HD display support Issue 01 Huawei Confidential...
-
Page 32: Adjusting The Hd Display Support
HUAWEI RP Series Telepresence Systems V100R001C04 Commissioning Guide 3 Installation 3.5.2 Adjusting the HD Display Support CAUTION If you are using an RP100-46S or RP100-55S, you do not need to adjust its support. l When adjusting the support, only partially tighten the screws. Tighten the screws after the l... -
Page 33: Installing The Rp100 Hd Display
HUAWEI RP Series Telepresence Systems V100R001C04 Commissioning Guide 3 Installation Figure 3-13 Adjusting the HD display support ----End 3.5.3 Installing the RP100 HD Display Before installing the RP100 HD display, remove the cables temporarily from the locations marked with a red circle shown in Figure 3-14. Keep the cables for later use. - Page 34 HUAWEI RP Series Telepresence Systems V100R001C04 Commissioning Guide 3 Installation Figure 3-14 Locations from which cables must be removed temporarily Step 2 Lay a soft cushion on the ground. Place the HD display on the cushion with its screen facing down.
- Page 35 HUAWEI RP Series Telepresence Systems V100R001C04 Commissioning Guide 3 Installation NOTE If you are using a 46-inch HD display, align the HD display holes with the holes silk-screened with l 1 on the L and R bars. If you are using a 55-inch HD display, align the HD display holes with the holes silk-screened with l...
- Page 36 3 Installation Figure 3-16 Attaching the HD display to the rack Step 8 Connect the power and other cables to the HD display. For details about cable connections, see the HUAWEI RP V100R001C04 Series Telepresence System Connection Diagrams. ----End If the HD display tilts, remove the HD display from the rack, and place it on the cushion with its screen facing down.
-
Page 37: Installing The Rp200 Hd Displays
HUAWEI RP Series Telepresence Systems V100R001C04 Commissioning Guide 3 Installation 3.5.4 Installing the RP200 HD Displays CAUTION Before you install the RP200 HD displays on a dual-screen HD display support, connect l the cables of the HD displays and set the power switches on the HD displays to ON. - Page 38 HUAWEI RP Series Telepresence Systems V100R001C04 Commissioning Guide 3 Installation Step 3 Remove the eight screws on the back of both HD displays using a Phillips screwdriver. Step 4 Push the two HD displays toward the center until they are tightly placed side by side and horizontally aligned with each other.
- Page 39 HUAWEI RP Series Telepresence Systems V100R001C04 Commissioning Guide 3 Installation Figure 3-21 Installing the connecting plates for 46-inch HD displays Figure 3-22 Installing the connecting plates for 55-inch HD displays Issue 01 Huawei Confidential...
- Page 40 HUAWEI RP Series Telepresence Systems V100R001C04 Commissioning Guide 3 Installation Step 6 Keep the arrows on the horizontal bars facing inward and arrows on the L and R bars pointing towards the top of the HD displays. Place the supports on the rear of the HD displays, as shown in Figure 3-23.
- Page 41 HUAWEI RP Series Telepresence Systems V100R001C04 Commissioning Guide 3 Installation Figure 3-25 Installing the mounting components Step 10 Install the connecting bars on the left and right HD display supports, as shown in Figure 3-26. Figure 3-26 Installing the connecting bars Step 11 Align the holes on the connecting bar with the holes on the horizontal bars of the supports.
- Page 42 HUAWEI RP Series Telepresence Systems V100R001C04 Commissioning Guide 3 Installation Figure 3-27 Adjusting the connecting bars Step 12 Fasten the screws and washers to the connecting bars, as shown in Figure 3-28. Figure 3-28 Fastening the connecting bars Issue 01...
-
Page 43: Installing The Te30 Videoconferencing Endpoint
Step 16 Mount the screws on the back of the HD displays into the corresponding holes on the rack, as shown in Figure 3-29. Figure 3-29 Mounting the HD displays Step 17 Connect cables to the HD display. For details about cable connections, see the HUAWEI RP V100R001C04 Series Telepresence System Connection Diagrams. ----End 3.6 Installing the TE30 Videoconferencing Endpoint... - Page 44 Step 3 Connect the composite cable to the TE30 and use a flat-head screwdriver to fasten the screws, as shown in Figure 3-32. For details about cable connections, see the HUAWEI RP V100R001C04 Series Telepresence System Connection Diagrams. Issue 01...
- Page 45 HUAWEI RP Series Telepresence Systems V100R001C04 Commissioning Guide 3 Installation Figure 3-32 Connecting the composite cable to the TE30 Step 4 Install the pad to the camera base, as shown in Figure 3-33. CAUTION The composite cable connected to the TE30 must be placed in the groove of the cable trough on the pad.
- Page 46 HUAWEI RP Series Telepresence Systems V100R001C04 Commissioning Guide 3 Installation Figure 3-33 Installing the pad CAUTION When installing the TE30, push the pad to the front most and then fasten the screws. l To remove the HD display, loosen the camera pad, push the TE30 to the back, and then l...
- Page 47 Figure 3-34 Installing the TE30 videoconferencing endpoint Step 6 Connect cables to the TE30. For details about cable connections, see the HUAWEI RP V100R001C04 Series Telepresence System Connection Diagrams. Step 7 Align the cable clamp with the holes on the pad and fasten the screws, as shown in Figure 3-35.
- Page 48 HUAWEI RP Series Telepresence Systems V100R001C04 Commissioning Guide 3 Installation Figure 3-35 Installing the cable clamp Step 8 Strap the two VGA cables connected to the TE30 using cable ties, as shown in Figure 3-36. Figure 3-36 Strapping cables Issue 01...
- Page 49 HUAWEI RP Series Telepresence Systems V100R001C04 Commissioning Guide 3 Installation Step 9 Install the decorative component behind the camera on the rack and clip it in place, as shown in Figure 3-37. Figure 3-37 Install the decorative component behind the camera Step 10 Fasten five M6 x 12 flat head screws to securely install the decorative component, as shown in Figure 3-38.
- Page 50 HUAWEI RP Series Telepresence Systems V100R001C04 Commissioning Guide 3 Installation Step 11 Fasten the TE30 composite cable. Remove the screws on the two sides of the rack, as shown in Figure 3-39. Figure 3-39 Removing rack screws Remove the rack cover, as shown in Figure 3-40.
- Page 51 HUAWEI RP Series Telepresence Systems V100R001C04 Commissioning Guide 3 Installation CAUTION Use the cable tie to hold the ferrite bead to protect the cable from falling off. l Do not tightly fasten the cable tie; otherwise, the cable core may be damaged.
-
Page 52: Installing Equipment In The Rack
HUAWEI RP Series Telepresence Systems V100R001C04 Commissioning Guide 3 Installation 3.7 Installing Equipment in the Rack 3.7.1 Location of the 5-Port PDU The 5-port power distribution unit (PDU) is embedded in the rack, as shown in Figure 3-42. You do not need to install it. -
Page 53: Installing The Camera's Power Adapter
HUAWEI RP Series Telepresence Systems V100R001C04 Commissioning Guide 3 Installation 3.7.2 Installing the Camera's Power Adapter Insert the camera's power adapter into the bracket and mount the bracket onto the rack, as shown in Figure 3-43. Figure 3-43 Installing the camera's power adapter 3.8 Troubleshooting... -
Page 54: Tilted Hd Display
HUAWEI RP Series Telepresence Systems V100R001C04 Commissioning Guide 3 Installation 3.8.1.3 Installation Techniques Use the M10 open-ended wrench to adjust the wheels. The wheel height rises when you turn the wrench counterclockwise and lowers when you turn the wrench clockwise, as shown inFigure 3-44. -
Page 55: Noise From The Power Adapter Bracket
HUAWEI RP Series Telepresence Systems V100R001C04 Commissioning Guide 3 Installation Figure 3-45 Adjusting the horizontal bars 3.8.3 Noise From the Power Adapter Bracket 3.8.3.7 Symptom Noise is generated by the swinging of the camera's power adapter bracket when you move the rack. - Page 56 HUAWEI RP Series Telepresence Systems V100R001C04 Commissioning Guide 3 Installation Figure 3-46 Fastening the camera's power adapter bracket Issue 01 Huawei Confidential...
-
Page 57: Cable Connection
HUAWEI RP Series Telepresence Systems V100R001C04 Commissioning Guide 4 Cable Connection Cable Connection For how to connect devices in an RP system, see the HUAWEI RP100 & RP200 Telepresence Systems V100R001C04 Installation Guide. 4.1 Cables Before connecting the cables, label them according to section 4.1.1 Attaching Cable Labels... -
Page 58: Cable Connectors
HUAWEI RP Series Telepresence Systems V100R001C04 Commissioning Guide 4 Cable Connection The Chinese label is closer to the cable connector, about 10 cm away from the connector. l Figure 4-2 Positions of the labels Some cables may have a ferrite bead close to the connector. In this case, the labels must not be attached between the connector and ferrite bead, as shown in Figure 4-3. - Page 59 HUAWEI RP Series Telepresence Systems V100R001C04 Commissioning Guide 4 Cable Connection Type Connector Remarks TE30 composite cable Proprietary connector [V04] [V05] HDMI connector Composite connector [V06] 0.5 m HDMI HDMI male and female extension cable Dedicated for the RP200 [A01]...
-
Page 60: Cabling
HUAWEI RP Series Telepresence Systems V100R001C04 Commissioning Guide 4 Cable Connection Type Connector Remarks [A02] 6 m audio cable with 3.5 mm connector a 3.5 mm connector [P01] [P05] 1 m Chinese-standard Plug power cable C13 connector HD display power... -
Page 61: Cabling Rules
HUAWEI RP Series Telepresence Systems V100R001C04 Commissioning Guide 4 Cable Connection Table 4-2 Cable colors and signs Start Type Sign Scope Letter DVI cable DVI-VGA cable Video VGA cable HDMI cable XLR cable RCA cable Audio 3.5 mm audio cable... - Page 62 HUAWEI RP Series Telepresence Systems V100R001C04 Commissioning Guide 4 Cable Connection Type Part Length Devices to Be Remarks Pre-Installed or Number Connected HDMI HDMI HD display RP200 [V06] extension 04050910 0.5 m extension × HDMI 1 only cable cable TE30 cable...
-
Page 63: Cabling Connection Illustration
HUAWEI RP Series Telepresence Systems V100R001C04 Commissioning Guide 4 Cable Connection 4.2.2 Cabling Connection Illustration Figure 4-4 RP100-46S/55S cabling Figure 4-5 RP200-46S/55S cabling Issue 01 Huawei Confidential... -
Page 64: Soft Upgrade
(for Huawei engineers) or http://www.huawei.com/cn/enterprise/ (for Huawei's agents). After downloading the software package, check it against the version description file to ensure that its version number, date modified, and size are correct. Check whether the upgrade package contains the files listed in Table 1-1. -
Page 65: Setting The Ip Address
HUAWEI RP100&RP200 V100R001C04B010 Upgrade Guide 5 Soft Upgrade 5.1.2 Setting the IP Address Please refer to chapter 2.6 Setting IP Addresses for the HD Videoconferencing Endpoints 5.1.3 Checking the Current Version Check and record the current version of the TE30. - Page 66 HUAWEI RP100&RP200 V100R001C04B010 Upgrade Guide 5 Soft Upgrade Figure 5-2 Security screen Step 2 Under Upgrade Password, set an upgrade password, as shown in Figure 1-5. Figure 5-3 Setting an upgrade password Step 3 Click Save. ----End 5.1.4.2 From the Remote Controlled UI Choose Advanced >...
-
Page 67: Upgrading The Te30
HUAWEI RP100&RP200 V100R001C04B010 Upgrade Guide 5 Soft Upgrade 5.2 Upgrading the TE30 There are two upgrade methods: normal upgrade using the normal system and forcible upgrade using the bootrom system. Use the bootrom system to upgrade the TE30 if the TE30 cannot be properly started due to upgrade failures caused by, for example, power failures. - Page 68 HUAWEI RP100&RP200 V100R001C04B010 Upgrade Guide 5 Soft Upgrade Figure 5-57 shows the Wi-Fi network where the TE30 to be upgraded is placed. Figure 5-5 Upgrading the TE30 on a Wi-Fi network Wi-‐Fi network HD e ndpoint Upgrading a single TE30 endpoint l...
- Page 69 HUAWEI RP100&RP200 V100R001C04B010 Upgrade Guide 5 Soft Upgrade Figure 5-7 Batch upgrade by manually entering the TE30 IP addresses Endpoint IP addresses Upgrade passwords of the endpoints NOTE An upgrade password is required for each endpoint. If the upgrade password is incorrect, the upgrade will fail.
- Page 70 HUAWEI RP100&RP200 V100R001C04B010 Upgrade Guide 5 Soft Upgrade Figure 5-8 Adding IP addresses to the exported file Upgrade passwords of the endpoints Step 7 Choose File > Import to import the IP address file. The imported IP addresses are displayed in the upgrade tool window, as shown in Figure 1-11.
- Page 71 HUAWEI RP100&RP200 V100R001C04B010 Upgrade Guide 5 Soft Upgrade 5.2.1.5 Upgrade Using the TE30 Web Interface To perform a normal upgrade by importing the upgrade resource file from the TE30 web interface: Step 1 Log in to the TE30 web interface, and choose Maintenance > Upgrade.
- Page 72 HUAWEI RP100&RP200 V100R001C04B010 Upgrade Guide 5 Soft Upgrade Figure 5-12 Upgrade progress bar Step 5 Wait 5 minutes. After the upgrade is complete, the TE30 automatically restarts. ----End 5.2.1.6 Upgrade Using the Automatic Upgrade Function An automatic upgrade can be performed from the TE30 web interface or the remote control interface.
- Page 73 HUAWEI RP100&RP200 V100R001C04B010 Upgrade Guide 5 Soft Upgrade Figure 5-13 Performing an automatic upgrade Step 2 Click Auto Upgrade Settings to display the Auto Upgrade Settings dialog box, as shown in Figure 1-16. Figure 5-14 Auto Upgrade Settings dialog box Note: Auto upgrade: specifies whether to enable automatic upgrade.
- Page 74 HUAWEI RP100&RP200 V100R001C04B010 Upgrade Guide 5 Soft Upgrade Selected: The TE30 checks the software version on the server at the specified − upgrade interval and displays the upgrade prompt upon a new version. You can decide whether to perform the upgrade.
- Page 75 HUAWEI RP100&RP200 V100R001C04B010 Upgrade Guide 5 Soft Upgrade Figure 5-16 Confirming the upgrade Click OK to upgrade or Cancel to call off the upgrade. This message will be displayed when the next upgrade period arrives and a new software version has been detected on the upgrade server.
- Page 76 HUAWEI RP100&RP200 V100R001C04B010 Upgrade Guide 5 Soft Upgrade Step 7 Click Auto Upgrade Settings to display the Auto Upgrade Settings screen, and set related parameters, as shown in Figure 1-20. Figure 5-18 Setting parameters Note: Parameters in Figure 3-18 are the same as those in Figure 1-16.
-
Page 77: Forcible Upgrade
HUAWEI RP100&RP200 V100R001C04B010 Upgrade Guide 5 Soft Upgrade are inconsistent, a message is displayed to indicate a new version and ask for confirmation, as shown in Figure 1-22. Figure 5-20 Confirming the upgrade Click Yes to upgrade or No to call off the upgrade. This message will be displayed when the next upgrade period arrives and a new software version has been detected on the upgrade server. - Page 78 HUAWEI RP100&RP200 V100R001C04B010 Upgrade Guide 5 Soft Upgrade Figure 5-21 Forcible upgrade diagram To perform a forcible upgrade: Step 2 Restart the TE30. When the TE30 is starting, press and hold the MODE button for 3 seconds or more to enter the bootrom system.
- Page 79 HUAWEI RP100&RP200 V100R001C04B010 Upgrade Guide 5 Soft Upgrade According to the security policy, the bootrom system switch must be turned off. Therefore, the settings of bootrom system switch are not saved, and you must turn it on every time you perform the forcible upgrade.
-
Page 80: Display Settings
HUAWEI RP100&RP200 V100R001C04B010 Upgrade Guide 6 Display Settings Display Settings 6.1 Precautions Do not adjust the image parameters. l Set the video input source to HDMI 1 and presentation input source to PC. l Disable No signal stand by. Otherwise, the RP performance may be affected. -
Page 81: Setting The Image Size
HUAWEI RP100&RP200 V100R001C04B010 Upgrade Guide 6 Display Settings 6.4 Setting the Image Size Step 1 Press the menu key on the remote control, scroll to Settings, and press OK. Step 2 Scroll to Picture and press OK. Step 3 Scroll to Picture Size and press OK. Scroll to Native and press OK. -
Page 82: System Settings
HUAWEI RP100&RP200 V100R001C04B010 Upgrade Guide 7 System Settings System Settings Configure the HD videoconferencing endpoint according to the following section to ensure that common videoconferencing requirements are met. 7.1 Logging In to the TE30 Web Interface Log in to the videoconferencing endpoint's web interface. -
Page 83: Setting The General Parameters
HUAWEI RP100&RP200 V100R001C04B010 Upgrade Guide 7 System Settings 7.2 Setting the General Parameters Choose System Settings > General and set the parameters according to Table 7-1, Table 7-2, and Table 7-3. Figure 7-3 Time and Time zone Table 7-1 Time and time zone settings... - Page 84 HUAWEI RP100&RP200 V100R001C04B010 Upgrade Guide 7 System Settings Figure 7-4 Power management Table 7-2 Power management settings Parameter Value Remarks Shut Down Disable Recommended value. Enter sleep mode After 10 min Recommended value. Scheduled Disable Default value. power-on Scheduled Set it based on the actual condition.
- Page 85 HUAWEI RP100&RP200 V100R001C04B010 Upgrade Guide 7 System Settings Figure 7-5 Personal Table 7-3 User settings Parameter Value Remarks Administrator name admin Fixed value. This user can configure the system settings for the videoconferencing endpoint. Administrator admin Set it based on the actual condition.
-
Page 86: Setting The Site Name
HUAWEI RP100&RP200 V100R001C04B010 Upgrade Guide 7 System Settings User name Reserved user. This user cannot configure the system settings for the videoconferencing endpoint. User password Default value. Confirm password Default value. 7.3 Setting the Site Name Choose System Settings > Display and set the parameters according to Table 7-4. -
Page 87: Configuring Input And Output
HUAWEI RP100&RP200 V100R001C04B010 Upgrade Guide 7 System Settings Horizontal offset Default value. Vertical offset Default value. 7.4 Configuring Input and Output Choose System Settings > Input/Output and set the parameters according to Table 7-5 and Table 7-6. 7.4.1 Configuring Video Input Click Video Input and set the parameters according to Table 7-5. -
Page 88: Configuring Video Output
HUAWEI RP100&RP200 V100R001C04B010 Upgrade Guide 7 System Settings 7.4.2 Configuring Video Output Click Video Output and set the parameters according to Table 7-6. Not the difference when configuring the RP100 or RP200. Figure 7-8 Video output settings Table 7-6 Video output settings... -
Page 89: Setting Conference Parameters
HUAWEI RP100&RP200 V100R001C04B010 Upgrade Guide 7 System Settings VGA OUT Name VGA OUT Default value. Output Mode Default value. Video resolution 720p Recommended value. Refresh rate 60Hz Recommended value. Stretch mode Stretch Recommended value. 7.5 Setting Conference Parameters Choose System Settings > Conference and set the parameters according Table 7-7 and Table 7-8. -
Page 90: Configuring Advanced Settings
HUAWEI RP100&RP200 V100R001C04B010 Upgrade Guide 7 System Settings Site called during Default call bandwidth None startup Default call Recommended value. 1920 kbps bandwidth Call parameter Default value. Disable configuration Wi-Fi network Default value. Disable preferred 7.5.2 Configuring Advanced Settings Choose System Settings > Conference > Advanced Settings and set the parameters according to Table 7-8. -
Page 91: Setting Network Parameters
HUAWEI RP100&RP200 V100R001C04B010 Upgrade Guide 7 System Settings Table 7-8 Advance conference parameter settings Parameter Value Remarks Audio protocol Auto Default value. Video protocol H.264HP Recommended value. Video resolution 720p 50/60 Hz Recommended value. Video frame rate Auto Default value. - Page 92 Recommended value. gateway VoIP gateway Default value. address Huawei GK Enable Set it to Enable when a Huawei GK is used. HTTP mode Enable Recommended value. Set it to Enable if the service layer supports HTTPS calls. Issue 01 (2013-06-18)
- Page 93 HUAWEI RP100&RP200 V100R001C04B010 Upgrade Guide 7 System Settings Multipoint Disable Default value. conference authentication Click SIP and set the parameters. Figure 7-12 SIP parameters Table 7-10 SIP settings Parameter Default Value Remarks Register with Enable Set it to Enable when SIP is used.
-
Page 94: Setting Network Address Book Parameters
HUAWEI RP100&RP200 V100R001C04B010 Upgrade Guide 7 System Settings Video request Manual Set it based on the actual condition. handling 7.6.2 Setting Network Address Book Parameters Choose System Settings > Network > Network Address Book, set Enable network address book to Enable and Synchronize automatically to Enable, and choose to enable or disable FTPS based on the status of the network address book on the service layer. - Page 95 HUAWEI RP100&RP200 V100R001C04B010 Upgrade Guide 7 System Settings Figure 7-14 LDAP Server Table 7-11 LDAP server settings Parameter Default Value Remarks Server address. 127.0.0.1 Set it based on the actual condition. Port Set it based on the actual condition. Base DN Set it based on the actual condition.
-
Page 96: Configuring Security Settings
HUAWEI RP100&RP200 V100R001C04B010 Upgrade Guide 7 System Settings 7.7 Configuring Security Settings Choose System Settings > Security and configure SSH/Telnet, GUI, and Upgrade password settings. Figure 7-15 SSH/Telnet, GUI, and Upgrade password Table 7-12 Security settings Parameter Default Value Remarks Forbid Recommended value. -
Page 97: Device Control
HUAWEI RP100&RP200 V100R001C04B010 Upgrade Guide 7 System Settings 7.8 Device Control Device control settings include parameters for audio and video control. 7.8.1 Setting Video Control Parameters Choose Device Control > Video Control and set the parameters according to Table 7-13. - Page 98 HUAWEI RP100&RP200 V100R001C04B010 Upgrade Guide 7 System Settings Figure 7-17 Audio input and output and sound effect parameters Table 7-14 Audio control settings Parameter Default Value Remarks Audio Input Unmute Recommended value. Built-in MIC1 Recommended values. Unmute cleared Built-in MIC2 Recommended values.
-
Page 99: Configuring The Address Book
HUAWEI RP100&RP200 V100R001C04B010 Upgrade Guide 7 System Settings Locally output sound Unmute Default value. from AUDIO IN AUDIO IN remote Unmute Default value. output Bass Default value. Middle Default value. Treble Default value. Because the VPM220 is used, do not select Unmute for Built-in MIC1 or Built-in MIC2. -
Page 100: Exporting An Address Book
HUAWEI RP100&RP200 V100R001C04B010 Upgrade Guide 7 System Settings Figure 7-19 Importing contacts to the local address book Step 3 Click Import. Figure 7-20 Clicking Import ----End 7.9.2 Exporting an Address Book Before exporting the local address book, configure the browser as follows. Otherwise, the operation may fail. - Page 101 HUAWEI RP100&RP200 V100R001C04B010 Upgrade Guide 7 System Settings Step 7 Click the Privacy tab. Then set the slider label to Medium. Step 8 Click OK to save the settings. ----End To export the address book, click Export from Local Address Book on the Address Book screen and click OK.
-
Page 102: Camera Settings
HUAWEI RP100&RP200 V100R001C04B010 Upgrade Guide 8 Camera Settings Camera Settings To configure the camera: Step 1 Open the Internet Explorer, enter the IP address of the videoconferencing endpoint in the address box, and log in to the web interface. Choose Device Control > Built-in Camera Parameters. - Page 103 HUAWEI RP100&RP200 V100R001C04B010 Upgrade Guide 8 Camera Settings Figure 8-3 Manual 2A mode settings Table 8-1 2A mode settings Parameter Default Value Brightness gain Affects the image brightness. Minimizing the value reduces the image noise as well as darkens the image.
- Page 104 HUAWEI RP100&RP200 V100R001C04B010 Upgrade Guide 8 Camera Settings If the image noise is high, set Noise reduction to Low. Do not set it to High; otherwise, ghost images may appear. Figure 8-5 Noise reduction ----End Issue 01 (2013-06-18) Huawei Confidential.
-
Page 105: Appendix-Physical Buttons
HUAWEI RP100&RP200 V100R001C04B010 Upgrade Guide 9 Appendix-Physical Buttons Appendix-Physical Buttons The TE30 provides two physical buttons: MODE and SELECT. 9.1 MODE Button The MODE button provides three functions, as listed in Table 9-1. Table 9-1 Functions of the MODE button To... -
Page 106: Select Button
HUAWEI RP100&RP200 V100R001C04B010 Upgrade Guide 9 Appendix-Physical Buttons Figure 9-1 Restore Default dialog box Note To obtain the SN of a videoconferencing endpoint, choose Help > Version on the web interface. 9.2 SELECT Button Table 9-2 Functions of the SELECT button To...