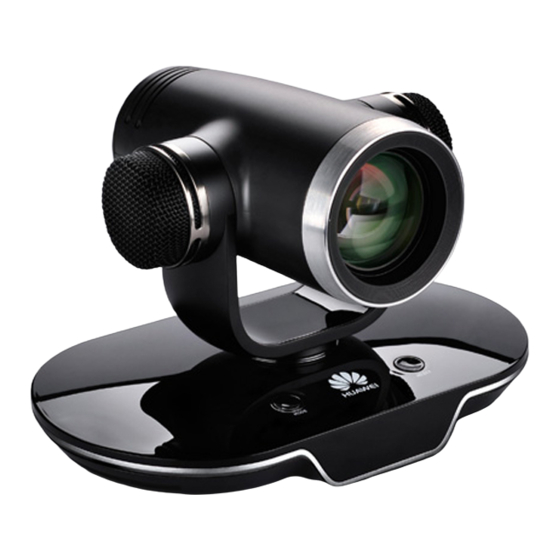
Huawei TE30 Manual
Hide thumbs
Also See for TE30:
- User manual (157 pages) ,
- Operation manual (51 pages) ,
- Product overview (50 pages)
Table of Contents
Advertisement
What's in the Box
TE30
L-shaped bracket (1) and
hook-and-loop fastener (1)
L-shaped bracket: secures the TE30 during
mounting.
Hook-and-loop fastener: secures the L-shaped
bracket to a monitor or bundles cables.
Screw (four for each)
Warranty Card
The power adapter, power cable, and
endpoint in the same box.
Power adapter (1) and
Accessorial integration cable
This cable provides two female connectors and is used
to extend an HDMI cable for transmission over a
longer distance. Connect the two female connectors to
the HDMI connector of the integration cable provided
and the male connector of a standard HDMI cable.
Safety Precautions
accessorial integration cable in the box can be used only with the
The item pictures are for your reference only.
power cable (1)
(1, 2 m)
Remote control
1
Copyright © Huawei Technologies Co., Ltd.2014. All rights reserved.
Network cable (1, 3 m)
HDMI cable (1, 0.2 m)
Extends the HDMI cable for longer
transmission.
Qualification Card
Quick Start Guide
Quick Installation Guide
Advertisement
Table of Contents

Summary of Contents for Huawei TE30
- Page 1 The power adapter, power cable, and endpoint in the same box. The item pictures are for your reference only. Copyright © Huawei Technologies Co., Ltd.2014. All rights reserved.
-
Page 2: Getting Started
Enters the bootrom system if you press and hold this button for 3 seconds or more when the TE30 is being started. Places the TE30 in sleep mode or wakes it up if you press this button when it is operating properly. Infrared... - Page 3 Toggles the VGA OUT port between VGA and YPbPr modes if you press this button. Restores the TE30 to the settings used during its previous operating if you press and hold this button for 10 seconds or more. USB port Connects to a USB flash drive.
-
Page 4: Device Specifications
Codec dimensions (H x W 157 mm x 235 mm x 167 mm (6.17 in. x 9.24 specifications x D) in. x 6.56 in.) Weight 2.1 kg Package Weight 4.7 kg Note: Before installing the TE30, prepare an electric screwdriver, hammer drill, and hammer. -
Page 5: Installation
Installation Standard Mounting If the monitor is 97 mm (3.82 in.) or slimmer, follow the steps in the following figure. If the monitor is 170 mm (6.69 in.) or thicker or is wall-mounted, use the wall-mounting, free- standing, inverted installation, or other installation options. -
Page 6: Wall Mounting
35 mm (1.38 in.). While drilling, make sure the two upper holes are in a straight line and parallel to the ground, so the TE30 is level after installation. Connect the cables delivered with the TE30. Then follow the steps in the following figure to install the TE30. - Page 7 Free-Standing Place the TE30 on a flat surface. If you have to place the TE30 on an inclined surface, ensure that the inclination is less than 15° so that the TE30 can function properly. Inverted Installation Purchase a bracket for inverted installation and mount the TE30 onto the ceiling using the bracket.
-
Page 8: Other Installation Options
Other Installation Options Purchase a tripod and install the TE30 on it. The tripod must be able to bear a weight of at least 10.5 kg (23.15 lb), and the sizes and positions of its holes must be the same as those of the holes on the bottom of the TE30. -
Page 9: Powering On The Te30
Powering On the TE30 With all cables connected correctly, use the power adapter to connect the TE30 to a power supply. When the power adapter indicator turns on, the TE30 automatically powers on and the Wizard screen is displayed. -
Page 10: Using The Wizard Screen
5. After the restart is complete, remove the USB device. Using the Wizard Screen When you power on your TE30 for the first time, you can use the remote control to configure your TE30 from the Wizard screen. You can also use the configuration wizard from the TE30 web interface with the administrator account. - Page 11 IP address to one in the the SMC 2.0, ensure that the IP specified IP address range. For example, if address of the TE30 is in the same the IP address range is 192.168.1.1 through network segment as that of the SMC 192.168.1.100, and the current IP address...
-
Page 12: Setting H.323 Parameters
IPv4 address: 192.168.1.1 IPv6 address: 2001:0:0:0:200:55:26:1 Gateway Gateway address that corresponds to Contact your network address the TE30 IP address. administrator. This parameter is mandatory when Connection type is set to Static IP. Examples: IPv4 address: 192.168.1.1 ... - Page 13 IP addresses. Site number Site number for the TE30. The site number can contain only digits. If the TE30 has registered with the GK, other endpoints can call the TE30 by Example: 12345 this number. H.323 ID Name by which the GK identifies the The name consists of digits, TE30 after it registers with the GK.
-
Page 14: Setting Sip Parameters
Whether to register with the SIP server. By default, this parameter is server deselected. If you select this parameter, the TE30 registers with the SIP server. After successfully registering with the SIP server, the TE30 can call endpoints defined in the address book by their IP addresses, numbers, and names. - Page 15 @ # %. Example: ab3@Joe Click Finish. To obtain more documentation for the endpoint, visit http://enterprise.huawei.com and choose SUPPORT > Product Support > Unified Communications and Collaboration > Telepresence and Videoconferencing > Telepresence Endpoints > Group Endpoints >...


