ABB TZIDC-200 Commissioning Instructions
Electro-pneumatic positioner
Hide thumbs
Also See for TZIDC-200:
- Operating instructions manual (68 pages) ,
- Operating instruction (68 pages) ,
- Manual (44 pages)

Related Manuals for ABB TZIDC-200


Summary of Contents for ABB TZIDC-200
- Page 1 CI/TZIDC-200/210/220-EN TZIDC-200, TZDIC-210, TZIDC-220 Commissioning Instructions Electro-Pneumatic Positioner TZIDC-200, TZIDC-210, TZIDC-220...
- Page 3 Tel.: +49 551 905-534 Fax: +49 551 905-555 CCC-support.deapr@de.abb.com © Copyright 2009 by ABB Automation Products GmbH Subject to changes without notice This document is protected by copyright. It assists the user in safe and efficient operation of the device.
-
Page 4: Table Of Contents
Cable entry ..............................20 Pneumatic connection ............................21 Commissioning..............................23 TZIDC-200..............................23 6.1.1 Operating modes...........................24 TZIDC-210 / TZIDC-220..........................25 6.2.1 Setting the bus address ........................27 6.2.2 Request information ..........................28 6.2.3 Operating modes...........................28 Ex relevant specifications ..........................29 TZIDC-200..............................29 TZIDC-210..............................29 TZIDC-220..............................30 2 - EN TZIDC-200, TZIDC-210, TZIDC-220 CI/TZIDC-200/210/220-EN... -
Page 5: Safety
Intended use TZIDC-200, TZIDC-210, TZIDC-220 positioners are electro-pneumatic positioning devices for use with pneumatically controlled actuators. The device may only be used for the applications listed in these operating instructions and in the data sheet. -
Page 6: Target Groups And Qualifications
Prior to using corrosive and abrasive materials for measurement purposes, the operator must check the level of resistance of all parts coming into contact with the materials to be measured. ABB Automation Products GmbH will gladly support you in selecting the materials, but cannot accept any liability in doing so. -
Page 7: Plates And Symbols
IMPORTANT (NOTICE) This symbol indicates operator tips, particularly useful information, or important information about the product or its further uses. It does not indicate a dangerous or damaging situation. CI/TZIDC-200/210/220-EN TZIDC-200, TZIDC-210, TZIDC-220 EN - 5... -
Page 8: Name Plate
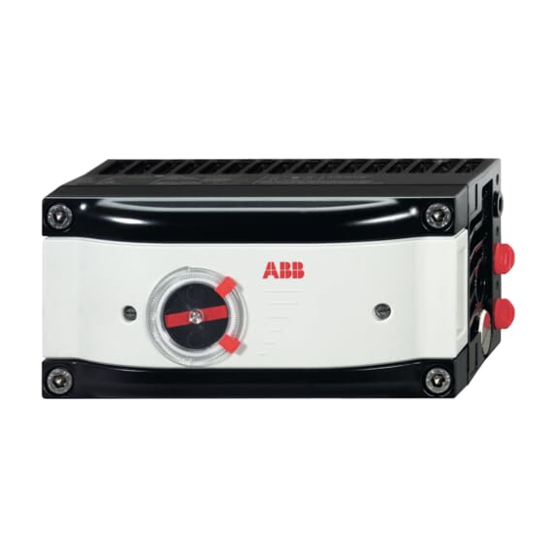
Made in Germany M00406 Fig. 1: Name plate 1 Complete model name 6 Supply pressure 2 Software version 7 Input 3 Serial number 8 Output 4 NL number 9 Dead 5 Year 10 Options 6 - EN TZIDC-200, TZIDC-210, TZIDC-220 CI/TZIDC-200/210/220-EN... -
Page 9: Safety Information For Electrical Installation
If there is a chance that safe operation is no longer possible, take the unit out of operation and secure against unintended startup. When mounting the unit in areas that may be accessed by unauthorized persons, take the required protective measures. CI/TZIDC-200/210/220-EN TZIDC-200, TZIDC-210, TZIDC-220 EN - 7... -
Page 10: Ex Relevant Safety Instructions
• To prevent loss of its ignition-proof classification, the housing may not be opened. • Use only cable glands that conform to protection type ≥ IP 65. • Avoid hazardous sliding brush discharges. 8 - EN TZIDC-200, TZIDC-210, TZIDC-220 CI/TZIDC-200/210/220-EN... -
Page 11: Mounting
Incorrect parameter values can cause the valve to move unexpectedly. This can lead to process failures and result in injuries. Before recommissioning a TZIDC-200, TZIDC-210, TZIDC-220 positioner that was used at another location, the device must always be reset to factory settings. Never start Autoadjust before restoring factory settings. - Page 12 During installation make sure that the actuator travel or rotation angle for position feedback is implemented correctly. The maximum rotation angle for position feedback is 60° when installed on linear actuators and 120° on rotary actuators. The minimum angle is always 25°. 10 - EN TZIDC-200, TZIDC-210, TZIDC-220 CI/TZIDC-200/210/220-EN...
-
Page 13: Mounting On Linear Actuators
Screw (1) and shim (2) for mounting to cast iron yoke • Two U-bolts (7) with two shims (8) and two nuts (9) for mounting to columnar yoke Required tools: Wrench, size 10 / 13 Allen key, size 4 CI/TZIDC-200/210/220-EN TZIDC-200, TZIDC-210, TZIDC-220 EN - 11... - Page 14 (5) and nut (6) at the lever. The scale on the lever indicates the link point for the stroke range. • Place the washer (2) on the screw (1). Insert the screw in the lever and lock with the nut (3). 12 - EN TZIDC-200, TZIDC-210, TZIDC-220 CI/TZIDC-200/210/220-EN...
- Page 15 Tighten the screws as evenly as possible to ensure subsequent linearity. Align the mount bracket in the oblong hole to ensure that the operating range is symmetrical (lever moves between the arrows (4)). CI/TZIDC-200/210/220-EN TZIDC-200, TZIDC-210, TZIDC-220 EN - 13...
- Page 16 Add the washers (4) and nuts (5). Hand tighten the nuts. Important Adjust the height of the positioner on the cast iron yoke or columnar yoke until the lever is horizontal (based on visual check) at half stroke of the valve. 14 - EN TZIDC-200, TZIDC-210, TZIDC-220 CI/TZIDC-200/210/220-EN...
- Page 17 Adjust the actuator stroke to make use of as large an angle of rotation as possible (symmetrical around the center position). Recommended range for linear actuators: between -28 ... 28° Minimum angle: 25° Important After mounting the unit check whether the positioner is operating within the sensor range. CI/TZIDC-200/210/220-EN TZIDC-200, TZIDC-210, TZIDC-220 EN - 15...
-
Page 18: Mounting On Rotary Actuator
• each four screws M5 (7), spring washers (8) and shim (9) to attach the mounting bracket on the actuator Required tools: Wrench, size 10 / 13 Allen key, size 3 16 - EN TZIDC-200, TZIDC-210, TZIDC-220 CI/TZIDC-200/210/220-EN... - Page 19 Place the adapter in the proper position on the feedback shaft and fasten with set screws (3). One of the set screws must be locked in place on the flat side of the feedback shaft. CI/TZIDC-200/210/220-EN TZIDC-200, TZIDC-210, TZIDC-220 EN - 17...
- Page 20 Fig. 13 1 Mounting bracket 3. Attach positioner to the actuator Fig. 14 Important After mounting the unit check whether the operating range for the actuator matches the sensor range on the positioner. 18 - EN TZIDC-200, TZIDC-210, TZIDC-220 CI/TZIDC-200/210/220-EN...
-
Page 21: Electrical Connection
Electrical connection Electrical connection Warning! Risk of explosion! (TZIDC-200 only) It is prohibited to use the integrated communication interface (LKS) in an Ex area. Never use the integrated communication interface (LKS) on the main board with a positioner that is being used in an explosion risk area. -
Page 22: Screw Terminal Assignments
4 Installation kit for digital position feedback, either proximity switches or 24 V microswitches 5 Same as 4 1) TZIDC-200 only Cable entry Important The cable terminals are delivered closed and must be unscrewed before inserting the cable. -
Page 23: Pneumatic Connection
Pneumatic connection Pneumatic connection Important The TZIDC-200, TZIDC-210, TZIDC-220 positioners must be supplied with instrument air that is free of oil, water, and dust. The purity and oil content should meet the requirements of Class 3 according to DIN / ISO 8573-1. - Page 24 Arrange the connections according to their marks: Designation Pipe connection Air supply, pressure 1.4 ... 6 bar (20 ... 90 psi) OUT1 Output pressure for actuator OUT2 Output pressure for actuator (2nd connection with double-acting actuator) 22 - EN TZIDC-200, TZIDC-210, TZIDC-220 CI/TZIDC-200/210/220-EN...
-
Page 25: Commissioning
1.3 (manual adjustment within the sensor range). The mount is checked and corrected if necessary. Autoadjust then runs again. 1) The zero position is determined automatically and saved during Autoadjust (counter-clockwise (CTCLOCKW) for linear actuators and clockwise (CLOCKW) for rotary actuators). CI/TZIDC-200/210/220-EN TZIDC-200, TZIDC-210, TZIDC-220 EN - 23... -
Page 26: Operating Modes
1.1 2) Position not active 3) For high speed mode: Press simultaneously 24 - EN TZIDC-200, TZIDC-210, TZIDC-220 CI/TZIDC-200/210/220-EN... -
Page 27: Tzidc-210 / Tzidc-220
. This starts Autoadjust For rotary actuators • Press and hold down until is displayed. Release the control button • Press again and hold down until the countdown ends • Release . This starts Autoadjust CI/TZIDC-200/210/220-EN TZIDC-200, TZIDC-210, TZIDC-220 EN - 25... - Page 28 This step is only required for critical (e.g., very small) actuators. It is not necessary under normal circumstances. 1) The zero position is determined automatically and saved during Autoadjust (counter-clockwise (CTCLOCKW) for linear actuators and clockwise (CLOCKW) for rotary actuators). 26 - EN TZIDC-200, TZIDC-210, TZIDC-220 CI/TZIDC-200/210/220-EN...
-
Page 29: Setting The Bus Address
The new parameter setting is saved and the positioner automatically returns to the working level, continuing to run on the operating level that was active prior to the configuration level being called up. CI/TZIDC-200/210/220-EN TZIDC-200, TZIDC-210, TZIDC-220 EN - 27... -
Page 30: Request Information
° Manual adjustment in the operating range Adjust with conf conf ° ° Manual adjustment in the sensor range Adjust with conf conf 1) Positioning not active. 2) for high-speed mode: Press simultaneously. 28 - EN TZIDC-200, TZIDC-210, TZIDC-220 CI/TZIDC-200/210/220-EN... -
Page 31: Ex Relevant Specifications
Intrinsic safety Temperature class: T4, T5, T6 Permissible ambient T4: -40 °C < T < 85 °C temperature: T5: -40 °C < T < 50 °C T6: -40 °C < T < 35 °C CI/TZIDC-200/210/220-EN TZIDC-200, TZIDC-210, TZIDC-220 EN - 29... -
Page 32: Tzidc-220
= 380 mA li = 360 mA li = 250 mA Power Pi = 5.32 W Pi = 2.52 W Pi = 1.2 W Characteri rectangular trapezoidal Linear stic Change from one to two columns 30 - EN TZIDC-200, TZIDC-210, TZIDC-220 CI/TZIDC-200/210/220-EN... - Page 33 Ex relevant specifications CI/TZIDC-200/210/220-EN TZIDC-200, TZIDC-210, TZIDC-220 EN - 31...
- Page 34 ABB has Sales & Customer Support expertise in over The Company’s policy is one of continuous product 100 countries worldwide. improvement and the right is reserved to modify the information contained herein without notice. www.abb.com/instrumentation Printed in the Fed. Rep. of Germany (12.2009) ©...