Table of Contents
Advertisement
Quick Links
Advertisement
Table of Contents

Related Manuals for ABB RE 610 Series


Summary of Contents for ABB RE 610 Series
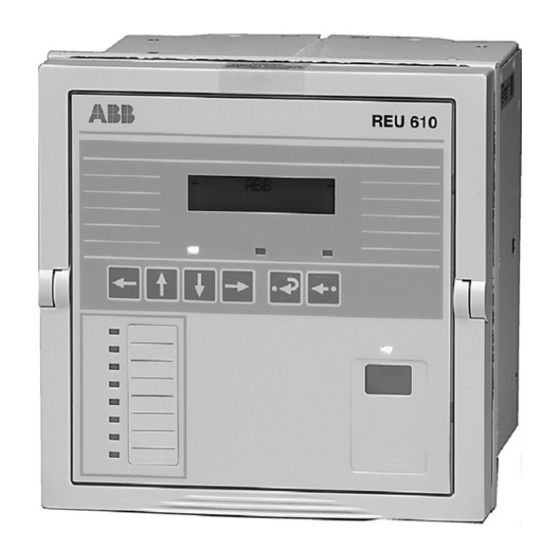
- Page 1 Protection Relay RE_ 610 Installation Manual...
-
Page 3: Table Of Contents
1MRS752265-MUM Protection Relay RE_ 610 Issued: 25.11.2003 Installation Manual Version: D/01.02.2006 Contents 1. Introduction................. 7 1.1. This manual................7 1.2. Use of symbols..............7 1.3. Intended audience..............8 1.4. Product documentation............8 1.5. Document conventions............8 2. - Page 5 Copyrights The information in this document is subject to change without notice and should not be construed as a commitment by ABB Oy. ABB Oy assumes no responsibility for any errors that may appear in this document. In no event shall ABB Oy be liable for direct, indirect, special, incidental or...
-
Page 7: Introduction
1MRS752265-MUM Protection Relay RE_ 610 Installation Manual Introduction 1.1. This manual This manual contains instructions for unpacking and installing the protection relay RE_ 610, as well as general information about different mounting kits available. In addition to the relay, the delivery contains: Product documentation (refer to Section 1.4. -
Page 8: Intended Audience
RE_ 610 Protection Relay 1MRS752265-MUM Installation Manual 1.3. Intended audience This manual is intended for installation personnel to support the installation of the product hardware. 1.4. Product documentation In addition to the relay and this manual, the delivery contains the following relay-specific documentation: Table 1.4.-1 REF 610 product documentation... - Page 9 1MRS752265-MUM Protection Relay RE_ 610 Installation Manual HMI menu paths are presented as follows: Use the arrow buttons to select CONFIGURATION\COMMUNICATION \SPA SETTINGS\PASSWORD SPA. Parameter names, menu names, relay indication messages and relay's HMI views are shown in a Courier font, for example: Use the arrow buttons to monitor other measured values in the menus DEMAND VALUES and HISTORY DATA.
-
Page 11: Safety Information
1MRS752265-MUM Protection Relay RE_ 610 Installation Manual Safety information Dangerous voltages can occur on the connectors, even though the auxiliary voltage has been disconnected. Non-observance can result in death, personal injury or substantial property damage. Only a competent electrician is allowed to carry out the electrical installation. -
Page 13: Unpacking
If a product has been damaged, a claim should be made to the transport contractor and the local representative of ABB should be promptly notified. 3.1. Identifying the product Compare the order number of the relay with the ordering information to verify that you have received the right product. -
Page 14: Disposal Of Packing Material
RE_ 610 Protection Relay 1MRS752265-MUM Installation Manual 3.3. Disposal of packing material The packing material of cardboard is 100% recyclable. -
Page 15: Mounting
1MRS752265-MUM Protection Relay RE_ 610 Installation Manual Mounting RE_ 610 can be: Flush mounted Semi-flush mounted Semi-flush mounted in a 25º angle Rack mounted Wall mounted Mounted to a 19" equipment frame Mounted with a RTXP 18 test switch to a 19" rack You need separate mounting kits for the different methods except for the flush-mounting method. - Page 16 RE_ 610 Protection Relay 1MRS752265-MUM Installation Manual A040166 Fig. 4.1.-1 Detaching a plug-in unit from the case Before fitting a relay plug-in unit into a relay case, check that the unit and the case have the same order number. The order number of the case is printed on the bottom plate inside the case. However, if a substitute plug-in unit has to be used instead of the original unit, ensure that at least the first 10 characters in the order numbers of the case and the plug-in unit are identical, as in the following example (the same...
-
Page 17: Mounting Dimensions
1MRS752265-MUM Protection Relay RE_ 610 Installation Manual A040167 Fig. 4.1.-2 Installing a plug-in unit into the case 4.2. Mounting dimensions Frame width mm Frame height mm Frame depth mm 149.3 177 (4U) A040168 Fig. 4.2.-1 Main dimensions of RE_ 610 4.3. - Page 18 RE_ 610 Protection Relay 1MRS752265-MUM Installation Manual To flush mount the case to the cut-out in the panel: 1. Loosen the four M5 fixing screws approximately 7 turns. 2. Mount the case to the panel cut-out; see Fig. 4.3.-1. 3. Tighten the screws; see Fig. 4.3.-2. The allowed range for the fixing screws’...
- Page 19 1MRS752265-MUM Protection Relay RE_ 610 Installation Manual A040170 Fig. 4.3.-2 Case flush mounted, tightening the screws A040171 Fig. 4.3.-3 Relay (case and plug-in unit) flush mounted...
-
Page 20: Semi-Flush Mounting
RE_ 610 Protection Relay 1MRS752265-MUM Installation Manual 4.4. Semi-flush mounting The semi-flush mounting kit contains (for order number, refer to Chapter 6. Accessories): Raising frame Gasket Screws The gasket is used when an IP 54 degree of protection (according to IEC 60529) is required for the front side. - Page 21 1MRS752265-MUM Protection Relay RE_ 610 Installation Manual Case A040175 Fig. 4.4.-2 Mounting case For instructions on how to mount the case to the raising frame, refer to Section 4.3. Flush mounting. A040176 Fig. 4.4.-3 Relay (raising frame, case and plug-in unit) semi-flush mounted...
-
Page 22: Inclined Semi-Flush Mounting
RE_ 610 Protection Relay 1MRS752265-MUM Installation Manual 4.5. Inclined semi-flush mounting The inclined semi-flush mounting kit (for order number, refer to Chapter 6. Accessories) allows you to mount the relay to a 25° angle. The mounting kit contains: Angled frame Gasket Screws The gasket is used when an IP 54 degree of protection is required for the front... - Page 23 1MRS752265-MUM Protection Relay RE_ 610 Installation Manual Mount the angled frame to the cut-out in the panel with four screws. The recommended panel thickness is 2 mm at the minimum. +0,2 -0,2 A051484 Fig. 4.5.-2 Panel cut-out dimensions A051486 Fig. 4.5.-3 Relay (angled frame, case and plug-in unit) mounted in a 25°...
-
Page 24: Rack Mounting
RE_ 610 Protection Relay 1MRS752265-MUM Installation Manual For instructions on how to mount the case to the angled frame, refer to Section 4.3. Flush mounting. 4.6. Rack mounting The relay can be mounted to a 19" rack by using a mounting panel. The required mounting panel type depends on the number of relays mounted. -
Page 25: Wall Mounting
1MRS752265-MUM Protection Relay RE_ 610 Installation Manual A040173 Fig. 4.6.-2 Relay (case and plug-in unit) rack mounted 4.7. Wall mounting The wall mounting kit (for order numbers, refer to Chapter 6. Accessories) allows you to mount the relay on a wall (projection mounting). The mounting kit contains: Two two-piece mounting brackets (frame and rail parts). - Page 26 RE_ 610 Protection Relay 1MRS752265-MUM Installation Manual A040177 Fig. 4.7.-1 Relay (case and plug-in unit) wall mounted A) Locks the relay to selected position (pushed-in or pulled-out) Rotate the relay by loosening the knurled-head screw, see item "B" in Fig. 4.7.-2.
-
Page 27: 19" Rack Mounting With Rtxp 18
1MRS752265-MUM Protection Relay RE_ 610 Installation Manual Min 50 mm spacing between two kits 50 mm space needed above and below the frame for rotating A040178 Fig. 4.7.-2 Wall-mounted relay in pulled-out position and rotated A) Locks the relay to selected position (pushed-in or pulled-out) B) Knurled-head screw 4.8. -
Page 28: 19" Equipment Frame Mounting (Combiflex)
RE_ 610 Protection Relay 1MRS752265-MUM Installation Manual A040179 Fig. 4.8.-1 Mounting of the relay and the frame for a RTXP 18 test switch 1) Mounting panel 2) Metallic frame 4.9. 19" equipment frame mounting (Combiflex) The relay can be mounted to a 19" equipment frame (4U high, Combiflex) by using two different types of mounting brackets. -
Page 29: Lens Sensors For Arc Protection System (Ref 610 Only)
1MRS752265-MUM Protection Relay RE_ 610 Installation Manual A040180 Fig. 4.9.-1 Mounting the relay to a 19" equipment frame 1) Mounting bracket type 1MRS061208 A040181 Fig. 4.9.-2 Mounting the relay and test switch RTXP 18 to a 19" equipment frame 1) Mounting bracket type 1MRS061208 2) Mounting bracket type 1MRS061207 4.10. - Page 30 RE_ 610 Protection Relay 1MRS752265-MUM Installation Manual To mount the lens sensor, drill a hole (Ø 10 mm) in the wall of the space to be supervised. Fit the lens sensor to the hole and fasten it with a self-tapping M3 screw.
-
Page 31: Connections
1MRS752265-MUM Protection Relay RE_ 610 Installation Manual Connections Connection terminals are described in the Technical Reference Manual. Each contact has its own identification number, X2.1, for instance. The numbering of the contacts runs from top to bottom, except connectors X2.1, X5.5 and X5.8 which are numbered from bottom to top;... -
Page 32: Mounting Instructions For Snap Ferrite Ring
RE_ 610 Protection Relay 1MRS752265-MUM Installation Manual 5.1. Mounting instructions for snap ferrite ring Install the snap ferrite ring around the wires for current/voltage measurement as follows: 1. Place the snap ferrite ring on a flat surface. To open the ring, use the key included in the package by pressing it gently into the key holes on the snap ferrite ring as shown in Fig. -
Page 33: Electrical Connections
1MRS752265-MUM Protection Relay RE_ 610 Installation Manual A040186 Fig. 5.1.-2 Snap ferrite ring installed 5.2. Electrical connections All connections are made on the rear of the case. No soldering is needed. Each signal connector (X3.1 and X4.1) terminal is dimensioned for one 0.2...2.5 mm wire or two 0.2...1.0 mm wires. - Page 34 RE_ 610 Protection Relay 1MRS752265-MUM Installation Manual X2.1 X3.1 X4.1 X5.5 A040187 Fig. 5.2.-1 Rear view of RE_ 610 with the RS-485 communication module...
- Page 35 1MRS752265-MUM Protection Relay RE_ 610 Installation Manual X2.1 X3.1 X4.1 X5.1 X5.2 X5.3 X5.4 A040188 Fig. 5.2.-2 Rear view of RE_ 610 with the fibre-optic communication module for plastic and glass fibre with light sensor inputs...
- Page 36 RE_ 610 Protection Relay 1MRS752265-MUM Installation Manual X2.1 X3.1 X4.1 X5.8 A040189 Fig. 5.2.-3 Rear view of RE_ 610 with the DNP 3.0 communication module for RS-485...
-
Page 37: Accessories
1MRS752265-MUM Protection Relay RE_ 610 Installation Manual Accessories Table 6.-1 Available accessories Item Order number Semi-flush mounting kit 1MRS050696 Inclined semi-flush mounting kit, 25° angle 1MRS050831 Wall mounting kit 1MRS050697 19” rack mounting kit, two relays side-by-side 1MRS050695 19" rack mounting kit, single relay 1MRS050694 19"... - Page 40 ABB Oy Distribution Automation P.O. Box 699 FI-65101 Vaasa FINLAND +358 10 22 11 +358 10 224 1094 www.abb.com\substationautomation...