Table of Contents
Advertisement
Quick Links
Operating Manual
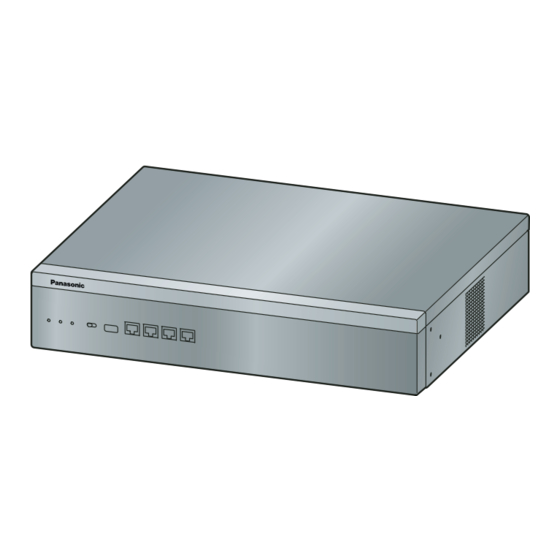
Video Intercom System ― Control Box
VL-VN1800
Model No.
Thank you for purchasing this Panasonic product.
Please read this manual carefully before using this product and save this manual for future use.
In particular, be sure to read "1.1.1 For Your Safety, page 8" before using this product.
PNMPR Software File Version 001.00000 or later
Manuals and supporting information are provided on the Panasonic Web site at:
https://panasonic.net/cns/pcc/support/intercom/vn1900
Advertisement
Table of Contents

Related Manuals for Panasonic VL-VN1800


Summary of Contents for Panasonic VL-VN1800
- Page 1 Please read this manual carefully before using this product and save this manual for future use. In particular, be sure to read "1.1.1 For Your Safety, page 8" before using this product. PNMPR Software File Version 001.00000 or later Manuals and supporting information are provided on the Panasonic Web site at: https://panasonic.net/cns/pcc/support/intercom/vn1900...
- Page 2 • Some optional hardware, software, and features are not available in some countries/areas, or for some models. Please consult your certified Panasonic dealer for more information. • This manual provides basic information on how you can access commonly used Control Box functions with KX-HDV series SIP phones.
- Page 3 Introduction https://panasonic.net/cns/pcc/support/intercom/vn1900 At least three (3) years from delivery of this product, Panasonic Corporation will give to any third party who contacts us at the contact information provided below, for a charge of no more than the cost of physically distributing source code, a complete machine-readable copy of the corresponding source code and the copyright notices covered under the GPL and the LGPL.
- Page 4 Introduction Operating Manual...
-
Page 5: Table Of Contents
Table of Contents Table of Contents 1 Operation ....................7 Before Operating the Telephones .................. 8 1.1.1 For Your Safety ....................... 8 1.1.2 Important Safety Instructions ..................10 1.1.3 Precautions ........................11 1.1.4 Data Security ........................ 13 1.1.5 Before Operating the Telephones ................. 13 Making Calls ........................ - Page 6 Table of Contents Operating Manual...
-
Page 7: Operation
Section 1 Operation This section shows you step by step how to use each feature. Read this chapter to become familiar with the many useful features of this Control Box. Operating Manual... -
Page 8: Before Operating The Telephones
1.1 Before Operating the Telephones 1.1 Before Operating the Telephones 1.1.1 For Your Safety To prevent personal injury and/or damage to property, be sure to observe the following safety precautions. The following symbols classify and describe the level of hazard and injury caused when this unit is operated or handled improperly. - Page 9 • Do not attempt to repair the power cord or plug. If the power cord or plug is damaged or frayed, contact an authorised Panasonic Factory Service Centre for a replacement. • When mounting the unit on a 19-inch rack, only use the 19-inch rack mounting equipment (attachment bracket, screws) included with the unit.
-
Page 10: Important Safety Instructions
1.1.2 Important Safety Instructions • Plug the power cord firmly into an AC outlet. Otherwise, it can cause fire or electric shock. CAUTION For All Telephone Equipment The product should be kept free of dust, moisture, high temperature (more than 40 ℃), and vibration, and •... -
Page 11: Precautions
1.1.3 Precautions • Avoid using wired telephones during an electrical storm. There is a remote risk of electric shock from lightning. • Do not use a telephone in the vicinity of a gas leak to report the leak. • Rack Mount Instructions—The following or similar rack-mount instructions are included with the installation instructions: Elevated Operating Ambient—If installed in a closed or multi-unit rack assembly, the operating ambient temperature of the rack environment may be greater than room ambient. - Page 12 1.1.3 Precautions Disposal of Old Equipment and Batteries (Only for European Union and countries with recycling systems) These symbols (①, ②) on the products, packaging, and/or accompanying documents mean that used electrical and electronic products and batteries must not be mixed with general household waste.
-
Page 13: Data Security
1.1.4 Data Security 1.1.4 Data Security In order to use the Control Box safely and correctly, the Security Requirements below must be observed. Failure to do so may result in: • Loss, leakage, falsification or theft of user information. • Illegal use of the Control Box by a third party. - Page 14 Support up to 2000 SIP devices on a system with a Control Box (example 1) R1 R2 R3 R1 R2 R3 Mobile network Smartphone Router <Gate> Public IP address Push VL-VN1800 Internet Internet server <Reception / Guard> Control box Operating Manual...
- Page 15 Smartphone Router <Gate> Public IP address Push VL-VN1800 Internet Internet server <Reception / Guard> Control box "SIP devices" include lobby stations, room monitors, door stations, SIP phones, and smartphones. A router connected to the internet with a public IP address is required. (A DDNS server may be required depending on the contract of the Internet Service Provider.) Router configuration is required in order for the [Video Intercom System] app to...
- Page 16 By installing the [Video Intercom System] app on a smartphone, you can expand the features available when using the VL-VN1800 control box system with a smartphone. In order to use the [Video Intercom System] app, you must download it to your smartphone and register your smartphones with your "main"...
- Page 17 1.1.5 Before Operating the Telephones "Main" room monitor "Sub" room monitor Smartphone Depending on your facility's system configuration, in order to establish a system only with smartphones for residences that do not have a room monitor, an activation key (VL-AKA005; sold separately) is required. Depending on your facility's system configuration, the number of smartphones that can be registered differs.
-
Page 18: Making Calls
1.2 Making Calls 1.2 Making Calls – Calling Another Extension Calling Another Extension To call an extension (Intercom Call) extension no. Off-hook. Dial extension number. Talk. Operating Manual... -
Page 19: Receiving Calls
1.3 Receiving Calls 1.3 Receiving Calls Off-hook. Talk. • Hands-free Operation You can receive a call and have a conversation in hands-free mode using the SP-PHONE button. Operating Manual... -
Page 20: Before Leaving Your Desk
1.4 Before Leaving Your Desk 1.4 Before Leaving Your Desk 1.4.1 Forwarding Calls – Forwarding Your Calls (Call Forwarding [FWD]) Forwarding Your Calls (Call Forwarding [FWD]) You can have your incoming calls forwarded to a specified destination. All Calls: All calls are forwarded. Preset extensions may also forward from their own receiving group. Busy: All calls are forwarded when your extension is busy. -
Page 21: Refusing Incoming Calls (Do Not Disturb [Dnd])
1.4.2 Refusing Incoming Calls (Do Not Disturb [DND]) To set the timer for "No Answer" and "Busy/No Answer" time C.Tone Enter 713. Enter time On-hook. Off-hook. (seconds [2 digits]). 1.4.2 Refusing Incoming Calls (Do Not Disturb [DND]) – Do Not Disturb (DND) Do Not Disturb (DND) You can set this feature to prevent incoming calls from ringing at your extension. -
Page 22: Using The Unified Messaging Features
1.5 Using the Unified Messaging Features 1.5 Using the Unified Messaging Features 1.5.1 What is the Unified Messaging system? Introduction to the Unified Messaging system Your Control Box can provide you with Unified Messaging system service. You can access the Unified Messaging system from a telephone. - Page 23 1.5.2 Logging in to and Configuring Your Mailbox • The UM group’s default floating extension number depends on system programming. For more information, consult your System Administrator or System Manager. • Mailbox Capacity Warning When your mailbox is almost full, you will receive a Mailbox Capacity Warning shortly after logging in to your mailbox.
-
Page 24: Message Playback And Related Features
1.5.3 Message Playback and Related Features Help If pressed while in Subscriber Service, you will return to the Subscriber Service Main Menu. • Command #7 is available only after you have accessed Subscriber Service. • Some commands may not be available depending on the COS settings of your mailbox. When Using Voice Prompts The following commands can be used to help you navigate through Unified Messaging system menus. - Page 25 1.5.3 Message Playback and Related Features To play messages messages Log in to your mailbox. Listen to the message. Voice messages messages Deleted messages Enter 1, 3 or 91. Follow the prompts as necessary. • * This step is omitted depending on settings and COS settings of your mailbox. Additional features are available during/after the playback of voice messages.
- Page 26 1.5.3 Message Playback and Related Features Message Type Feature Deleted <During playback only> Set a Bookmark for the voice message ü ü • To restart message playback, press 8. Start playback at the Bookmark for ü ü the voice message <During playback only>...
- Page 27 1.5.3 Message Playback and Related Features To start playback at the Bookmark During or after message playback Enter 86. Recovering Deleted Messages You can delete voice messages in your mailbox. Once a message has been deleted, it is retained until the end of the day, then it will be permanently deleted.
- Page 28 1.5.3 Message Playback and Related Features To leave a message for the sender During or after voice message playback C.Tone Enter 4. Enter 2 Record your message. Enter 1 to begin recording. to end recording. You can pause and resume recording by pressing 2.
-
Page 29: Sending Messages
1.5.4 Sending Messages • Record your own comments and send them along with the transferred message. • No acknowledgement will be given to indicate the message has been transferred. • Only new and old messages can be transferred. To transfer a deleted message, recover the message first (refer to "... - Page 30 1.5.4 Sending Messages To send a message Log in to your mailbox. Enter 2. To specify recipients by number Go to mailbox no. "To record your message". Enter 2 Enter the mailbox number. to accept. To record your message C.Tone Enter 1 to record Record your message.
-
Page 31: Quick Reference
1.5.5 Quick Reference • *1 Example: To enter 5:00, press 5#. To enter 5:15, press 515#. • *2 This option may not be available if the system is programmed to use 24-hour time. • *3 Example: If today is February 16 and you enter 17#, the message will be delivered tomorrow. - Page 32 1.5.5 Quick Reference For SIP phone users Main Menu: 1 Listen to New Messages Log in to your mailbox. You have 2 Send a Message new messages. 3 Listen to Old Messages Receive New Message (During or after playback): Repeat Message 1.1 Previous Message Next Message Erase Message...
- Page 33 1.5.5 Quick Reference For Room Monitor users Log in to your mailbox. Receive New Message (During or after playback): You have Repeat Message New Messages? new messages. 1.1 Previous Message Next Message Erase Message You have 0 1 Listen to New Messages 0 No messages new messages.
-
Page 34: User Device Management
1.6 User Device Management 1.6 User Device Management 1.6.1 Introduction to the User Container Feature The User Container feature links the user to each Control Box device, and is configured to provide services and perform maintenance on a per-user basis. Each user has a SIP extension as their main device and a Unified Messaging mailbox. -
Page 35: Manager Operation
Section 2 Manager Operation This section shows the manager how to control the other extensions or the Control Box. Operating Manual... -
Page 36: Configuring Unified Messaging Features
2.1 Configuring Unified Messaging Features 2.1 Configuring Unified Messaging Features 2.1.1 System Manager Features The System Manager can send broadcast messages. – Logging in to the System Manager’s Mailbox – Broadcasting Messages – Changing the System Manager’s Password Logging in to the System Manager’s Mailbox The procedures described in this section require the System Manager to use a telephone, however, many of these procedures can also be performed using a PC with Web Maintenance Console. - Page 37 2.1.1 System Manager Features Manual log-in System Manager’s mailbox no. UM group’s floating extension no. Off-hook. Enter #6. Enter and System Manager’s Press MESSAGE or enter mailbox number (default: 999001). UM group’s floating extension number. Enter System Manager’s System Manager password Mailbox Enter System Manager password and #.
- Page 38 2.1.1 System Manager Features Changing the System Manager’s Password The System Manager must enter the System Manager password in order to log in before performing any System Manager tasks. In order to ensure system security, we recommend selecting a long (max. 16 digits) password that cannot be easily guessed.
-
Page 39: Appendix
Section 3 Appendix This section provides the Troubleshooting and the Feature Number Table. Check the Troubleshooting section before consulting your dealer. Operating Manual... -
Page 40: Troubleshooting
3.1 Troubleshooting 3.1 Troubleshooting 3.1.1 Troubleshooting Troubleshooting Problem Remedy The telephone does not work properly. • Confirm with your manager that your settings are correct. • If the problem persists, consult your dealer. Some features do not work. • System management may restrict certain features. -
Page 41: Feature Number Table
3.2 Feature Number Table 3.2 Feature Number Table 3.2.1 Feature Number Table Feature Default Additional digits/buttons 1.4.1 Forwarding Calls Forwarding Your Calls (Call Forwarding [FWD]) 1.4.2 Refusing Incoming Calls (Do Not Disturb [DND]) Do Not Disturb (DND) 0 (Cancel)/ 1 (Do Not Disturb [DND])/ 2 (All calls) + phone no. - Page 42 Note Operating Manual...
- Page 43 Note Operating Manual...
- Page 44 MODEL NO. SERIAL NO. DATE OF PURCHASE NAME OF DEALER DEALER'S ADDRESS DEALER'S TEL. NO. 1006, Oaza Kadoma, Kadoma-shi, Osaka 571-8501, Japan http://www.panasonic.com © Panasonic Corporation 2019 PNQP1452XA PM0319MG2120...