
Related Manuals for Silvercrest 300874


Summary of Contents for Silvercrest 300874
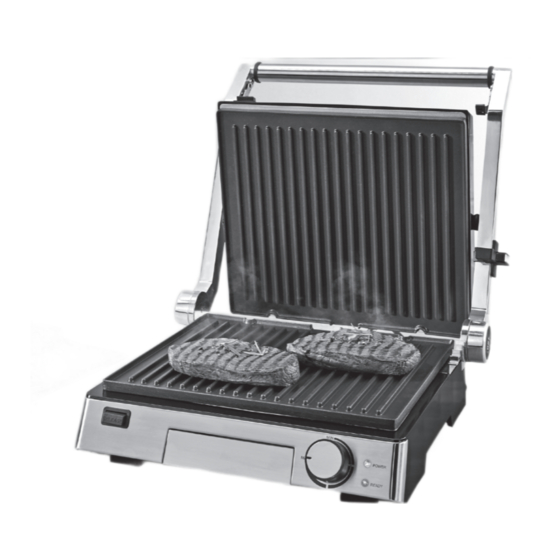
- Page 1 3-IN-1 GRILL SKGE 2000 C3 3-IN-1 GRILL ΨΗΣΤΙΈΡΑ Operating instructions Οδηүίες χρήσης KOMFORTGRILL Bedienungsanleitung IAN 300874...
- Page 2 Before reading, unfold the page containing the illustrations and familiarise yourself with all functions of the device. Πριν ξεκινήσετε την ανάγνωση, ανοίξτε τη σελίδα με τις εικόνες και εξοικειωθείτε με όλες τις λειτουργίες της συσκευής. Klappen Sie vor dem Lesen die Seite mit den Abbildungen aus und machen Sie sich anschließend mit allen Funktionen des Gerätes vertraut.
-
Page 4: Table Of Contents
Contents Introduction . . . . . . . . . . . . . . . . . . . . . . . . . . . . . . . . . . . . . . . . . . . . . .2 Information concerning these operating instructions . -
Page 5: Introduction
Introduction Information concerning these operating instructions Congratulations on the purchase of your new appliance . You have selected a high-quality product . The operating instructions are part of this product . They contain important information on safety, usage and disposal . Before using the product, familiarise yourself with all handling and safety guidelines . -
Page 6: Safety
WARNING! A warning notice at this hazard level indicates a potentially hazardous situation . Failure to avoid this hazardous situation could result in injury . ► Follow the instructions in this warning notice to prevent injury . CAUTION A warning notice at this hazard level indicates a potential for property damage . - Page 7 This appliance may be used by children of the age of 8 years or ■ more and by persons with reduced physical, sensory or mental capabilities or lack of experience and/or knowledge if they are being supervised or have been instructed with regard to the safe use of the appliance and have understood the potential risks .
- Page 8 RISK OF ELECTRIC SHOCK! The appliance should only be connected to correctly installed ► and earthed mains power sockets . Ensure that the rating for your local power supply corresponds with the details on the rating plate of the appliance . Arrange for customer service to repair or replace connecting ►...
- Page 9 RISK OF ELECTRIC SHOCK! Protect the appliance from drips or splashes of water . Thus, ► do not place any vessels containing liquid (e .g . flower vases) on or near the appliance . Always pull the plug out of the power socket during each ►...
-
Page 10: Operating Components
Operating components Figure A: 1 Support feet 2 Safety catch 3 Unlocking button 180° 4 Red "Power" control lamp 5 Green "Ready" control lamp 6 Heat level control 7 Fat collector tray 8 RELEASE button (lower hotplate) 9 Fat outlet 0 Hotplates q RELEASE button (upper hotplate) Figure B:... -
Page 11: Package Contents And Transport Inspection
Package contents and transport inspection The appliance is supplied with the following components as standard (see fold-out page): ● 3-in-1 Grill ● Fat collector tray ● Cleaning scraper ● Operating instructions NOTE ► Check the package for completeness and for signs of visible damage . ►... -
Page 12: Handling And Operation
Handling and operation This section provides you with important information on handling and using the appliance . Before initial use 1) Clean all accessories as described in the section "Cleaning and care" to remove any production residues . 2) Read these operating instructions carefully . 3) Install the appliance in accordance with the safety instructions . -
Page 13: Heat Level Control
Heat level control The temperature is set using the heat level control 6 . – Heat level range 1: heating up range / low temperature – Heat level range 2: medium temperature (e . g . cooking vegetables) – Heat level range 3: high temperature (e .g . -
Page 14: Contact Grill" Position
NOTE ► The green control lamp "Ready" 5 also comes on when the heat level control 6 is set to MIN . As soon as you set the heat level control 6 to the desired position, the green control lamp "Ready" 5 goes out until the temperature has been reached . -
Page 15: Panini Grill" Position
CAUTION ► Always remove the plug from the mains power socket when the appliance is not in use . It is not sufficient to simply set the heat level control 6 to MIN! "Panini grill" position 1) Open the appliance lid and place the food to be grilled on the lower hotplate 0 . - Page 16 "Table grill" position 1) Fold out both support feet 1 (Fig .1) . 2) Press the unlocking button 180° 3 (Fig .1) and open the appliance lid until both hotplates 0 can be used as a table grill . Fig .1 3) The hotplates 0 are now positioned next to each other and can be used as a table grill (Fig .
-
Page 17: Tips And Tricks
4) Place the food to be grilled onto the hotplates 0 . 5) Turn the food to be grilled from time to time and remove it from the hot- plates 0 once it is cooked . CAUTION Damage to the appliance! ►... -
Page 18: Cleaning And Care
Cleaning and care Safety instructions WARNING! DANGER TO LIFE DUE TO ELECTRIC SHOCK! Risk of injury when cleaning the appliance! To avoid risks, observe the following safety instructions: Before cleaning, pull out the plug and wait until the appliance ► has completely cooled down . -
Page 19: Storage
Clean the hotplates 0 which have been removed in warm water with a little detergent in it . For severe incrustations, leave the hotplates 0 to soak for a while in the water . After washing, rinse the hotplates 0 with clean water to remove all detergent residues . -
Page 20: Recipes
Recipes NOTE Depending on the quality of the ingredients, the specified temperature settings or times in the recipes may vary! "Contact grill" position Mex-Tex burger 900 g minced beef 6 tbsp . BBQ sauce 6 tbsp . finely chopped onions 3 tbsp . -
Page 21: Panini Grill" Position
NOTE The herb sauce collected in the oil collector tray 7 can be poured over the steak when served . Tuna with slices of orange (4 people) 4 fresh tuna steaks (each 170 g) 1 orange 1 tbsp . finely chopped parsley Salt Pepper 1) Peel the oranges and cut them into slices that are approx . - Page 22 1) Sort and wash the spinach leaves . 2) Peel and finely chop the onion and garlic, stew in hot oil . Add the spinach . Season with lemon juice, salt and pepper . 3) Spread the herb butter onto the toast . 4) Cut the mozzarella into slices .
- Page 23 5) Cut the chicken breasts along their length and place them on top of the tomatoes . 6) Arrange the strips of bacon on the chicken breasts . 7) Cut open the avocados vertically and use a turning movement to remove the halves from the stone .
- Page 24 "Table grill" position Chicken/turkey breast 200 g chicken/turkey breast A little flour 1) Coat the hotplates 0 with a little oil that is suitable for grill-roasting and heat the appliance to heat level range 3 . 2) Cut the 200 g of chicken/turkey breast into slices and lightly dust with flour . 3) Grill-roast on one side for around 4 minutes, then turn, sprinkle with a little salt and grill the other side for about 4 minutes .
- Page 25 Coconut curry prawns 100 g red curry paste 50 ml coconut milk 400 g prawns (alternatively crab or shrimps) 200 g sugar snaps 2 peppers 2 onions 2 garlic cloves Salt and pepper Aluminium foil 1) Mix the curry paste and the coconut milk . 2) Wash the prawns, the sugar snaps and the peppers .
-
Page 26: Disposal
Grilled corn on the cob 2 sweet corn cobs 100 g herb butter Garlic salt Salt Pepper Aluminium foil 1) Brush a piece of aluminium foil with the herb butter . 2) Salt the corn cobs and wrap them in the aluminium foil . 3) Heat the appliance to the end of heat level range 2 . -
Page 27: Kompernass Handels Gmbh Warranty
Kompernass Handels GmbH warranty Dear Customer, This appliance has a 3-year warranty valid from the date of purchase . If this product has any faults, you, the buyer, have certain statutory rights . Your statutory rights are not restricted in any way by the warranty described below . Warranty conditions The validity period of the warranty starts from the date of purchase . -
Page 28: Service
E-Mail: kompernass@lidl .ie Service Cyprus Tel .: 8009 4409 E-Mail: kompernass@lidl .com .cy IAN 300874 Importer Please note that the following address is not the service address . Please use the service address provided in the operating instructions . KOMPERNASS HANDELS GMBH... - Page 29 ■ 26 │ GB │ IE │ NI │ CY SKGE 2000 C3...
- Page 30 Περιεχόμενα Εισαγωγή . . . . . . . . . . . . . . . . . . . . . . . . . . . . . . . . . . . . . . . . . . . . . . . .28 Πληροφορίες...
-
Page 31: Εισαγωγή
Εισαγωγή Πληροφορίες για αυτές τις οδηγίες χρήσης Συγχαρητήρια για την αγορά της νέας σας συσκευής . Αποφασίσατε έτσι για την απόκτηση ενός προϊόντος υψηλής ποιότητας . Οι οδηγίες χρήσης είναι τμήμα αυτού του προϊόντος . Περιέχουν σημαντικές υποδείξεις για την ασφάλεια, τη χρήση και την απόρριψη . Πριν από τη χρήση του... -
Page 32: Ασφάλεια
ΠΡΟΕΊΔΟΠΟΊΗΣΗ Μία υπόδειξη προειδοποίησης αυτού του βαθμού κινδύνου χαρακτηρίζει μία πιθανή επικίνδυνη κατάσταση . Στην περίπτωση που δεν μπορεί να αποφευχθεί αυτή η επικίνδυνη κατάσταση, μπορεί να προκληθούν τραυματισμοί . ► Οι οδηγίες σε αυτή την υπόδειξη προειδοποίησης γίνονται ώστε να απο- φεύγονται... - Page 33 Μπορεί να γίνεται χρήση αυτής της συσκευής από παιδιά άνω ■ των 8 ετών, καθώς και από άτομα με μειωμένες φυσικές, αισθη- τηριακές ή νοητικές ικανότητες ή με έλλειψη εμπειρίας και/ή γνώσεων, εφόσον επιτηρούνται ή έχουν εκπαιδευτεί αναφορικά με την ασφαλή χρήση της συσκευής και έχουν κατανοήσει τους επακόλουθους...
- Page 34 Τοποθετείτε τη συσκευή όσο γίνεται πιο κοντά σε μια πρίζα . ■ Φροντίζετε ώστε το βύσμα, σε περίπτωση κινδύνου, να είναι γρήγορα προσβάσιμο και η γραμμή δικτύου να μη γίνεται παγίδα για να σκοντάψετε . Φροντίζετε για την ασφαλή θέση της συσκευής . ■...
- Page 35 ΚΊΝΔΥΝΟΣ ΗΛΕΚΤΡΟΠΛΗΞΊΑΣ! Προστατεύετε τη συσκευή από νερό που στάζει και πιτσιλάει . ► Γι' αυτό, μην τοποθετείτε αντικείμενα γεμάτα με υγρά (π .χ . βάζα) επάνω ή δίπλα στη συσκευή . Σε κάθε διακοπή ή μετά το τέλος χρήσης και πριν τον καθαρι- ►...
-
Page 36: Στοιχεία Χειρισμού
Στοιχεία χειρισμού Εικόνα A: 1 Πόδια στήριξης 2 Κλείστρο ασφαλείας 3 Πλήκτρο απασφάλισης 180° 4 Κόκκινη λυχνία ελέγχου «Power» 5 Πράσινη λυχνία ελέγχου «Ready» 6 Ρυθμιστής βαθμίδας θέρμανσης 7 Δοχείο συλλογής λίπους 8 Πλήκτρο RELEASE (κάτω θερμαντική πλάκα) 9 Σημείο εκροής λίπους 0 Θερμαντικές... -
Page 37: Παραδοτέος Εξοπλισμός Και Έλεγχος Μεταφοράς
Παραδοτέος εξοπλισμός και έλεγχος μεταφοράς Η συσκευή παραδίδεται κανονικά με τα εξής στοιχεία (βλ . αναδιπλούμενη σελίδα): ● Ψηστιέρα ● Δοχείο συλλογής λίπους ● Σπάτουλα καθαρισμού ● Οδηγίες χρήσης ΥΠΟΔΕΙΞΗ ► Ελέγξτε τον παραδοτέο εξοπλισμό ως προς την πληρότητα και για εμφανείς φθορές... -
Page 38: Χειρισμός Και Λειτουργία
Χειρισμός και λειτουργία Σε αυτό το κεφάλαιο λαμβάνετε σημαντικές υποδείξεις για το χειρισμό και τη λειτουργία της συσκευής . Πριν την πρώτη χρήση 1) Για να απομακρύνετε πιθανά υπολείμματα παραγωγής, καθαρίστε όλα τα εξαρτήματα όπως περιγράφεται στο Κεφάλαιο «Καθαρισμός και φροντίδα» . 2) Διαβάστε... -
Page 39: Ρυθμιστής Βαθμίδας Θέρμανσης
Ρυθμιστής βαθμίδας θέρμανσης Στον ρυθμιστή βαθμίδας θέρμανσης 6 ρυθμίζετε τη θερμοκρασία . – Τομέας βαθμίδας θέρμανσης 1: Τομέας θέρμανσης/χαμηλή θερμοκρασία – Τομέας βαθμίδας θέρμανσης 2: Μεσαία θερμοκρασία (π .χ . μαγείρεμα λαχανικών) – Τομέας βαθμίδας θέρμανσης 3: Υψηλή θερμοκρασία (π .χ . ψήσιμο κρέατος) Τομέας... -
Page 40: Θέση "Απλή Ψηστιέρα
ΥΠΟΔΕΙΞΗ ► Η πράσινη λυχνία ελέγχου "Ready" 5 ανάβει ακόμη και όταν ο ρυθμιστής βαθμίδας θέρμανσης 6 είναι στη θέση ΜΙΝ . Μόλις γυρίσετε το ρυθμιστή βαθμίδας θέρμανσης 6 στην επιθυμητή θέση, η πράσινη λυχνία ελέγχου "Ready" 5 σβήνει, μέχρι να επιτευχθεί η θερμοκρασία . ►... -
Page 41: Θέση "Ψηστιέρα Για Ψωμάκια Πανίνι
ΠΡΟΣΟΧΗ ► Όταν δεν χρησιμοποιείτε τη συσκευή, αποσυνδέετε πάντα το βύσμα από την πρίζα . Δεν αρκεί να θέσετε το ρυθμιστή βαθμίδας θέρμανσης 6 στη θέση ΜΙΝ! Θέση «Ψηστιέρα για ψωμάκια πανίνι» 1) Ανοίξτε το καπάκι της συσκευής και τοποθετήστε τα τρόφιμα που πρόκειται να... -
Page 42: Θέση "Επιτραπέζια Ψηστιέρα
Θέση «Επιτραπέζια ψηστιέρα» 1) Ανοίξτε τα δύο πόδια στήριξης 1 (Εικ . 1) . 2) Πιέστε το πλήκτρο απασφάλισης 180° 3 (Εικ .1) και ανοίξτε το καπάκι της συσκευής τόσο, ώστε και οι δύο θερμαντικές πλάκες 0 να μπορούν να χρησιμοποιηθούν σαν επιτραπέζια ψηστιέρα . Εικ... -
Page 43: Υποδείξεις Και Τεχνάσματα
4) Τοποθετήστε τα τρόφιμα για ψήσιμο επάνω στις θερμαντικές πλάκες 0 . 5) Γυρίζετε το προϊόν ψησίματος ενδιάμεσα και όταν ψηθεί απομακρύνετέ το από τις θερμαντικές πλάκες 0 . ΠΡΟΣΟΧΗ Ζημιά στη συσκευή! ► Μη χρησιμοποιείτε μυτερά ή αιχμηρά αντικείμενα για να γυρίσετε/απομα- κρύνετε... -
Page 44: Καθαρισμός Και Φροντίδα
Καθαρισμός και φροντίδα Υποδείξεις ασφαλείας ΠΡΟΕΊΔΟΠΟΊΗΣΗ! ΚΊΝΔΥΝΟΣ ΖΩΗΣ ΛΟΓΩ ΗΛΕΚΤΡΟΠΛΗΞΊΑΣ! Κατά τον καθαρισμό της συσκευής μπορεί να προ- κύψουν σωματικές βλάβες! Τηρείτε τις ακόλουθες υποδείξεις ασφαλείας, ώστε να αποφεύ- γετε κινδύνους: Πριν από τον καθαρισμό αποσυνδέετε το βύσμα και περιμένετε, ►... -
Page 45: Φύλαξη
Καθαρίστε τις θερμαντικές πλάκες 0 που απομακρύνθηκαν σε ζεστό νερό και λίγο απορρυπαντικό . Σε επίμονες εναποθέσεις αφήστε τις θερμαντικές πλάκες 0 να μαλακώσουν λίγο στο νερό πλύσης . Ξεπλύνετε τις θερμαντικές πλάκες 0 μετά τον καθαρισμό με καθαρό νερό, ώστε να απομακρύνετε υπολείμματα απορρυ- παντικού... -
Page 46: Συνταγές
Συνταγές ΥΠΟΔΕΙΞΗ Ανάλογα με το είδος των συστατικών, μπορεί να ποικίλουν οι αναφερόμενες ρυθμίσεις θερμοκρασίας ή τα στοιχεία των χρόνων στις συνταγές! Θέση «Απλή ψηστιέρα» Μπέργκερ Mex-Tex 900 γρ . κιμάς μοσχαρίσιος 6 ΚΣ σος μπάρμπεκιου 6 ΚΣ λεπτοκομμένα κρεμμύδια 3 ΚΣ... -
Page 47: Θέση "Ψηστιέρα Για Ψωμάκια Πανίνι
ΥΠΟΔΕΙΞΗ Κατά το σερβίρισμα μπορείτε να περιχύσετε τη σος βοτάνων που συγκεντρώνεται στην υποδοχή συλλογής λίπους 7 επάνω στο φιλέτο . Τόνος με φέτες πορτοκαλιού (4 άτομα) 4 φρέσκα φιλέτα τόνου (έκαστο 170 γρ .) 1 πορτοκάλι 1 ΚΣ λεπτοκομμένος μαϊντανός Αλάτι... - Page 48 1) Ξεδιαλέγετε και πλένετε τα φύλλα από σπανάκι . 2) Ξεφλουδίζετε και κόβετε σε λεπτές φέτες τα κρεμμύδια και τη σκελίδα σκόρδο και τα σοτάρετε, μέχρι να γίνουν διάφανα . Προσθέτετε το σπανάκι . Στη συνέχεια ρίχνετε το χυμό λεμονιού, το αλάτι και το πιπέρι . 3) Αλείφετε...
- Page 49 4) Σε 3 φέτες ψωμί του τοστ/λευκό ψωμί απλώνετε το ντρέσινγκ γιαουρτιού, από πάνω το μαρούλι άισμπεργκ, κόβετε τις τομάτες σε φέτες, αλατοπιπε- ρώνετε και τις τοποθετείτε από πάνω . 5) Κόβετε τα φιλέτα κοτόπουλου κατά μήκος και τα τοποθετείτε επάνω από τις τομάτες...
-
Page 50: Θέση "Επιτραπέζια Ψηστιέρα
5) Τοποθετείτε τις μπαγκέτες στην προθερμασμένη θερμαντική πλάκα 0 στον τομέα βαθμίδας θέρμανσης 3/Max . 6) Με το κλείστρο ασφαλείας 2 ρυθμίζετε την επιθυμητή απόσταση της άνω θερμαντικής πλάκας 0 και κλείνετε το καπάκι . 7) Η μπαγκέτα θα πρέπει να ροδοψηθεί . Θέση... - Page 51 Γαρίδες με καρύδα και κάρυ 100 γρ . κόκκινη πάστα κάρυ 50 ml γάλα καρύδας 400 γρ . γαρίδες (εναλλακτικά και καβούρια) 200 γρ . στρογγυλά φασόλια 2 πιπεριές 2 κρεμμύδια 2 σκελίδες σκόρδο Αλάτι και πιπέρι Αλουμινόχαρτο 1) Ανακατεύετε την πάστα κάρυ και το γάλα καρύδας . 2) Πλένετε...
-
Page 52: Απόρριψη
Ψητή ρόκα καλαμποκιού 2 ρόκες καλαμποκιού 100 γρ . βούτυρο με μυρωδικά Αλάτι σκόρδου Αλάτι Πιπέρι Αλουμινόχαρτο 1) Αλείφετε ένα κομμάτι αλουμινόχαρτο με το βούτυρο μυρωδικών . 2) Αλατίζετε τις ρόκες καλαμποκιού και τις τυλίγετε στο αλουμινόχαρτο . 3) Ζεσταίνετε τη συσκευή στην τελευταία βαθμίδα του τομέα βαθμίδας θέρμανσης... -
Page 53: Εγγύηση Της Kompernass Handels Gmbh
Εγγύηση της Kompernass Handels GmbH Αξιότιμη πελάτισσα, αξιότιμε πελάτη, Η παρούσα συσκευή διαθέτει 3 χρόνια εγγύηση από την ημερομηνία αγοράς . Στην περίπτωση ελλείψεων στο προϊόν έχετε νομικά δικαιώματα έναντι του πωλητή του προϊόντος . Αυτά τα νομικά δικαιώματα δεν περιορίζονται μέσω της κατωτέρω αναφερόμενης... -
Page 54: Σέρβις
Tel .: 801 5000 019 (0,03 EUR/Min .) E-Mail: kompernass@lidl .gr Σέρβις Κύπρος Tel .: 8009 4409 E-Mail: kompernass@lidl .com .cy IAN 300874 Εισαγωγέας Η ακόλουθη διεύθυνση δεν είναι διεύθυνση σέρβις . Επικοινωνήστε, κατ’ αρχήν, με την αναφερόμενη υπηρεσία σέρβις . KOMPERNASS HANDELS GMBH... - Page 55 ■ 52 │ GR │ CY SKGE 2000 C3...
- Page 56 Inhaltsverzeichnis Einführung . . . . . . . . . . . . . . . . . . . . . . . . . . . . . . . . . . . . . . . . . . . . . . .54 Informationen zu dieser Bedienungsanleitung .
-
Page 57: Einführung
Einführung Informationen zu dieser Bedienungsanleitung Herzlichen Glückwunsch zum Kauf Ihres neuen Gerätes . Sie haben sich damit für ein hochwertiges Produkt entschieden . Die Bedienungs- anleitung ist Bestandteil dieses Produkts . Sie enthält wichtige Hinweise für Sicherheit, Gebrauch und Entsorgung . Machen Sie sich vor der Benutzung des Produkts mit allen Bedien- und Sicherheitshinweisen vertraut . -
Page 58: Sicherheit
WARNUNG Ein Warnhinweis dieser Gefahrenstufe kennzeichnet eine mögliche gefährliche Situation . Falls die gefährliche Situation nicht vermieden wird, kann dies zu Verletzungen führen . ► Die Anweisungen in diesem Warnhinweis befolgen, um Verletzungen von Personen zu vermeiden . ACHTUNG Ein Warnhinweis dieser Gefahrenstufe kennzeichnet einen möglichen Sachschaden . - Page 59 Dieses Gerät kann von Kindern ab 8 Jahren sowie von Personen ■ mit reduzierten physischen, sensorischen oder mentalen Fähigkeiten oder Mangel an Erfahrung und/oder Wissen benutzt werden, wenn sie beaufsichtigt oder bezüglich des sicheren Gebrauchs des Gerätes unterwiesen wurden und die daraus resultierenden Gefahren verstanden haben .
- Page 60 Stellen Sie das Gerät möglichst in der Nähe einer Steckdose auf . ■ Sorgen Sie dafür, dass der Netzstecker bei Gefahr schnell erreich- bar ist und die Netzleitung nicht zur Stolperfalle werden kann . Sorgen Sie für einen sicheren Stand des Gerätes . ■...
- Page 61 GEFAHR DURCH ELEKTRISCHEN SCHLAG! Schützen Sie das Gerät vor Tropf- und Spritzwasser . ► Stellen Sie deshalb keine mit Flüssigkeit gefüllten Gegen- stände (z . B . Blumenvasen) auf oder neben das Gerät . Ziehen Sie bei jeder Unterbrechung sowie nach Beenden ►...
-
Page 62: Bedienelemente
Bedienelemente Abbildung A: 1 Stützfüße 2 Sicherheitsverschluss 3 Entriegelungstaste 180° 4 rote Kontrollleuchte „Power“ 5 grüne Kontrollleuchte „Ready“ 6 Heizstufenregler 7 Fett-Auffangschale 8 Taste RELEASE (untere Heizplatte) 9 Fettauslauf 0 Heizplatten q Taste RELEASE (obere Heizplatte) Abbildung B: w Reinigungsschaber Auspacken und Anschließen Sicherheitshinweise WARNUNG... -
Page 63: Lieferumfang Und Transportinspektion
Lieferumfang und Transportinspektion Das Gerät wird standardmäßig mit folgenden Komponenten geliefert (siehe Ausklappseite): ● Komfortgrill ● Fett-Auffangschale ● Reinigungsschaber ● Bedienungsanleitung HINWEIS ► Prüfen Sie die Lieferung auf Vollständigkeit und auf sichtbare Schäden . ► Bei einer unvollständigen Lieferung oder Schäden infolge mangelhafter Verpackung oder durch Transport wenden Sie sich an die Service-Hotline (siehe Kapitel „Service“) . -
Page 64: Bedienung Und Betrieb
Bedienung und Betrieb In diesem Kapitel erhalten Sie wichtige Hinweise zur Bedienung und Betrieb des Gerätes . Vor dem ersten Gebrauch 1) Reinigen Sie sämtliche Zubehörteile wie im Kapitel „Reinigen und Pflegen“ beschrieben, um mögliche Rückstände aus der Produktion zu entfernen . 2) Lesen Sie diese Bedienungsanleitung aufmerksam durch . -
Page 65: Heizstufenregler
Heizstufenregler Am Heizstufenregler 6 stellen Sie die Temperatur ein . – Heizstufenbereich 1: Aufheizbereich/niedrige Temperatur – Heizstufenbereich 2: mittlere Temperatur (z . B . Gemüse garen) – Heizstufenbereich 3: hohe Temperatur (z . B . Fleisch braten) Heizstufenbereich 1 Heizstufenbereich 2 Heizstufenbereich 3 HINWEIS ►... -
Page 66: Position „Kontaktgrill
HINWEIS ► Die grüne Kontrollleuchte „Ready“ 5 leuchtet auch, wenn der Heizstufen- regler 6 auf MIN steht . Sobald Sie den Heizstufenregler 6 auf die gewünschte Position stellen, erlischt die grüne Kontrollleuchte „Ready“ 5 bis die Temperatur erreicht ist . ►... -
Page 67: Position „Paninigrill
ACHTUNG ► Ziehen Sie immer den Netzstecker aus der Netzsteckdose, wenn Sie das Gerät nicht verwenden . Es genügt nicht, den Heizstufenregler 6 auf MIN zu stellen! Position „Paninigrill“ 1) Öffnen Sie den Gerätedeckel und legen Sie die zu grillenden Lebensmittel auf die untere Heizplatte 0 . -
Page 68: Position „Tischgrill
Position „Tischgrill“ 1) Klappen Sie die beiden Stützfüße 1 aus (Abb .1) . 2) Drücken Sie die Entriegelungstaste 180° 3 (Abb .1) und öffnen Sie den Gerätedeckel so weit, dass beide Heizplatten 0 als Tischgrill benutzt werden können . Abb .1 3) Die Heizplatten 0 liegen nun nebeneinander und können als Tischgrill genutzt werden (Abb . -
Page 69: Tipps Und Tricks
4) Legen Sie die zu grillenden Lebensmittel auf die Heizplatten 0 . 5) Wenden Sie das Grillgut zwischendurch und nehmen Sie es von den Heiz- platten 0, wenn es gar ist . ACHTUNG Beschädigung des Gerätes! ► Verwenden Sie keine spitzen oder scharfen Gegenstände, um das Grillgut zu wenden / herunter zu nehmen . -
Page 70: Reinigen Und Pflegen
Reinigen und Pflegen Sicherheitshinweise WARNUNG! LEBENSGEFAHR DURCH ELEKTRISCHEN SCHLAG! Bei der Reinigung des Gerätes können Personenschäden auftreten! Beachten Sie die folgenden Sicherheitshinweise, um die Gefahren zu vermeiden: Ziehen Sie vor der Reinigung den Netzstecker und warten Sie, bis ► das Gerät vollständig abgekühlt ist . Verletzungsgefahr! Reinigen Sie das Gerät nie unter fließendem Wasser und tauchen ►... -
Page 71: Aufbewahren
Reinigen Sie die abgenommenen Heizplatten 0 in warmem Wasser mit etwas Spülmittel . Bei starken Verkrustungen lassen Sie die Heizplatten 0 ein wenig in dem Spülwasser einweichen . Spülen Sie die Heizplatten 0 nach der Reinigung mit klarem Wasser ab, um Spülmittelrückstände zu beseitigen . Trocknen Sie alles gut ab . -
Page 72: Rezepte
Rezepte HINWEIS Je nach Beschaffenheit der Zutaten können die angegebenen Temperaturein- stellungen oder Zeitangaben in den Rezepten variieren! Position „Kontaktgrill“ Mex-Tex-Burger 900 g Rinderhackfleisch 6 EL Barbecuesauce 6 EL fein gehackte Zwiebeln 3 EL frische oder fertige Salsa 1/2 TL Chilipulver 4 große Hamburgerbrötchen 1) Vermischen Sie das Hackfleisch, die Zwiebeln, die Salsa, das Chilipulver und die Barbecuesauce in einer großen Schüssel . -
Page 73: Position „Paninigrill
HINWEIS Die sich in der Fett-Auffangschale 7 sammelnde Kräutersoße können Sie zum Servieren über das Steak gießen! Thunfisch mit Orangenscheiben (4 Personen) 4 frische Thunfischsteaks (je 170 g) 1 Orange 1 EL fein gehackte Petersilie Salz Pfeffer 1) Schälen Sie die Orange und schneiden Sie sie in etwa 5 mm dicke Scheiben . 2) Heizen Sie das Gerät vor (Heizstufenbereich 3) . - Page 74 1) Verlesen und waschen Sie den Blattspinat . 2) Zwiebel und Knoblauchzehe schälen und fein hacken, in heißem Öl glasig dünsten . Den Spinat zufügen . Mit Zitronensaft, Salz und Pfeffer würzen . 3) Bestreichen Sie den Toast mit Kräuterbutter . 4) Schneiden Sie den Mozzarella in Scheiben .
- Page 75 5) Hähnchenbrustfilets der Länge nach aufschneiden und auf die Tomaten legen . 6) Bacon-Streifen auf die Hähnchenbrustfilets legen . 7) Avocado der Länge nach rundum aufschneiden und durch eine Drehbewegung vom Kern lösen . Schale abziehen und Avocado in Scheiben schneiden . Avocado mit dem Limonensaft beträufeln, damit sie nicht braun anläuft .
-
Page 76: Position „Tischgrill
Position „Tischgrill“ Hühner-/Putenbrust 200 g Hühner-/Putenbrust etwas Mehl 1) Ein wenig zum Braten geeignetes Öl auf die Heizplatten 0 geben und das Gerät auf den Heizstufenbereich 3 aufheizen . 2) Die 200 g Hühner-/Putenbrust in Scheiben schneiden und leicht bemehlen . 3) Ca . - Page 77 Kokos-Curry-Garnelen 100 g rote Curry-Paste 50 ml Kokosmilch 400 g Garnelen (alternativ Krabben oder Shrimps) 200 g Zuckerschoten 2 Paprika 2 Zwiebeln 2 Knoblauchzehen Salz und Pfeffer Alufolie 1) Mischen Sie die Curry-Paste und die Kokosmilch . 2) Waschen Sie die Garnelen, die Zuckerschoten und die Paprika . 3) Schälen Sie die Zwiebeln und die Knoblauchzehen .
-
Page 78: Entsorgung
Gegrillte Maiskolben 2 Zucker-Maiskolben 100 g Kräuterbutter Knoblauchsalz Salz Pfeffer Alufolie 1) Bestreichen Sie ein Stück Alufolie mit der Kräuterbutter . 2) Salzen Sie den Maiskolben und wickeln diesen in die Alufolie . 3) Heizen Sie das Gerät auf Ende Heizstufenbereich 2 auf . 4) Legen Sie das Päckchen auf die Heizplatten 0 . -
Page 79: Garantie Der Kompernaß Handels Gmbh
Garantie der Kompernaß Handels GmbH Sehr geehrte Kundin, sehr geehrter Kunde, Sie erhalten auf dieses Gerät 3 Jahre Garantie ab Kaufdatum . Im Falle von Mängeln dieses Produkts stehen Ihnen gegen den Verkäufer des Produkts gesetz- liche Rechte zu . Diese gesetzlichen Rechte werden durch unsere im Folgenden dargestellte Garantie nicht eingeschränkt . -
Page 80: Service
E-Mail: kompernass@lidl .at Service Schweiz Tel .: 0842 665566 (0,08 CHF/Min ., Mobilfunk max . 0,40 CHF/Min .) E-Mail: kompernass@lidl .ch IAN 300874 Importeur Bitte beachten Sie, dass die folgende Anschrift keine Serviceanschrift ist . Kontaktieren Sie zunächst die benannte Servicestelle . - Page 81 ■ 78 │ DE │ AT │ CH SKGE 2000 C3...
- Page 82 KOMPERNASS HANDELS GMBH BURGSTRASSE 21 DE - 44867 BOCHUM GERMANY www.kompernass.com Last Information Update · Έκδοση των πληροφοριών Stand der Informationen: 07 / 2018 · Ident.-No.: SKGE2000C3-072018-2 IAN 300874...