
Related Manuals for ABB PowerWave 33 Series 3


Summary of Contents for ABB PowerWave 33 Series 3
- Page 1 User Manual PowerWave 33 Series 3 60 – 120 kW © Copyright 2017 ABB, All rights reserved...
- Page 2 Document information File name : 4NWP100532R0001_OPM_ABB_PW33_S3_60-120kW_EN_REV-B.docx : PowerWave 33 Series 3 UPS model Date of issue : 02.02.2016 Article number : 4NWP100532R0001 Document number : 4NWD003253 Revision Foreword OPERATIONS INSIDE THE UPS MUST BE PERFORMED BY A SERVICE ENGINEER FROM THE MANUFACTURER OR FROM AN AGENT CERTIFIED BY THE MANUFACTURER.
-
Page 3: Table Of Contents
Contents 1 Safety regulation ..................5 1.1 Safety rules ......................5 1.2 Safety symbols and warnings ................6 2 General characteristics ................7 2.1 Environmental requirements ................. 7 2.2 CE marking and declaration of safety and emc conformity ......... 7 2.3 Inquiries ........................ - Page 4 6.2.3 Dip switch SW1-9 ......................... 29 6.2.4 Multidrop Master/Slave configuration - Dip switch SW2 ............29 6.3 Control panel ......................30 6.3.1 Led indicators ........................30 6.3.2 Buttons ..........................31 6.3.3 Status screens ........................31 6.3.4 Main menu screen ........................ 32 6.3.5 Event log screen ........................
-
Page 5: Safety Regulation
1 Safety regulation 1.1 Safety rules This UPS operates with mains, battery or bypass power. It contains components that carry high currents and voltages. The properly installed UPS is grounded to earth and IP20 rated against electric shock and foreign objects. Installation and service have to be performed by the manufacturer’s qualified technicians or their certified service partners. -
Page 6: Safety Symbols And Warnings
HIGH FAULT CURRENTS (LEAKAGE CURRENTS): BEFORE CONNECTING THE MAINS, YOU MUST ENSURE THAT THERE IS A PROPER EARTH CONNECTION! WARNING! THE USER MUST DISPLAY A WARNING SHIELD ON ALL PRIMARY UPS CIRCUIT BREAKERS. THE SERVICE PERSONNEL HAS TO BE INFORMED ABOUT DANGEROUS VOLTAGES. -
Page 7: General Characteristics
2 General characteristics 2.1 Environmental requirements THIS IS A PRODUCT FOR COMMERCIAL AND INDUSTRIAL APPLICATION IN THE SECOND ENVIRONMENT – INSTALLATION RESTRICTIONS OR ADDITIONAL MEASURES MAY BE NEEDED TO PREVENT DISTURBANCES. WARNING! To operate the UPS at the best efficiency point, your installation site should meet the environmental parameters outlined in this manual. -
Page 8: Type Plate And Model Identification
The identification table (Table 2) helps to crosscheck the Type (first part of the serial number) with the UPS model. Figure 1: Type plate of PowerWave 33 Series 3. Table 2: identification table with dimensions of PowerWave 33 Series 3. Dimensions with Dimensions w/... -
Page 9: Transport - Storage - Unpacking
3 Transport – storage – unpacking 3.1 Visual inspection Upon receiving the goods, make sure that they corresponds to the material indicated in the delivery note. Carefully examine the packed unit(s) for any sign of physical damage. Two TiltWatch indicators (see Figure 2) are placed on two sides of the packed unit, in a well visible position. -
Page 10: Unpacking
3.3 Unpacking Prior unpacking make sure that the floor surface is solid and suitable for supporting the weight of all the equipment. Bring the unit(s) close to the end position and unpack them by removing the packing and shipping materials as described next. UPS AND BATTERY CABINETS ARE HEAVY AND TALL. - Page 11 Figure 4: side view of the lower part of PowerWave 33 S3 with the socket (base). Figure 5: front view of the lower part of PowerWave 33 S3 showing the adjustable feet. Figure 6: side view of the lower part of PowerWave 33 S3 showing the socket and its screws. Modifications reserved Page 11/50...
-
Page 12: Optional Sea Freight Packaging (Wooden Box)
3.3.2 Optional sea freight packaging (wooden box) Perform the following steps to unpack the UPS equipment from the sea freight package: Disassemble the wooden box by removing all screws. Remove the plastic film and bag from the UPS, by cutting it without causing damage to the cabinet; the edges are not protected. - Page 13 Figure 8: Photograph of the accessories zone, PowerWave 33 S3 front bottom. Figure 9: Photographs showing the 2x humidity-absorber. One on the inside front part of the UPS (left) and another on the rear (right). Modifications reserved Page 13/50...
-
Page 14: Installation And Wiring
4 Installation and wiring 4.1 Positioning of the UPS and battery cabinet The UPS is designed for location in a restricted access location only and should be located where: • The relative humidity does not exceed 95% (non-condensing) and the temperature remains always between 0°C and +40°C. - Page 15 Figure 10: Top view and indication of the minimum clearances for UPS + other cabinets in row. Table 4: minimum clearances for UPS + other cabinets in row. UPS + battery cabinets PowerWave 33 Series 3 Cabinets 60 / 80 / 100 / 120 in row.
-
Page 16: Electrical Installation
4.2 Electrical installation The electrical installation procedure is described in the following text. To ensure correct operation of the UPS, the voltage Total Harmonic Distortion (THDu) of the mains shall not exceed the values according to Standard IEC 61000-2-2. In case of exceeding of the indicated values, please contact the manufacturer. -
Page 17: Block Diagram
4.3 Block diagram Figure 12: Block diagram of PowerWave 33 S3. On the left with single input feed configuration and on the right with dual input feed configuration. 4.4 Wiring Before proceeding to wire the UPS, make sure that you have read and understood the chapter above 4.2 Electrical installation and make sure that the following is respected: •... - Page 18 Table 6: DUAL INPUT FEED (STANDARD VERSION) Fuse B Fuse C Fuse E Rated Cable B Cable C Cable D Type:gL or Type:gL or Type: Cable E output (qty. x (qty. x (qty. x gR or (qty. x mm power (qty.
- Page 19 Figure 13: bottom front view and connection terminals of PW33 S3 60-80-100-120 kW models. Table 7: connection terminals overview and tightening torque. PW33 S3 Input Input Tightening Output Batt (+) N / Batt. (-) Model Rectifier Bypass torque (Nm) 2xM8 12.3 (M8) 60 kW 2xM8...
-
Page 20: Conversion From Single Input Feed To Dual Input Feed And Vice-Versa
4.4.1 Conversion from single input feed to dual input feed and vice-versa The Figure 14 below shows the situation with single input feed which is achieved thank to 3x link wires which are factory mounted in case the unit is ordered with single input feed. To convert the unit from single into dual input feed simply remove the 3x link wires which connect the INPOUT RECTIFIER 1-L1, 1-L2, 1-L3 with the INPUT BYPASS 2-L1, 2-L2, 2-L3. -
Page 21: Connectivity
5 Connectivity 5.1 Customer interface Each UPS cabinet is provided with customer interface ports (also called communication ports) which provides information about the UPS (single units) or the UPS system (parallel system). The customer interface is composed by: 1. Slot for optional USB & relay card (customer outputs) 2. -
Page 22: Customer Inputs
5.1.1 Customer inputs The customer input interfaces are standard for each model and are located in the front bottom part of the unit. All voltage free contacts are rated 60 VAC max. and 500 mA max.: All the interfaces are connected to Phoenix Spring terminals with wires : 0.5 mm Table 8: details of the customer inputs. -
Page 23: Connectivity Options
5.2 Connectivity options 5.2.1 Remote SHUT DOWN (EPO) The REMOTE SHUT DOWN must use a normally closed contact, which opens to operate the remote shut down sequence. Usually the shutdown procedure is disabled and it should be activated by a Hardware Code on “Setup Service”... -
Page 24: Wavemon Shutdown And Management Software
5.2.3 Wavemon Shutdown and management software WAVEMON Software is an external monitoring and shutdown software which was designed to operate with all UPS products, both with the DRY PORT (Relays) on Terminal block X2 …X4 and RS232 port JD11 on the communication card The software packet consists of a CD ROM for most diffused operating systems (Windows, Unix, OS/2, DEC VMS, Novell, Apple), a standard connection and a user manual. -
Page 25: Snmp Card/Adapter For Network Management / Remote Monitoring
When UPSServ detects voltage variations or a power failure it can execute various so called system „event routines“, which for example may shutdown the server or send warning to connected users. These system event routines which are a part of the UPS-Management Software can be adjusted to your demands. - Page 26 Figure 19: SNMP card or box wired between the UPS and the WEB/Ethernet The adapter may be configured via Telnet, HTTP (Web-Browser) or serial connection (Terminal). For normal operation at least one network connection (Ethernet) is required. The SNMP adapter can be used, utilizing the RCCMD send function, for an automatic network wide shut down or just for informing connected users.
-
Page 27: Operation
6 Operation 6.1 Commissioning The PowerWave 33 is a high quality electronic machine, which must be commissioned by a fully trained and certified field service engineer before being put into use. The commissioning of the UPS involves the connection of the UPS and battery, the checking of the electrical installation and operating environment of the UPS, the controlled start-up and testing of the UPS and customer training. -
Page 28: Paralleling Of Ups-Cabinets
6.2.2 Paralleling of UPS-Cabinets For the correct performance of different parallel functions and operations the parallel units communicate continuously between each other. This is achieved by means of the so-called communication BUS- Lines. After terminating the input and output cabling of each single UPS, it is necessary to connect the units together to form the parallel system. -
Page 29: Dip Switch Sw1-9
6.2.3 Dip switch SW1-9 The DIP Switch SW1-9 is located on every UPS cabinet. With this switch it is possible to determine the “position of the cabinet” in a Multi-Cabinet Chain. Define each PowerWave 33 S3 - Cabinet in a Multi- Cabinet Chain as: The “First”, The “Middle”... -
Page 30: Control Panel
6.3 Control panel ONLY PERSONS WHICH HAVE BEEN TRAINED BY THE MANUFACTURER OR HIS CERTIFIED SERVICE PARTNERS ARE ALLOWED TO OPERATE ON THE CONTROL PANEL WITH CLOSED DOORS. ALL OTHER OPERATIONS ON THE UPS SYSTEM HAVE TO BE DONE ONLY BY SERVICE TECHNICIANS OF THE MANUFACTURER.. -
Page 31: Buttons
INDICATOR INDICATOR STATUS MEANING ALARM No alarm condition Alarm condition LINE 1 GREEN Mains rectifier available Mains rectifier not available LINE 2 GREEN Mains bypass available Main bypass not ok or not available UPS is turned off BYPASS GREEN Load on bypass (Bypass-or Eco-Mode) Bypass not operating (switched-off) INVERTER GREEN... -
Page 32: Main Menu Screen
stands for Single UPS. The system consists only of one UPS. stands for Parallel UPS in a Multi- UPS system and 01 stands for the first UPS (MASTER) in the parallel UPS system. stands for Parallel UPS in a Multi- UPS system and 02 stands for the second UPS (SLAVE) in the Multi- UPS system. -
Page 33: Measurements Screen
6.3.6 Measurements screen DESCRIPTION LCD-DISPLAY Battery Runtime BATT. RUN TIME (MIN) 00h 00m UPS-Output Frequency OUTPUT FREQUENCY (HZ) 50.00 Bypass Frequency. BYPASS FREQUENCY (HZ) 50.00 Battery Voltage BATTERY VOLTAGE (V) + 0.0 Battery Charger Current BATT. CHARGE CUR. (A) + 0.0 Discharge Current. -
Page 34: Ups Data
6.3.8 Ups data DESCRIPTION LCD-DISPLAY UPS SERIAL NUMBER These general UPS Data are set by the manufacturer. PWA nnnnnn DATE OF MANUFACTURE Manufacturing date 15/01/2014 EPROM Version EPROM VERSION CCCC Hardware Version HARDWARE VERSION 00000000 Dynamic password DYNAMIC PASSWORD YES/NO Actual Date and Time DATE TIME... -
Page 35: Operating Modes
6.4 Operating modes 6.4.1 Mode "ON LINE" (INVERTER MODE) The ON-LINE-Mode is the UPS-Operating Mode in which the load is supplied through the RECTIFIER and INVERTER. LED Indicator Color LINE 1 Green LINE 2 Green BYPASS INVERTER Green BATTERY Green Using the control panel the UPS can easily be transferred to the ON-LINE-Mode. -
Page 36: Maintenance Bypass" - Mode
6.4.3 "Maintenance bypass" - mode Before transferring the load to Maintenance Bypass (IA1) always make sure all the UPS-modules are in the "Bypass-Mode” or “ECO-Mode”. The Maintenance Bypass mode is performed by closing (put in position ON) the IA1 Maintenance Bypass switch on the front of the UPS. POSITION OF IA1 EFFECT Bypass-Switch Closed (Load supplied directly from mains) -
Page 37: Operation Procedures
6.5 Operation procedures 6.5.1 Start-up procedure THE OPERATIONS DESCRIBED IN THIS CHAPTER MUST BE PERFORMED BY A SERVICE ENGINEER FROM THE MANUFACTURER OR FROM AN AGENT CERTIFIED BY THE MANUFACTURER. WARNING! Situation of UPS-System before switching it on: Make sure the fuses for the supply of UPS-System in the Input Distribution Board on site are open. -
Page 38: Shutdown Procedure
Press simultaneously the two ON/OFF buttons on the UPS-control panel (PMD) on all control panels to turn the UPSs OFF. On the LCDs message “LOAD OFF, SUPPLY FAILURE” will appear Close Parallel Isolator IA2 (position ON) of UPS 1, on LCD: “PARALLEL SW CLOSED” will appear “EVENT LOG”... -
Page 39: Load Transfer: From Inverter Operation To Maintenance Bypass
The load may be disconnected by means of the two ON/OFF (LOAD-OFF) buttons for security reasons. Complete Shutdown procedure of POWERWAVE 33: Only in case there is no need to supply the load, the UPS System can be completely shutdown. The following procedures can only be executed after the load has completely been de-energized. -
Page 40: Load Transfer: From Maintenance Bypass To Inverter Operations
Situation of UPS-System before starting the Transfer Procedure to Maintenance Bypass: The load is protected by PowerWave 33 running in normal operation. (The UPS is operating on inverter). Using LCD panel, select the COMMANDS menu, choose command “LOAD TO BYPASS” and transfer the load to mains. (for parallel operation is enough to give the order in one of the units). - Page 41 Situation of UPS-System before starting the Transfer Procedure to ON-LINE mode: The load is supplied directly by Input Mains through the Maintenance Switch (IA1) and the UPS is OFF. Close the Input Switch (IA4) and the Bypass Switch (IA3) Close battery fuses/breakers in the external battery cabinets or racks. On the LCD’s: “LOAD OFF, SUPPLY FAILURE”...
-
Page 42: Maintenance
7 Maintenance THE OPERATIONS DESCRIBED IN THIS CHAPTER MUST BE PERFORMED BY A SERVICE ENGINEER FROM THE MANUFACTURER OR FROM AN AGENT CERTIFIED BY THE MANUFACTURER.. WARNING! 7.1 User responsibilities There are no parts within the UPS which need to be serviced by the user, so the maintenance responsibilities of the user are zero. -
Page 43: Battery Maintenance, Disposal And Recycling
mains is present. • The battery testing can be carried out independently of the operation mode (OFF-LINE or ON-LINE) and whether or not the load is connected. The battery test procedure can be performed from the UPS display, in the service setup mode. 7.4 Battery maintenance, disposal and recycling The battery maintenance shall be done by a certified Service Partner. -
Page 44: Troubleshooting
8 Troubleshooting 8.1 Alarms In the event of an alarm condition the red LED-Indicator “Alarm” and the audible alarm will turn on. In this case proceed as follows: Silence the audible alarm by pressing the button "Reset". Identify the cause of the alarm condition by means of the EVENT LOG in the MAIN menu. (see Section-4, Chapter 4.1.3.3 or Appendix D.4.5.1 for graphical display) In case of doubts please contact the nearest Service centre. -
Page 45: End Of Life Treatment
9 End of life treatment 9.1 UPS and material disposing Whenever the UPS has to be disposed, it is mandatory to contact any local recycling or disposing treatment facility. They will assure a proper disposing of the unit (recycling, separation for special treatment, etc.). -
Page 46: Attachments
10 Attachments 10.1 Technical data sheet Modifications reserved Page 46/50... - Page 47 Contact us www.abb.com/ups © Copyright ABB. All rights reserved. Specification ups.sales@ch.abb.com subjects to change without notice.
- Page 49 Technical data sheet PowerWave 33 Serie 3 60 – 120 kW © Copyright 2016 ABB, All rights reserved...
-
Page 50: Revision History
Document information File name : TDS_ABB_PW33_S3_60-120kW_EN_REV-A.docx : PowerWave 33 Series 3 UPS model Date of issue : 02.02.2016 Article number : N/A Document number : 4NWD003258 Revision Revision history Revision number Chapter Description Date 140714 Cable entry: bottom bottom, bottom rear 14.07.2014... - Page 51 Contents 1 System description..................4 2 General characteristics ................5 3 Input characteristics .................. 6 4 Output characteristics ................7 5 Battery characteristics ................9 6 User interface - communication .............. 10 6.1 Display & mimic diagram ..................10 6.2 Customer inputs ....................11 6.3 Customer outputs (optional usb port &...
-
Page 52: System Description
1 System description In environments that demand zero downtime, continuous power protection availability is essential. In order to respond to today’s dynamic IT and process-related environments that experience daily change through new server technologies, migration and centralization, resilient and easily adaptable power protection concepts are required. -
Page 53: General Characteristics
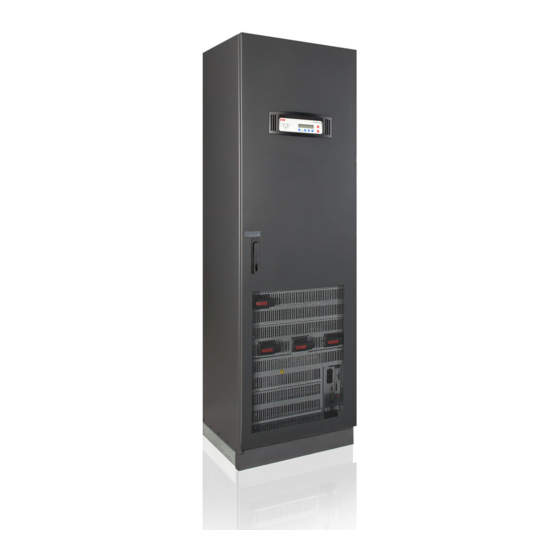
2 General characteristics PowerWave 33 Series 3 Photograph (front view with open doors) Power, rated: Apparent Active UPS type: on-line, trasformerfree, decentralized parallel architecture Parallel capability: up to 10 frames Battery: not included Performance classification: VFI-SS-111 MECHANICAL Dimensions 615x1954x480 or with feet 615x1978x480 (width×height×depth) -
Page 54: Input Characteristics
USB port & Relay card with potential-free contacts (Customer outputs) Back-feed protection Single input feed KIT Sea freight packaging (wooden box) 3 Input characteristics PowerWave 33 Series 3 Rated voltage 380 / 220 (steady-state, r.m.s) 400 / 230 415 / 240 -10 / +15 at <100% load... -
Page 55: Output Characteristics
5 wires, 3 phase + N + PE Cable entry: Bottom Accessibility: Frontal Walk In/Soft Start: 4 Output characteristics PowerWave 33 Series 3 Power, rated: AC power distribution system: TN-S, TN-C, TN-C-S, TT available phases neutral available Rated voltage 380 / 220 (steady state, r.m.s.) - Page 56 Max slew-rate Hz/s Nominal current (In), r.m.s. rated: 0.5 @ 150% load; 5 @ 125% load; 20 @ 110% load Overload on inverter Fault clearing capability 2.0 x In 2.0 x In 2.0 x In 2.0 x In normal mode and battery mode (100ms) Crest factor (Load supported) 3: 1...
-
Page 57: Battery Characteristics
5 Battery characteristics PowerWave 33 Series 3 Technology: VRLA, vented lead-acid, NiCd Number of 12 V blocks (even 42 – 48 and odd) Number of 1.2 V NiCd cells 420 – 480 (even and odd) Battery charger max. current charger capability Battery charger max. -
Page 58: User Interface - Communication
6 User interface - communication STANDARD ITEMS RS232 on Sub-D9 port For service (upgrades and event log download) and for SNMP box Customer INPUTS (see details in 1.6.2) RJ45 port Multidrop connection (for a parallel system) DISPLAY + MIMIC DIAGRAM 2x20 characters LCD display + mimic diagram with 5x dual colour LEDs OPTIONAL ITEMS On x1 5/6... -
Page 59: Customer Inputs
6.2 Customer inputs The customer input interfaces are standard for each model and are located in the front bottom part of the unit. All voltage free contacts are rated 60 VAC max. and 500 mA max.: All the interfaces are connected to Phoenix Spring terminals with wires : 0.5 mm Table 1: details of the customer inputs. -
Page 60: Installation Planning
Figure 2: Top view and indication of the minimum clearances for UPS + other cabinets in row. Table 3: minimum clearances for UPS + other cabinets in row. UPS + battery cabinets in PowerWave 33 Series 3 Cabinets 60 / 80 / 100 / 120 row. -
Page 61: Heat Dissipation
8 Heat dissipation PowerWave 33 Series 3 Air-flow from front to top 2850 3800 4750 5700 Heat Dissipation with 100% linear load 9730 12970 16220 19460 3158 4211 5264 6316 Heat Dissipation with 100% non-lin. load (acc. to 62040-3) 10778... - Page 62 9 Cable and fuse recommendations Figure 3: block diagram PowerWave 33 S3 60-120kW Cable Sections and fuse ratings recommended according to (IEC 60950-1). Alternatively, local standards to be respected! Table 4: SINGLE INPUT FEED (CABLE LINKS TO ACHIEVE SINGLE INPUT ARE OPTIONAL) Rated Fuse A Cable A...
- Page 63 Contact us www.abb.com/ups © Copyright ABB. All rights reserved. Specification ups.sales@ch.abb.com subjects to change without notice.