
Related Manuals for ABB Zenith ZTG 30


Summary of Contents for ABB Zenith ZTG 30
- Page 1 O P E R AT I O N , M A I N T E N A N C E , A N D I N S TA L L AT I O N G U I D E Zenith ZTG series For ZTG(D) series automatic transfer switches, 30-1200 A, 200-480 Vac...
- Page 3 HAZARD OF EQUIPMENT pany, and notify your local ABB sales OVERTURNING office. When moving with a fork lift, do not re-...
- Page 4 Z e n i t h Z T G S e r i e s AT S , O P E R AT I O N , M A I N T E N A N C E , A N D I N S TA L L AT I O N G U I D E —...
- Page 5 — Operation, maintenance, and installation instruction OPER ATION AND MAINTENANCE INSTRUCTIONS, ZENITH Automatic transfer ZTG SERIES ATS, CHAPTERS 1– 8 switches, Zenith ZTG series ATS INSTALL ATION INSTRUCTIONS, ZENITH ZTG SERIES ATS, CHAPTERS 9 –11...
- Page 6 Z e n i t h Z T G S e r i e s AT S , O P E R AT I O N , M A I N T E N A N C E , A N D I N S TA L L AT I O N G U I D E...
-
Page 7: Table Of Contents
— Operation and maintenance instruction Automatic transfer switches, Zenith ZTG series ATS Introduction 1.1 Hazard Categories 1.2 Definitions 1.3 Warranty 1.4 Product Specification Product overview 2.1 General overview 2.1.1 Operation types 2.2 HMI 2.3 Zenith ZTG series features 2.4 Typical applications 2.5 Sequence of operations 2.5.1 Switching sequence / Automatic 2.6 Special features description... - Page 8 Z e n i t h Z T G S e r i e s AT S , O P E R AT I O N , M A I N T E N A N C E , A N D I N S TA L L AT I O N G U I D E General operation 3.1 Position indication 3.2 Operating and locking...
- Page 9 5.5 Using Ekip Signalling 2K-_ -module 5.5.1 Electrical characteristics of Ekip Signalling 2K-_ -module 5.5.2 Access from the display / Ekip Signalling 2K-_ -module 5.5.3 LED indications and inputs/outputs of Ekip Signalling 2K-_ -module 5.6 Using Ekip Com _ -modules 5.6.1 Ekip Com Modbus RTU -module 5.6.2 Ekip Com Profibus DP -module 5.6.3 Ekip Com DeviceNet -module...
- Page 10 Z e n i t h Z T G S e r i e s AT S , O P E R AT I O N , M A I N T E N A N C E , A N D I N S TA L L AT I O N G U I D E...
-
Page 11: Introduction
1.1 Hazard Categories the Zenith ZTG series (30-1200A, 200- 480Vac) automatic transfer switches, The following important highlighted in- manufactured by ABB. Installation in- formation appears throughout this docu- structions for the transfer switch and ment to warn of potential hazards or to... -
Page 12: Definitions
Z e n i t h Z T G S e r i e s AT S , O P E R AT I O N , M A I N T E N A N C E , A N D I N S TA L L AT I O N G U I D E —... -
Page 13: Warranty
90 days when installed by a factory or an authorized service station. ABB Zenith assumes no obligation of notice to holders of this document with Contact Service team at: +1 800 637 1738 respect to changes subsequently made. -
Page 14: Product Specification
800 A Frequency 50/60 Hz Phase 3 Phase Transition type Open Country of Origin Finland Figure 1.1: Sample nameplate Product Rating / Applicable Standards For UL 1008 ‘withstand’ and ‘close on short circuit’ ratings, refer to ABB publication number TB-1102... -
Page 15: Product Overview
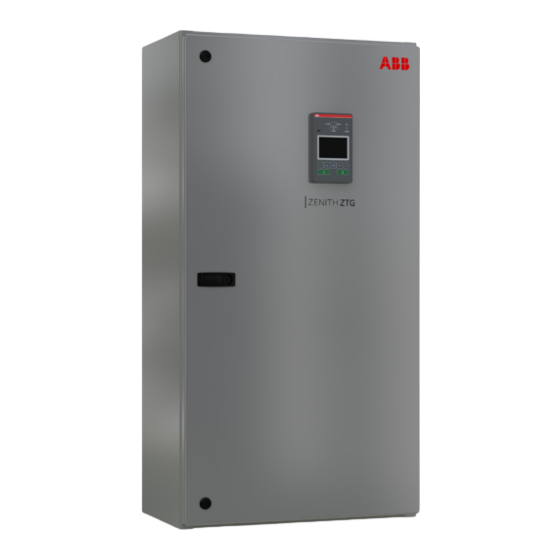
— 2. Product overview — Zenith ZTG series automatic transfer switches, from 30 A up to 1200 A, are designed for use in general purpose commercial and industrial low voltage automatic transfer switch applications. Zenith ZTG series automatic transfer switches can be operated electrically by LCD control interface (HMI) or manually by using the handle. -
Page 16: General Overview
Z e n i t h Z T G S e r i e s AT S , O P E R AT I O N , M A I N T E N A N C E , A N D I N S TA L L AT I O N G U I D E —... -
Page 17: Operation Types
2.1.1 Operation types In this table you can find the differences of the automatic transfer switch open and de- layed transition operation types. Due to the different transition types, there are differ- ences are on HMI and on wiring of I/O con- tacts. -
Page 18: Hmi
Z e n i t h Z T G S e r i e s AT S , O P E R AT I O N , M A I N T E N A N C E , A N D I N S TA L L AT I O N G U I D E —... -
Page 19: Zenith Ztg Series Features
— 2.3 Zenith ZTG series features Feature comparison ZTG(D) controls (LCD) LOAD AUTO LOAD AUTO Auto Auto Alarm reset Alarm reset Ampere sizes available UL: 30...1200 A Rated voltage 200...480 Vac Rated frequency 50 / 60 Hz Phase system Single and Three Number of poles 2, 3 and 4 Neutral configuration... - Page 20 Z e n i t h Z T G S e r i e s AT S , O P E R AT I O N , M A I N T E N A N C E , A N D I N S TA L L AT I O N G U I D E Feature comparison ZTG(D) controls (LCD) LOAD...
- Page 21 Connectivity Modbus RS485 Modbus/TCP Profibus DP ProfiNet DeviceNet Ethernet IP Monitoring via ABB Abilitytm: EDCS Enclosures Type 1, 3R, 4, 12, and 4X For applications Mains - Mains Mains - Generator — Table 2.2 ATS features not limited to what is in the table above...
-
Page 22: Typical Applications
Z e n i t h Z T G S e r i e s AT S , O P E R AT I O N , M A I N T E N A N C E , A N D I N S TA L L AT I O N G U I D E —... - Page 23 Phase A Phase A Neutral Phase A Neutral Phase B Phase A Neutral Single-phase, two-wire Single-phase, three-wire Neutral Phase B Phase A Phase A Phase B Phase A Neutral Phase A Phase B Phase B Phase C Phase C Neutral Phase B Three-phase, four-wire Three-phase, three-wire...
-
Page 24: Sequence Of Operations
Z e n i t h Z T G S e r i e s AT S , O P E R AT I O N , M A I N T E N A N C E , A N D I N S TA L L AT I O N G U I D E —... - Page 25 SOURCE 1 priority (SOURCE 2 = generator) Switch position I Switch position O Switch position II SOURCE 1 OK SOURCE 2 OK Generator started Pre-transfer signal Load shed signal Override momentary S1 outage delay Transfer from S1 to S2 delay Override momentary S2 outage delay Transfer from S2 to S1 delay Generator stop delay...
- Page 26 Z e n i t h Z T G S e r i e s AT S , O P E R AT I O N , M A I N T E N A N C E , A N D I N S TA L L AT I O N G U I D E 2.5.1.2 SOURCE 2 Priority (No generator) And the re-transfer sequence can be The switching sequence can be...
- Page 27 SOURCE 2 priority (no generator) Switch position I Switch position O Switch position II SOURCE 1 OK SOURCE 2 OK Pre-transfer signal Load shed signal Override momentary S1 outage delay Transfer from S1 to S2 delay Override momentary S2 outage delay Transfer from S2 to S1 delay Center-off delay, I - O - II Pre-transfer S1 to S2 delay...
- Page 28 Z e n i t h Z T G S e r i e s AT S , O P E R AT I O N , M A I N T E N A N C E , A N D I N S TA L L AT I O N G U I D E 2.5.1.3 No Source Priority (Generator When an anomaly occurs in the source in- and load shed usage disabled)
- Page 29 No source priority (generator and load shed usage disabled) Switch position I Switch position O Switch position II SOURCE 1 OK SOURCE 2 OK Pre-transfer signal Override momentary S1 outage delay Transfer from S1 to S2 delay Override momentary S2 outage delay Transfer from S2 to S1 delay Center-off delay, I - O - II Pre-transfer S1 to S2 delay...
-
Page 30: Special Features Description
Z e n i t h Z T G S e r i e s AT S , O P E R AT I O N , M A I N T E N A N C E , A N D I N S TA L L AT I O N G U I D E —... -
Page 31: General Operation
— 3. General operation — 3.1 Position indication Contact movement and position indica- tion is indicated in the figure below, on left side: Open transition I - II (or II - I) and on right side: Delayed transition I - O - II (or II - O - I) ZTGD: I - O - II ZTG I - II... -
Page 32: Operating And Locking
Z e n i t h Z T G S e r i e s AT S , O P E R AT I O N , M A I N T E N A N C E , A N D I N S TA L L AT I O N G U I D E —... -
Page 33: Manual Handle Operation
— 3.3 Manual handle operation Manual mode Warning Verify the condition of power source prior to manually transferring. Manual operation may result in out-of-phase transfer when both sources are energized. To mount the handle in the operat- ing position, turn the slide switch to the Manual mode (Hand), lift the handle from its place inside and place it to the operating position. - Page 34 Z e n i t h Z T G S e r i e s AT S , O P E R AT I O N , M A I N T E N A N C E , A N D I N S TA L L AT I O N G U I D E I-position ZTGD: I - O - II O-position...
-
Page 35: Return To Automatic Mode, Operating By Hmi
I-position II-position ZTG: I - II — Fig. 3.5 Manual mode, operating by handle, open transition I - II — 3.4 Return to Automatic mode, operating by HMI When operating the automatic transfer switch by HMI, turn the slide switch to Au- tomatic mode (AUTO). -
Page 36: Led Functionality In Hmi
Z e n i t h Z T G S e r i e s AT S , O P E R AT I O N , M A I N T E N A N C E , A N D I N S TA L L AT I O N G U I D E —... - Page 37 Bypass Lamp Auto load load time test Alarm reset test test delay I, II and 0 leds ON, fixed light Switch position is indicated with fixed Generator O Position light in I, O or II led. Only one can be on stop delay delay S1 Failure...
-
Page 38: Using Hmi
Z e n i t h Z T G S e r i e s AT S , O P E R AT I O N , M A I N T E N A N C E , A N D I N S TA L L AT I O N G U I D E —... -
Page 39: Navigating Hmi Menu
— 4. Navigating HMI menu — 4.1 Start Screens 11:06 11:06 System Overview Voltages (S1) S1 Ok Not Ok S2 - - - U12 - - - - - - U23 - - - S1 Connected to Load - - - U31 - - - - - - —... - Page 40 Z e n i t h Z T G S e r i e s AT S , O P E R AT I O N , M A I N T E N A N C E , A N D I N S TA L L AT I O N G U I D E Description of the icons Alarm List 11:06...
-
Page 41: Using Main Menu And Setting Parameters
— 4.2 Using main menu and setting parameters Main menu Notice When you have changed the parameter, al- ways go back in the menu by pressing Esc-key and when prompted confirm changes with Enter-key. — Fig. 4.4 By pressing Enter-key (3) you will move to the main menu page of Operation, Parameters, Measurements, Settings, Test and About, see the table below for the selections. -
Page 42: Menus And Parameters
Z e n i t h Z T G S e r i e s AT S , O P E R AT I O N , M A I N T E N A N C E , A N D I N S TA L L AT I O N G U I D E —... - Page 43 Parameters (continued) *Default Device Parameters In-phase Monitor Enable Off* Synchronization 0*...60 s Delay Time Delays Override S1 0...60 s (2* s) S1 priority: How long the device is waiting S1 Failure recovery before starting transfer sequence to S2. S2 priority: How long the device is keeping the load on failed S1 although S2 is already available.
- Page 44 Z e n i t h Z T G S e r i e s AT S , O P E R AT I O N , M A I N T E N A N C E , A N D I N S TA L L AT I O N G U I D E Parameters (continued) *Default Device Parameters (continued)
- Page 45 Parameters (continued) *Default Device Parameters (continued) Voltage & Frequency Setpoints Defines the voltage and frequency limits for source being acceptable. Source has an anomaly when measured voltage/frequency goes out of range drop-out lower/drop-out Upper. Source becomes acceptable when measured voltage/frequency goes back in range pick-up lower/pick-up higher.
- Page 46 Z e n i t h Z T G S e r i e s AT S , O P E R AT I O N , M A I N T E N A N C E , A N D I N S TA L L AT I O N G U I D E Parameters (continued) *Default Device Parameters (continued)
- Page 47 Measurements Switch Diagnostics Total operations I-O-II switches: Total number of transfers I-O, O-II, II-O and O-I. I-II switches: Total number of transfers I-II and II-I. Manual operations Total transfers operated by the handle. Number of load transfers Total number of transfers I-II and II-I. Transfer time Time it took to transfer the load between sources (ms).
- Page 48 Z e n i t h Z T G S e r i e s AT S , O P E R AT I O N , M A I N T E N A N C E , A N D I N S TA L L AT I O N G U I D E Settings *Default Standard I/O Settings...
- Page 49 Settings *Default Standard I/O Settings (continued) O 01 (continued) Function (continued) Pre-transfer Signal Signal is activated and transfer is delayed according to pre-transfer delay. Signal is kept activated according to post-transfer delay after transfer. Source 1 Available No anomalies in S1 voltage supply. Source 2 Available No anomalies in S2 voltage supply.
- Page 50 Z e n i t h Z T G S e r i e s AT S , O P E R AT I O N , M A I N T E N A N C E , A N D I N S TA L L AT I O N G U I D E Test *Default On-Load Test Settings...
- Page 51 4.3.1 Esc key Alarm List Invalid Date Ethernet disconnected — Fig. 4.7 By pressing Esc-key (1) in System Overview -pages, the alarm list is shown. Alarm list More information, see chapter 6, Troubleshooting...
- Page 52 Z e n i t h Z T G S e r i e s AT S , O P E R AT I O N , M A I N T E N A N C E , A N D I N S TA L L AT I O N G U I D E...
-
Page 53: Electronic Accessories
— 5. Electronic accessories Ekip-modules mounted with auxiliary power supply module are (see chapters Warning Hazardous voltage may be present within the 5.4 …5.8): panel when connecting electronic accesso- ries. Remove all sources of power to the ATS panel before connecting Ekip modules. •... -
Page 54: Using Ekip Connect -Software
— 5.1 Using Ekip Connect -software Ekip Connect is a free software for com- With its communication function, it allows munication and testing of ABB automatic you to: transfer switches. The software is com- patible with ZTG(D) 30-1200 A, 200-480 •... -
Page 55: Using Ekip Bluetooth-Module
— 5.2 Using Ekip Bluetooth-module The Ekip Bluetooth module allows con- The Ekip bluetooth module draws its nection via Bluetooth between the auto- power from a rechargeable lithium-poly- matic transfer switch and a support de- mer battery supplied with the unit. It is vice (PC, tablet, or smart phone) with the connected directly to the programming Ekip Connect software installed. -
Page 56: Using Ekip Programming -Module
Z e n i t h Z T G S e r i e s AT S , O P E R AT I O N , M A I N T E N A N C E , A N D I N S TA L L AT I O N G U I D E —... -
Page 57: Auxiliary Power Supply Module
— 5.4 Auxiliary power supply module The auxiliary power supply module, type main control unit, for example: Operation OXEA1, supplies non-insulated power to of Sensor module isn't possible. the external Ekip-modules, HMI and main control unit. It is supplied by external sup- Connections are push-in spring terminals, ply, for example from generator battery or no tool is required. -
Page 58: Using Ekip Signalling 2K
Z e n i t h Z T G S e r i e s AT S , O P E R AT I O N , M A I N T E N A N C E , A N D I N S TA L L AT I O N G U I D E —... - Page 59 Settings (*Default) Description Modules (Optional modules) Ekip Signalling 2K-1 / -2 / -3 I 11/12, I 21/22, I 31/32 Function No Function* Input disabled Emergency Stop Transfers to O position in delayed transition I-O-II type switches. Disables automatic control mode in both delayed and open transition types.
- Page 60 Z e n i t h Z T G S e r i e s AT S , O P E R AT I O N , M A I N T E N A N C E , A N D I N S TA L L AT I O N G U I D E Settings (*Default) (continued) Description Modules (Optional modules) (continued)
- Page 61 5.5.3 LED indications and inputs/ Green LED for signalling the physical outputs of Ekip Signalling 2K-_ -module state of the input H x12). The possible states are: – Off: floating input – On fixed: input short-circuited on H Cx Green LED for signalling the physical state of the input H x2 .
-
Page 62: Ekip Com Modbus Rtu -Module
Z e n i t h Z T G S e r i e s AT S , O P E R AT I O N , M A I N T E N A N C E , A N D I N S TA L L AT I O N G U I D E —... - Page 63 5.6.1.1 LED indications 5.6.1.2 Termination resistor The following table illustrates the possi- On the Ekip Com Modbus RTU module it is ble signals, and their meaning: possible to activate the terminating resis- tance Rterm = 120 Ω. To enable the Rterm, the corresponding dip-switches 1 and 2 Indication Description...
- Page 64 Z e n i t h Z T G S e r i e s AT S , O P E R AT I O N , M A I N T E N A N C E , A N D I N S TA L L AT I O N G U I D E 5.6.1.3 Access from the display / Ekip Com Modbus RTU –module With modules connected and energized...
-
Page 65: Ekip Com Profibus Dp -Module
5.6.2 Ekip Com Profibus DP -module It can be connected to a network RS-485 The Ekip Com Profibus DB is a communi- of Profibus communication protocol, cation accessory module, that integrates and allows: the automatic transfer switch in an indus- trial remote supervision and control net- •... - Page 66 Z e n i t h Z T G S e r i e s AT S , O P E R AT I O N , M A I N T E N A N C E , A N D I N S TA L L AT I O N G U I D E 5.6.2.1 LED indications The following table illustrates the possi- ble signals, and their meaning:...
- Page 67 5.6.2.3 Access from the display / Ekip Com Profibus DB -module With modules connected and energized, the presence of the modules on the mod- ule slot activates additional menus on the display. The following table illustrates the path for accessing the configuration parameters of the modules from the display: Settings (*Default value) Description...
-
Page 68: Ekip Com Devicenet -Module
Z e n i t h Z T G S e r i e s AT S , O P E R AT I O N , M A I N T E N A N C E , A N D I N S TA L L AT I O N G U I D E 5.6.3 Ekip Com DeviceNet -module It can be connected to a CAN network The Ekip Com DeviceNet –module is a... - Page 69 5.6.3.1 LED indications The following table illustrates the possi- ble signals, and their meaning: Indication Description Power LED, green Power supply absent. On fixed Power supply and communication with the device present. On, with two quick flashes per second Power supply present, and communication with device absent.
- Page 70 Z e n i t h Z T G S e r i e s AT S , O P E R AT I O N , M A I N T E N A N C E , A N D I N S TA L L AT I O N G U I D E 5.6.3.2 Termination resistor The modules provide the possibility to Notice...
- Page 71 5.6.3.3 Access from the display / Ekip Com DeviceNet –module With modules connected and energized, the presence of the modules on the mod- ule slot activates additional menus on the display. The following table illustrates the path for accessing the configuration parameters of the modules from the display: Settings (*Default value) Description...
-
Page 72: Ekip Com Modbus Tcp -Module
Z e n i t h Z T G S e r i e s AT S , O P E R AT I O N , M A I N T E N A N C E , A N D I N S TA L L AT I O N G U I D E 5.6.4 Ekip Com Modbus TCP -module As an HTTP Server, connected to an Ether- Ekip Com Modbus TCP is an accessory... - Page 73 The following table illustrates the ports used by the module: Port Service Notes 502/tcp Modbus TCP When the module is used as a Modbus TCP/IP communication module. 80/tcp Server HTTP When the module is used as a Server HTTP. 319/udp IEEE 1588 When IEEE protocol 1588 is enabled 320/udp...
- Page 74 Z e n i t h Z T G S e r i e s AT S , O P E R AT I O N , M A I N T E N A N C E , A N D I N S TA L L AT I O N G U I D E 5.6.4.2 Access from the display / Ekip Com Modbus TCP –module With modules connected and energized,...
- Page 75 There are three IP Addresses of the client devices connected to the modules. MAC Address It is the address assigned by ABB, having a OUI equal to ac:d3:64 Organizationally Unique Identifier, formed from the first three bytes of a MAC address, and which uniquely identifies the manufacturer of an Ethernet device.
-
Page 76: Ekip Com Profinet -Module
Z e n i t h Z T G S e r i e s AT S , O P E R AT I O N , M A I N T E N A N C E , A N D I N S TA L L AT I O N G U I D E 5.6.5 Ekip Com Profinet -module The Ekip Com Profinet is a communica- Notice... - Page 77 The following table illustrates the ports used by the module: Ethertype Port Service Notes 0x88CC LLDP Link Layer Discovery Protocol 0x8892 (Profinet) Profinet IO Specific for real time communications (RT) 0x0800 34964/udp Profinet-cm DCE/RP (Context Manager) — Table 5.19 Ports of Ekip Com Profinet –module 5.6.5.1 LED indications The following table illustrates the possi- ble signals, and their meaning:...
- Page 78 Version Software version MAC Address It is the address assigned by ABB and with an OUI (Organizationally Unique Identifier, formed of the first three bytes of a MAC address, and which uniquely identifies the manufacturer of an Ethernet device) equal to ac:d3:64.
-
Page 79: Ekip Com Ethernet/Ip -Module
5.6.6 Ekip Com EtherNet/IP -module The Ekip Com EtherNet/IP is an accessory Notice Since this module allows the access to the module that can act as a communication data contained in the automatic transfer module integrating the automatic trans- switch, it can only be connected to networks possessing all the necessary requirements for fer switch in an industrial remote supervi- security and prevention of unauthorized ac-... - Page 80 Z e n i t h Z T G S e r i e s AT S , O P E R AT I O N , M A I N T E N A N C E , A N D I N S TA L L AT I O N G U I D E 5.6.6.1 LED indications The following table illustrates the possible signals, and their meaning:...
- Page 81 5.6.6.2 Access from the display / Ekip Com EtherNet/IP With modules connected and energized, the presence of the modules on the mod- ule slot activates additional menus on the display: • To set the addressing of the modules. • In order to display information on the modules.
- Page 82 There are three IP Addresses of the client devices connected to the modules. MAC Address It is the address assigned by ABB, having a OUI equal to ac:d3:64 Organizationally Unique Identifier, formed from the first three bytes of a MAC address, and which uniquely identifies the manufacturer of an Ethernet device.
-
Page 83: Troubleshooting
— 6. Troubleshooting Warning Any troubleshooting should be conducted by trained and authorized personnel only. Appropriate personal protectiveequipment (PPE) shall be used when troubleshooting the ATS panel. Hazardous voltage may be present. Discon- nect all power sources before performing work inside the ATS panel. Failure to do so may result in serious injury or death. - Page 84 Z e n i t h Z T G s e r i e s AT S , O P E R AT I O N , M A I N T E N A N C E , A N D I N S TA L L AT I O N G U I D E Message Fault Action...
-
Page 85: Warnings
— 6.2 Warnings Touch Message Reason S1 and S2 not in sync Voltage sources are not synchronized Voltage Not Calibrated Calibration data in power module is invalid or unavailable Current Not Calibrated Calibration data in current measurement module is invalid or unavailable Pole temperature warning Measured pole temperature is near the alarm level Control Retry... -
Page 86: Information
Z e n i t h Z T G s e r i e s AT S , O P E R AT I O N , M A I N T E N A N C E , A N D I N S TA L L AT I O N G U I D E —... -
Page 87: Technical Data
— 7. Technical data — 7.1 General technical data U/SOURCE 2 Operating voltage for U/SOURCE 2 Operating voltage for control circuit 200...480 Vac. control circuit 200...480 Vac. Generator supply; min. Generator supply; min. power rating 20 kVA power rating 20 kVA U/SOURCE 1 U/SOURCE 1 —... - Page 88 Z e n i t h Z T G S e r i e s AT S , O P E R AT I O N , M A I N T E N A N C E , A N D I N S TA L L AT I O N G U I D E Cabling / Automatic transfer switch, I/O contacts Terminal...
- Page 89 Recommended Operating / Storage Temperature Do not store the automatic transfer switch in corrosive environments above LC1 (sea salt mist) and G1 as per ANSI/ ISA-S71.04 -1985. Failure to comply with these instruc- tions may result in product damage. Store the automatic transfer switch and related accessories in a clean, dry location in their original packaging.
-
Page 90: Circuit Diagrams
Z e n i t h Z T G S e r i e s AT S , O P E R AT I O N , M A I N T E N A N C E , A N D I N S TA L L AT I O N G U I D E —... - Page 91 — Fig. 7.3 ZTGD, delayed transition circuit diagram...
-
Page 92: Overall Dimensions
Z e n i t h Z T G S e r i e s AT S , O P E R AT I O N , M A I N T E N A N C E , A N D I N S TA L L AT I O N G U I D E —... - Page 93 Figure A Figure B...
- Page 94 Z e n i t h Z T G S e r i e s AT S , O P E R AT I O N , M A I N T E N A N C E , A N D I N S TA L L AT I O N G U I D E Figure C...
-
Page 95: Maintenance
Hazardous voltage may be present. Discon- Routine Inspection nect all power sources before performing work inside the ATS panel. ABB recommends a routine (such as Failure to do so may result in serious injury annual) inspection to, e.g. , check or death. - Page 96 Z e n i t h Z T G S e r i e s AT S , O P E R AT I O N , M A I N T E N A N C E , A N D I N S TA L L AT I O N G U I D E...
- Page 97 — Installation instruction Automatic transfer switches Panel installation 9.1 Basic Tools for Installation and Maintenance 9.2 Equipment Inspection and Storage 9.3 Lifting and mounting the panel 9.4 Mounting the automatic transfer switch 9.4.1 Mounting hole dimensions 9.5 Mounting of the handle 9.5.1 Mounting of the handle to operation position, manual mode 9.5.2 Mounting of the HMI,...
- Page 98 Z e n i t h Z T G S e r i e s AT S , O P E R AT I O N , M A I N T E N A N C E , A N D I N S TA L L AT I O N G U I D E 10.
-
Page 99: Panel Installation
Check to be sure that all covers and barriers are properly installed and fastened. If any damage is found or suspected, file a claim as soon as possible with the carrier, and notify the nearest ABB Zenith representative, or call 1-800-637-1738. -
Page 100: Basic Tools For Installation And Maintenance
This in- cludes damage to the enclosure, power panel, control panel and wiring harness. If any damage is found or suspected, file a claim as soon as possible with the carrier and notify the nearest ABB Zenith representative. -
Page 101: Lifting And Mounting The Panel
Lifting, Mounting and Installation Warning Due to hazardous voltages and currents, ABB The safe operation of your switch at all recommends that an ABB Certified technician times is paramount to ABB. Please recog- or a qualified electrician perform the installa- tion &... -
Page 102: Mounting The Automatic Transfer Switch
Z e n i t h Z T G S e r i e s AT S , O P E R AT I O N , M A I N T E N A N C E , A N D I N S TA L L AT I O N G U I D E —... -
Page 103: Mounting Of The Handle
— 9.5 Mounting of the handle 9.5.1 Mounting of the handle to For more information of operating, operation position, manual mode position indication and the selection of the operating mode, see the Chapter 3.2 Operating and locking. Manual mode More information, see animation: Manual and automatic operation - TruONE®... -
Page 104: Mounting Of The Hmi, Automatic Mode
Z e n i t h Z T G S e r i e s AT S , O P E R AT I O N , M A I N T E N A N C E , A N D I N S TA L L AT I O N G U I D E 9.5.2 Mounting of the HMI, automatic mode Automatic... -
Page 105: Hmi Installation
9.5.3 HMI Installation Max. 3 m, HMI (RJ45) cable Ø 25.5 / 1 — Fig. 9.4 HMI can be mounted on the switch or the door, door drilling. HMI protective cover available as accessory, type OXEC21, provides protection against accidental contact, see Chapter 9, Mounting of accessories... -
Page 106: Wire Connection
9.7 Final Equipment Quick start guide document number 1SCC303023K0201. Inspection Each ABB Zenith transfer switch is factory Prior to energizing the transfer switch: wired and tested. A complete information 1. Remove any debris incurred, with a vac- package is furnished with each switch uum, due to shipment or installation. -
Page 107: Initial Energizing
— Energizing the panel 9.8 Initial Energizing 1. Close Source 1 circuit breaker. NOTE: The HMI should illuminate if line Before proceeding, refer to the informa- voltage is present and S1 LED should tion package supplied with the ATS and light up. - Page 108 Z e n i t h Z T G S e r i e s AT S , O P E R AT I O N , M A I N T E N A N C E , A N D I N S TA L L AT I O N G U I D E...
-
Page 109: Accessories
— 10. Accessories More information, see animation: Installation of accessories - TruONE® ATS Warning Any troubleshooting should be conducted by (https://youtu.be/qV2KoIv38GY). trained and authorized personnel only. Appropriate personal protectiveequipment (PPE) shall be used when troubleshooting the ATS panel. Hazardous voltage may be present. Discon- nect all power sources before performing work inside the ATS panel. -
Page 110: Auxiliary Contact Blocks
Z e n i t h Z T G S e r i e s AT S , O P E R AT I O N , M A I N T E N A N C E , A N D I N S TA L L AT I O N G U I D E —... -
Page 111: Auxiliary Power Supply And Ekip -Modules
— 10.3 Auxiliary power supply and Ekip -modules ZTG(D) 30-1200 A, 200-480 Vac The maximum number of Ekip-modules Automatic transfer switches can be varies by panel ampacity : equipped with Ekip-modules. Ekip- • 30-200A: 3 Ekip modules modules are mounted with a auxiliary •... - Page 112 Z e n i t h Z T G S e r i e s AT S , O P E R AT I O N , M A I N T E N A N C E , A N D I N S TA L L AT I O N G U I D E OXEA1 Ekip —...
-
Page 113: Hmi Protective Cover
— 10.4 HMI protective cover UL Type 3R HMI protective cover, type — OXEC21, provides protection against Fig. 10.6 Mounting of HMI protective cover, type OXEC21 water ingress. It comes standard with NEMA 3R enclosures, and is available as a replacement part. Torx TX, 6 pcs 0.8 Nm / 7.1 lb.in OXEC21... - Page 114 Z e n i t h Z T G S e r i e s AT S , O P E R AT I O N , M A I N T E N A N C E , A N D I N S TA L L AT I O N G U I D E...
-
Page 115: Replacement Parts
— 11. Replacement Parts ZTG series replacement parts Type Suitable for Switches Order code Weight (lb) Open transition (ZTG 30-1200 A, OXAHMI-L3 0.42 200-480 Vac) HMI module Delayed transition (ZTGD 30-1200 A, OXBHMI-L3 0.42 200-480 Vac) Open transition and delayed transition Manual handle OXHANDLE-1600 0.18... - Page 116 — Contact us ABB Zenith Controls, Inc. 305 Gregson Drive Cary, NC 27511 24-hour support: ABB Technical Services +1 (800) 637-1738 epis.pqservice@abb.com new.abb.com/low-voltage © Copyright 2019 ABB. All rights reserved. Specifications subject to change without notice.