
Related Manuals for Beko BEP 09C


Summary of Contents for Beko BEP 09C
- Page 1 Mobile type air conditioners (local air conditioners) User Manual BEP 09C BEP 09H BEP 12C BEP 12H...
- Page 2 Please read this user manual first! Dear Customer, Thank you for preferring a Beko product. We hope that you get the best results from your product which has been manufactured with high quality and state-of-the-art technology. Therefore, please read this entire user manual and all other accompanying documents carefully before using the product and keep it as a reference for future use.
-
Page 3: Table Of Contents
CONTENTS 1 Safety instructions 2 Sociable remark 3 Safety precautions 3.1 Safety rules ..................7 3.2 Operating condition. -
Page 4: Safety Instructions
Safety instructions Read this manual Inside you will find many helpful hints on how to use and maintain your air conditioner properly. Just a little preventive care on your part can save you a great deal of time and money over the life of your air conditioner. - Page 5 Safety instructions manufacturer, its service agent or similarly qualified persons in order to avoid a hazard. • The appliance shall be installed in accordance with national wiring regulations. • Do not operate your air conditioner in a wet room such as a bathroom or laundry room.
-
Page 6: Sociable Remark
Sociable remark When using this air conditioner in the European countries, the following information must be followed: DISPOSAL: Do not dispose this product as unsorted municipal waste. Collection of such waste separately for special treatment is necessary. It is prohibited to dispose of this appliance in domestic household waste. For disposal, there are several possibilities: A) The municipality has established collection systems, where electronic waste can be disposed of at least free of charge to the user. -
Page 7: Safety Precautions
Safety precautions 3.1 Safety rules To prevent injury to the user or other people and property damage, the following instructions must be followed. Incorrect operation due to ignoring of instructions may cause harm or damage. Always do this • Y our air conditioner should be used in such a way that it is protected from moisture. -
Page 8: Operating Condition
Safety precautions Never do this • D o not operate your air conditioner in a wet room such as a bathroom or laundry room. • D o not touch the unit with wet or damp hands or when barefoot. • D o not press the buttons on the control panel with anything other than your fingers. -
Page 9: Electrical Information
Safety precautions Suggested tools for window kit installation 1. Screwdriver (medium size Phillips) 2. Tape measure or ruler 3. Knife or scissors 4. Saw (In the event that the window kit needs to be cut down in size because the window is too narrow for direct installation) For your safety • D o not store or use gasoline or other flammable vapors and liquids in the vicinity of... -
Page 10: Identification Of Parts
Identification of parts 4.1 Accessories Parts: Parts name: Quantıty: Exhaust hose and Apaptor and Adaptor B (flat mouth or round 1 set mouth: depending on models) Window Slider Kit and bolt 1 pc Wall Exhaust Adaptor A ( ? ) 1 pc Adaptor B (round mouth) ( ? ) Expansion Plug and wooden... -
Page 11: Names Of Parts
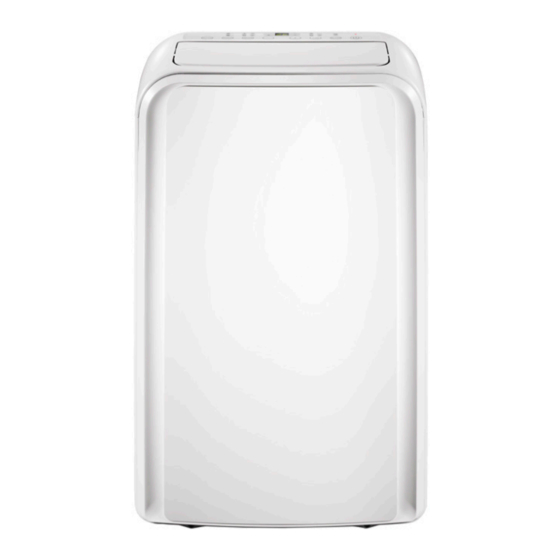
Identification of parts 4.2 Names of parts Front 1. Operation panel 2. Horizontal louver blade (swing automatically) 3. Caster 4. Carrying handle (both sides) Fig. 1 Rear 5. Upper air filter (Behind the grille) 6. Upper air intake 7. Air outlet 8. -
Page 12: Air Conditioner Features
Air conditioner features Electronic control operating instructions Before you begin, thoroughly familiarize yourself with the control panel and remote controller and all its functions, then follow the symbol for the functions you desire. The unit can be controlled by the unit control panel alone or with the remote controller. Note: This manual does not include Remote Controller Operations, see the <Remote Controller Instruction>... - Page 13 Air conditioner features Note: The control is capable of displaying temperature in degrees Fahrenheit or degrees Celsius. To convert from one to the other, press and hold the Up and Down buttons at the same time, for 3 seconds. 5. MODE select button Selects the appropriate operating mode.
-
Page 14: Operating Instructions
Operating instructions COOL operation - Press the "MODE" button until the "COOL" indicator light comes on. - Press the ADJUST buttons "+" or " - " to select your desired room temperature. The temperature can be set within a range of 17°C-30°C/62°F-88°F (or 86°F). - Press the "FAN SPEED"... - Page 15 Operating instructions TIMER operation - When the unit is on, press the Timer button will initiate the Auto-off stop program, the TIMER OFF indicator light illuminates. Press the UP or down button to select the desired time. Press the TIMER button again within 5 seconds, the Auto-on start program is initiated.
- Page 16 Operating instructions Air flow direction adjustment The louver can be adjusted automatically. Note: On some models the louver can be adjusted manually only. • Adjust the air flow direction automatically (Fig. 4): - When the Power is ON, the louver opens fully. Press the SWING button on the panel or remote controller to initiate the Auto swing feature.
-
Page 17: Installation Instructions (Optional)
Installation instructions (optional) 7.1 Location • The air conditioner should be placed on a firm foundation to minimize noise and virbration. For safe and secure positioning, place the unit on a smooth, level floor strong enough to support the unit. • The unit has casters to aid placement, but it should only be Fig. -
Page 18: Installation In A Double-Hung Sash Window
Installation instructions (optional) 7.2.1 Installation in a double-hung Foam seal A sash window (adhesive type) 1. Cut the foam seal (adhesive type) to the proper length and attach it to the window stool. Fig. 8 2. Attach the window slider kit to the window stool. Adjust Fig. -
Page 19: Installation In A Sliding Sash Window
Installation instructions (optional) 7.2.2 Installation in a sliding sash Foam seal A window (adhesive type) 1. Cut the foam seal (adhesive type) to the proper length and attach it to the window frame. See Fig. 12. 2. Attach the window slider kit to the window stool. Adjust Fig. -
Page 20: Installation Instructions
Installation instructions 8.1 Exhaust hose installation The exhaust hose and adaptor must be installed or removed in Fig. 16a Fig. 16b accordance with the usage mode. COOL, HEAT (heat pump type) or AUTO Install mode Hole seat FAN, DEHUMIDIIFY or HEAT (electrical Remove Hook heat type) mode... -
Page 21: Water Drainage
Installation instructions 8.2 Water drainage Continuous - During dehumidifying modes, remove the drain hose upper drain plug from the back of the unit, install the drain connector (5/8 universal female mender) with 3/4 hose (locally √ purchased). For the models without drain Remove the upper connector, just attach the drain hose Fig. - Page 22 Installation instructions - When the water level of the bottom tray reaches a predetermined level, the unit beeps 8 times, the digital display area shows "P1". At this time the air conditioning/dehumidification process will immediately stop. However, the fan motor will continue to operate (this is normal). Carefully move the unit to a drain location, remove the bottom drain plug and let the water drain away (Fig.
-
Page 23: Care And Maintenance
Care and maintenance Important: 1) Be sure to unplug the unit before cleaning or servicing. Upper filter 2) Do not use gasoline, thinner or other chemicals to (take out) clean the unit. 3) Do not wash the unit directly under a tap or using a Remove the screw, then take the lower hose. - Page 24 Care and maintenance 2. Unit enclosure - Use a lint-free cloth soaked with neutral detergent to clean the unit enclosure. Finished by a dry clean cloth. 3. Unit idle for a long time - Remove the rubber plug at the back of the unit and attach a hose to drain outlet.
-
Page 25: Troubleshooting Tips
Troubleshooting tips Troubles Possible causes Suggest remedies 1. Unit does not start when - P1 appears in the display Drain the water in the bottom pressing on/off button window tray. - Room temperature is lower Reset the temperature. than the set temperature. (Cooling mode) 2. -
Page 26: Installation Instructions
Installation instructions 11.1 F-Gas instruction This product contains fluorinated greenhouse gases covered by the Kyoto protocol. The fluorinated greehouse gases are contained in hermetically sealed equipment. Installs, services, maintains, repairs, checks for leaks or decommissions equipment and product recycling should be carried out by natural persons that hold relevant certificates. If the system has a leakage detection system installed, leakage checks should be performed at least every 12 months, make sure system operate properly. - Page 28 www.beko.com...
- Page 29 Aparate de aer condiționat de tip mobil (aparate de aer condiționat locale) Manual de utilizare BEP 09C BEP 09H BEP 12C BEP 12H...
- Page 30 Vă rugăm să citiți mai întâi acest manual de utilizare! Stimate client, Vă mulțumim pentru că ați preferat un produs Beko. Sperăm că veți obține cele mai bune rezultate cu acest produs, care a fost fabricat cu o înaltă calitate și folosind tehnologia cea mai modernă.
- Page 31 CUPRINS 1 Instrucțiuni referitoare la siguranță 2 Remarcă neoficială 3 Măsuri de protecție 3.1 Reguli privind siguranţa................7 3.2 Condiţii de funcţionare.
-
Page 32: Instrucțiuni Referitoare La Siguranță
Instrucțiuni referitoare la siguranță Citiți acest manual Manualul conţine multe sfaturi utile cu privire la utilizarea şi întreţinerea aparatului de aer condiţionat în mod adecvat. Puţină grijă şi întreţinere preventivă din partea dumneavoastră pot economisi timp şi bani pe durata de viaţă a aparatului de aer condiţionat. - Page 33 Instrucțiuni referitoare la siguranță • Copiii trebuie supravegheaţi pentru a vă asigura că nu se joacă cu aparatul. • În cazul în care cablul de alimentare este deteriorat, trebuie înlocuit de producător, de agentul de service al acestuia sau de persoane cu o calificare similară...
-
Page 34: Remarcă Neoficială
Remarcă neoficială Atunci când acest aparat de aer condiționat este utilizat în țările europene, următoarele informații trebuie respectate: ELIMINARE: Nu aruncaţi acest produs cu deşeurile menajere nesortate. Este necesară colectarea separată a acestor deşeuri pentru a fi supuse unui tratament special. -
Page 35: Măsuri De Protecție
Măsuri de protecție 3.1 Reguli privind siguranţa Pentru a preveni rănirea utilizatorului sau a altor persoane şi deteriorarea bunurilor, trebuie respectate următoarele instrucţiuni: Utilizarea incorectă cauzată de ignorarea instrucţiunilor poate cauza accidentări sau deteriorări. Faceți întotdeauna acest lucru • A paratul de aer condiţionat trebuie folosit astfel încât să fie protejat de umezeală, de exemplu, condens, stropi de apă... -
Page 36: Condiţii De Funcţionare
Măsuri de protecție Nu faceți niciodată acest lucru • N u utilizați aparatul de aer condiționat într-o cameră umedă, cum ar fi o baie sau spălătorie. • N u atingeţi unitatea dacă aveţi mâinile ude sau umede sau dacă sunteţi în picioarele goale. -
Page 37: Informaţii Electrice
Măsuri de protecție Instrumente recomandate pentru instalarea kitului pentru ferestre 1. Şurubelniţă (medie Phillips) 2. Metru sau riglă 3. Cuţit sau foarfece 4. Fierăstrău (în cazul în care kitul pentru ferestre trebuie micşorat, deoarece fereastra este prea îngustă pentru instalarea directă) Pentru siguranţa dumneavoastră... -
Page 38: Identificarea Pieselor
Identificarea pieselor 4.1 Accesoriile Piese: Numele pieselor: Cantitate: Furtun de evacuare, adaptor şi adaptor B (capăt plat sau rotund: în funcţie de model) 1 set Kit pentru ferestre culisante şi şurub Adaptor de perete A pentru 1 buc evacuare ( ? ) 1 buc Adaptor B (capăt rotund) ( ? ) Buşon expandabil şi şurub... -
Page 39: Numele Pieselor
Identificarea pieselor 4.2 Numele pieselor Față 1. Panou de comandă 2. Lama fantei orizontale (pendulare automată) 3. Rotițe 4. Mâner pentru transport (ambele părţi) Fig. 1 Spate 5. Filtru de aer superior (în spatele grilajului) 6. Admisie superioară de aer 7. -
Page 40: Funcţiile Aparatului De Aer Condiţionat
Funcţiile aparatului de aer condiţionat Instrucţiuni privind comenzile electronice Înainte de a începe, familiarizaţi-vă bine cu panoul de comandă, cu telecomanda şi cu toate funcţiile acesteia, apoi urmăriţi simbolul funcţiilor pe care le doriţi. Unitatea poate fi controlată doar de panoul de comandă sau cu ajutorul telecomenzii. Notă: Acest manual nu include şi instrucțiuni de utilizare a telecomenzii, pentru detalii, consultaţi <Instrucţiunile telecomenzii>, furnizate împreună... - Page 41 Funcţiile aparatului de aer condiţionat Notă: Temperatura poate fi afişată în grade Fahrenheit sau Celsius. Pentru a trece de la un afişaj la altul, ţineţi apăsate butoanele Sus şi Jos concomitent timp de 3 secunde. 5. Butonul de selectare MODE (Mod) Selectează...
-
Page 42: Instrucţiuni De Utilizare
Instrucţiuni de utilizare Utilizarea în modul COOL (Răcire) - Apăsaţi butonul "MODE" (Mod) până când se aprinde lumina indicatoare "COOL" (Răcire). - Apăsaţi butoanele ADJUST (Reglare) "+" sau " - " pentru a selecta temperatura dorită pentru cameră. Temperatura poate fi reglată în intervalul 17°C - 30°C/62°F - 88°F (sau 86°F). - Apăsaţi butonul "FAN SPEED"... - Page 43 Instrucţiuni de utilizare Modul de funcționare Timer (Temporizator) - Când unitatea este pornită, apăsaţi butonul Timer (Temporizator) pentru a activa programul de oprire automată. Lumina indicatoare TIMER OFF (Temporizator dezactivat) se aprinde. Apăsaţi butonul UP (Sus) sau DOWN (Jos) pentru a alege ora dorită. Apăsaţi din nou butonul TIMER (Temporizator) timp de 5 secunde, programul de pornire automată...
- Page 44 Instrucţiuni de utilizare Reglarea direcţiei fluxului de aer Fanta poate fi reglată automat. Notă: La unele modele, fanta poate fi reglată numai manual. • Reglarea automată a direcţiei fluxului de aer (Fig. 4): - Când este pornită unitatea, fanta se deschide în întregime. Apăsaţi butonul SWING (Pendulare) de pe panou sau de pe telecomandă...
-
Page 45: Instrucțiuni De Instalare (Opțional)
Instrucțiuni de instalare (opțional) 7.1 Amplasare • Aparatul de aer condiţionat trebuie amplasat pe o suprafaţă rezistentă pentru a reduce la minim zgomotul şi vibraţiile. Pentru o poziţionare în siguranţă, amplasaţi unitatea pe o suprafaţă netedă, uniformă și suficient de rezistentă pentru a susține unitatea. -
Page 46: Instalarea În Cazul Ferestrelor Glisante Cu Două Canate
Instrucțiuni de instalare (opțional) 7.2.1 Instalarea în cazul ferestrelor Garnitură de glisante cu două canate spumă A 1. Tăiaţi garnitura de spumă (de tip adeziv) la lungimea (de tip adeziv) corespunzătoare şi lipiţi-o pe pervazul ferestrei. Fig. 8 2. Fixaţi kitul pentru ferestre culisante pe pervazul Fig. -
Page 47: Instalarea În Cazul Ferestrelor Cu Canat Culisant
Instrucțiuni de instalare (opțional) 7.2.2 Instalarea în cazul ferestrelor cu Garnitură de canat culisant spumă A 1. Tăiaţi garnitura de spumă (de tip adeziv) la lungimea (de tip adeziv) corespunzătoare şi lipiţi-o pe tocul ferestrei. Vedeți Fig. 12. Fig. 12 2. -
Page 48: Instrucțiuni De Instalare
Instrucțiuni de instalare 8.1 Instalarea furtunului de evacuare Furtunul de evacuare şi adaptorul trebuie instalate sau Fig. 16a Fig. 16b îndepărtate în funcţie de modul de utilizare. Mod COOL (Răcire), HEAT (Încălzire) (model cu Instalați pompă de încălzire) sau AUTO Orificiu Mod FAN (Ventilare), DRY (Dezumidificare) sau Eliminați... -
Page 49: Evacuarea Apei
Instrucțiuni de instalare 8.2 Evacuarea apei Furtun de evacuare - În modurile de dezumidificare, scoateţi continuă buşonul superior de evacuare din spatele unităţii, instalaţi conectorul de evacuare (mufă mamă universală de 5/8") şi furtunul √ de 3/4" (achiziționat local). Pentru modelele Scoateţi buşonul fără... - Page 50 Instrucțiuni de instalare - Când nivelul de apă din tăviţa inferioară ajunge la un nivel prestabilit, unitatea emite 8 semnale sonore, iar pe afişajul digital apare "P1". În acest moment, funcţionarea aparatului de aer condiţionat/ procesul de dezumidificare se oprește imediat. Totuși, motorul ventilatorului continuă să funcţioneze (acest lucru este normal).
-
Page 51: Îngrijire Și Întreținere
Îngrijire și întreținere Important: 1) Asiguraţi-vă că scoateţi unitatea din priză înainte de Filtru superior operaţiunile de curăţare sau reparaţii. (scoateţi) 2) Nu folosiţi benzină, solvenţi sau alte substanţe chimice pentru curăţarea unităţii. Desfaceţi şurubul, 3) Nu spălaţi unitatea direct sub jetul de apă de la apoi scoateţi filtrul inferior. - Page 52 Îngrijire și întreținere 2. Carcasa unităţii - Pentru a curăţa carcasa unităţii, folosiţi o lavetă care nu lasă scame, înmuiată într-un detergent neutru. Finisaţi cu o cârpă curată şi uscată. 3. Unitate nefolosită o perioadă lungă de timp - Scoateţi buşonul de cauciuc din spatele unităţii şi introduceţi furtunul în orificiul de evacuare.
-
Page 53: Sfaturi De Depanare
Sfaturi de depanare Probleme Cauze posibile Soluţii recomandate 1. Unitatea nu porneşte - P1 apare pe ecranul de afişare. Goliţi apa din tăviţa inferioară. când apăsaţi butonul ON/ - Temperatura camerei este Resetaţi temperatura. OFF (Pornire/Oprire) mai mică decât temperatura selectată. -
Page 54: Instrucțiuni De Instalare
Instrucțiuni de instalare 11.1 Instrucțiune privind gazul fluorurat Acest produs conține gaze cu efect de seră fluorurate prevăzute de Protocolul de la Kyoto. Gazele cu efect de seră fluorurate se află în echipamente închise ermetic. Instalările, servisările, întreținerile, reparațiile, verificările pentru scurgeri sau scoaterile din funcțiune ale echipamentelor și reciclarea produsului trebuie efectuate de persoanele fizice, care dețin autorizații corespunzătoare. - Page 56 www.beko.com...