
Related Manuals for ABB Levelmeter 2000


Summary of Contents for ABB Levelmeter 2000
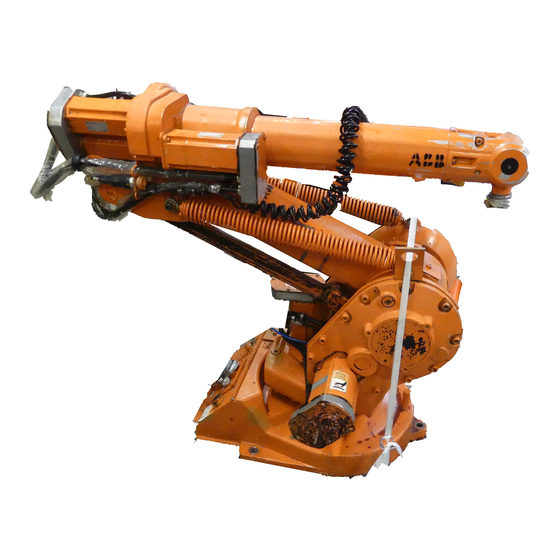
- Page 1 Instructions for Levelmeter calibration (alternative method) Calibration equipment Levelmeter 2000 IRB 140 / IRB 1400 / IRB 2400 / IRB 4400 IRB 6600 / IRB 6650 / IRB 6650S / IRB 7600 / IRB 6400R...
- Page 3 Instructions for Levelmeter calibration (alternative method) Levelmeter 2000 IRB 140 IRB 1400 IRB 2400 IRB 4400 IRB 6600 IRB 6650 IRB 6650S IRB 7600 IRB 6400R Document ID: 3HAC 022907-001 Revision: -...
- Page 4 Except as may be expressly stated anywhere in this manual, nothing herein shall be construed as any kind of guarantee or warranty by ABB for losses, damages to persons or property, fitness for a specific purpose or the like.
-
Page 5: Table Of Contents
3.16 Resetting of Levelmeter 2000 and sensor ........ - Page 6 Table of Contents 3HAC 022907-001 Revision: -...
-
Page 7: Overview
Overview Overview About this manual This manual contains instructions for calibrating a robot, using the alternative method with Levelmeter calibration equipment. Usage This manual should be used during calibration with the Levelmeter (alternative method). Who should read this manual? This manual is intended for: •... - Page 8 Overview 3HAC 022907-001 Revision: -...
-
Page 9: Overview
1 Overview 1.1. Introduction General This chapter contains a brief description of how to calibrate a robot, using the alternative method with the Levelmeter 2000. This chapter also includes facts useful before comissioning the actual calibration procedure. 3HAC 022907-001 Revision: -... -
Page 10: How And When To Calibrate The Robot System
General This section provides an overview of the procedures to perform when calibrating the robot system with the alternative method, using Levelmeter 2000. The steps in this overview are detailed in other sections to which references are given. When to calibrate... - Page 11 1 Overview 1.2. How and when to calibrate the robot system Step Action Note Start the calibration procedure on the TPU / Detailed in section Fine calibration FlexPendant. procedure on TPU on page 65 (RobotWare 4.0). Detailed in section Fine calibration procedure on FlexPendant on page 67 (RobotWare 5.0).
-
Page 12: Calibration, Prerequisites
1 Overview 1.3. Calibration, prerequisites 1.3. Calibration, prerequisites Peripheral equipment The robots upper arm must be free from any peripheral equipment during calibration. Fitted tools and similar will cause erroneous calibration positions. Calibration order The axes must be adjusted in increasing sequence, i.e. 1 - 2 - 3 - 4 - 5 - 6. 3HAC 022907-001 Revision: -... -
Page 13: Calibration Movement Directions For All Axes
1 Overview 1.4. Calibration movement directions for all axes 1.4. Calibration movement directions for all axes Calibration movement directions When calibrating, the axis must consistently be run towards the calibration position in the same direction, in order to avoid position errors caused by backlash in gears etc. Positive directions are shown in the figure below. - Page 14 1 Overview 1.4. Calibration movement directions for all axes 3HAC 022907-001 Revision: -...
-
Page 15: Reference Information
2 Reference information 2.1. Introduction 2 Reference information 2.1. Introduction General This chapter contains necessary reference information for performing the actual calibration of the robot. 3HAC 022907-001 Revision: -... -
Page 16: Calibration Equipment, Axis 1
2 Reference information 2.2. Calibration equipment, axis 1 2.2. Calibration equipment, axis 1 General Axis 1 is calibrated mechanically without use of the Levelmeter. The special calibration equipment is listed in this section and also in the procedure for axis 1 calibration of each robot. -
Page 17: Calibration Equipment, Axes 2-6
2.3. Calibration equipment, axes 2-6 General Axes 2-6 are calibrated with the alternative method, using Levelmeter 2000, including one sensor. The calibration equipment is gathered in the table below as well as in the procedures for calibration of each axis. -
Page 18: Calibration Scales And Correct Axis Position
2 Reference information 2.4. Calibration scales and correct axis position 2.4. Calibration scales and correct axis position Introduction This section specifies the calibration scale positions and/or correct axis position for all robot models. Calibration scales, IRB 140 The illustration below shows the calibration scale positions on IRB 140: xx0200000157 3HAC 022907-001 Revision: -... - Page 19 2 Reference information 2.4. Calibration scales and correct axis position Calibration scales, IRB 1400 The illustration below shows the calibration scale positions on IRB 1400: en0200000272 3HAC 022907-001 Revision: -...
- Page 20 2 Reference information 2.4. Calibration scales and correct axis position Calibration scales, IRB 2400 The illustration below shows the calibration scale positions on IRB 2400: en0200000273 3HAC 022907-001 Revision: -...
- Page 21 2 Reference information 2.4. Calibration scales and correct axis position Calibration scales, IRB 4400 The illustration below shows the calibration scale positions on IRB 4400. The calibration marks for axes 2, 3, 4 and 5 are marked using punch mark tools. xx0300000209 Punch, axis 2, 3HAB 1521-1 Punch, axis 3, 3HAB 1522-1...
- Page 22 2 Reference information 2.4. Calibration scales and correct axis position Calibration scales/marks, IRB 6600, IRB 6650, IRB 6650S,IRB 7600 The illustration below shows the location of the calibration scales on specific plates and the calibration marks directly in the casting at axes 2 and 3. The figure shows IRB 6600, but the scales and their positions are the same for IRB 6650S and IRB 7600.
-
Page 23: Initialization Of Levelmeter 2000
Whenever Levelmeter 2000 is used for calibrating the robot, the equipment must first be initialized as detailed in this section. Shown below is an outline of how to initialize the Levelmeter 2000. Detailed procedures are given further down. 1. Select the correct filter type, as detailed in Illustration, Levelmeter 2000 on page 21. - Page 24 Press ON/MODE until the dot flashes under SENSOR . Press ENTER. Press ZERO/SELECT until a flashing "A" is shown. Press ENTER. Wait until the "A" flashes again. Press ENTER. Result The Levelmeter 2000 is now initialized and ready for service. 3HAC 022907-001 Revision: -...
-
Page 25: Checking The Calibration Position
This section describes how to create a program, which runs all the robot axes to their zero position. Step Action Note On ABB menu tap Program Editor. Create a new program. Use MoveAbsJ in the Motion&Proc menu. Create the following program: MoveAbsJ [[0,0,0,0,0,0],[9E9,9E9,9E9,9E9,9E9,9E9]]\NoEOff s, v1000, z50, Tool0 Run the program in manual mode. - Page 26 This section describes how to jog the robot to all axes zero position. Step Action Note Tap Jogging in the ABB menu. Tap Motion mode to choose group of axes to jog. Tap axes 1-3 to jog axes 1, 2 or 3. Manually run the robots axes to a position where the axis position value read on the FlexPendant, is equal to zero.
-
Page 27: Positions And Directions Of Sensor
When calibrating an axis with only one sensor, the sensor must first be positioned at the reference plane of the robot in order to create reference values. This is further detailed in section Resetting of Levelmeter 2000 and sensor on page 69. These reference values are then used to calibrate the axes of the robot. - Page 28 2 Reference information 2.7. Positions and directions of sensor Calibration sensor, axis 1, IRB 140 xx0200000140 Reference surface Calibration tool on axis 1 Calibration sensor, axis 2, IRB 140 xx0200000144 Calibration sensor position and orientation, axis 2 3HAC 022907-001 Revision: -...
- Page 29 2 Reference information 2.7. Positions and directions of sensor Calibration sensor, axis 3, IRB 140 xx0200000145 Calibration sensor position and orientation, axis 3 Calibration sensor, axis 4, IRB 140 xx0200000146 Calibration sensor position and orientation, axis 4 3HAC 022907-001 Revision: -...
- Page 30 2 Reference information 2.7. Positions and directions of sensor Calibration sensor, axis 5, IRB 140 xx0200000147 Calibration sensor position and orientation, axis 5 Calibration sensor, axis 6, IRB 140 xx0200000148 Calibration sensor position and orientation, axis 6 3HAC 022907-001 Revision: -...
- Page 31 2 Reference information 2.7. Positions and directions of sensor Sensor position and direction, IRB 1400 This section specifies the position and alignment of the calibration sensor at the reference plane and on each axis of IRB 1400. xx0400001019 Axis 2 sensor Axis 3 sensor Axis 4 sensor Axis 5 sensor...
- Page 32 2 Reference information 2.7. Positions and directions of sensor Sensor position and direction, IRB 2400 This section specifies the position and alignment of the calibration sensor at the reference plane and on each axis of IRB 2400. xx0300000218 View from above Axis 2 View from above Axis 6 View from above Axis 5 Axis 4...
- Page 33 2 Reference information 2.7. Positions and directions of sensor Sensor position and direction, IRB 4400 This section specifies the position and alignment of the calibration sensor at the reference plane and on each axis of IRB 4400. xx0300000204 Flange plate Axis 2 sensor Axis 2 sensor, view from above Axis 3 sensor...
- Page 34 2 Reference information 2.7. Positions and directions of sensor Sensor position and direction, IRB 6600, IRB 6650, IRB 6650S, IRB 7600 This section specifies the position and alignment of the calibration sensor at the reference plane and on each axis of IRB 6600, IRB 6650, IRB 6650S and IRB 7600. The figures show IRB 7600, but the positions and alignments are the same for IRB 6600/6650/6650S.
- Page 35 2 Reference information 2.7. Positions and directions of sensor Calibration sensor at axes, IRB 6600, IRB 6650, IRB 6650S, IRB 7600 The calibration sensor is positioned and aligned on the axes as shown in the figures below. xx0200000091 Calibration sensor, axis 2 xx0200000092 Calibration sensor, axis 3 3HAC 022907-001 Revision: -...
- Page 36 2 Reference information 2.7. Positions and directions of sensor xx0200000093 Calibration sensor, axis 4 3HAC 022907-001 Revision: -...
- Page 37 2 Reference information 2.7. Positions and directions of sensor xx0200000094 Calibration sensor, axis 5 xx0200000095 Calibration sensor, axis 6 3HAC 022907-001 Revision: -...
- Page 38 2 Reference information 2.7. Positions and directions of sensor Sensor position and direction, IRB 6400R This section specifies the position and alignment of the calibration sensor at the reference plane and on each axis of IRB 6400R. xx0400001134 Reference plane Direction for sensor at reference plane, axes 2, 3 and 5 Direction for sensor at reference plane, axes 4 and 6 Axis 2 sensor...
-
Page 39: Calibration
General This chapter details the complete procedure of calibrating a robot, using the alternative method with the Levelmeter 2000. The chapter is divided, so that calibration of each axis is detailed in separate sections. Only calibration of axis 1 is unique for each robot model, otherwise the same procedure is followed for the remaining axes with the exception of use of unique equipment. -
Page 40: Calibration, Axis 1, Irb 140
3 Calibration 3.2. Calibration, axis 1, IRB 140 3.2. Calibration, axis 1, IRB 140 General This section details how to perform the mechanical calibration of axis 1 using special calibration equipment without sensors. Required equipment Equipment Art. no. Calibration tool 3HAC 0181-1 Isopropanol 1177 1012-208... - Page 41 3 Calibration 3.2. Calibration, axis 1, IRB 140 WARNING! Be very careful when releasing the brakes during the following instructions The brakes must be released and the axes become activated very quickly and may cause damage or personnel injury. Calibration, axis 1 Step Action Note...
-
Page 42: Calibration, Axis 1, Irb 1400
3 Calibration 3.3. Calibration, axis 1, IRB 1400 3.3. Calibration, axis 1, IRB 1400 General This section details how to perform the mechanical calibration of axis 1, using special calibration equipment without sensors. Required equipment Equipment Art. no. Note Isopropanol 1177 1012-208 Used to clean the reference surface. - Page 43 3 Calibration 3.3. Calibration, axis 1, IRB 1400 Calibration, axis 1 The procedure below details how to perform the actual calibration of axis 1 using the calibration equipment. Step Action Note Move the robot to its calibration position Detailed in section Calibration corresponding to the calibration scales.
-
Page 44: Calibration Axis 1, Irb 2400
3 Calibration 3.4. Calibration axis 1, IRB 2400 3.4. Calibration axis 1, IRB 2400 General This section details how to perform the mechanical calibration of axis 1, using special calibration equipment without sensors. Required equipment Equipment, etc. Art. no. Note Ethanol Calibration tool 3HAB 8064-1... - Page 45 3 Calibration 3.4. Calibration axis 1, IRB 2400 Calibration, axis 1 The procedure below details how to calibrate axis 1. NOTE! Make sure the sensors and sensor positions on the manipulator are clean and free from metallic materials! Step Action Note Move the robot to its calibration position corresponding to the calibration scales.
-
Page 46: Calibration, Axis 1, Irb 4400
3 Calibration 3.5. Calibration, axis 1, IRB 4400 3.5. Calibration, axis 1, IRB 4400 General This section details how to perform the mechanical calibration of axis 1 using special calibration equipment without sensors. Required equipment Equipment, etc. Art. no. Note Isopropanol 1177 1012-208 Used to clean the reference surface. - Page 47 3 Calibration 3.5. Calibration, axis 1, IRB 4400 Calibration, axis 1 The procedure below details how to perform the actual calibration of axis 1 using the special calibration equipment. CAUTION! If the manipulator normally works in an inverted position, it must be removed from this position and placed on the floor before the work detailed in this instruction may be carried out ! Step Action...
-
Page 48: Calibration, Axis 1, Irb 6600 / Irb 6650 / Irb 6650S / Irb 7600
3 Calibration 3.6. Calibration, axis 1, IRB 6600 / IRB 6650 / IRB 6650S / IRB 7600 3.6. Calibration, axis 1, IRB 6600 / IRB 6650 / IRB 6650S / IRB 7600 General This section details how to perform the mechanical calibration of axis 1 using special calibration equipment without sensors. - Page 49 3 Calibration 3.6. Calibration, axis 1, IRB 6600 / IRB 6650 / IRB 6650S / IRB 7600 Calibration, axis 1 The procedure below details how to mechanically calibrate axis 1. Step Action Note Switch the operating mode selector to MANUAL MODE AT REDUCED SPEED.
-
Page 50: Calibration, Axis 1, Irb 7600 (Early Design)
3 Calibration 3.7. Calibration, axis 1, IRB 7600 (early design) 3.7. Calibration, axis 1, IRB 7600 (early design) General This section details how to perform the mechanical calibration of axis 1 using special calibration equipment without sensors. The IRB 7600 robot has two different designs of the calibration tabs on the base. This section details how to calibrate axis 1 when the robot has the earlier design of the tabs. - Page 51 3 Calibration 3.7. Calibration, axis 1, IRB 7600 (early design) Calibration, axis 1 Step Action Note Switch the operating mode selector to MANUAL MODE AT REDUCED SPEED. Manually run the robot to the calibration position, axis 1. Fit the calibration tool over the tabs on frame and base, according to the figure Calibration tool position, early design...
-
Page 52: Calibration, Axis 1, Irb 6400R
3 Calibration 3.8. Calibration, axis 1, IRB 6400R 3.8. Calibration, axis 1, IRB 6400R General This section details how to perform the mechanical calibration of axis 1 using special calibration equipment without sensors. Equipment Equipment Art. no. Note Isopropanol 1177 1012-208 Used to clean the reference surface. - Page 53 3 Calibration 3.8. Calibration, axis 1, IRB 6400R Step Action Note Fit the calibration tool (C) over the measuring pin Art. no. is specified in Equipment and the calibration fixture. on page 50. If the tool fits over the pin and the fixture simultaneously, axis 1 is calibrated correctly.
-
Page 54: Calibration, Axis 2
3.9. Calibration, axis 2 3.9. Calibration, axis 2 General This section details how to perform the actual fine calibration of axis 2 using the alternative method with Levelmeter 2000 and is applicable for all robot models. Required equipment Equipment Art. no. - Page 55 3 Calibration 3.9. Calibration, axis 2 Step Action Note Tip! Reduce the jogging velocity in order to easily position the axis as close to zero as possible! Manually run axis 2 with the joystick to the correct Correct measurement on the position as indicated by the levelmeter.
-
Page 56: Calibration, Axis 3
3 Calibration 3.10. Calibration, axis 3 3.10. Calibration, axis 3 General This section details how to perform the actual fine calibration of axis 3 using the alternative method with Levelmeter 2000. Required equipment Equipment Art. no. Info Levelmeter 2000 6369 901-347 Only one sensor required. - Page 57 3. Reset the levelmeter with correct orientation of Detailed in section Resetting of the sensor for calibration of axis 3. Levelmeter 2000 and sensor page 69. Fit the calibration sensor unit (sensor and plate) Shown in the section Positions on the turning disk fixture.
- Page 58 3 Calibration 3.10. Calibration, axis 3 Step Action Note Update only axis 3. Detailed in sections Fine calibration procedure on on page 65 (RobotWare 4.0). Fine calibration procedure on FlexPendant on page 67 (RobotWare 5.0). 10. Remove the sensor. 11. Check the calibration according to section Post calibration procedure on page 78 or continue with...
-
Page 59: Calibration, Axis 4
3 Calibration 3.11. Calibration, axis 4 3.11. Calibration, axis 4 General This section details how to perform the actual fine calibration of axis 4 using the alternative method with Levelmeter 2000. Required equipment Equipment Art. no. Info Levelmeter 2000 6369 901-347 Only one sensor required. - Page 60 4. Reset the levelmeter with correct orientation of Detailed in section Resetting of the sensor for calibration of axis 4. Levelmeter 2000 and sensor page 69. Fit the calibration sensor unit (sensor and plate) Shown in the section Positions on the turning disk fixture.
- Page 61 3 Calibration 3.11. Calibration, axis 4 Step Action Note Update only axis 4. Detailed in sections: Fine calibration procedure on on page 65 (RobotWare 4.0). Fine calibration procedure on FlexPendant on page 67 (RobotWare 5.0). 10. Remove the sensor. 11. Select Calib: CAL4B. The axis 4 moves 90º, to a correct position.
-
Page 62: Calibration, Axis 5
3 Calibration 3.12. Calibration, axis 5 3.12. Calibration, axis 5 General This section details how to perform the actual fine calibration of axis 5 using the alternative method with Levelmeter 2000. Required equipment Equipment Art. no. Info Levelmeter 2000 6369 901-347 Only one sensor required. - Page 63 5. Reset the levelmeter with correct orientation of Detailed in section Resetting of the sensor for calibration of axis 5. Levelmeter 2000 and sensor page 69. Fit the calibration sensor on the turning disk Shown in the section Positions fixture.
- Page 64 3 Calibration 3.12. Calibration, axis 5 Step Action Note Update only axis 5. Detailed in sections: Fine calibration procedure on on page 65 (RobotWare 4.0). Fine calibration procedure on FlexPendant on page 67 (RobotWare 5.0). 10. Remove the sensor. 11. Check the calibration according to section Post calibration procedure on page 78 or continue with...
-
Page 65: Calibration, Axis 6
3 Calibration 3.13. Calibration, axis 6 3.13. Calibration, axis 6 General This section details how to perform the actual fine calibration of axis 6 using the alternative method with Levelmeter 2000. Required equipment Equipment Art. no. Info Levelmeter 2000 6369 901-347 Only one sensor required. - Page 66 60. Reset the levelmeter with correct orientation of Detailed in section Resetting of the sensor for calibration of axis 6. Levelmeter 2000 and sensor page 69. Fit the calibration sensor unit (sensor and plate) Shown in section Positions and on the turning disk fixture.
-
Page 67: Fine Calibration Procedure On Tpu
3 Calibration 3.14. Fine calibration procedure on TPU 3.14. Fine calibration procedure on TPU General This section details how to use the Teach Pendant Unit (TPU) when performing a fine calibration of the robot. The method of fitting the calibration equipment to each axis is detailed in the calibration instruction for the axis. - Page 68 3 Calibration 3.14. Fine calibration procedure on TPU Step Action Note/Illustration Select the desired unit and choose Fine Calibrate from the Calib menu. A Warning window appears. xx0100000203 Move the desired robot axis according to the calibration procedure for current axis. These procedures are found in section Calibration...
-
Page 69: Fine Calibration Procedure On Flexpendant
Do not fine calibrate the robot without special equipment used for axis calibration! It would cause an unsatisfied accuracy in the robot movement. On the ABB menu, tap Calibration. All mechanical units connected to the system are shown along with their calibration status. - Page 70 3 Calibration 3.15. Fine calibration procedure on FlexPendant Step Action Tap Fine Calibration..A dialog box is displayed, urging you to use external equipment to performing the actual calibration. Make sure all necessary calibration equipment is fitted, as detailed in the calibration instruction, for the axis to be calibrated. A warning that updating the revolution counters may change programmed robot positions is also displayed: •...
-
Page 71: Resetting Of Levelmeter 2000 And Sensor
3.16. Resetting of Levelmeter 2000 and sensor General The equipment must first be reset before calibrating each axis. This section details how to reset the Levelmeter 2000 and make the one sensor ready for calibration. Levelmeter 2000 The Levelmeter 2000 is shown for reference below:... - Page 72 3 Calibration 3.16. Resetting of Levelmeter 2000 and sensor Sensor mounted on fixture When using the sensor as a reference sensor it is fitted to the sensor fixture, together with a sensor plate, as shown below. See the section Positions and directions of sensor...
- Page 73 12. Wait until + or - flashes. 13. Press ENTER. Result The Levelmeter 2000 and the one sensor is now reset and ready for service. When moving the sensor and the sensor plate to different axes, move it as a complete unit. 3HAC 022907-001 Revision: -...
-
Page 74: Updating Revolution Counters
3 Calibration 3.17. Updating revolution counters 3.17. Updating revolution counters General This section details how to perform a rough calibration of each robot axis, i.e. updating the revolution counter value for each axis, using either the TPU or the FlexPendant. Manually running the robot to the calibration position This procedure details the first step when updating the revolution counter;... - Page 75 3 Calibration 3.17. Updating revolution counters Storing the revolution counter setting with the TPU This section details the second step when updating the revolution counter; storing the revolution counter setting with the TPU (RobotWare 4.0). Step Action Note Press the button "Miscellaneous" then ENTER to select the service window.
- Page 76 This procedure details the second step when updating the revolution counter; storing the revolution counter setting with the FlexPendant (RobotWare 5.0). Step Action On the ABB menu, tap Calibration. All mechanical units connected to the system are shown along with their calibration status. Tap the mechanical unit in question.
- Page 77 3 Calibration 3.17. Updating revolution counters Step Action Tap Update revolution counters..A dialog box is displayed, warning that updating the revolution counters may change programmed robot positions: • Tap Yes to update the revolution counters. • Tap No to cancel updating the revolution counters. Tapping Yes displays the axis selection window.
- Page 78 3 Calibration 3.17. Updating revolution counters 3HAC 022907-001 Revision: -...
-
Page 79: After Calibration
4 After calibration 4.1. Introduction 4 After calibration 4.1. Introduction General This chapter details the final step in the calibration procedure; how to verify that the calibration of the robot is correct. 3HAC 022907-001 Revision: -... -
Page 80: Post Calibration Procedure
4 After calibration 4.2. Post calibration procedure 4.2. Post calibration procedure General Perform the following procedure after calibrating any robot axis. The procedure is intended to verify that all calibration positions are correct. Checking the calibration Step Action Note Run the calibration home position program twice. Detailed in section Checking the calibration position... - Page 81 Index Calibration position calibration position, checking calibration position, jog to direction of axes negative directions, axes positive directions, axes Revolution counters Updating revolution counters 3HAC 022907-001 Revision: -...