Table of Contents
Advertisement
Quick Links
Advertisement
Table of Contents

Related Manuals for Asus ASMB3-IKVM


Summary of Contents for Asus ASMB3-IKVM
- Page 1 ASMB3-IKVM Server Management Board...
- Page 2 Product warranty or service will not be extended if: (1) the product is repaired, modified or altered, unless such repair, modification of alteration is authorized in writing by ASUS; or (2) the serial number of the product is defaced or missing.
-
Page 3: Table Of Contents
AMI BIOS setup .............. 2-6 2.4.2 Phoenix BIOS setup ............2-9 Running the KIRARARI utility ........... 2-13 2.5.1 Updating the ASMB3-IKVM firmware ......2-14 2.5.2 Configuring the LAN controller ........2-15 2.5.3 Configuring the user name and password ....2-16... -
Page 4: Contents
Contents 3.1.8 Device Settings ............. 3-17 3.1.9 Maintenance ..............3-24 Appendix: Reference information LAN port for server management ..........A-2 BMC socket ...................A-3 Troubleshooting ................A-4... -
Page 5: Notices
Notices Federal Communications Commission Statement This device complies with Part 15 of the FCC Rules. Operation is subject to the following two conditions: • This device may not cause harmful interference, and • This device must accept any interference received including interference that may cause undesired operation. -
Page 6: Safety Information
Safety information Electrical safety • To prevent electrical shock hazard, disconnect the power cable from the electrical outlet before relocating the server. • When adding or removing devices to or from the server, ensure that the power cables for the devices are unplugged before the signal cables are connected. If possible, disconnect all power cables from the existing server before you add a device. -
Page 7: About This Guide
Refer to the following sources for additional information and for product and software updates. ASUS websites The ASUS website provides updated information on ASUS hardware and software products. Refer to the ASUS contact information. Optional documentation Your product package may include optional documentation, such as warranty flyers, that may have been added by your dealer. - Page 8 Conventions used in this guide To make sure that you perform certain tasks properly, take note of the following symbols used throughout this manual. DANGER/WARNING: Information to prevent injury to yourself when trying to complete a task. CAUTION: Information to prevent damage to the components when trying to complete a task.
-
Page 9: Asmb3-Ikvm Specifications Summary
ASMB3-IKVM specifications summary Chipset KIRA100 Internal RAM 256 Mb for system 256 Mb for video Internal ROM 64 Mb Timers 32-bit Watchdog Timer System interface Supports Keyboard Controller Style (KCS) LAN type 10/100 Mbps Dedicated LAN 1 x BMC heartbeat... -
Page 11: Chapter 1: Product Introduction
This chapter describes the server management board features and the new technologies it supports. Chapter 1: Product introduction... -
Page 12: Welcome
2.0-compliant board that allows you to monitor, control, and manage a remote server from the local or central server in your local area network (LAN). With ASMB3-IKVM plugging in a server motherboard, you can completely and efficiently monitor your server in real-time. The solution allows you to reduce IT management costs and increase the productivity. - Page 13 * Install Java Runtime Environment (JRE) before using web-based remote management Virtual media: Allows you to share the data stored in a local drive of the remote server • Hard disk drive • USB flash • CD/DVD ROM • Floppy • Image file ASUS ASMB3-IKVM...
-
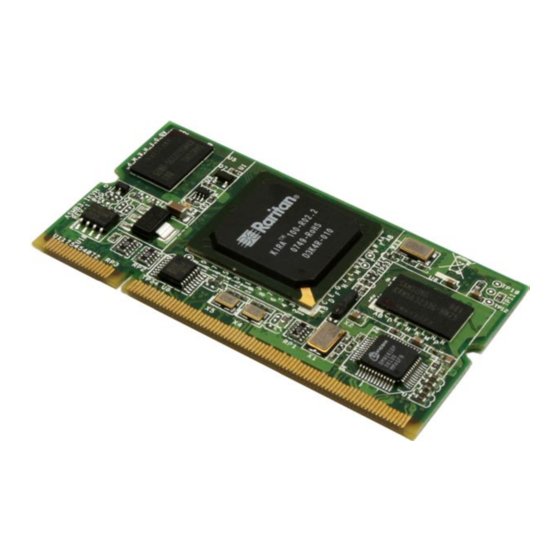
Page 14: Board Layout
Server management chip Heartbeat LED Board connectors LED indicators The ASMB3-IKVM board comes with a BMC heartbeat LED. Refer to the table below for the LED indications. Name Status Description LED1 BMC Heartbeat Blinking ASMB3-IKVM firmware is in execution. -
Page 15: Network Setup
Network setup The ASMB3-IKVM server management board installed on the remote server connects to a local/central server via direct LAN connection or through a network hub. Below are the supported server management configurations. Direct LAN connection RJ-45 cable Remote server... - Page 16 Chapter 1: Product introduction...
-
Page 17: Chapter 2: Installation
This chapter provides instructions on how to install the board to the server system and install the utilities that the board supports. Chapter 2: Installation... -
Page 18: Before You Proceed
Before you proceed Take note of the following precautions before you install the server management board to the remote server system. • Unplug the server system power cord from the wall socket before touching any component. • Use a grounded wrist strap or touch a safely grounded object or to a metal object, such as the power supply case, before handling components to avoid damaging them due to static electricity. - Page 19 For direct LAN configuration, connect the other end of the LAN cable to the local/central server LAN port. For connection to a network hub or router, connect the other end of the LAN cable to the network hub or router. ASUS ASMB3-IKVM...
- Page 20 To uninstall the board: Simultaneously push the BMC socket retaining clips outward until the board tilts up. Carefully pull the board out from the BMC socket, then set aside. Chapter 2: Installation...
-
Page 21: Firmware Update
Firmware update You need to update the ASMB3-IKVM firmware before you start using the ASMB3-IKVM board. To update the firmware: Insert the support CD into the optical drive. Restart the remote server, then press <Del> during POST to enter the BIOS setup. -
Page 22: Bios Configuration
• Update the remote server BIOS file following the instructions in the motherboard/system user guide. Visit the ASUS website (www.asus.com) to download the latest BIOS file for the motherboard. • The BIOS setup screens shown in this section are for reference purposes only, and may not exactly match what you see on your screen. - Page 23 IP address, subnet mask and gateway address for the remote server. When set to [DHCP Mode], you don’t have to assign the IP address, subnet mask and gateway address for the remote server. ASUS ASMB3-IKVM...
- Page 24 Allows the BMC to reset or power down the system when the operating system crashes or hangs. Configuration options: [Disabled] [Reset System] [Power Down] [Power Cycle] It is necessary to install ASWM (ASUS System Web-based Management) for using this function. Chapter 2: Installation...
-
Page 25: Phoenix Bios Setup
Timer for loading OS (min) [ 10] Time out action [No action] Date Format to show [MM DD YYYY] Date Separator Help Select Item Change Values Setup Defaults ↑↓ ESC: Exit Select Menu Enter Select Sub-menu Save and Exit →← ASUS ASMB3-IKVM... - Page 26 IPMI Specification Version This item shows the auto-detected IPMI specification version. BMC Firmware Version This item shows the auto-detected BMC firmware version. System Event Logging [Enabled] Allows you to enable or disable the IPMI event logging feature. Configuration options: [Enabled] [Disabled] Clear System Event Log [Disabled] Enabling this item forces the BIOS to clear the system event log on the next cold boot.
- Page 27 01 - Threshold Event Description = Upper Non-critical Going High, Assertion SEL Event Data = 57 80 50 Help Select Item Change Values Setup Defaults ↑↓ ESC: Exit Select Menu Enter Select Sub-menu Save and Exit →← ASUS ASMB3-IKVM 2-11...
- Page 28 System Event Log (list mode) Press <Enter> to open the System Event Log in list mode. PhoenixBIOS Setup Utility Main Advanced Server Security Boot Exit System Event Log (list mode) Event ID Sensor Name Sensor Type Date/Time Stamp ------------------------------------------------------------------------------ CPU2temperature1 Temp 04/17/2006 16:10:44...
-
Page 29: Running The Kirarari Utility
Running the KIRARARI utility The KIRARARI utility allows you to update the ASMB3-IKVM firmware, configure the LAN setting for the remote server and change the user name/password in DOS environment. This utility is available from the support CD that came with the package. -
Page 30: Updating The Asmb3-Ikvm Firmware
Set login password of administrator to xxxxx 2.5.1 Updating the ASMB3-IKVM firmware You may use KIRARARI utility to update the ASMB3-IKVM firmware. To update the firmware: Download the latest ASMB3-IKVM firmware from the ASUS website (www.asus.com), and then save the file. -
Page 31: Configuring The Lan Controller
2.5.2 Configuring the LAN controller Before you can establish connection to the ASMB3-IKVM board, you must configure the LAN port for server management used by the remote server to connect to the local/central server. -
Page 32: Configuring The User Name And Password
2.5.3 Configuring the user name and password You may change your login name and password from the KIRARARI utility. To change the login name and password: Follow steps 1-6 on page 2-13. At the prompt, type kirarari admin name xxxxx, then press <Enter> to change the login name. -
Page 33: Chapter 3: Software Support
This chapter tells you how to use the web-based user interface that the server management board supports. Chapter 3: Software support... -
Page 34: Web-Based User Interface
This application also lets you instantly power on/off or reset the remote server. You should install JRE on remote console first before using web-based management. You can find JRE from the folder JAVA of the ASMB3-IKVM support CD. You can also download JRE from http://java.sun.com/javase/ downloads. -
Page 35: Home Page
Remote server screen: Displays the remote server screen. Click this screen to open the remote server window. Refresh: Click this icon to refresh the remote server screen. Function keys: Click each function key to start using its specific functions. ASUS ASMB3-IKVM... -
Page 36: Remote Control
3.1.3 Remote Control Click Remote Control to open its submenu, and then click KVM Console to open remote server console screen. Remote server console screen Click to open the Options menu Click to open/close the Drive Redirection window Indicates the number of networks (users) that are connected via Console Redirection Indicates the availability of keyboard and mouse Chapter 3: Software support... - Page 37 You may want to share an ISO image file with users in the remote system. Click Connect ISO, and then a Choose ISO image to redirect screen appears, allowing you to select the ISO image you wnat to share in the remote system. ASUS ASMB3-IKVM...
- Page 38 Options menu Monitor Only: Click to toggle the Monitor Only function on or off. If this function is switched on, the remote server console screen could be viewed only, no remote console interaction is possible. Exclusive Access: Click to toggle the Exclusive Access function on or off. If this function is switched on, no other users could open the remote console at the same time until you disable this function or log off.*...
-
Page 39: Virtual Media
Active Image - Drive 2: Displays the data that has been uploaded to Drive 2 of the remote server. Floppy Image Upload: Allows you to upload a binary image with a maximum size of 1.44 MB to the ASMB3-IKVM. This image will be emulated to the remote server as a USB floppy device. - Page 40 CD-ROM Image CD-ROM Image: Click this function key to share data stored in your CD-ROM image with other users in the remote server through the Windows Share application via USB. Active Image - Drive 1: Displays the file name of the data in Drive 1 of the remote server.
- Page 41 Force read-only connectors: Check this box to allow the data stored in local drives to be read in the remote system, but could not be overwritten to ensure data integrity and system security. Apply: Click to apply your settings. Reset to defaults: Click to return to the default settings. ASUS ASMB3-IKVM...
- Page 42 Options Options: Click this function key to open the Virtual Media options. Virtual Media Options: Check this box to disable the funciton of Virtual Media options to prevent data stored in a local drive from being accessed by the user in the remote server.
-
Page 43: System Health
Reset to reset the remote console. Click Power Cycle to turn off the remote server, and allow the remote server to be powered on automatically after about 3 minutes. ASUS ASMB3-IKVM 3-11... - Page 44 Monitor Sensors Monitor Sensors: Click this function key to display the health monitoring information for the remote server. Monitoring Sensors: Allows you to see the related health monitoring information for the remote server. Click Refresh to update the information on this window. System Event Log System Event Log: Click this function key to display the system health event log information for the remote server.
- Page 45 Alert Settings Alert Settings: Click this function key to enter the alert settings submenu for the remote server. ASUS ASMB3-IKVM 3-13...
-
Page 46: User Management
3.1.6 User Management Click User Management to open its submenu. Change Password Change Password: Click this function key to enter the Change Password window. After entering all the necessary information, click Apply to apply the new settings. Users & Groups Users &... - Page 47 Permissions: Click this function key to enter the user/group permissions submenu. User / Group Permissions: Selects the user and group that you want to show the permission details. Update: Click to update the permission information. You can only set the user permission by setting group only. ASUS ASMB3-IKVM 3-15...
-
Page 48: Kvm Settings
3.1.7 KVM Settings Click KVM Settings to open its submenu. User Console Click User Console to open the setup window. From the window you could configure the detailed settings for the remote server console. Keyboard/Mouse Click Keyboard/Mouse to open the setup window. From the window you could configure the detailed settings for the keyboard and mouse. -
Page 49: Device Settings
Network Basic Settings: Allows you to configure basic settings for the network. Network Miscellaneous Settings: Allows you to configure other settings for the network. LAN Interface Settings: Allows you to configure the LAN interface speed and LAN interface duplex mode. ASUS ASMB3-IKVM 3-17... - Page 50 Dynamic DNS Dynamic DNS: Click this function key to enter the dynamic DNS submenus and configure its related settings. Enable Dynamic DNS: Check this box to enable the dynamic DNS service. 3-18 Chapter 3: Software support...
- Page 51 Group based System Access Control: Allows you to limit several user access to the network by identifying their IP addresses. User Blocking: Allows you to set the conditions when a user will be blocked. Login limitations: Allows you to configure the login limitations. ASUS ASMB3-IKVM 3-19...
- Page 52 Certificate Certificate: Click this function key to enter the Certificate submenus and configure its related settings. Certificate Signing Request (CSR): Allows you to define the Certificate Signing Request (CSR) form. Click Create to apply the settings. Date/Time Date/Time: Click this function key to enter the Date/Time submenus. Date/Time Settings: Allows you to configure the internal realtime clock for the remote server.
-
Page 53: Event Log
Authentication Authentication: Click this function key to enter the Authentication submenus. Authentication Settings: Allows you to configure the authentication settings. Click Apply to apply the settings. Event Log ASUS ASMB3-IKVM 3-21... - Page 54 Scroll down to display more items. Event Log: Click this function key to enter the Event Log submenus. Event Log Targets: Allows you to configure the event log targets. List Logging Enabled: Check the box to enable the event log list. •...
- Page 55 SNMP Settings SNMP Settings: Click this function key to enter the SNMP submenus. SNMP Settings: Allows you to configure the Simple Network Management Protocol (SNMP) settings. ASUS ASMB3-IKVM 3-23...
-
Page 56: Maintenance
Device Information Device Information: Click this function key to enter the Device Information submenus. Device Information: Displays the detailed information of the ASMB3-IKVM board. Connected Users: Displays the user name, IP address and status of the users connected to the remote system. - Page 57 Unit Reset: Click this function key to enter the Unit Reset submenus. Reset Keyboard/Mouse: Click to reset keyboard/mouse. Reset Video Engine: Click to reset the video and its controller. Reset Device: Click to reset the IPMI firmaware. ASUS ASMB3-IKVM 3-25...
- Page 58 3-26 Chapter 3: Software support...
- Page 59 The Appendix shows the location of the IKVM LAN port for server management and BMC socket on several motherboards. This section also presents common problems that you may encounter when installing or using the server management board. Appendix: Reference information...
-
Page 60: Appendix: Reference Information
LAN port for server management The ASUS server motherboards that support the ASMB3-IKVM comes with an IKVM LAN port. You must use the IKVM LAN port for server management to connect the remote server to the local/central host (direct LAN connection) or to the network hub or router. -
Page 61: Bmc Socket
BMC socket The ASUS server motherboards that support the ASMB3-IKVM comes with a Baseboard Management Controller (BMC) socket. Refer to the illustrations below to locate the BMC socket on different server motherboards. P5BV-M/RS100-E5 motherboard 24.5cm (9.6in) ATX12V1 EATXPWR1 PS/2KBMS T: Mouse... -
Page 62: Troubleshooting
Troubleshooting This troubleshooting guide provides answers to some common problems that you may encounter while installing and/or using ASUS ASMB3-IKVM. These problems require simple troubleshooting that you can perform by yourself. Contact the Technical Support if you encounter problems not mentioned in this section.