
Related Manuals for Silvercrest SNM 33 C1


Summary of Contents for Silvercrest SNM 33 C1
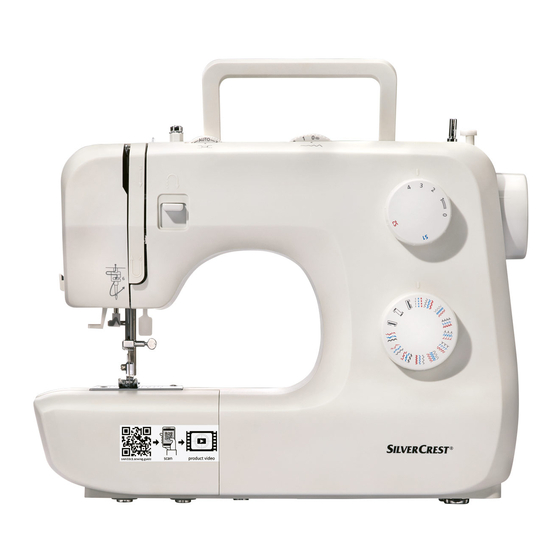
- Page 1 IAN 315502 SEWING MACHINE SNM 33 C1 SEWING MACHINE MÁQUINA DE COSER Operation and Safety Notes Instrucciones de uso y de seguridad US-EN US-ES US-EN US-ES...
- Page 2 Antes de empezar a leer, abra la página que contiene las imágenes y familiarícese con todas las funciones del dispositivo. Further helpful hints for using your Silvercrest sewing machine can US-EN be found under the following link or QR code.
-
Page 5: Table Of Contents
Table of contents Table of contents Introduction Important safety instructions Introduction ............................. 6 Intended use ............................6 Getting ready Sewing machine components ......................... 6 Accessories ............................6 Technical data ............................7 Important safety instructions ........................8 Connecting machine to power source ....................9 Installing the snap-in sewing table ......................10 Inserting the needle ..........................10 Two-step presser foot lifter ........................11... -
Page 6: Introduction
Introduction Introduction Introduction Congratulations on the purchase of your sewing machine. You have bought a top quality product which has been manufactured with great care. These Operating Instructions contain all you need to know about using your sewing machine. However, if you still have any questions, please contact your dealer. We hope you enjoy your sewing machine and wish you success. -
Page 7: Technical Data
Introduction Technical data Rated voltage 120 Volt/ 60 Hz Power rating - Total 0.5 A Dimensions - When handle is folded down Approx. 15.28 x 10.83 x 6.65 inch (LxHxW) Cable length - Power cable Approx. 5.91 ft - Foot control cable Approx. -
Page 8: Important Safety Instructions
Important safety instructions Important safety instructions Important safety instructions DANGER When using an electrical appliance, the basic safety instructions should always be followed. WARNING Read all Operating Instructions before using this sewing machine. - To reduce the risk of electric shock: 1. -
Page 9: Connecting Machine To Power Source
Getting ready Getting ready Connecting machine to power source Important: Unplug power cable when machine is not in use. Important: about connecting the machine to the power source. Unplug power cable if you are not using the power supply. Connect the machine to a power source as illustrated in the adjacent drawing. -
Page 10: Installing The Snap-In Sewing Table
Getting ready Installing the snap-in sewing table If you want to sew on the arm bed, pull out the snap-in sewing table (7) in the direction of the arrow. The inside of the snap-in sewing table (7) can be utilised as an accessory box. The included accessories can be found inside the snap-in compartment. -
Page 11: Two-Step Presser Foot Lifter
Getting ready Two-step presser foot lifter When sewing thick fabrics, the passage of fabrics under the presser foot can be improved by raising the two-step presser foot lifter (18) further (arrow). Attaching the presser foot holder Important: Turn the power switch (20) to off ("O") when carrying out all the operations! 1. -
Page 12: Sewing Basics Winding The Lower Thread
Getting ready Winding the lower thread A. Place the spool (m) on the spool pin (15) and hold it in place with a spool pin cap (r). - Small spool pin cap for thin threads - Large spool pin cap for thick threads B. -
Page 13: Threading The Upper Thread
Getting ready Threading the upper thread Important: Turn the power switch (20) to off ("O"). Raise the presser foot bar by lifting the two-step presser foot lifter (18) and lift the thread lever (1) by turning the hand wheel (21) anti-clockwise. Follow the arrows and numbers on the sewing machine when threading. -
Page 14: Automatic Needle Threader
Getting ready Automatic needle threader Attention: Turn the power switch (20) to off ("O") before threading the needle. Important: Raise the needle to its highest position by turning the hand wheel toward you until the mark (A) matches with the line (B) on the machine. -
Page 15: Thread Tension
Getting ready Thread tension A. Upper thread tension Basic upper thread tension setting: "AUTO" To increase the tension, turn the dial to the next higher number. To reduce the tension, turn the dial to the next lower number. 1. Normal thread tension 2. -
Page 16: Sewing / Useful Applications
Sewing basics Sewing basics Sewing / Useful applications A. Sewing Once the sewing machine is correctly threaded and adjusted, lower the presser foot before sewing by lowering the two- step presser foot lifter (18). Press the foot pedal (t) to start sewing. B. -
Page 17: Matching The Needle, Fabric And Thread
Sewing basics Matching the needle, fabric and thread NEEDLE, FABRIC, THREAD SELECTION GUIDE NEEDLE SIZE FABRICS THREAD 9-11 (65-75) Lightweight fabrics: thin cottons, voile, Light-duty thread in cotton, serge, silk, muslin, interlocks, cotton knits, nylon or polyester. jerseys, crepes, woven polyester, shirt & blouse fabrics. -
Page 18: How To Choose Your Stitch
Sewing basics How to choose your stitch Stitch width dial Stitch length dial For straight stitch, turn the pattern S1-S2 selector dial (6) until the straight stitch coincides with the mark. You can adjust the needle position from central to right by turning the stitch width dial from "0"... -
Page 19: Zigzag Stitching
Sewing basics Zigzag stitching Stitch width dial Stitch length dial Turn the pattern selector dial (6) to zigzag stitch. The function of stitch width dial (4) The maximum stitch width for zigzag stitch is "5"; however, the stitch width can be reduced on any type of stitch. -
Page 20: Invisible Zipper Application
Sewing basics Invisible zipper application The Invisible Zipper Foot provides an invisible closing on skirts, dresses and a variety of garments and accessories. Surface Attach the invisible zipper foot to the 3/4" machine, with the needle lined up with center mark. Place open zipper face-down 5/8"... -
Page 21: Blind Stitch
Sewing basics Blind stitch Stitch Stitch width stitch length For hems, curtains, trousers, skirts, etc. Blind stitch for elastic fabrics. 1. Fold the fabric as illustrated with the left side uppermost. 2. Place the reversed fabric under the blind stitch presser foot (a). Turn the handwheel (21) forwards by hand until the needle is fully to the left. -
Page 22: Buttonhole Foot
Sewing basics Buttonhole foot Stitch Stitch width stitch length Stitch length dial 0.5~1 Preparation: Remove the presser foot and attach the buttonhole foot (e). Adjust the stitch length dial (5) to between "0.5" - "1". The density of the stitch depends on thickness of the fabric. -
Page 23: Maintenance 3-Step Zigzag
Sewing basics Overlock stitches Stitch Stitch width stitch length S1, S2 Note: Use new needles or ball point needles. Seams, sewing and neatening visible hems. Overlock stitch (A) borders. Standard overlock stitch (B) borders. Double overlock stitch (C) All overlock stitches are suitable for sewing and neatening edges and visible seams in one operation. -
Page 24: Stretch-Stitch
Sewing basics Stretch-stitch Stitch Stitch width stitch length S1, S2 Triple straight stitch (A) For hardwearing seams. The machine sews two stitches forwards and one stitch backwards. This gives triple reinforcement. Stitch Stitch width stitch length S1, S2 Triple zigzag (B) For hardwearing seams, hems and decorative seams. -
Page 25: Monogramming And Embroidering With Embroidery Hoop
Sewing basics Monogramming and embroidering with embroidery hoop* * The embroidery hoop is not supplied with the Stitch Stitch width stitch length machine. Attach the embroidery and darning plate 1. Remove the presser foot and the presser foot holder. 2. Attach the embroidery and darning plate (o). -
Page 26: Applique
Sewing basics Applique Stitch Stitch width stitch length 0.5~1 1. Cut out the applique design and tack it to the fabric. 2. Sew slowly around the edge of the design. 3. Trim excess material outside the stitching. Make sure not to cut any stitches. -
Page 27: Maintenance
Maintenance Maintenance Maintenance Important: Disconnect the machine from the electricity supply by removing the plug from the mains socket. When cleaning the machine, it must always be disconnected from the electricity supply. Removing the stitch plate (A) Turn the hand wheel (21) until the needle is fully raised. -
Page 28: Trouble Shooting Guide
Maintenance Trouble shooting guide Problem Cause Correction Upper thread 1.The machine is not threaded breaks correctly. 1.Rethread the machine. 2.The thread tension is too tight. 2.Reduce the thread tension (3). (lower number) 3.The thread is too thick for the needle. 3.Use a larger needle. 4.The needle is not inserted correctly. -
Page 29: Disposal
Disposal / Guarantee / Service / Manufacturer Disposal / Guarantee / Service / Manufacturer Disposal - Dispose of devices with dangerous defects immediately and ensure that they can no longer be used. - Do not dispose of the sewing machine in normal domestic waste. - This product is subject to UL 1594. - Page 30 IAN 315502 Service number for complaints: 1-844-543-5872 Número de asistencia en caso de reclamación: 1-844-543-5872 US-EN Last Information Update · Estado de las informaciones: 12/2018 · Ident.-No.:122018 US-ES 021K7U0103(EN.ES) www.sewingguide.de...