
Related Manuals for Silvercrest SCNM 100 A1


Summary of Contents for Silvercrest SCNM 100 A1
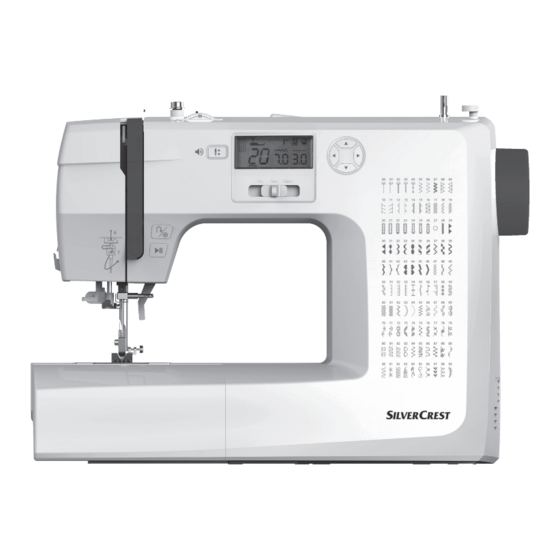
- Page 1 COMPUTERISED SEWING MACHINE SCNM 100 A1 SEWING MACHINE Operating and safety instructions IAN 413627_2204...
- Page 2 Before reading, unfold the page containing the illustrations and familiarise yourself with all functions of the device. Further helpful hints for using your Silvercrest sewing machine can be found under the following link or QR code. http://scnm100a1.sewing.guide Operating and safety instructions...
-
Page 5: Table Of Contents
Table of contents Introduction Description of the user .........................................8 Explanation of the safety instructions ....................................8 Intended use ............................................8 Package contents and accessories .....................................9 Package contents ..........................................9 Accessory set ...........................................9 Optional accessories ........................................9 Description of parts ..........................................9 LCD screen ............................................10 Operation buttons .......................................... - Page 6 Table of contents Altering the stitch length and width ....................................31 Altering the stitch length .......................................31 Altering the stitch width ........................................31 Straight stitch ............................................32 Zigzag stitch ............................................33 Starting to sew ........................................... 34 Useful skills ............................................36 Sewing thick fabrics ........................................36 Reverse sewing ..........................................
- Page 7 Table of contents Troubleshooting Troubleshooting guide ........................................59 Environment, Disposal, Conformity Disposal of electrical devices ......................................60 Disposal of the packaging ........................................ 60 Notices of conformity ........................................60 Notes on warranty and service Warranty of Crown Technics GmbH ....................................61 Warranty conditions...........................................61 Warranty period and statutory claims for defects ................................61 Scope of warranty ..........................................61 Handling the warranty claims ......................................61...
-
Page 8: Description Of The User
Hand over all documents when passing the unit on to third parties. Description of the user These operating and safety instructions are intended for the user of the sewing machine SCNM 100 A1. Explanation of the safety instructions DANGER indicates a hazardous situation which, if not avoided, will result in immediate death or serious injury. -
Page 9: Package Contents And Accessories
Introduction Package contents and accessories v Package contents 1 Sewing machine 1 Power cord 1 Foot controller 1 User manual 1 Accessory set 1 Dust cover v Accessory set The inside space of the sewing table (10) is used as an accessory box. The included accessories can be found inside the snap-in compartment. All-purpose presser foot (T) (already installed) Screwdriver Zipper foot (I) -
Page 10: Lcd Screen
Introduction LCD screen ① Recommended presser foot ② Auto-Lock button ③ Needle up/down position button ④ Buttonhole lever ⑤ Winding the lower thread ⑥ Stitch number ⑦ Stitch width ⑧ Stitch length Operation buttons Start/Stop button Press the Start/Stop button to start sewing. Press the Start/Stop button again to stop the sewing machine. - Page 11 Introduction Needle up/down position button a. Use the Needle up/down position button to decide whether the needle should stop at the highest or lowest position (in the fabric) when stopping sewing. NOTE If you press the Needle up/down position button during sew- ing, the sewing machine stops automatically.
-
Page 12: Technical Data
Introduction Technical data Rated voltage 100-240V~ / 50-60 Hz Power rating - Total 70 watts Dimensions - Handle folded in approx. 398 x 289 x 181 mm (WxHxD) Cable length - Power cord approx. 1.98 m - Foot controller connection cable approx. -
Page 13: Safety Instructions
Safety instructions Symbol Description This device is fragile. Handle with care. This recycling symbol marks, for example, an item or material parts as valuable for recycling. Observe the labelling of the packaging materials when separating waste. These are marked with abbreviations (a) and numbers (b) with the following meaning: 1-7 Plastics / 20-22: Paper and cardboard / 80-98: Com- posite materials. -
Page 14: Electrical Safety
Safety instructions Electrical safety • Only use the original power cord supplied with the sewing machine. Other power cords may damage the device. Do not use the supplied power cord with other devices. • Make sure that the mains voltage corresponds to the voltage indicated on the labelling of the device (devices labelled 230V or 240V can also be operated with 220V). -
Page 15: Safety Instructions For Service
Safety instructions Safety instructions for service • Have the device repaired only by qualified personnel and only with original spare parts. This ensures maintaining the safety of the unit. • If the LED lamp is damaged or defective, it must be replaced by the manufacturer or its customer services to avoid hazards. -
Page 16: Before Use
Safety instructions Before use Obtaining practical information is recommended before using the device for the first time. If you are not familiar with the operation of sewing machines, we recommend that you attend an introductory course. Always check that the mains voltage matches the voltage indicated on the labelling of the device. During use 1. -
Page 17: Before Starting Up
Before starting up Selection of an installation site Avoid exposing the device to extremely dusty, dirty or greasy areas such as kitchens, garages or boiler rooms. Dust and grease can affect the operation. Do not install in damp or wet rooms such as bathrooms. Always install the device in dry rooms only. Do not install in areas where the temperature is below 5°C or above 40°C. -
Page 18: Inserting The Needle
Before starting up Inserting the needle WARNING! Set the main power switch to the "0 OFF" position. Change the needles regularly, especially at the first signs of prob- lems when sewing. Insert the needle: Loosen the needle clamp screw (A). Insert the new needle with the flat side of the shaft facing backwards (B). -
Page 19: Attaching And Removing The Presser Foot
Before starting up Attaching and removing the presser foot WARNING! Set the main power switch to the "0 OFF" position. NOTE All-purpose presser foot is already installed. Attach the presser foot: Lower the presser foot bar (A) by lowering the two-step presser foot lever (22) until the indentation (C) is directly over the pin (D). -
Page 20: Starting Up
Starting up Matching the needle, fabric and thread NOTE Match needle size to thread size and weight of fabric. In general, fine threads and needles are used for sewing fine fabrics, and thicker threads are used for sewing heavy fabrics. Please note: •... -
Page 21: Using The Two-Step Presser Foot Lever
Starting up Using the two-step presser foot lever The presser foot can be raised and lowered with the two-step presser foot lever. • Lift the two-step presser foot lever (22) upwards to raise the presser foot. • Press the two-step presser foot lever (22) down to lower the presser foot. -
Page 22: Operating Speed Of The Sewing Machine
Starting up Operating speed of the sewing machine The operating speed of the sewing machine is controlled with the foot controller (r) or with the speed adjustment slider (15). • Press the foot controller lightly for a lower operating speed. •... - Page 23 Starting up Wind the thread counter-clockwise around the bobbin thread guide (2). Lead the thread from the inside through a hole of the empty bobbin (m) as illustrated. Place the bobbin on the bobbin ① winder spindle (17). Align the notch with the spring of the bobbin winder spindle (2).
-
Page 24: Inserting The Bobbin With The Lower Thread
Starting up Inserting the bobbin with the lower thread NOTE To insert or remove the bobbin, the needle must be at the very top; so move the needle to the top position by pressing the Needle up/down position button (4). Lift the presser foot. Then turn off the device. -
Page 25: Threading The Upper Thread
Starting up Threading the upper thread For good sewing results, the threading must be carried out cor- rectly. Otherwise several problems will occur. NOTE The needle threader can be used with home sewing machine needle sizers from 75/1 1 to 100/16 . Thread the upper thread: Set the main power switch (26) to the “I ON”... - Page 26 Starting up As illustrated, run the upper thread to the left around the preload spring of the upper thread guide (20) and then forward. Lead the upper thread through the right slot further to forward and down. The thread must run between the silver discs so that it remains well tensioned.
- Page 27 Starting up 10. Lower the two-step presser foot lever (22). 1 1. Press the needle threader (12) down a bit and lead the ① upper thread over the thread guide as illustrated and hold it to the right. 12. Press the needle threader lever (12) down as much as possible.
-
Page 28: Bringing Up The Lower Thread
Starting up Bringing up the lower thread NOTE If you are using a ruffle stitch or smocking stitch, first bring up the lower thread. Bring up the lower thread: Hold the upper thread with your left hand. Turn the handwheel (25) counter-clockwise to lower the needle under the needle plate (9). -
Page 29: Sewing Basics
Sewing basics Thread tension The thread tension dial is used to set the upper thread tension. NOTE Proper tension setting is important for sewing. No single tension setting is suitable for all stitch functions and all fabrics. v Basic settings Basic setting of the thread tension dial: “4”. -
Page 30: Stitch Chart
Sewing basics Stitch chart Selecting stitch In the stitch chart you will find the numbers of all possible stitches. To use a stitch, select the stitch number on the device. Select the stitch number: Move the cursor in the LCD screen (5) under the digits of the stitch number with the left or right button. -
Page 31: Altering The Stitch Length And Width
Sewing basics Altering the stitch length and width v Altering the stitch length • When you select a stitch the device will automatically set the recommended stitch length which will be indicated by numbers on the LCD screen (5). • Different stitches have different length limits. •... -
Page 32: Straight Stitch
Sewing basics Straight stitch Use the all-purpose presser foot (a). 01 02 03 Set the pattern as shown in figure. Move the cursor under the stitch length digits with the left or right button. Press the down button for a shorter stitch length. Press the up button for a longer stitch length. -
Page 33: Zigzag Stitch
Sewing basics Zigzag stitch Use the all-purpose presser foot (a). Set the pattern as shown in figure. Adjust the stitch width. Move the cursor under the stitch width digits with the left or right button. For a narrower stitch, press the down button. For a wider stitch, press the up button. -
Page 34: Starting To Sew
Sewing basics Starting to sew NOTE Follow the needle/fabric/yarn chart before you start sewing and select the recommended presser foot. For more information, see the chapter "Matching the needle, fabric and thread". Set the main power switch (26) to the “I ON” position. Bring the needle in the highest position using the Needle up/down position button (4). - Page 35 Sewing basics Slowly press down the foot controller or press the Start/ Stop button (8) to start sewing. Release the foot controller or press the Start/Stop button again to stop the sewing machine. NOTE You can use reverse sewing for back tacking and reinforcing seams by pressing the reverse button.
-
Page 36: Useful Skills
Sewing basics Useful skills Various ways to achieve better results for your sewing projects are described below. Refer to these tips when sewing your project. • The results depend on types of fabrics and stitches. Please use the same fabric as your project for testing and do a sewing test in advance. •... -
Page 37: Sewing Corners
Sewing basics v Sewing corners Stop the sewing machine when you reach a corner. Lower the needle into the fabric by moving the needle to the low- est position with the up/down button (3). Lift the two-step presser foot lever (22). Use the needle as a pivot and turn the fabric 90°. -
Page 38: Sewing Heavy Fabric
Sewing basics v Sewing heavy fabric The black button on the right side of the presser foot will lock the presser foot in a horizontal position if you push it in before lower- ing the presser foot. This ensures even feeding at the beginning of a seam and helps when sewing multiple layers of fabrics such as sewing over seams when hemming jeans. -
Page 39: Sewing Applications
Sewing applications Sewing stretch fabrics The stretch stitch is suitable for elastic and durable seams that stretch with the fabric without tearing. Ideal for stretch fabrics and jersey as well as hard-wearing seams on firm fabrics such as denim. NOTE ①... -
Page 40: Sewing Elastic Band To Fabric
Sewing applications Sewing elastic band to fabric By attaching an elastic band, you can sew, for example, an elastic arm cuff or an elastic waistband. NOTE When measuring the length of the elastic band for sleeves or waist, note that in the finished elastic waistband, the elastic band is stretched when worn. -
Page 41: Overcasting
Sewing applications Overcasting By sewing overcasting stitches along the edge of fabric you can prevent it from fraying. v Sewing overcasting stitch with the all-purpose presser foot: 2.0~3.0 2.5~5.0 Attach the all purpose presser foot. Sew overcasting stitches along the edge of the fabric so that the needle drops over the right side of the fabric (needle ①... -
Page 42: Blind Hem
Sewing applications Blind hem The seam with this stitch is not visible on the right side of the fabric. NOTE Use the blind hem stitch for skirt hems and trouser hems. NOTE Please use the same fabric as for the project and carry out a sewing test in advance. •... -
Page 43: Sewing Buttonholes
Sewing applications Sewing buttonholes NOTE Buttonholes can be adapted to the size of the button. NOTE For stretch fabric or thin fabric, it is recommended to use a stabilizer/auxiliary material for a better buttonhole sewing. Lower the thread tension of the upper thread slightly with the thread tension dial. -
Page 44: Sewing A Buttonhole On Non-Stretch Fabrics
Sewing applications v Sewing a buttonhole on non-stretch fab- rics: Mark the positions of the buttonhole on the fabric. NOTE The maximum buttonhole length is 3 cm. (Total of diameter + thickness of button). The size of the buttonhole is determined by the button inserted in the button holder plate. -
Page 45: Sewing A Buttonhole On Stretch Fabrics
Sewing applications After sewing the buttonhole stitch, raise the buttonhole lever ① as far as it will go. Use the seam ripper to cut open the center of the button- hole. CAUTION When cutting the buttonhole with the seam ripper, do not place your hands in the cutting direction, otherwise injuries may result. -
Page 46: Reinforcing Seams
Sewing applications Reinforcing seams Bar tack stitch is used to reinforce points subject to strain, such as pocket corners and openings. NOTE It is suggested that you sew with a stabilizer material under the fabric. Use the buttonhole foot (h) ①... -
Page 47: Button Sewing
Sewing applications Button sewing Buttons can be sewn on with the sewing machine. Buttons with 2 or 4 holes can be attached. Use the button sewing foot (f) ① Slide the feed dog lever to position to lower the feed dog. -
Page 48: Zipper Sewing
Sewing applications Zipper sewing Use the all-purpose presser foot (a) and the zipper foot (b) NOTE The zipper foot can be adjusted to sew on either side of the zipper. The edge of the foot guides the zipper so that it is posi- tioned straight. -
Page 49: Concealed Zipper Sewing On One Side
Sewing applications v Concealed zipper sewing on one side: 1. Preparation: Insert the all-purpose presser foot (a). Place the right sides of the fabric on top of each other and sew to the end of the zip opening with a seam allowance of approx. -
Page 50: Concealed Zipper
Sewing applications v Concealed zipper Concealed zippers provide an invisible closing on skirts, dresses and a variety of garments and accessories. Use the concealed zipper foot (g). Insert the concealed zipper foot (g). Surface 1.9 cm NOTE Make sure that the needle is in line with the center mark. 1.6 cm NOTE Be sure to use a stabiliser material when sewing in the zipper. -
Page 51: Satin Stitch Sewing
Sewing applications Satin stitch sewing • Use the satin stitch foot for satin stitching and sewing deco- 05 29 30 31 32 33 34 rative stitches. • When sewing very lightweight fabrics, it is recommended that you use interfacing or stabilizer on the back side of the 39 40 41 42 43 44 45 fabric. -
Page 52: Smocking
Sewing applications Smocking The decorative stitch over ruffles is called "smocking". Smocking is used to decorate the front of blouses or cuffs. The smocking stitch adds texture and elasticity to the fabric. Use the satin stitch foot (e). 17 18 Increase the stitch length to the maximum, set the thread ten- ②... -
Page 53: Quilting, Sewing Pieces Of Fabric Together And Sewing Patchwork
Sewing applications Quilting, sewing pieces of fabric together and sewing patchwork Sandwich padding between the top and bottom layers of fabric is called "Quilting". The top layer is usually formed by multiple geometrically shaped pieces of materials joined together. v Quilting: •... -
Page 54: Sewing Patchwork
Sewing applications v Sewing patchwork: 17 18 Use the all-purpose presser foot (a) or satin stitch foot (e). Lay the two fabrics, right sides together and lockstitch the ① edges with the back of the fabric facing up. Open the seam allowance and press it flat. Work on the fabric front side. -
Page 55: Applique
Sewing applications Applique NOTE You can create and applique by cutting a different piece of fabric into a shape and using it as a decoration. Use the all-purpose presser foot (a). 1.0~3.0 3.5~5.0 ① Cut out the desired design and baste it on the fabric Sew slowly around the edge of your applique. -
Page 56: Scallop Stitch
Sewing applications Scallop stitch The wave-shaped repeating stitch, that looks like shells, is called "scalloping". It is used to decorate the collar of blouses and the edges of knitting pro- jects. Use the satin stitch foot (e) or all-purpose presser foot (a). Stitch along the edge of the fabric, making sure not to sew directly on the edge of the fabric. -
Page 57: Maintenance
Maintenance WARNING! Disconnect the power cord from the wall socket before carrying out any maintenance, otherwise injury or electrical shock may result. Clean the machine surface NOTE Do not use any organic solvents or detergents. Clean the sewing machine if the surface of the sewing machine is dirty: Wipe the sewing machine with a light cloth dipped in mild detergent and wrung out thoroughly. -
Page 58: Warning Function
Warning function Signal tones Signal tones Cause Correction One short signal tone Correct function Incorrect operation of the buttons Check that you are pressing the right button and performing the right actions Thread bobbin is full or the sewing Three short beeps when a button is pressed machine stops while the bobbin winder Push the bobbin winder spindle (17) back spindle is still in the right position. -
Page 59: Troubleshooting
Troubleshooting Troubleshooting guide Problem Cause Correction The machine is not correctly threaded. Thread the yarn again. The thread tension is too high. Loosen the thread tension (3). The thread is too thick for the needle. Select a larger needle size. Upper thread tears The needle is not correctly inserted. -
Page 60: Environment, Disposal, Conformity
Environment, Disposal, Conformity Disposal of electrical devices • Dispose of devices with dangerous defects immediately and ensure that they can no longer be used. • Do not dispose of the sewing machine in normal domestic waste. • This product is subject to 2012/19/EU •... -
Page 61: Notes On Warranty And Service
Notes on warranty and service Warranty of Crown Technics GmbH You receive a 3-year warranty on this device from the date of purchase. In the event of defects in this device, you have legal rights against the seller of the device. These legal rights are not limited by our warranty set out below. Warranty conditions The warranty period begins on the date of purchase. -
Page 62: Service Number
Notes on warranty and service Service number These operating and safety instructions cannot take into account every possible use. For further information or in case of problems that are not covered at all or covered insufficiently in these operating and safety instructions, please contact the service number: 00800 555 00 666 (free of charge). Keep the operating and safety instructions carefully and pass them on to later users. - Page 63 Index Accessories Package contents and accessories Adjusting the upper thread tension Sewing patchwork Altering the stitch length and width Applique Attaching and removing the presser foot Quilting, sewing pieces of fabric together and sewing patchwork Attaching and removing the presser foot holder Raising or lowering the feed dog Blind hem Reinforcing stitches...
- Page 64 Free service telephone for complaints: 00800 555 00 666 sewingguide-service-de@teknihall.com Version: 1 1/2022 Onlineversion www.sewingguide.de IAN 413627_2204...