Table of Contents
Advertisement
Advertisement
Table of Contents

Related Manuals for Silvercrest SL 65 T


Summary of Contents for Silvercrest SL 65 T
-
Page 3: Remote Control
Remote control... - Page 4 Digital terrestrial receiver SL 65 T Operating manual Version 1.6, as of 26.09.2006 Modifications and errors reserved. We will not assume any liability for printing errors. Dear customer, Having in mind an environmentally friendly behaviour we ask you to switch off your receiver after usage by operating the mains switch at the rear side of the device.
-
Page 5: Preface
Preface This operating manual will help you in the • appropriate • safe • favourable usage of the digital terrestrial satellite receiver, in short, the “receiver”. We assume that the user of the receiver has overall knowledge regarding the handling of audio and video equipment. Each person who •... -
Page 6: Table Of Contents
Contents Remote control ................. 1 Preface ....................5 Style features ..................5 Contents .................... 6 Safety instructions ................8 Basic safety instructions ..............8 Explanation of safety instructions..........10 Appropriate usage ................11 Scope of supply ................12 Description ..................13 Connecting the receiver.............. - Page 7 Editing channels ................52 Uninstalling the receiver ..............55 Cleaning................... 55 Troubleshooting ................56 Technical specifications ..............58 Manufacturer ................... 60 Declaration of conformity .............. 61 Glossary ..................62...
-
Page 8: Safety Instructions
Safety instructions Safety instructions Please read the safety instructions carefully before operating the receiver. Please follow all warnings and instructions on the equipment and in the operating manual. Basic safety instructions Electrical connection • Disconnect the receiver from the power source in case of operational disruptions. - Page 9 Safety instructions • Always ask qualified personnel to carry out maintenance jobs. Otherwise, you are putting yourself and others at risk. • Spare parts to be ordered from the manufacturer. • Modifications of the device lead to an extinction of the manufacturer’s liability.
-
Page 10: Explanation Of Safety Instructions
Safety instructions Correct battery handling • Batteries may contain toxic agents. Ensure that batteries are not within the reach of children. Children may eat and swallow batteries. • Batteries that are getting discharged may damage the remote control. If the receiver is not in use for a longer period of time, remove the batteries from the remote control. -
Page 11: Appropriate Usage
Safety instructions Appropriate usage The digital terrestrial receiver SL 65 T receives uncoded digital channels (free-to-air) in a covered area. It is exclusively meant for this purpose and should only be used for the same. This also includes paying attention to all information in this operating manual especially that of safety instructions. -
Page 12: Scope Of Supply
Scope of supply Scope of supply Check the scope of supply after purchase. The scope of supply may vary according to the type of the receiver. Please follow the information on the packaging... -
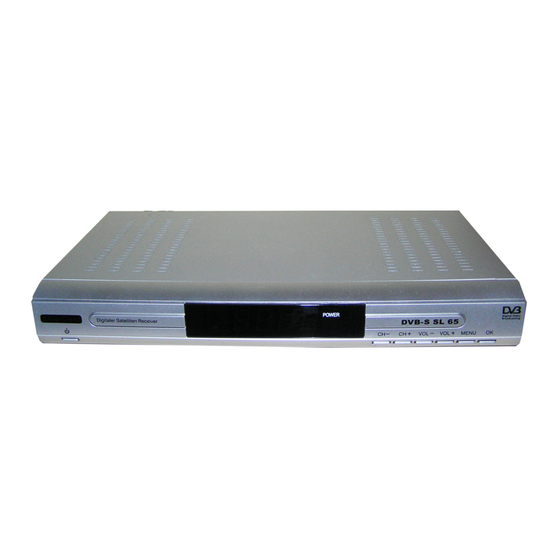
Page 13: Description
Description Description With this receiver you are able to receive uncoded digital terrestrial channels (free-to-air) via a house or indoor antenna. During the first operation, you will be led through the menu automatically. Required settings are made or you are asked for information. - Page 14 Description • 100–240 V, 50/60 Hz mains connection • Installation assistant, convenient initial installation with help • Child lock • Automatic scanning of broadcasting stations • Analogue sound output through Cinch connector (stereo), volume adjustment possible via remote control • RCA video output Cinch, S-VHS output •...
-
Page 15: Connecting The Receiver
Connecting the receiver Connecting the receiver Connecting the receiver to the antenna Caution! Remove all plastic wraps from the receiver before connecting it to the antenna. Otherwise the receiver can suffer damages. Danger of overheating. Connect the receiver to the antenna using an antenna cable. The coaxial cable is not included in the scope of supply. -
Page 16: Connection With The Scart Cable
Connecting the receiver Connection with the SCART cable Insert the SCART cable in the SCART socket “TV” on the receiver. Connect the SCART cable to the TV set. Follow the operating manual of the TV set. Insert the SCART cable in the SCART socket “VCR” on the receiver if you want to connect a video set. - Page 17 Connecting the receiver Connection diagram...
-
Page 18: Connection With The Yuv Cable (Ycbcr)
Connecting the receiver Connection with the YUV cable (YCbCr) If you own a TV set with YUV connections, you can connect it via the SCART socket “TV“ to the receiver. For this purpose, you need a YUV cable with YUV connectors and YUF wiring at one and a SCART connector at the other extreme. - Page 19 Connecting the receiver Connection diagram...
-
Page 20: Connection With The S-Video Cable (S-Vhs)
Connecting the receiver Connection with the S-Video Cable (S-VHS) Caution! Strictly follow instructions for connecting the S-video cable (SVHS) given in the operating manual of your TV set. The S-Video cable is not included in the scope of supply. Insert the S-Video cable in the “S-VHS“ socket of the receiver. Connect the S-Video cable to the TV set. - Page 21 Connecting the receiver Connection diagram...
-
Page 22: Connection With The Cinch Cable
Connecting the receiver Connection with the Cinch cable If you own a TV set not provided with a SCART socket, you can connect the receiver via a Cinch cable. Connect the “VIDEO“ socket of the receiver to the video input of the TV set. - Page 23 Connecting the receiver Connection diagram...
-
Page 24: Connection Of An Audio-Digital Receiver
Connecting the receiver Connection of an Audio-Digital Receiver If you want to use 5-channel audio transmission (Dolby digital sound/AC3), you must connect your audio-digital receiver to the optical or coaxial output of the receiver. Caution! Never connect the Phono input of your stereo system to the receiver;... - Page 25 Connecting the receiver Connection of the coaxial digital output Insert the coaxial cable in the “COAXIAL” socket on the receiver. Connect the coaxial cable to the audio-digital receiver. Connection diagram...
- Page 26 Connecting the receiver Connection of the optical digital output Pull the protective cap out of the "OPTICAL“ socket of the receiver. Insert the optical cable in the “OPTICAL” socket of the receiver. Connect the optical cable to the audio-digital receiver. Connection diagram...
-
Page 27: Connecting The Receiver To The Mains Supply
Connecting the receiver Connecting the receiver to the mains supply Caution! Check that the connections of all equipment and the antenna are proper before connecting the receiver to the mains supply. Insert the mains plug of the receiver in the mains socket. Turn the mains switch to ON. -
Page 28: Getting Started
Getting started Getting started Switching on and off The mains switch on the rear side of the receiver must be in position „ON“. Press the “ “ key of the receiver or the remote control to change between standby and operation mode. In the operation mode, the green channel-location indicator of the receiver is lit. - Page 29 Getting started Caution! Batteries may contain toxic agents that are hazardous to health and environment. Therefore, dispose of the batteries immediately according to the prevailing statutory regulations. Never throw the batteries into normal household waste. The remote control transmits infrared signals to the receiver. Please refer to the overview of the remote control for the functioning of the keys.
-
Page 30: Initial Installation With The Installation Assistant
Getting started Initial installation with the installation assistant When switching on the receiver for the first time, the installation assistant will be invoked. It will lead you through all important points of initial installation. (The installation assistant will also be invoked if you load the company settings). -
Page 31: Operation
Operation Operation Basic steps Select a channel Press the “CH+“ or “CH–“ key of the remote control or the “CH–“ and “CH+“ keys of the receiver to go to the previous or next channel. You can also go directly to a particular channel by entering the channel location number of the desired channel using the numerical keys. -
Page 32: Additional Functions
Operation Additional functions Invoking the Electronic Programme Guide (EPG) With this function, you can obtain information on the current programme. To display further information • on the current programme, • on the next programme, or • on the programme of the selected channel press the “EPG“... - Page 33 Operation Starting Teletext Press the TEXT key during operation to start Teletext. It will be activated by selecting the menu item “Teletext” with the “OK” key. In this menu you can also display subtitles. Use the “CH+“ and “CH-" keys to switch between the pages. Use the “V+“...
- Page 34 Operation Selecting language or audio track Press the “A/B“ key to invoke the language menu. Select the desired language option by pressing the “CH+“ and “CH-“ keys and confirm your selection with “OK”. LAST CHANNEL MEMORY function ”RECALL” key With this function you can go back to the channel you have watched before changing over to the current channel.
-
Page 35: Screen-Inlays While Switching A Channel
Operation Screen-inlays while switching a channel When a channel is switched, an information bar is inlayed on the screen. This information bar can also be displayed by pressing the “INFO“ key. This way, you can obtain information on the current programme: Press the “INFO“... -
Page 36: Menu Structure
Operation Menu structure Navigating in menus and sub-menus You can select several sub-menus in the main menu. With the multi- functional keys, diverse functions can be invoked. At the bottom of the screen you will get information on which of the multi-functional keys to use for which purpose. - Page 37 Operation enter numbers with the numerical keys if the setting requires a numerical entry. Press the “EXIT“ key to return to the next higher menu level. Press the “EXIT” key again to exit the main menu. Please see the explanations at the bottom edge of the screen.
-
Page 38: Entering Basic Settings
Entering basic settings Entering basic settings Setting the language of the user interface (OSD) In this main menu, you can set the language of the on-screen display (OSD). You can choose between the following languages: • German • English • Spanish •... -
Page 39: Scanning To Add New Channels
Entering basic settings Scanning to add new channels You can add new channels by using the following scan options. Select the main-menu item “Channel Search“. Confirm your selection by pressing “OK”. Select the desired scan option with the “CH–“ and ”CH+“ keys. Confirm your selection by pressing “OK”. - Page 40 Entering basic settings Auto search With the automatic scan, the whole frequency range of the receiver will be scanned for new channels. It may take more than 15 minutes until the scan is complete. Select “Auto search” with the “CH–“ and ”CH+“ keys. Confirm your selection by pressing “OK”.
- Page 41 Entering basic settings Manual search With the manual scan, you can scan for a particular channel. You can observe the scanning progress on the screen. As soon as the channel scan is complete, a message appears telling you how many channels have been found and how many of them are new channels.
- Page 42 Entering basic settings You will be assisted here by the acoustic signal meter. The higher the sound, the better the signal quality.
-
Page 43: Settings
Entering basic settings Settings In this main menu, you can do general settings of the receiver and display data. Select the main-menu item “Settings“. Confirm your selection by pressing “OK”. Select the desired sub-menu with the “CH–“ and ”CH+“ keys. You can choose between the following sub-menus:... - Page 44 Entering basic settings Change Receiver PIN In the sub-menu “Change Receiver PIN“ you can change the password. You can change the PIN code set by the company and enter any other four-digit number as a personal PIN code. With the PIN code the settings of the receiver can be blocked.
- Page 45 Entering basic settings Basic settings Select the sub-menu “Basic settings“. Confirm by pressing the “OK” key. Here, you can activate the following settings.
- Page 46 Entering basic settings Audio/Video settings For an optimisation of your receiver settings, you can do additional settings. Select the sub-menu “Audio/Video Settings“. Confirm by pressing the “OK” key. Here, you can activate the following settings.
- Page 47 Entering basic settings Should you want to connect your receiver to your TV set via the S-Video connection, select the option “CVBS” in menu item “TV SCART Mode“. Antenna Adjustment Your receiver is equipped with a signal strength indicator that makes an optimum direction of the antenna easier.
- Page 48 Entering basic settings System Configuration Select the sub-menu “System Configuration“. Confirm by pressing the “OK” key. Here, the software and hardware version of the receiver is displayed. Factory Settings You can restore the original company settings (default settings) at any time. After that, the installation assistant will be invoked automatically, see initial installation.
-
Page 49: Timer / Sleep Timer
Entering basic settings Timer / Sleep timer Your receiver is equipped with a timer. If you wish to record a particular programme with a connected video recorder, the recorder must be switched on. With the help of the timer you are also able to record TV programmes with your video recorder even if you are not personally present. - Page 50 Entering basic settings Enter the end time with the numerical keys. The entry is accepted and appears in the input field. Press the “OK“ key to select the repeat rate. On the screen, a list containing the diverse repeat rates will be displayed.
- Page 51 Entering basic settings Select the programming to be changed by using the “CH–“ and ”CH+“ keys. Press the yellow functional key “F3" to modify the entries. Select the desired input field with the keys “CH–“, ”CH+“, “V–“ and “V+”. Modify the entries as required. Example: Sleep timer –...
-
Page 52: Editing Channels
Entering basic settings Editing channels The LCN settings must be disabled for being able to change the channel order. To deactivate the LCN settings, choose “LCN Settings” in the main menu with the “CH+” and “CH-“ keys and then press the “OK” key. Now use the “V-“ and “V+” keys to choose the “off”... - Page 53 Entering basic settings With the blue “Edit Mode” function key, you can set the order for each category. The possible options are explained below. Category Favourite list Red “Remove“ function key: To remove a channel from your “Favourite list”, choose the channel with the “CH-“...
- Page 54 Entering basic settings mode. Now, the parental control function is activated for the channel to be blocked. To remove the protection, press the green function key of the corresponding application again. The lock symbol disappears. The parental controls apply to all 3 categories. Yellow “Sort“...
-
Page 55: Uninstalling The Receiver
Uninstalling the receiver Uninstalling the receiver Disconnect the receiver and connected equipment from the power supply. Remove the antenna cable from the receiver. Take the batteries out of the remote control, if you will not use the receiver for a longer period of time. Pack up the receiver, the cables and the remote control in a cardboard box. -
Page 56: Troubleshooting
Troubleshooting Troubleshooting... - Page 57 Troubleshooting If a malfunction cannot be rectified in spite of this, please contact your specialized dealer or the manufacturer.
-
Page 58: Technical Specifications
Technical specifications Technical specifications... - Page 59 Technical specifications...
-
Page 60: Manufacturer
Website: www.comag-ag.de Guarantee: The guarantee for the digital terrestrial receiver SL 65 T is in conformity with the prevailing statutory regulations at the time of purchasing the product. The term of guarantee is 3 years. Modifications of the device lead to an extinction of the manufacturer’s guarantee obligation... -
Page 61: Declaration Of Conformity
Guideline for low voltage, 73/23/EEC EN 60 065 • Guideline for electromagnetic compatibility, 89/336/EEC EN 55 013 • EN 55 020 • EN 61000-3-2 • EN 61000-3-3 • Equipment type/model: Digital terrestrial receiver SL 65 T... -
Page 62: Glossary
Glossary Glossary...