Table of Contents
Advertisement
Please open!
Bitte aufklappen
IAN: 32533
IAN: 32533
COMAG Handels AG
COMAG Handels AG
Zillenhardtstr. 41
Zillenhardtstr. 41
D-73037 Göppingen
D-73037 Göppingen
5
5
Estado de las informaciones · Versione delle informazioni
Estado de las informaciones · Versione delle informazioni
Last Information Update · Stand der Informationen:
Last Information Update · Stand der Informationen:
03 / 2009 · Ident.-No.: SL65T 032009 - 5
03 / 2009 · Ident.-No.: SL65T 032009 - 5
RECEPTOR DE SATÉLITE
RECEPTOR DE SATÉLITE
DIGITAL
DIGITAL
RICEVITORE SATELLITARE
RICEVITORE SATELLITARE
DIGITALE
DIGITALE
SL65
SL65
RECEPTOR DE SATÉLITE DIGITAL
RICEVITORE
RECEPTOR DE SATÉLITE DIGITAL
RICEVITORE
Instrucciones de utilización y de seguridad
SATELLITARE DIGITALE
Instrucciones de utilización y de seguridad
SATELLITARE DIGITALE
Indicazioni per l'uso e per la sicurezza
Indicazioni per l'uso e per la sicurezza
DIGITAL SATELLITE RECEIVER
DIGITALER SAT-RECEIVER
DIGITAL SATELLITE RECEIVER
DIGITALER SAT-RECEIVER
Operation and Safety Notes
Bedienungs- und Sicherheitshinweise
Operation and Safety Notes
Bedienungs- und Sicherheitshinweise
5
5
Please open!
Bitte aufklappen
Advertisement
Table of Contents

Related Manuals for Silvercrest SL 65


Summary of Contents for Silvercrest SL 65
- Page 1 RECEPTOR DE SATÉLITE RECEPTOR DE SATÉLITE DIGITAL DIGITAL RICEVITORE SATELLITARE RICEVITORE SATELLITARE DIGITALE DIGITALE SL65 SL65 IAN: 32533 IAN: 32533 RECEPTOR DE SATÉLITE DIGITAL RICEVITORE COMAG Handels AG RECEPTOR DE SATÉLITE DIGITAL RICEVITORE COMAG Handels AG Zillenhardtstr. 41 Instrucciones de utilización y de seguridad SATELLITARE DIGITALE Instrucciones de utilización y de seguridad SATELLITARE DIGITALE...
- Page 2 6Be Cursor moves down Service-hotline: 10 STANDBY Switches on and switches to the standby mode Model / type: Sl 65 00 44 (0) 8708 900137 The default settings will be restored if you keep this key e-mail: info@comag-ag.co.uk pressed for more than 10 seconds.
- Page 3 Remote control...
- Page 4 Digital Satellite Receiver SL 65 SL 65 SL 65 SL 65 Operating manual Modifications and errors reserved. We do not assume any liability for printing errors. Version 1.5 GB_MT 28/01/2009 Dear customer, Having in mind an environmentally friendly behaviour we ask you to switch off your receiver after usage by operating the mains switch at the rear side of the device.
-
Page 5: Preface
Preface This operating manual will help you in the • appropriate • safe • favourable usage of the digital satellite receiver, in short, the “receiver”. We assume that the user of the receiver has overall knowledge regarding the handling of audio and video equipment. -
Page 6: Table Of Contents
Contents Preface................3 Style features ..............3 Contents .................4 Safety instructions............6 Basic safety instructions ...........6 Explanation of safety instructions ........10 Appropriate use .............10 Scope of supply ............11 Description ..............12 Connecting the receiver ..........16 LNB cable installation ............17 Connection with the SCART cable.........20 Connection with the YUV cable ........22 Connection diagram............24 Connection with the S-Video Cable (S-VHS) ....25... - Page 7 Installation (symbol: satellite antenna)......51 System Setup (symbol: receiver) ........55 Tools (symbol: tool case) ..........61 Software update via satellite ..........62 Keys with special functions........63 Switch between TV and SAT .........63 Switch between TV and radio ........63 ZOOM ................63 LIST ................64 AUDIO ................64 EPG ................64 TEXT................65 M/P ................65...
-
Page 8: Safety Instructions
Safety instructions Please read the safety instructions carefully before operating the receiver. Please follow all warnings and instructions on the equipment and in the operating manual. Basic safety instructions Electrical connection • Separate the receiver from the power source in case of operational disruptions. - Page 9 • If foreign bodies or fluids enter the receiver, immediately pull out the mains plug from the socket. Ask a qualified person to check the equipment before operating it again. Otherwise, there is a risk of electric shock. • Ensure that the power source (socket) is easily accessible.
- Page 10 separate the device completely from the mains supply, the mains plug must be pulled out of the socket. Suitable location • Place the receiver on a stable and even base. • Avoid proximity to: - heat sources, like e. g. heaters, - naked flames, like e.
- Page 11 Correct battery handling • Batteries may contain toxic agents. Ensure that batteries are not within the reach of children. Children may eat and swallow batteries • Batteries that are getting discharged may damage the remote control. If the receiver is not in use for a longer period of time, remove the batteries from the remote control.
-
Page 12: Explanation Of Safety Instructions
Explanation of safety instructions The following categories of safety instructions are included in this operating manual: Danger! Instructions with the word DANGER give a warning against possible personal injuries. Caution! Instructions with the word CAUTION give a warning against possible material or environmental damages. These instructions contain special information regarding an economic use of the receiver. -
Page 13: Scope Of Supply
Scope of supply Check the scope of supply after purchase. The scope of supply may vary according to the type of the receiver. Please follow the information on the packaging. -
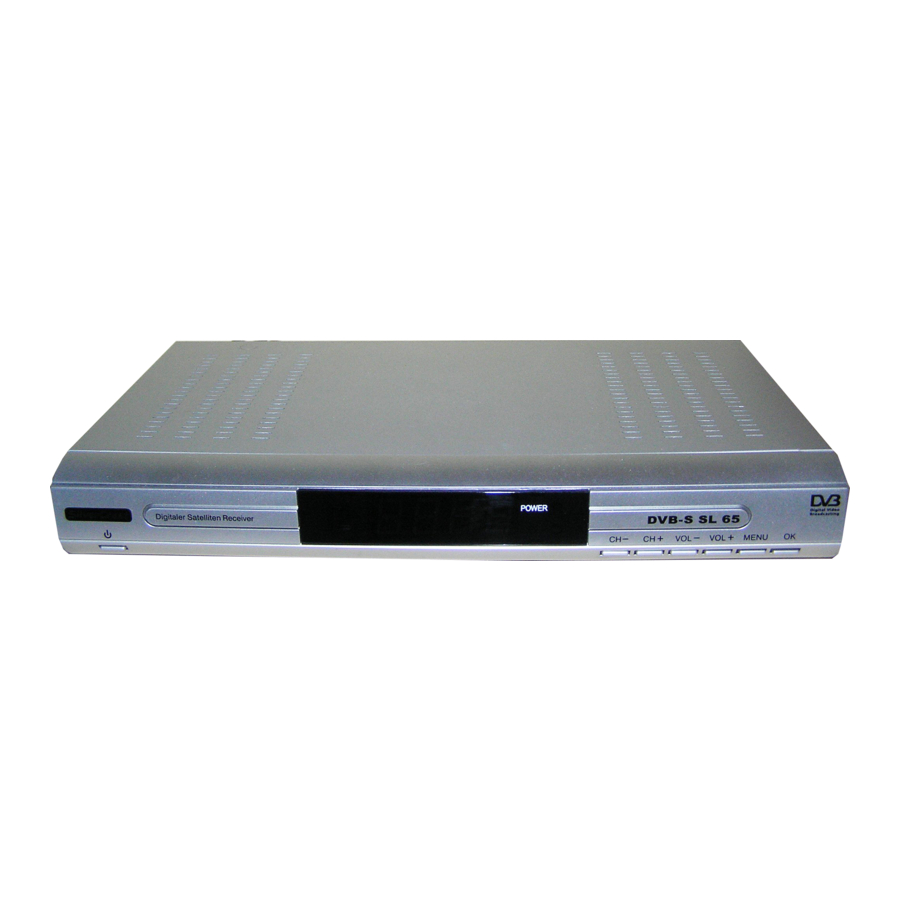
Page 14: Description
Description With this receiver you are able to receive unencrypted digital satellite channels (free-to-air) via satellite antenna. It is not necessary to programme the receiver yet. The most important broadcasting stations and satellites have been pre-programmed. The satellite antenna has to be directed towards the desired satellite. - Page 15 • Danish • French • Swedish • Croatian • Dutch • Norwegian • Finnish • Slovenian • Turkish • Portuguese The following satellites have been preset by the company: • ASTRA1 19.2° E • Hotbird 13.0° E • Türksat 42° E •...
- Page 16 • Short switching time, fast boot process when switching on the receiver • Saves the channel last watched (Last Station Memory) • LNB control logic (sound 0/22 kHz), max. current delivery for LNB 300 mA • Symbol rate 1-35 MS/s and 950-2150 MHz input frequency •...
- Page 17 • Loop-through-function in standby mode for the connection of an analogue receiver • Super fast videotext with a memory of 800 pages • Digital radio reception, background image for radio (background display) • Additional channel information is displayed when the channel is changed.
-
Page 18: Connecting The Receiver
Connecting the receiver The receiver is connected with your satellite antenna by means of a coaxial cable. If necessary, you have to prepare a coaxial cable before connecting the receiver. The coaxial cable is not included in the scope of supply. -
Page 19: Lnb Cable Installation
LNB cable installation (cp. installation diagram on the next page) For the installation of the F connector on the coaxial cable you will need a knife (ideally a wire stripper) and side cutting pliers. When stripping the isolation, neither the inner core or the foil nor the wire netting must be damaged. - Page 20 Cut the inner core with a cable cutter in such a manner that it projects maximum 1 mm from the connector.
- Page 21 Installation diagram Fasten the F connector of the coaxial cable onto the “LNB IN” antenna connection of the receiver. Fasten the other end of the coaxial cable on the LNB.
-
Page 22: Connection With The Scart Cable
Connection with the SCART cable Insert the SCART cable in the SCART socket “TV” of the receiver. Connect the SCART cable to the TV set. Follow the operating manual of the TV set. Insert the Scart cable in the Scart socket “VCR” of the receiver if you want to connect a video set. - Page 23 Connection diagram...
-
Page 24: Connection With The Yuv Cable
Connection with the YUV cable If you own a TV set with YUV connections, you can connect it via the SCART socket “TV“ to the receiver. For this purpose, you need a YUV cable with YUV connectors at one and a SCART connector with YUV element at the other extreme. - Page 25 the video recorder. This YUV output is a high-quality output especially made for flat screens, plasma TV sets or beamers. Follow the indications in the operating manual of the connected devices. Under menu item "System Setup – TV System" you can (among others) choose between the video output signals CVBS, RGB, and YUV.
-
Page 26: Connection Diagram
Connection diagram... -
Page 27: Connection With The S-Video Cable (S-Vhs)
Connection with the S-Video Cable (S-VHS) Caution! Strictly follow the instructions for connecting the S- video cable (SVHS) provided in the operating manual of your TV set. The S-video cable is not included in the scope of supply. Insert the S-Video cable in the “S-Video“ socket on the receiver. -
Page 28: Connection Diagram
Connection diagram... -
Page 29: Connection With The Cinch Cable
Connection with the Cinch cable If you own a TV set not provided with a SCART socket, you can connect the receiver via a Cinch cable. Connect the “VIDEO“ socket of the receiver to the video input of the TV set. Connect the “AUDIO-R“... -
Page 30: Connection Diagram
Connection diagram... -
Page 31: Connection Of An Audio-Digital Receiver
Connection of an audio-digital receiver If you want to use 5-channel audio transmission (Dolby digital sound/AC3), you must connect your audio-digital receiver to the optical or coaxial output of the receiver. Caution! Never connect the Phono input of your stereo system to the receiver;... - Page 32 Connection of the coaxial digital output Insert the coaxial cable in the “COAXIAL” socket of the receiver. Connect the coaxial cable to the audio-digital receiver. Connection diagram...
- Page 33 Connection of the optical digital output Pull the protective cap out of the "OPTICAL“ socket of the receiver. Insert the optical cable in the “OPTICAL” socket of the receiver. Connect the optical cable to the audio-digital receiver. Connection diagram...
-
Page 34: Connection And Rough Direction Of The Antenna
Connection and rough direction of the antenna You must connect the antenna cable to the LNB before directing the antenna. Please follow also the instructions in the operating manual of your satellite antenna. Caution! The receiver should only be connected to the power supply after you have connected the antenna cable to the receiver. - Page 35 South South East You must have this view when standing behind the antenna. In this angle of 90° nearly all common satellite positions, such as ASTRA1 19.2° E, Eutelsat Hotbird 13° E, and Türksat 42° E, can be found. Depending on which satellite you wish to receive, there must be free sight without any obstacles in this angle.
- Page 36 First step: Switch on your TV set. Please make sure that your TV set has been adjusted to the receiver. In case of a Scart connection, the TV set must be set to the correct AV channel. Second step: Switch on the receiver. Please ensure that the receiver has been preset for the most common satellites and their channels and that you just have to enter the channel locations via the numeric keys of the remote control of...
- Page 37 South Picture A Picture B Now, turn your antenna slowly towards the east (to the left) while observing the TV set, until the receiving component points exactly towards the east, i.e. rotate by 90° (see picture below). South East In case of digital satellite reception, the receiver receives the transmission signal with a time lag.
- Page 38 Now, move your antenna in such a way that it will become steeper by 1° . For this purpose, pull at the top of the antenna. Now, return the antenna slowly to its initial position towards the south. Now, turn the antenna once again 1°...
-
Page 39: Getting Started
Getting started Remote control For the remote control two Micro type batteries LR 03/AAA/1.5V are required. Open the battery compartment. Insert two batteries into the battery compartment - paying attention to the indicated polarities and push the cover of the battery compartment carefully until it is locked. - Page 40 Check the batteries of your remote control at least once a year. If one battery has leaked, wear protective gloves and clean the battery compartment with a dry cloth. Caution! Batteries may contain toxic agents that are hazardous to health and environment. Therefore, dispose of the batteries in any case according to the prevailing statutory regulations.
-
Page 41: The Receiver
The receiver Caution! Check that connections of all equipment and the antenna are proper before connecting the receiver to the mains. Insert the mains plugs of the connected equipment in the mains socket and switch it on. Switch on the AV channel of the TV set. If the TV set recognizes the switching voltage emitted by the receiver, it will switch automatically to the AV mode. -
Page 42: Operation
Operation Screen-inlays while switching channels When a channel is switched, an information bar appears on the screen for 5 seconds. In this information bar, you will find the following indications: (According to the presetting in menu item “Time“). - Page 43 Channel-group symbols Should the current programme belong to the general channel group, no symbol will appear.
-
Page 44: User Interface On The Tv Screen
User interface on the TV screen You can do individual settings of your receiver using the menus in the user interface. For this purpose, both the receiver and the TV set need to be switched on and connected by a Scart cable. Press the “MENU”... -
Page 45: Menu Structure
Menu structure... -
Page 46: Menu Navigation
Menu navigation Use the keys “CH▲”, “CH▼”, “V+”, and “V-” to navigate within the menus. The selected menu items are marked. Confirm your selection with the “OK” key. By pressing the “EXIT” key you can exit the menu again. Changes must be confirmed additionally. -
Page 47: Channel (Symbol: Tv)
Channel (symbol: TV) 1 Favorite By pressing the 1 key you can determine your favourite channels. Next to the corresponding channels, a heart symbol will be displayed. 2 Move By pressing the 2 key, the move symbol will appear behind the marked channel. By pressing the keys CH▲ and CH▼, the channel will be moved to the desired position. - Page 48 4 Sort Sorting of the complete channel list according to the offered options. The list must be confirmed with OK. 5 Edit This option is not available in the favourites list or a channel group. After entering the password (default value 0000), new selection options will appear.
- Page 49 3 Lock By marking with the 3 key, selected channels can be marked to be locked. Please confirm your selection and the safety message by pressing the "OK“ key. Then, the selected channels require the entry of a password (parental lock). 4 Create By pressing the 4 key, the menu "Create"...
- Page 50 5 Edit By pressing the 5 key, the editing menu will be displayed. Here, you can change the individual parameters as desired.
- Page 52 6 Del(ete) all Via the 6 key you can mark all channels to be deleted. Thereafter, individual channels can be deselected again by pressing the 1 key. Please confirm your selection and the safety message by pressing the "OK“ key. 6 Type (channel group) Here, you can assign selected channels to determined channel groups (Types) as desired.
-
Page 53: Installation (Symbol: Satellite Antenna)
Installation (symbol: satellite antenna) - Page 56 Table for the TP Index...
-
Page 57: System Setup (Symbol: Receiver)
System Setup (symbol: receiver) - Page 60 Table for time setting If GMT Usage is enabled, time in the standby mode on the front panel of the receiver is set automatically.
- Page 61 Table for timer setting However, the timer can also be programmed via the EPG mode. Example: Press the “EPG“ key. Via the 1 key you will then get an event list. By using the keys CH▲ and CH▼, you can select the desired event. After...
- Page 62 displaying the details by pressing the "OK" key, the result can be taken over directly to the timer by pressing the 2 key.
-
Page 63: Tools (Symbol: Tool Case)
Tools (symbol: tool case) -
Page 64: Software Update Via Satellite
Software update via satellite The update has nothing to do with the storage of new TV channels. It is rather meant to update the system software of the receiver. Normally, the update is not required for a trouble- free operation of the receiver. You must direct your satellite system towards the satellite Astra1 19°... -
Page 65: Keys With Special Functions
Keys with special functions Switch between TV and SAT With the “TV/SAT” key you can switch between TV and satellite functions. (This function has to be provided by your TV set). Press the “TV/SAT” key until you have set the desired function. -
Page 66: List
LIST Press the “LIST” key once. Here you have the option to edit the channel list as already described earlier under menu item “Channel“. AUDIO With the “AUDIO” key you can select the audio track if a broadcasting station offers multi-channel sound. Additionally, you can enable the Dolby Digital mode here. -
Page 67: Text
TEXT Teletext is an information system displaying Teletext on your TV set. For Teletext reception, the selected channel must support this function. The TTX symbol appears when channels are changed. Comparing our receiver with others you will notice that our Teletext is extremely fast. -
Page 68: Mute
By pressing the “EXIT“ key, you will leave the multi- picture mode. The channel you marked last will appear as complete image on your screen. MUTE By pressing the “MUTE“ key, the sound will be turned off. By pressing the “MUTE“ key again, the sound will be turned on again. -
Page 69: Info - Acoustic Signal For Directing The Satellite Antenna
INFO - acoustic signal for directing the satellite antenna For this purpose, press the “INFO” key. Apart from the current reception parameters, you will get information on the signal strength and quality. Additionally, you can enable an acoustic signal by pressing the 1 key. An acoustic signal will be emitted by the TV set. -
Page 70: Uninstalling The Receiver
Uninstalling the receiver Separate the receiver and connected equipment from the power supply. Loosen the LNB cable from the receiver. Take the batteries out of the remote control, if you will not use the receiver for a longer period of time. Pack the receiver, the cables and the remote control in a cardboard box. -
Page 71: Tips & Tricks/Trouble Shooting
Tips & tricks/trouble shooting... - Page 74 If a problem cannot be rectified in spite of this, please contact your specialized dealer or the manufacturer.
-
Page 75: Disposal
Disposal European disposal directive 2002/96/EC Never throw the receiver into normal household waste. Ask your municipal authorities or local government about different methods for disposing of the equipment in an eco-friendly and proper manner. Never throw the batteries into normal household waste. Batteries may contain toxic agents. -
Page 76: Specifications
Specifications... -
Page 78: Manufacturer
Manufacturer COMAG Handels AG Zillenhardtstraße 41 D-73037 Göppingen Germany Telephone: 0049 (0)7161 / 5 03 06 – 0 Telefax: 0049 (0)7161 / 5 03 06 – 11 Website: www.comag-ag.de Dear customer, Past experience has shown that many complaints can be settled through a simple telephone call. -
Page 79: Guarantee
Guarantee The guarantee for the digital camping satellite system of COMAG Handels AG is in conformity with the prevailing statutory regulations at the time of purchasing the product. The term of guarantee is 3 years. Modifications of the device lead to an extinction of the manufacturer’s guarantee obligation. -
Page 80: Declaration Of Conformity
• EN 60065:2002 + A1:2006 Guideline on electromagnetic compatibility, 2004/108/EC • EN 55013:2001 + A1:2003 + A2:2006 • EN 55020:2007 • EN 61000-3-2:2006 • EN 61000-3-3::1995 + A1:2001 + A2:2005 Equipment type/model: Digital Satellite Receiver SL 65 Göppingen, 28/01/2009 COMAG Handels AG... -
Page 81: Glossary
Glossary...