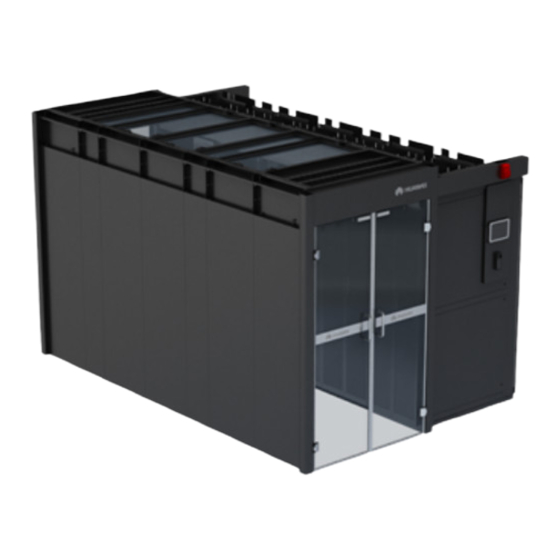
Huawei FusionModule2000 Maintenance Manual
Smart modular data center
Hide thumbs
Also See for FusionModule2000:
- Installation manual (318 pages) ,
- Product description (217 pages) ,
- Maintenance manual (144 pages)

Related Manuals for Huawei FusionModule2000


Summary of Contents for Huawei FusionModule2000
- Page 1 FusionModule2000 Smart Modular Data Center V100R022C10 Maintenance Guide Issue Date 2022-07-30 HUAWEI DIGITAL POWER TECHNOLOGIES CO., LTD.
- Page 2 Notice The purchased products, services and features are stipulated by the contract made between Huawei Digital Power Technologies Co., Ltd. and the customer. All or part of the products, services and features described in this document may not be within the purchase scope or the usage scope. Unless otherwise specified in the contract, all statements, information, and recommendations in this document are provided "AS IS"...
-
Page 3: About This Document
About This Document About This Document Purpose This document describes FusionModule2000 smart modular data center (FusionModule2000 for short) in terms of routine maintenance, troubleshooting, and parts replacement. It aids regular verification, maintenance and prompt solutions for device potential faults. Intended Audience This document is intended for: ●... - Page 4 Change History Issue Date Description 2022-07-30 ● Updated the safety information. ● Updated the tool list. 2022-04-30 This issue is the first official release. Issue 02 (2022-07-30) Copyright © Huawei Digital Power Technologies Co., Ltd.
-
Page 5: Table Of Contents
5.1 CommonECC800-Pro Operations............................ 58 5.1.1 Preparations and WebUI Login............................. 58 5.1.2 Synchronizing the Configuration Parameters......................62 5.2 Replacing Power Supply and Distribution System Components................62 5.2.1 Parts Replacement for the Precision PDF........................62 Issue 02 (2022-07-30) Copyright © Huawei Digital Power Technologies Co., Ltd. - Page 6 5.4.14 Replacing a FusionModule Actuator........................104 5.4.15 Replacing the Fuse for a FusionModule Actuator..................... 106 5.4.16 Replacing a Skylight Magnetic Lock........................106 5.4.17 Replacing a Pad................................107 5.4.18 Replacing the Smart Screen............................108 Issue 02 (2022-07-30) Copyright © Huawei Digital Power Technologies Co., Ltd.
- Page 7 5.5.1 Operating a Hydraulic Circuit breaker (Inside the Smart rPDU)..............128 5.5.2 Handling Long-time Hotspot at the Air Inlet of a Cabinet in iCooling Mode........... 129 A Acronyms and Abbreviations................... 131 Issue 02 (2022-07-30) Copyright © Huawei Digital Power Technologies Co., Ltd.
-
Page 8: Safety Information
Equipment damage due to force majeure, such as earthquakes, fire, and storms ● Damage caused during transportation by the customer ● Storage conditions that do not meet the requirements specified in this document Issue 02 (2022-07-30) Copyright © Huawei Digital Power Technologies Co., Ltd. -
Page 9: Personal Safety
In the case of a fire, immediately leave the building or the equipment area and activate the fire alarm or call emergency services. Do not re-enter the building or affected area until it has been deemed safe by qualified professionals. Issue 02 (2022-07-30) Copyright © Huawei Digital Power Technologies Co., Ltd. -
Page 10: Electrical Safety
A circuit breaker equipped with a residual current device (RCD) is not recommended. ● It is recommended that the three-phase loads be equalized and the neutral- ground voltage be kept at less than 2 V to meet power distribution requirements. Issue 02 (2022-07-30) Copyright © Huawei Digital Power Technologies Co., Ltd. - Page 11 0°C. Handle cables with caution, especially at a low temperature. – Cables stored at subzero temperatures must be stored at room temperature for at least 24 hours before they are laid out. Issue 02 (2022-07-30) Copyright © Huawei Digital Power Technologies Co., Ltd.
-
Page 12: Environmental Requirements
Ensure that no liquid enters the equipment to prevent faults or short circuits. Issue 02 (2022-07-30) Copyright © Huawei Digital Power Technologies Co., Ltd. - Page 13 After the preceding conditions no longer exist, the safety director and relevant technical personnel need to check the involved equipment. Operators can begin working only after obtaining consent. Issue 02 (2022-07-30) Copyright © Huawei Digital Power Technologies Co., Ltd.
-
Page 14: Mechanical Safety
Before installation, ensure that the equipment is firmly anchored to the floor or other solid objects, such as a wall or an installation rack. Hoisting ● Do not walk under hoisted objects. Issue 02 (2022-07-30) Copyright © Huawei Digital Power Technologies Co., Ltd. - Page 15 ● When transporting the equipment using a forklift truck, ensure that the forks are properly positioned so that the equipment does not topple. Before moving Issue 02 (2022-07-30) Copyright © Huawei Digital Power Technologies Co., Ltd.
- Page 16 Ensure that the wider end of the ladder is at the bottom, or protective measures have been taken at the bottom to prevent the ladder from sliding. Issue 02 (2022-07-30) Copyright © Huawei Digital Power Technologies Co., Ltd.
- Page 17 Otherwise, the gas may leak and cause a fire. ● High-temperature pipes after welding must be promptly cooled. ● Do not weld or cut on pressurized containers or pipes. Electric devices must be powered off before welding. Issue 02 (2022-07-30) Copyright © Huawei Digital Power Technologies Co., Ltd.
-
Page 18: Ups Safety
Disconnect the backfeed protection card from the UPS before operating the UPS. ● The upstream power distribution of the UPS should comply with IEC 60364-4-41. Issue 02 (2022-07-30) Copyright © Huawei Digital Power Technologies Co., Ltd. -
Page 19: Cooling System Safety
(such as the compressor and refrigerant pipe) to prevent the refrigerant system from being cracked or exploded due to misoperations. Refrigerant Frostbite Refrigerant leakage may cause frostbite. Take protective measures (for example, wear antifreeze gloves) when handling refrigerant. Issue 02 (2022-07-30) Copyright © Huawei Digital Power Technologies Co., Ltd. -
Page 20: Battery Safety
D ANGER Protect batteries from mechanical vibration, collision, punctures, and strong impact. Otherwise, the batteries may catch fire. Issue 02 (2022-07-30) Copyright © Huawei Digital Power Technologies Co., Ltd. - Page 21 After unpacking batteries, place them in the required direction. Do not place a battery upside down or vertically, lay it on one side, tilt it, or stack it with others. Any bumping or falling may damage the batteries. Issue 02 (2022-07-30) Copyright © Huawei Digital Power Technologies Co., Ltd.
- Page 22 After the installation is complete, clean up the objects on the batteries and the surrounding area. ● Use batteries of specified models. Using batteries of other models may damage the batteries. Issue 02 (2022-07-30) Copyright © Huawei Digital Power Technologies Co., Ltd.
- Page 23 Flammable Gas ● Lithium battery: – A battery module is an enclosed battery system and will not release any gases under normal operations. Issue 02 (2022-07-30) Copyright © Huawei Digital Power Technologies Co., Ltd.
- Page 24 ● The battery room should be equipped with cabinet-level or room-level CO sensors, smoke sensors, and temperature sensors. It is recommended that H Issue 02 (2022-07-30) Copyright © Huawei Digital Power Technologies Co., Ltd.
- Page 25 Fire alarms in the battery room should be automatically reported to the fire supervision center. If the battery room is unattended, an automatic fire alarm system must be deployed to report fire alarm signals to the remote supervision center. Issue 02 (2022-07-30) Copyright © Huawei Digital Power Technologies Co., Ltd.
-
Page 26: M Preparations
With cooling engineer qualifications Management Familiar with the smart module management system system configurations and device data upload methods, and able to proficiently operate the management system With monitoring engineer qualifications Issue 02 (2022-07-30) Copyright © Huawei Digital Power Technologies Co., Ltd. -
Page 27: Tools
Phillips insulated Flat-head torque torque insulated torque screwdriver screwdriver screwdriver (2–5 (M4/M6/M8) M3/M4 (length < 100 mm) Socket wrench (M6/M8/M12) Adjustable wrench Hex key Double box-end (6") wrench (M6/M8/ M12) Issue 02 (2022-07-30) Copyright © Huawei Digital Power Technologies Co., Ltd. - Page 28 Reducing valve Electrician's knife Impact tool Insulation tape Needle-nose Diagonal pliers RJ45 crimping Crimping tool pliers tool Wire stripper Hydraulic pliers Wire clippers Cable tie Multimeter Electroprobe Brush Claw hammer Issue 02 (2022-07-30) Copyright © Huawei Digital Power Technologies Co., Ltd.
-
Page 29: Reference Documentation
Table 2-3 Reference documents System Component Document Category PDU8000 Modular Precision PDC V2.0 Power supply Precision PDF Quick Guide Issue 02 (2022-07-30) Copyright © Huawei Digital Power Technologies Co., Ltd. - Page 30 ● The ECC800/NetEco version depends on the version in use. Click on the ECC800/ NetEco WebUI to obtain the current version. ● For NetEco maintenance, see the NetEco documents. Issue 02 (2022-07-30) Copyright © Huawei Digital Power Technologies Co., Ltd.
-
Page 31: Routine Maintenance
Maintenance Interval The routine maintenance interval specifies how often a maintenance task is performed. A maintenance task can be performed on a daily, monthly, quarterly, semi-annual, or annual basis. Issue 02 (2022-07-30) Copyright © Huawei Digital Power Technologies Co., Ltd. -
Page 32: Routine Maintenance
The power See the documents status of choose Monitoring > Power supply and for power supply power Distribution. distribution and distribution supply devices are devices. working distributio properly. n devices. Issue 02 (2022-07-30) Copyright © Huawei Digital Power Technologies Co., Ltd. - Page 33 Admin. ● IVS1800 scenario: Log in to the iClient as the admin user, choose Live > Cameras, and select an online camera to view live video. Issue 02 (2022-07-30) Copyright © Huawei Digital Power Technologies Co., Ltd.
-
Page 34: Monthly Maintenance
Power supply to Check The power supply to Check whether devices whether the devices is normal. cables are damaged switches of or loose. each IT cabinet are Issue 02 (2022-07-30) Copyright © Huawei Digital Power Technologies Co., Ltd. - Page 35 Clean up the scale pan and liquid inspection condensate water from the level detector pan and liquid level condensate water detector have no pan and liquid level scale. detector. Issue 02 (2022-07-30) Copyright © Huawei Digital Power Technologies Co., Ltd.
- Page 36 Check the Check that the Replace the fan running operating indoor assembly. sound of the fan generates no indoor fan. abnormal noise. Issue 02 (2022-07-30) Copyright © Huawei Digital Power Technologies Co., Ltd.
- Page 37 If not, replace the magnetic lock. VCN/IVS1800 Observe the The VCN/IVS1800 For details, see the Indicator VCN/IVS1800 indicator is steady VCN/IVS1800 indicator. green. documents. Issue 02 (2022-07-30) Copyright © Huawei Digital Power Technologies Co., Ltd.
- Page 38 If so, reconnect the cable. If not, replace the cable. ● If the ALM indicator is steady on, clear the alarm by referring to the iBattery user manual. Issue 02 (2022-07-30) Copyright © Huawei Digital Power Technologies Co., Ltd.
-
Page 39: Quarterly Maintenance
Check the bolt at every terminal. If any bolt is loose, tighten it. Issue 02 (2022-07-30) Copyright © Huawei Digital Power Technologies Co., Ltd. - Page 40 Maint > Diagnostic Mode > Enter on the main screen, and start the electric heater. NOTE To avoid burns, do not touch the electric heater surface with bare skin. Issue 02 (2022-07-30) Copyright © Huawei Digital Power Technologies Co., Ltd.
- Page 41 Set parameters management LCD, choose set based on correctly. parameter System Info > requirements. settings Settings > Battery Param. and check whether battery management parameters are set as required. Issue 02 (2022-07-30) Copyright © Huawei Digital Power Technologies Co., Ltd.
- Page 42 If so, reconnect the cable. If not, replace the cable. ● If the ALM indicator is steady on, check for alarms. Issue 02 (2022-07-30) Copyright © Huawei Digital Power Technologies Co., Ltd.
- Page 43 If a fault occurs in WiFi accessing or configuration, check whether the antenna is shielded. If so, install the antenna in a different position. If not, replace the WiFi antenna. Issue 02 (2022-07-30) Copyright © Huawei Digital Power Technologies Co., Ltd.
- Page 44 See the detector is faulty or product the cables are not instructions.) properly connected. Check the cables or replace the smoke detector. Issue 02 (2022-07-30) Copyright © Huawei Digital Power Technologies Co., Ltd.
- Page 45 UIM20A for the UIM20A expansion expansion module. module. Check the cable connections or replace the UIM20A expansion module. Issue 02 (2022-07-30) Copyright © Huawei Digital Power Technologies Co., Ltd.
- Page 46 ETH gateway is powered on. If the fault persists, replace the FusionModule Actuator. Issue 02 (2022-07-30) Copyright © Huawei Digital Power Technologies Co., Ltd.
- Page 47 ECC800-Pro WebUI. installed is opened, information replace the door on the status sensor. ECC800-Pro WebUI. Issue 02 (2022-07-30) Copyright © Huawei Digital Power Technologies Co., Ltd.
-
Page 48: Semiannual Maintenance
1°C sensors inside and humidity or humidity outside the deviation is less deviation is cabinet. than 5%. greater than 5%, the T/H sensor must be calibrated or replaced. Issue 02 (2022-07-30) Copyright © Huawei Digital Power Technologies Co., Ltd. - Page 49 ● Power off the rotate properly. outdoor unit ● Cables are not and replace damaged or cables. aged. Issue 02 (2022-07-30) Copyright © Huawei Digital Power Technologies Co., Ltd.
- Page 50 If so, Environment temperature is reconnect the cable. Unit. On the displayed properly. If not, replace the Running Info rack environment page, check unit. information such communication status and temperature. Issue 02 (2022-07-30) Copyright © Huawei Digital Power Technologies Co., Ltd.
- Page 51 Fusion Module Actuator. On the Running Control page, control the lights. NOTE After checking the FusionModule Actuator, set Lighting Control Mode to the status before the modification in 1. Issue 02 (2022-07-30) Copyright © Huawei Digital Power Technologies Co., Ltd.
- Page 52 Issue 02 (2022-07-30) Copyright © Huawei Digital Power Technologies Co., Ltd.
- Page 53 FusionModule Actuator, check whether the cables to the light buttons are properly connected. If the cables are properly connected, replace the light buttons. Issue 02 (2022-07-30) Copyright © Huawei Digital Power Technologies Co., Ltd.
- Page 54 If the cable connection and power supply are abnormal, replace the cabinet electronic lock. Issue 02 (2022-07-30) Copyright © Huawei Digital Power Technologies Co., Ltd.
- Page 55 PSUs, the board power supply or PoE power supply is abnormal. Take corrective measures based on the SYS indicator status: ● Off: The LAN switch is not operating. Issue 02 (2022-07-30) Copyright © Huawei Digital Power Technologies Co., Ltd.
- Page 56 WebUI increases. temperature sensor is the temperature properly connected. of the rack Otherwise, replace environment unit the cabinet on the WebUI. temperature sensor. Issue 02 (2022-07-30) Copyright © Huawei Digital Power Technologies Co., Ltd.
- Page 57 Otherwise, corresponding replace the asset indicator on the detection strip. asset detection strip. Issue 02 (2022-07-30) Copyright © Huawei Digital Power Technologies Co., Ltd.
- Page 58 If the door cannot be availability the door can be opened and closed opened or closed opened and smoothly. smoothly, check the closed smoothly. rail for obstacles and clear the obstacles. Issue 02 (2022-07-30) Copyright © Huawei Digital Power Technologies Co., Ltd.
-
Page 59: Annual Maintenance
2. If the fault alarm threshold, persists, to refresh the contact capacity of the technical battery. support. Issue 02 (2022-07-30) Copyright © Huawei Digital Power Technologies Co., Ltd. - Page 60 Replace a structures such as aisle end doors component if its aisle end doors and skylights are function is and skylights free from affected. deformation, corrosion, and paint flake-off. Issue 02 (2022-07-30) Copyright © Huawei Digital Power Technologies Co., Ltd.
-
Page 61: Alarms And Troubleshooting
Alarms and Troubleshooting If an incident occurs and may jeopardize the long-term stable running of the FusionModule2000, the system or a component will generate alarms. O&M personnel or the person on duty must promptly handle any identified alarms. Issue 02 (2022-07-30) -
Page 62: Alarm Handling Flowchart
Alarm information helps to rapidly locate and rectify faults. Procedure Step 1 Log in to the ECC800-Pro WebUI. Step 2 Choose Home > Active Alarms, and view the current alarm information. Issue 02 (2022-07-30) Copyright © Huawei Digital Power Technologies Co., Ltd. -
Page 63: Determining The Faulty Area And Alarm Severity
Locating Faults Locate faults from the following aspects: ● Component: Locate the component for which the alarm is generated. ● Module: Locate the faulty module after locating a faulty component. Issue 02 (2022-07-30) Copyright © Huawei Digital Power Technologies Co., Ltd. - Page 64 ● Alarm reference obtained from technical support It is recommended that the alarm handling report consists of information about the alarm occurrence time, location, symptom, fault locating process, alarm handling process, and alarm prevention solutions. Issue 02 (2022-07-30) Copyright © Huawei Digital Power Technologies Co., Ltd.
-
Page 65: Parts Replacement
(protected by a security mechanism) on the ECC800-Pro. Table 5-1 Default IP addresses for the WAN and LAN ports on the ECC800-Pro Port Default IP Address WAN1 192.168.8.10 WAN2 192.168.0.10 LAN1 and LAN2 192.168.248.10 Issue 02 (2022-07-30) Copyright © Huawei Digital Power Technologies Co., Ltd. - Page 66 Compatibility View, and add the web access address to the compatibility view. Choose Tools > Internet options > Security, choose Add the ECC800-Pro IP address to the list of trusted sites. Issue 02 (2022-07-30) Copyright © Huawei Digital Power Technologies Co., Ltd.
- Page 67 FusionModule2000 Smart Modular Data Center Maintenance Guide 5 Parts Replacement Figure 5-1 Adding an address Enable file download and set the security level of the trusted site to low. Figure 5-2 Setting parameters Issue 02 (2022-07-30) Copyright © Huawei Digital Power Technologies Co., Ltd.
- Page 68 – An account is logged out due to timeout if no operation is performed within 10 minutes after system login. – A maximum of three users can log in to the ECC800-Pro WebUI at the same time. ----End Issue 02 (2022-07-30) Copyright © Huawei Digital Power Technologies Co., Ltd.
-
Page 69: Synchronizing The Configuration Parameters
If you need to replace any other parts, contact technical support. 5.2.2 Parts Replacement for the Integrated PDF For details about parts replacement for the integrated PDF, see section "Parts Replacement" in the integrated PDF user manual. Issue 02 (2022-07-30) Copyright © Huawei Digital Power Technologies Co., Ltd. -
Page 70: Parts Replacement For The Integrated Ups
Circuit breaker NO TE If other components need to be replaced, contact technical support. 5.2.4 Replacing an rPDU Impact on the System One power input of the equipment cannot work. Issue 02 (2022-07-30) Copyright © Huawei Digital Power Technologies Co., Ltd. -
Page 71: Replacing A Smart Rpdu
Material: smart rPDU of the same specifications Context The smart rPDU is installed near the rear door of the cabinet. Procedure Step 1 Open the rear door of the cabinet. Issue 02 (2022-07-30) Copyright © Huawei Digital Power Technologies Co., Ltd. -
Page 72: Parts Replacement For Smart Busbars
Output circuit breaker of the power distribution unit NO TICE There could be service interruptions during parts replacement for the smart busbar. If power disconnection is required, seek the customer's permission first. Issue 02 (2022-07-30) Copyright © Huawei Digital Power Technologies Co., Ltd. -
Page 73: Parts Replacement For The Cooling System
Liquid level detector Water pump Display screen Wet film humidifier Refrigerant pump Table 5-7 Replaceable parts of the smart cooling outdoor unit Replaceable Part Switch Fan drive Refrigerant pump Issue 02 (2022-07-30) Copyright © Huawei Digital Power Technologies Co., Ltd. -
Page 74: Parts Replacement For The Management System
● The data regarding SNMP, access user rights, user management, IP addresses, time, time zone, and security certificates cannot be backed up. Issue 02 (2022-07-30) Copyright © Huawei Digital Power Technologies Co., Ltd. - Page 75 Step 9 Choose Maintenance > Configuration File and import the backup configuration file, or set parameters for the devices that connect to the ECC800-Pro to ensure normal communication. ----End Issue 02 (2022-07-30) Copyright © Huawei Digital Power Technologies Co., Ltd.
-
Page 76: Replacing An Ecc800-Pro Psu
Figure 5-6 Replacing a PSU ----End 5.4.1.3 Replacing ECC800-Pro Antennas Prerequisites ● Tools: ESD wrist strap, ESD gloves ● Materials: Spare ECC800-Pro antennas of the same model are available and functional. Issue 02 (2022-07-30) Copyright © Huawei Digital Power Technologies Co., Ltd. -
Page 77: Replacing A Sim Card And Micro Sd Card
Step 3 Pull the handles on both sides of the ECC800-Pro main control module, and to remove the main control module. Figure 5-8 Removing the ECC800-Pro main control module Issue 02 (2022-07-30) Copyright © Huawei Digital Power Technologies Co., Ltd. -
Page 78: Replacing The Management System
5.4.2.1 Replacing an IVS1800 Prerequisites ● Recommended tool: Phillips screwdriver ● An IVS1800 needs to be replaced. ● A spare IVS1800 of the same model is available and functional. Issue 02 (2022-07-30) Copyright © Huawei Digital Power Technologies Co., Ltd. - Page 79 Step 5 Turn on the power switch of the IVS1800. Step 6 Commissioning the IVS1800. If the video recording function works properly after commissioning, the IVS1800 is functional. ----End Issue 02 (2022-07-30) Copyright © Huawei Digital Power Technologies Co., Ltd.
-
Page 80: Replacing A Hard Disk For The Ivs1800
Before the installation, ensure that the fastener of the hard disk tray is on a different side from the hard disk port, as shown in the lower left figure. Issue 02 (2022-07-30) Copyright © Huawei Digital Power Technologies Co., Ltd. - Page 81 P0–P3 to hard disks on the lower-layer hard disk tray and ports P4–P7 to hard disks on the upper-layer. Figure 5-16 Connecting data and power cables to hard disks Issue 02 (2022-07-30) Copyright © Huawei Digital Power Technologies Co., Ltd.
-
Page 82: Replacing A Camera
Tools: ESD wrist strap, ESD gloves, step ladder, label, marker, Phillips screwdriver ● Material: camera Procedure Step 1 Remove the transparent cover using a Phillips screwdriver. Figure 5-18 Removing the transparent cover Step 2 Remove the SD card. Issue 02 (2022-07-30) Copyright © Huawei Digital Power Technologies Co., Ltd. -
Page 83: Parts Replacement For The Access System
Step 5 Check that the camera functions properly. ----End 5.4.3 Parts Replacement for the Access System 5.4.3.1 Replacing an Access Actuator Impact on the System The aisle access control system cannot be used. Issue 02 (2022-07-30) Copyright © Huawei Digital Power Technologies Co., Ltd. -
Page 84: Replacing An Access Control Device
The replacement methods are the same for the fingerprint and card reader with a keypad, fingerprint and card reader, and card reader with a keypad. Impact on the System The access control system cannot be used. Issue 02 (2022-07-30) Copyright © Huawei Digital Power Technologies Co., Ltd. -
Page 85: Replacing A Button
The emergency button (red) needs to be manually reset. Its BOM number is 16050102. ● The door open button, emergency button, and light button are replaced in the same way. Issue 02 (2022-07-30) Copyright © Huawei Digital Power Technologies Co., Ltd. -
Page 86: Replacing A Sliding Door Magnetic Lock
Step 3 Verify that the button function is normal. Step 4 Reinstall the post side panel. ----End 5.4.3.4 Replacing a Sliding Door Magnetic Lock Issue 02 (2022-07-30) Copyright © Huawei Digital Power Technologies Co., Ltd. - Page 87 5-25. Step 5 Use the screws removed in the previous step to secure the disassembled magnetic lock to the magnetic lock fastener, as shown by (3) in Figure 5-25. Issue 02 (2022-07-30) Copyright © Huawei Digital Power Technologies Co., Ltd.
-
Page 88: Replacing A Double-Door Magnetic Lock
The door cannot be controlled by the magnetic lock. Preparations ● Tools: Phillips screwdriver, rubber mallet ● Material: magnetic lock Procedure Step 1 Remove the mounting plate of the magnetic lock cover, as shown in Figure 5-26. Issue 02 (2022-07-30) Copyright © Huawei Digital Power Technologies Co., Ltd. - Page 89 Step 4 Connect the magnetic lock cable to the new magnetic lock, and secure the magnetic lock to the fixing plate using the delivered hex key, as shown in Figure 5-28. Issue 02 (2022-07-30) Copyright © Huawei Digital Power Technologies Co., Ltd.
- Page 90 Figure 5-29. Figure 5-29 Installing the mounting plate of a magnetic lock cover Step 6 Replace the magnet. Remove the magnet from the door, as shown in Figure 5-30. Issue 02 (2022-07-30) Copyright © Huawei Digital Power Technologies Co., Ltd.
- Page 91 When securing the magnet to the door panel, do not over-tighten the screws so that the white rubber washer is elastic. The washer will adjust the magnet to a correct position because of its elasticity. Issue 02 (2022-07-30) Copyright © Huawei Digital Power Technologies Co., Ltd.
- Page 92 (1) in Figure 5-33. If the magnet is not level, use a spacer shown by (2) in Figure 5-33 to adjust the magnet levelness. Issue 02 (2022-07-30) Copyright © Huawei Digital Power Technologies Co., Ltd.
-
Page 93: Replacing A Door Status Sensor
Step 3 Remove the door status sensor from the rack top using the Phillips screwdriver, as shown in Figure 5-34. Issue 02 (2022-07-30) Copyright © Huawei Digital Power Technologies Co., Ltd. -
Page 94: Replacing A Cabinet Electronic Lock
The electronic lock of the cabinet cannot be used. Preparations ● Material: electronic lock Procedure Step 1 Open the cabinet door, and disconnect the monitoring cable from the electronic lock. Step 2 Remove the electronic lock. Issue 02 (2022-07-30) Copyright © Huawei Digital Power Technologies Co., Ltd. -
Page 95: Replacing A Cabinet Fingerprint And Card Lock
Material: fingerprint and card lock Procedure Step 1 Open the cabinet door and disconnect the monitoring cable connected to the fingerprint and card lock. Step 2 Remove the fingerprint and card lock. Issue 02 (2022-07-30) Copyright © Huawei Digital Power Technologies Co., Ltd. -
Page 96: Replacing An Automatic Door Status Sensor
● Material: automatic door status sensor Procedure Step 1 Disconnect the cable from the automatic door status sensor to the actuator. Step 2 Remove the automatic door status sensor. Issue 02 (2022-07-30) Copyright © Huawei Digital Power Technologies Co., Ltd. -
Page 97: Replacing A Smart Eth Gateway
Step 3 Remove the faulty smart ETH gateway from the guide rails. Figure 5-38 Removing a smart ETH gateway Step 4 Install the spare smart ETH gateway in the original position and reconnect the cables. Issue 02 (2022-07-30) Copyright © Huawei Digital Power Technologies Co., Ltd. -
Page 98: Replacing The Wifi Module
Step 3 Log in to the ECC800-Pro WebUI. Figure 5-39 Position of the WiFi module ----End 5.4.6 Replacing a Multi-Functional Sensor Impact on the System The temperature, humidity, and smoke cannot be sensed. Issue 02 (2022-07-30) Copyright © Huawei Digital Power Technologies Co., Ltd. -
Page 99: Replacing A Smoke Detector
Step 8 Check the running status of the multi-functional sensor to ensure normal communication. ----End 5.4.7 Replacing a Smoke Detector Smoke detectors can be installed in various scenarios. This section describes how to replace a smoke detector on the control skylight. Issue 02 (2022-07-30) Copyright © Huawei Digital Power Technologies Co., Ltd. -
Page 100: Replacing A Cabinet Temperature Sensor
Step 2 Remove the fastener that secures the temperature sensor and remove the sensor. Step 3 Secure the new temperature sensor to the original position in the cabinet using the fastener, and reconnect to the T/H sensor. Issue 02 (2022-07-30) Copyright © Huawei Digital Power Technologies Co., Ltd. -
Page 101: Replacing A Temperature And Humidity Sensor
A temperature and humidity (T/H) sensor needs to be replaced. ● A spare T/H sensor of the same model is available and functional. Context A T/H sensor can be maintained only from the rear door. Issue 02 (2022-07-30) Copyright © Huawei Digital Power Technologies Co., Ltd. - Page 102 DIP switch settings of the old T/H sensor. Step 5 Connect cable terminals to RS485_IN and RS485_OUT ports, and install a new T/H sensor in the position where the original T/H sensor was installed. Issue 02 (2022-07-30) Copyright © Huawei Digital Power Technologies Co., Ltd.
- Page 103 DIP Switch Sequence No. Return air 2 return temp/humid side Cold Cold aisle 1 aisle temp/humid Cold aisle 2 temp/humid Cold aisle 3 temp/humid Cold aisle 4 temp/humid Cold aisle 5 temp/humid Issue 02 (2022-07-30) Copyright © Huawei Digital Power Technologies Co., Ltd.
-
Page 104: Replacing An Ambient T/H Sensor (33010516)
Step 3 Remove the cable terminal from the RS485 port on the T/H sensor, as shown by (1) in the following figure. Step 4 Pull out the T/H sensor in the direction shown by (2) in the following figure. Issue 02 (2022-07-30) Copyright © Huawei Digital Power Technologies Co., Ltd. - Page 105 DIP switch settings of the old T/H sensor. Step 5 Connect the RS485 cable terminal and install the new T/H sensor in the original position. The following uses the smart cooling product cabinet as an example. Issue 02 (2022-07-30) Copyright © Huawei Digital Power Technologies Co., Ltd.
- Page 106 DIP Switch No. Cold Cold aisle 1 aisle temp/humid Cold aisle 2 temp/humid Cold aisle 3 temp/humid Cold aisle 4 temp/humid Cold aisle 5 temp/humid Hot aisle 1 aisle temp/humid Issue 02 (2022-07-30) Copyright © Huawei Digital Power Technologies Co., Ltd.
-
Page 107: Replacing A Water Sensor
A water sensor consists of a water detection cable, water detector, and conversion cable. The water detection cable is laid out on the floor, connected to the water detector placed near the collector by the conversion cable. Issue 02 (2022-07-30) Copyright © Huawei Digital Power Technologies Co., Ltd. - Page 108 Remove the conversion cable at the conversion port for the water detector and conversion cable. Remove the communication cable from the water detector. Connect a new water detector to the conversion cable. Secure the new water detector. Issue 02 (2022-07-30) Copyright © Huawei Digital Power Technologies Co., Ltd.
-
Page 109: Replacing An Alarm Beacon
5.4.12 Replacing an Alarm Beacon Impact on the System No sound or flash can be generated by the alarm. Preparations ● Tools: Phillips screwdriver, step ladder ● Material: alarm beacon Issue 02 (2022-07-30) Copyright © Huawei Digital Power Technologies Co., Ltd. -
Page 110: Replacing A Uim20A Expansion Module
Step 2 Disconnect cables from the UIM20A expansion module. Step 3 Unscrew the mounting ears from the two sides of the UIM20A expansion module, and remove the UIM20A expansion module. Issue 02 (2022-07-30) Copyright © Huawei Digital Power Technologies Co., Ltd. -
Page 111: Replacing A Fusionmodule Actuator
Impact on the System The PAD cannot be charged, the lights and rotating skylight cannot be controlled, and the aisle access control system cannot be used. Issue 02 (2022-07-30) Copyright © Huawei Digital Power Technologies Co., Ltd. - Page 112 Step 10 Check the parameters and communication status of the FusionModule Actuator to ensure normal communication. Step 11 Turn on and then turn off the lights to check that the FusionModule Actuator supplies power to the lights properly. ----End Issue 02 (2022-07-30) Copyright © Huawei Digital Power Technologies Co., Ltd.
-
Page 113: Replacing The Fuse For A Fusionmodule Actuator
Impact on the System The rotating skylight cannot be controlled. Preparations ● Tools: Phillips screwdriver, step ladder (2 m) ● Material: skylight magnetic lock Procedure Step 1 Open the rotating skylight. Issue 02 (2022-07-30) Copyright © Huawei Digital Power Technologies Co., Ltd. -
Page 114: Replacing A Pad
Step 7 Close the rotating skylight. ----End 5.4.17 Replacing a Pad Impact on the System The pad cannot be used. Preparations ● Tools: ESD wrist strap, ESD gloves, labels, and marker ● Material: pad Issue 02 (2022-07-30) Copyright © Huawei Digital Power Technologies Co., Ltd. -
Page 115: Replacing The Smart Screen
Step 2 Remove the power and communications cables from the smart screen. Step 3 Remove the old smart screen from the door box and install the spare smart screen on the door box. Issue 02 (2022-07-30) Copyright © Huawei Digital Power Technologies Co., Ltd. -
Page 116: Replacing A Pad Power Connector
Step 7 Specify the user name and password for the app on the reserved smart screen and log in to check that the app works properly. ----End 5.4.19 Replacing a PAD Power Connector Context Item Appearance Remarks PAD power connector The BOM number is 14190892. Issue 02 (2022-07-30) Copyright © Huawei Digital Power Technologies Co., Ltd. - Page 117 Step 3 Remove the charging cable from the power connector. Step 4 Remove the PAD power connector and its holder from the door box. Figure 5-55 Removing the PAD power connector holder Issue 02 (2022-07-30) Copyright © Huawei Digital Power Technologies Co., Ltd.
- Page 118 Remove the holder cover by loosening M4x12 screw assemblies. Remove the power connector from the guide rail of the holder. Figure 5-58 Removing the PAD power connector holder (BOM number: 14190892) Issue 02 (2022-07-30) Copyright © Huawei Digital Power Technologies Co., Ltd.
- Page 119 Figure 5-60 Assembling the PAD power connector holder (BOM number: 14190892) Figure 5-61 Assembling the PAD power connector holder (BOM number: 14190242) Step 8 Connect cables from the power connector to the FusionModule Actuator, and route the cables. Issue 02 (2022-07-30) Copyright © Huawei Digital Power Technologies Co., Ltd.
- Page 120 Remove the baffle plate from the power connector mounting holes in the door box. Secure the PAD power connector holder to the door box using two M4x12 screw assemblies. Issue 02 (2022-07-30) Copyright © Huawei Digital Power Technologies Co., Ltd.
-
Page 121: Replacing An Aisle Led Light
The light at either end can connect to a power cable to obtain power. An LED light has male and female connectors at both ends for interconnection. Issue 02 (2022-07-30) Copyright © Huawei Digital Power Technologies Co., Ltd. - Page 122 LED light is removed. Replace the failed LED light with a new one, and reinstall the removed LED lights one by one. Figure 5-66 Replacing an LED light tube Issue 02 (2022-07-30) Copyright © Huawei Digital Power Technologies Co., Ltd.
-
Page 123: Replacing The Strip Light Of An Atmosphere Light
Step 8 Install the new strip light by performing the preceding steps in reverse order. ----End 5.4.22 Replacing an Atmosphere Light Power Supply Impact on the System The atmosphere light is off during replacement. Issue 02 (2022-07-30) Copyright © Huawei Digital Power Technologies Co., Ltd. - Page 124 Step 5 Install the new atmosphere light power supply in the original position and connect the cables. Step 6 Connect the upstream fuse for the atmosphere light power supply. ----End Issue 02 (2022-07-30) Copyright © Huawei Digital Power Technologies Co., Ltd.
-
Page 125: Replacing An Elight Strip Light
Step 4 Pull out the strip light from the hole at the bottom of the left post. Step 5 Disconnect the strip light terminal from the strip light extension cable of the door post. Step 6 Pull out the strip light from the fasteners. Issue 02 (2022-07-30) Copyright © Huawei Digital Power Technologies Co., Ltd. -
Page 126: Replacing An Elight Actuator
5.4.24 Replacing an eLight Actuator Impact on the System The eLight strip light is off during replacement. Preparations ● Tools: ESD gloves, Phillips screwdriver, step ladder, label, marker ● Material: eLight actuator Issue 02 (2022-07-30) Copyright © Huawei Digital Power Technologies Co., Ltd. - Page 127 Step 5 Check the parameters and communication status of the eLight actuator to ensure normal communication. Step 6 On the ECC800-Pro WebUI, choose Maintenance > Deployment Wizard > Linkage Test > eLight Actuator Commissioning and click Test. The eLight strip Issue 02 (2022-07-30) Copyright © Huawei Digital Power Technologies Co., Ltd.
-
Page 128: Replacing An Elight Power Supply
5.4.25 Replacing an eLight Power Supply Impact on the System The eLight strip light is off during replacement. Preparations ● Tools: ESD gloves, Phillips screwdriver, step ladder, label, marker ● Material: eLight power supply Issue 02 (2022-07-30) Copyright © Huawei Digital Power Technologies Co., Ltd. - Page 129 Step 2 Label each cable based on the corresponding ports on the eLight power supply. Step 3 Remove the cables from the eLight power supply. Step 4 Remove the old eLight power supply from guide rails. Issue 02 (2022-07-30) Copyright © Huawei Digital Power Technologies Co., Ltd.
-
Page 130: Replacing Cables On The Guide Rail Of An Electric Sliding Door
Step 5 Install the new guide rail in the original position and connect the cables. NO TICE When replacing the guide rail, you must also replace the extension cable. Issue 02 (2022-07-30) Copyright © Huawei Digital Power Technologies Co., Ltd. -
Page 131: Replacing A Smart U Space Manager (Connected To A Uim20A Expansion Module) (Bom Number: 52273314)
5.4.27 Replacing a Smart U Space Manager (Connected to a UIM20A Expansion Module) (BOM Number: 52273314) Impact on the System The U space status of the equipment cannot be displayed during replacement. Issue 02 (2022-07-30) Copyright © Huawei Digital Power Technologies Co., Ltd. - Page 132 Remove the faulty main control box. Install a new main control box in the original position. Connect the cables to the new main control box based on the cable labels. Issue 02 (2022-07-30) Copyright © Huawei Digital Power Technologies Co., Ltd.
- Page 133 Figure 5-74 Installing a smart U space manager (main control box attached to the top of the cabinet interior) (1) Fastener (2) UIM20A expansion module (3) Main control box (4) Asset detection strip (42 U detection point) Issue 02 (2022-07-30) Copyright © Huawei Digital Power Technologies Co., Ltd.
-
Page 134: Replacing A Smart U Space Manager (Connected To A Uim20A Expansion Module) (Bom Number: 52275819)
(Optional) Replacing an Asset Detection Strip Label the position of each U space e-label on the asset detection strip. Remove all U space e-labels from the asset detection strip. Issue 02 (2022-07-30) Copyright © Huawei Digital Power Technologies Co., Ltd. -
Page 135: Common Maintenance Tasks
Hydraulic circuit breakers are important components of the smart rPDU. Power-on Operation Step 1 When the circuit breaker is OFF, press the button in the direction of the arrow to set the circuit breaker to ON. Issue 02 (2022-07-30) Copyright © Huawei Digital Power Technologies Co., Ltd. -
Page 136: Handling Long-Time Hotspot At The Air Inlet Of A Cabinet In Icooling Mode
Mode Symptom There is a hotspot (higher than 27°C) at the air inlet of a cabinet in iCooling mode for more than 2 hours and the hotspot persists. Issue 02 (2022-07-30) Copyright © Huawei Digital Power Technologies Co., Ltd. - Page 137 Step 4 Check whether the cabinet temperature sensor is faulty. If so, replace it. ----End Issue 02 (2022-07-30) Copyright © Huawei Digital Power Technologies Co., Ltd.
-
Page 138: A Acronyms And Abbreviations
A Acronyms and Abbreviations Acronyms and Abbreviations alternating current AC transfer switch BCB-BOX battery circuit breaker box battery interface module bypass bus synchronization controller communication interface module direct current energy control center Issue 02 (2022-07-30) Copyright © Huawei Digital Power Technologies Co., Ltd. - Page 139 Internet technology liquid crystal display light emitting diode miniature circuit breaker monitor display unit NetEco Network Ecosystem negative temperature coefficient power distribution unit protective earthing Power over Ethernet Issue 02 (2022-07-30) Copyright © Huawei Digital Power Technologies Co., Ltd.
- Page 140 FusionModule2000 Smart Modular Data Center Maintenance Guide A Acronyms and Abbreviations secure digital memory subscriber identity module video cloud node uninterruptible power system WiFi Wireless Fidelity Issue 02 (2022-07-30) Copyright © Huawei Digital Power Technologies Co., Ltd.